How to configure SSO for Microsoft work accounts in OnBoard™ IoT Security
The Single Sign-On (SSO) feature in OnBoard™ IoT Security (OBIS) allows users to sign in with their company email through the Enterprise Identity Provider (IdP). OBIS will automatically create an account for them and assign default role permissions.
This article will guide you on how to configure and enable the Sign in with SSO feature in OBIS for Microsoft work accounts. Once enabled, users can sign in to OBIS using their work accounts and passwords.
Prerequisites
Before getting started, please ensure that you have obtained the Redirect URL required to configure SSO from Snowball.
Instructions
-
Sign in to the Microsoft Azure portal.
-
In the search box at the top, search for and select Microsoft Entra ID.
-
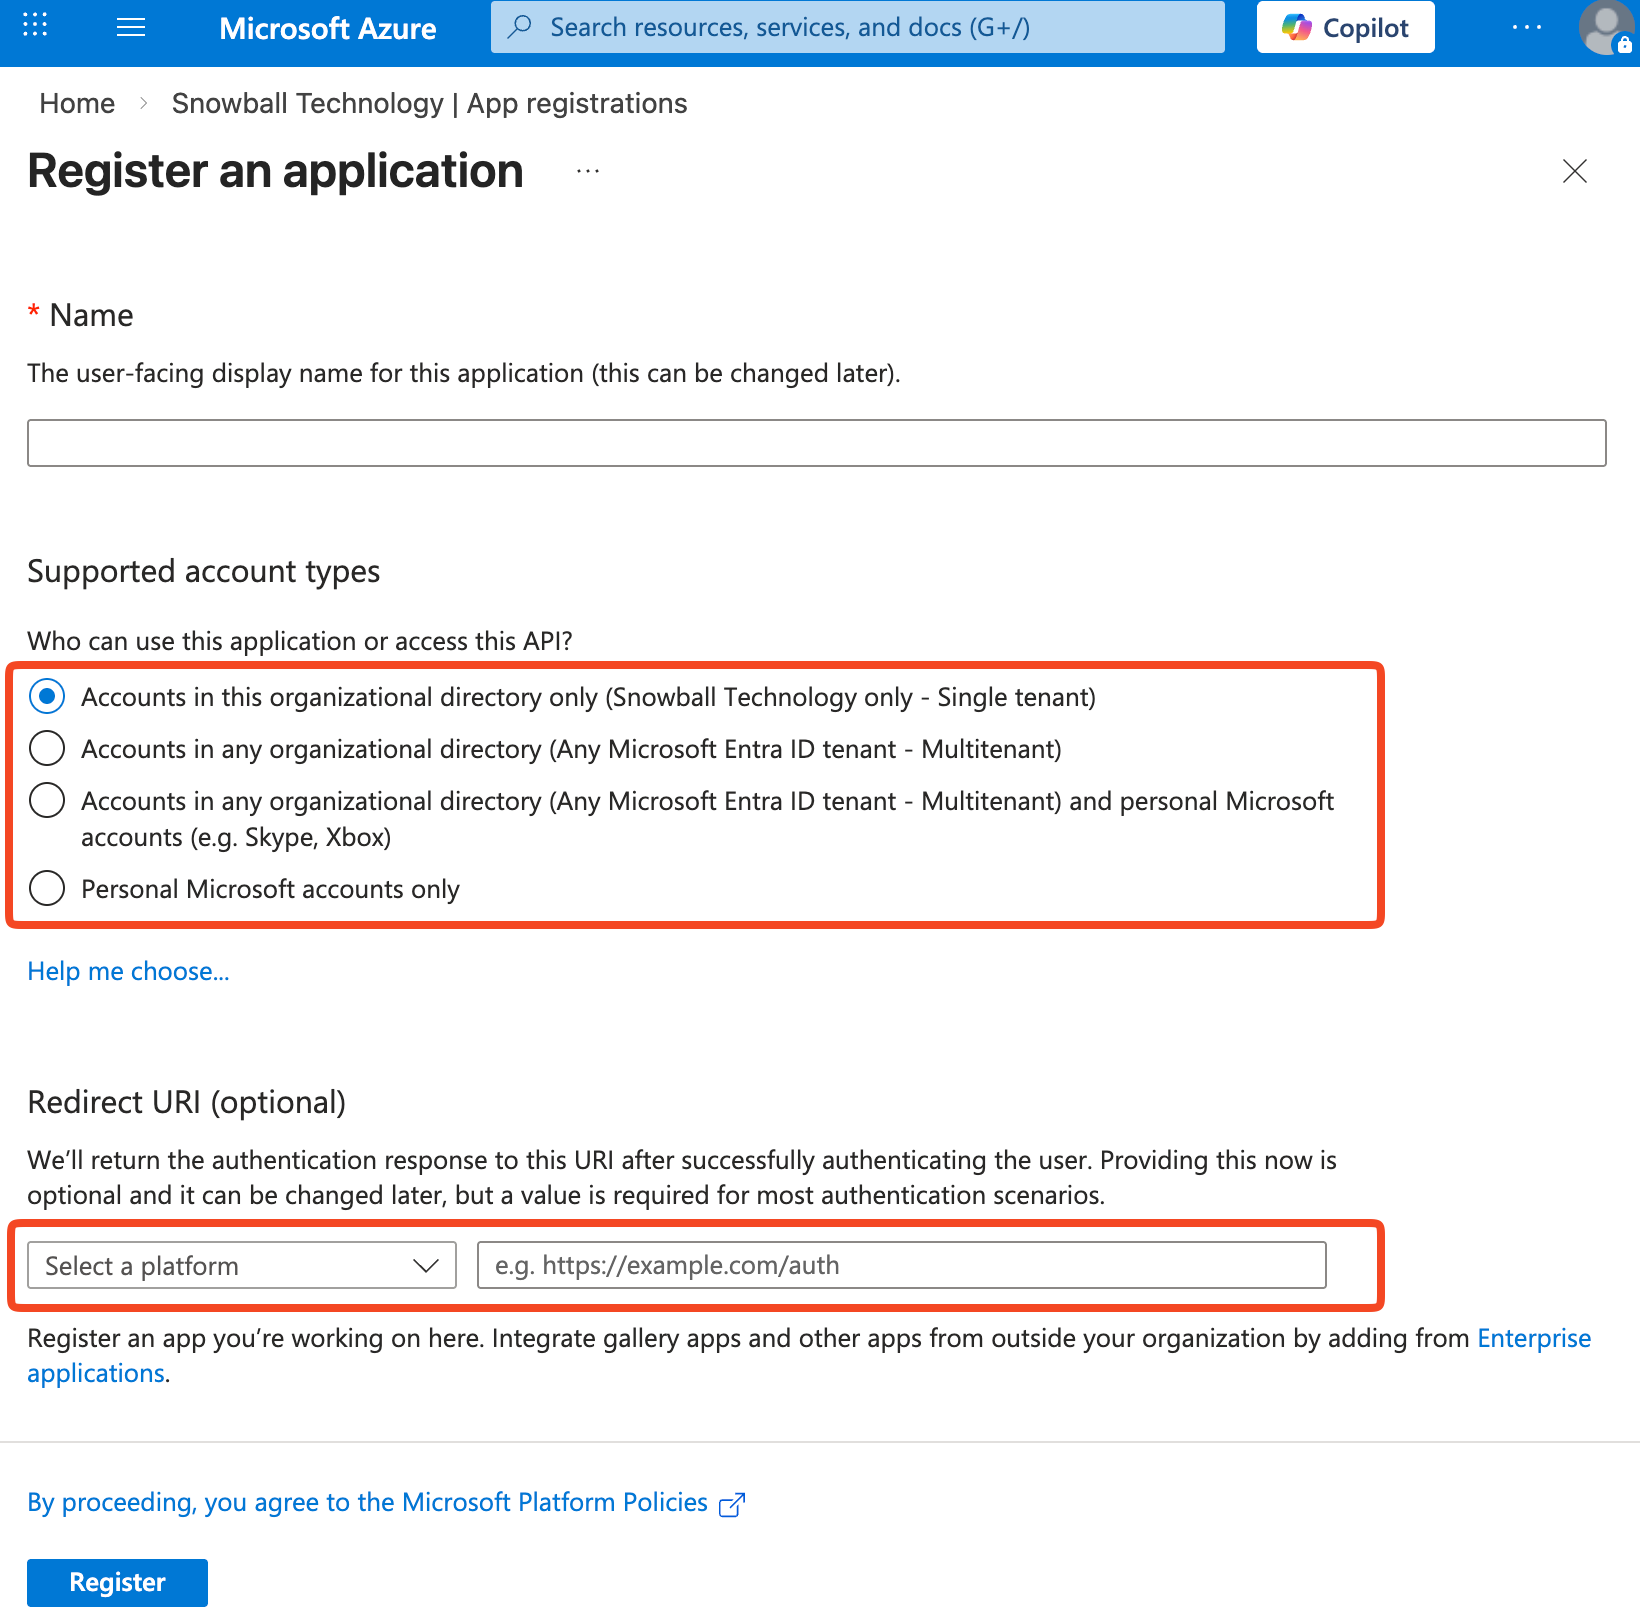
In the left menu, click Manage > App registrations > New registration. On the Register an application page, enter the application name and then select the Supported account types.
-
In the Redirect URI area, select Web as the platform, enter the Redirect URL obtained from Snowball, and then click Register.
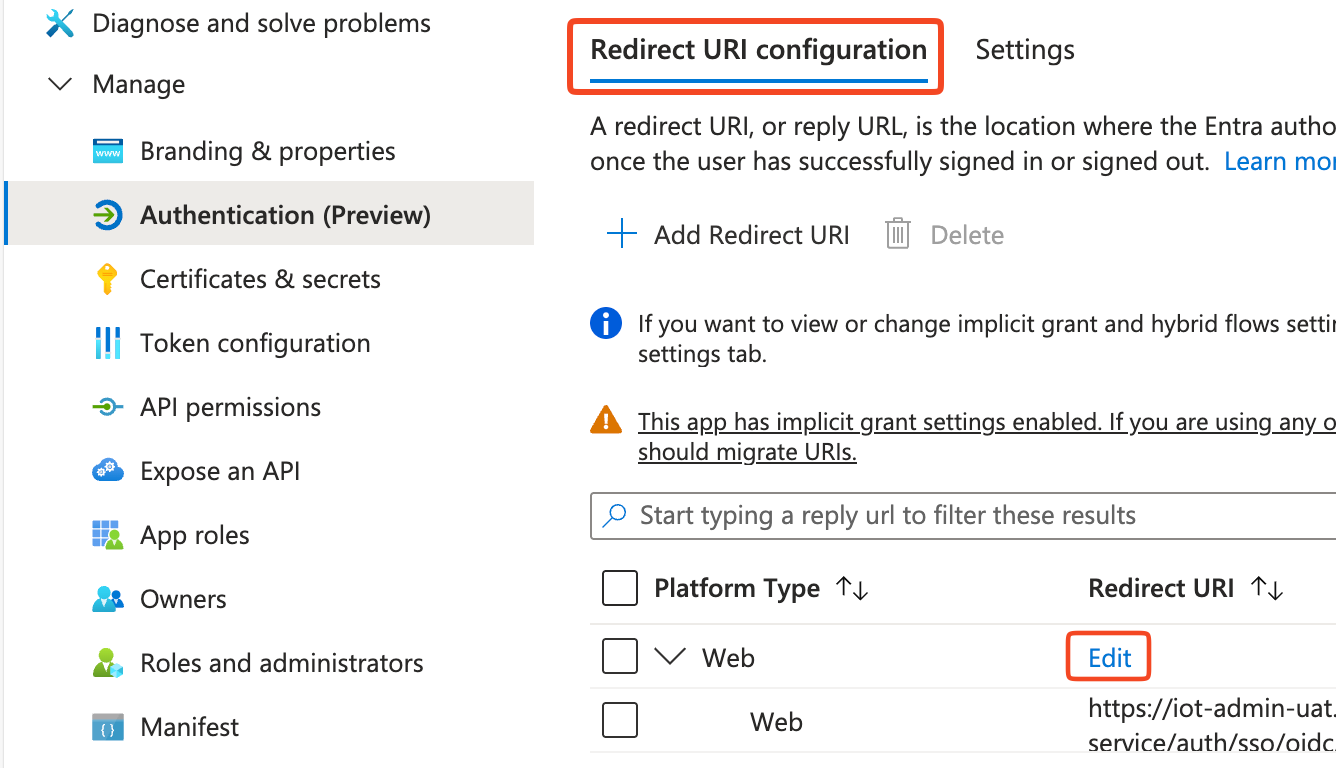
If you need to change the Redirect URI later, click Manage > Authentication (Preview) in the left menu of the application, and then make the edit on the Redirect URI configuration tab.
-
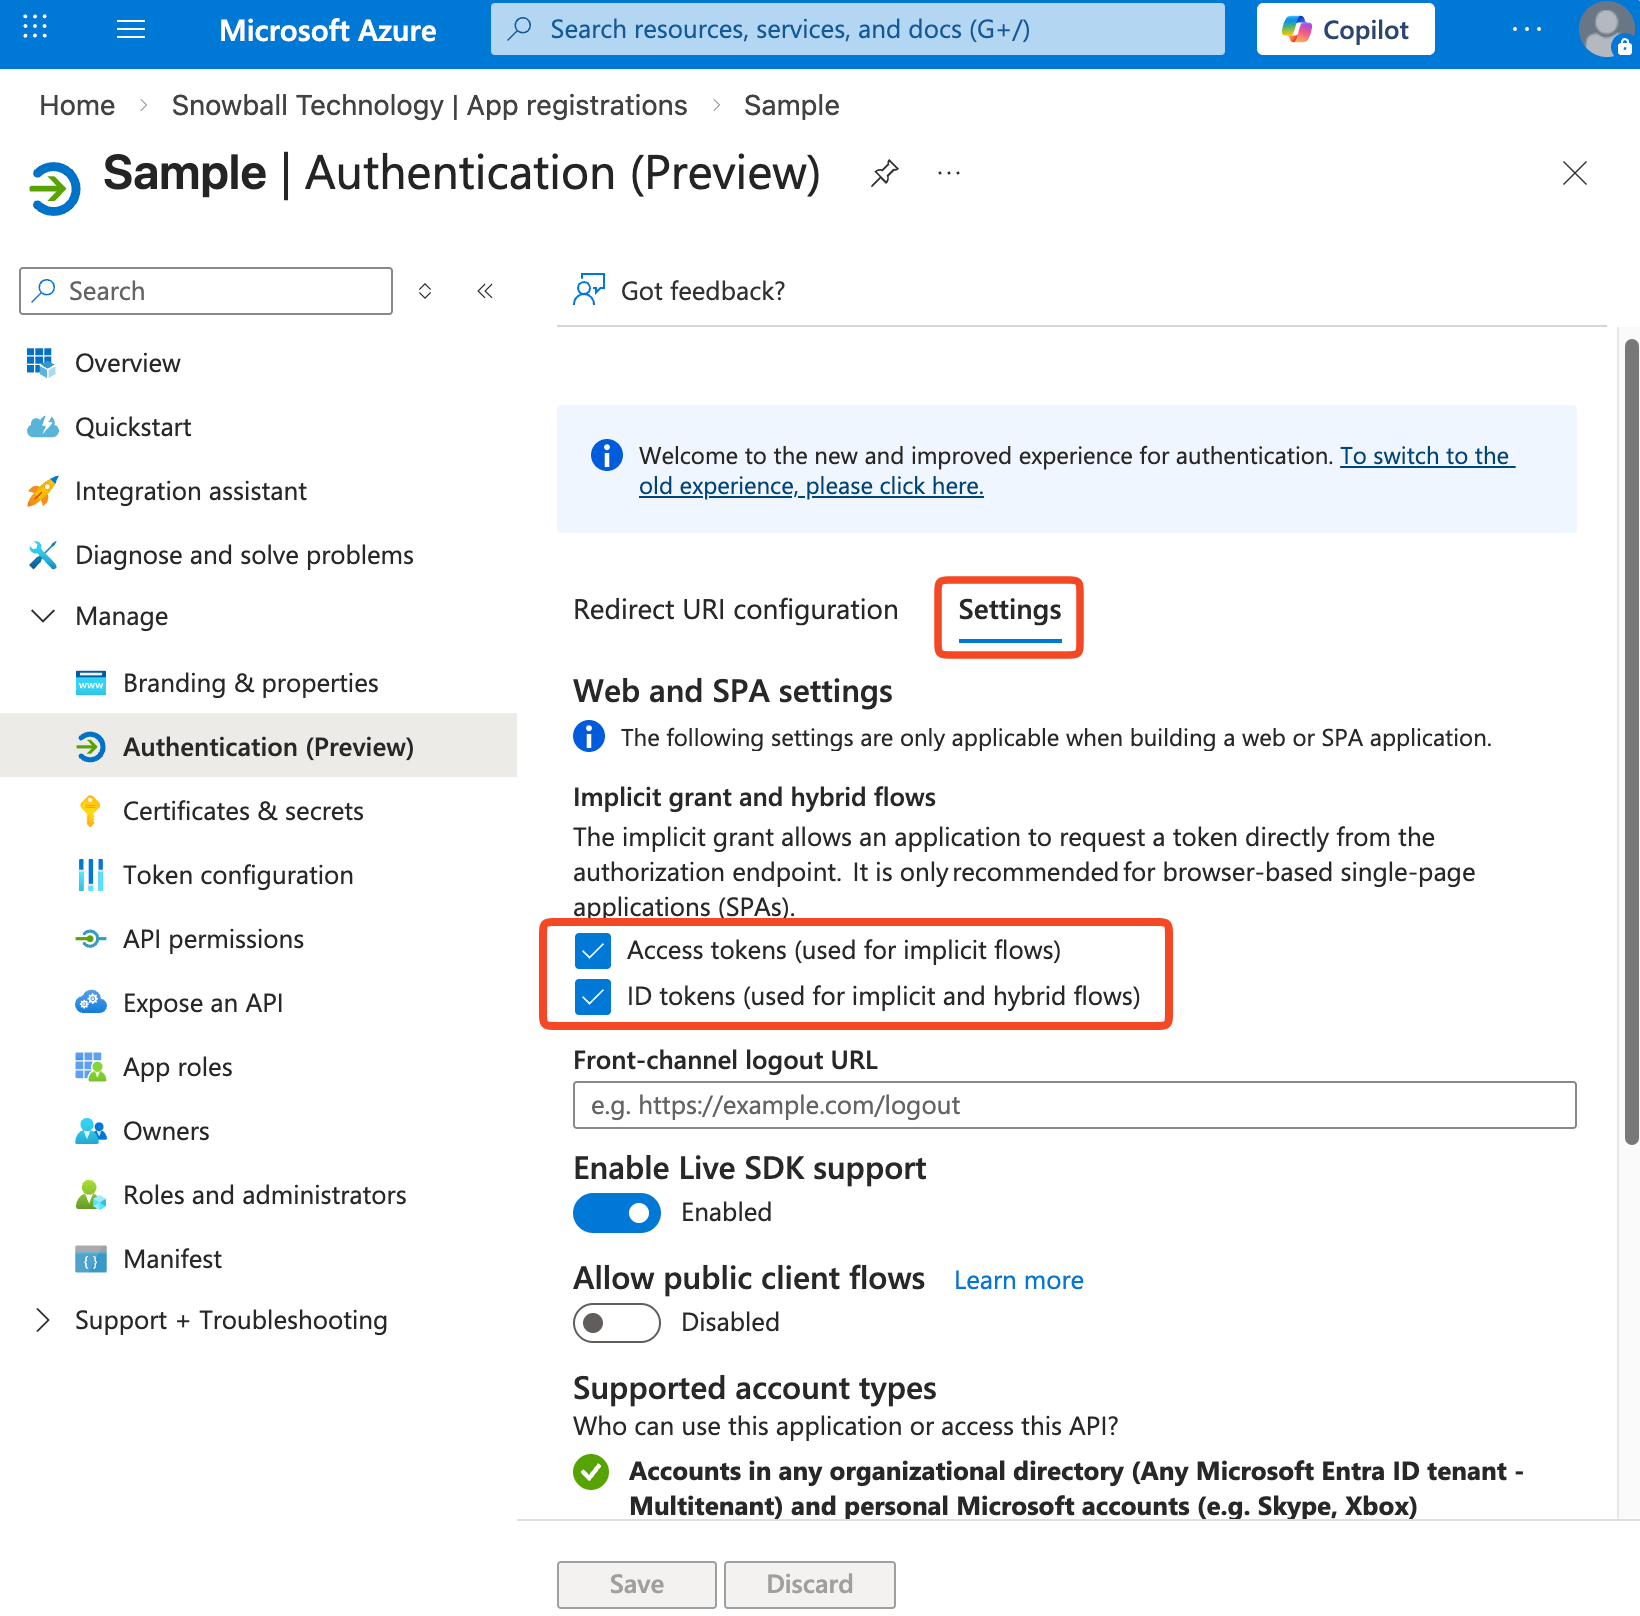
In the left menu of the application, click Manage > Authentication (Preview) > Settings, and then select the Access tokens (used for implicit flows) and ID tokens (used for implicit and hybrid flows) checkboxes.
tipThe Access token is used to call the API for retrieving user information, while the ID token is used for parameter validation during the SSO sign-in process.
-
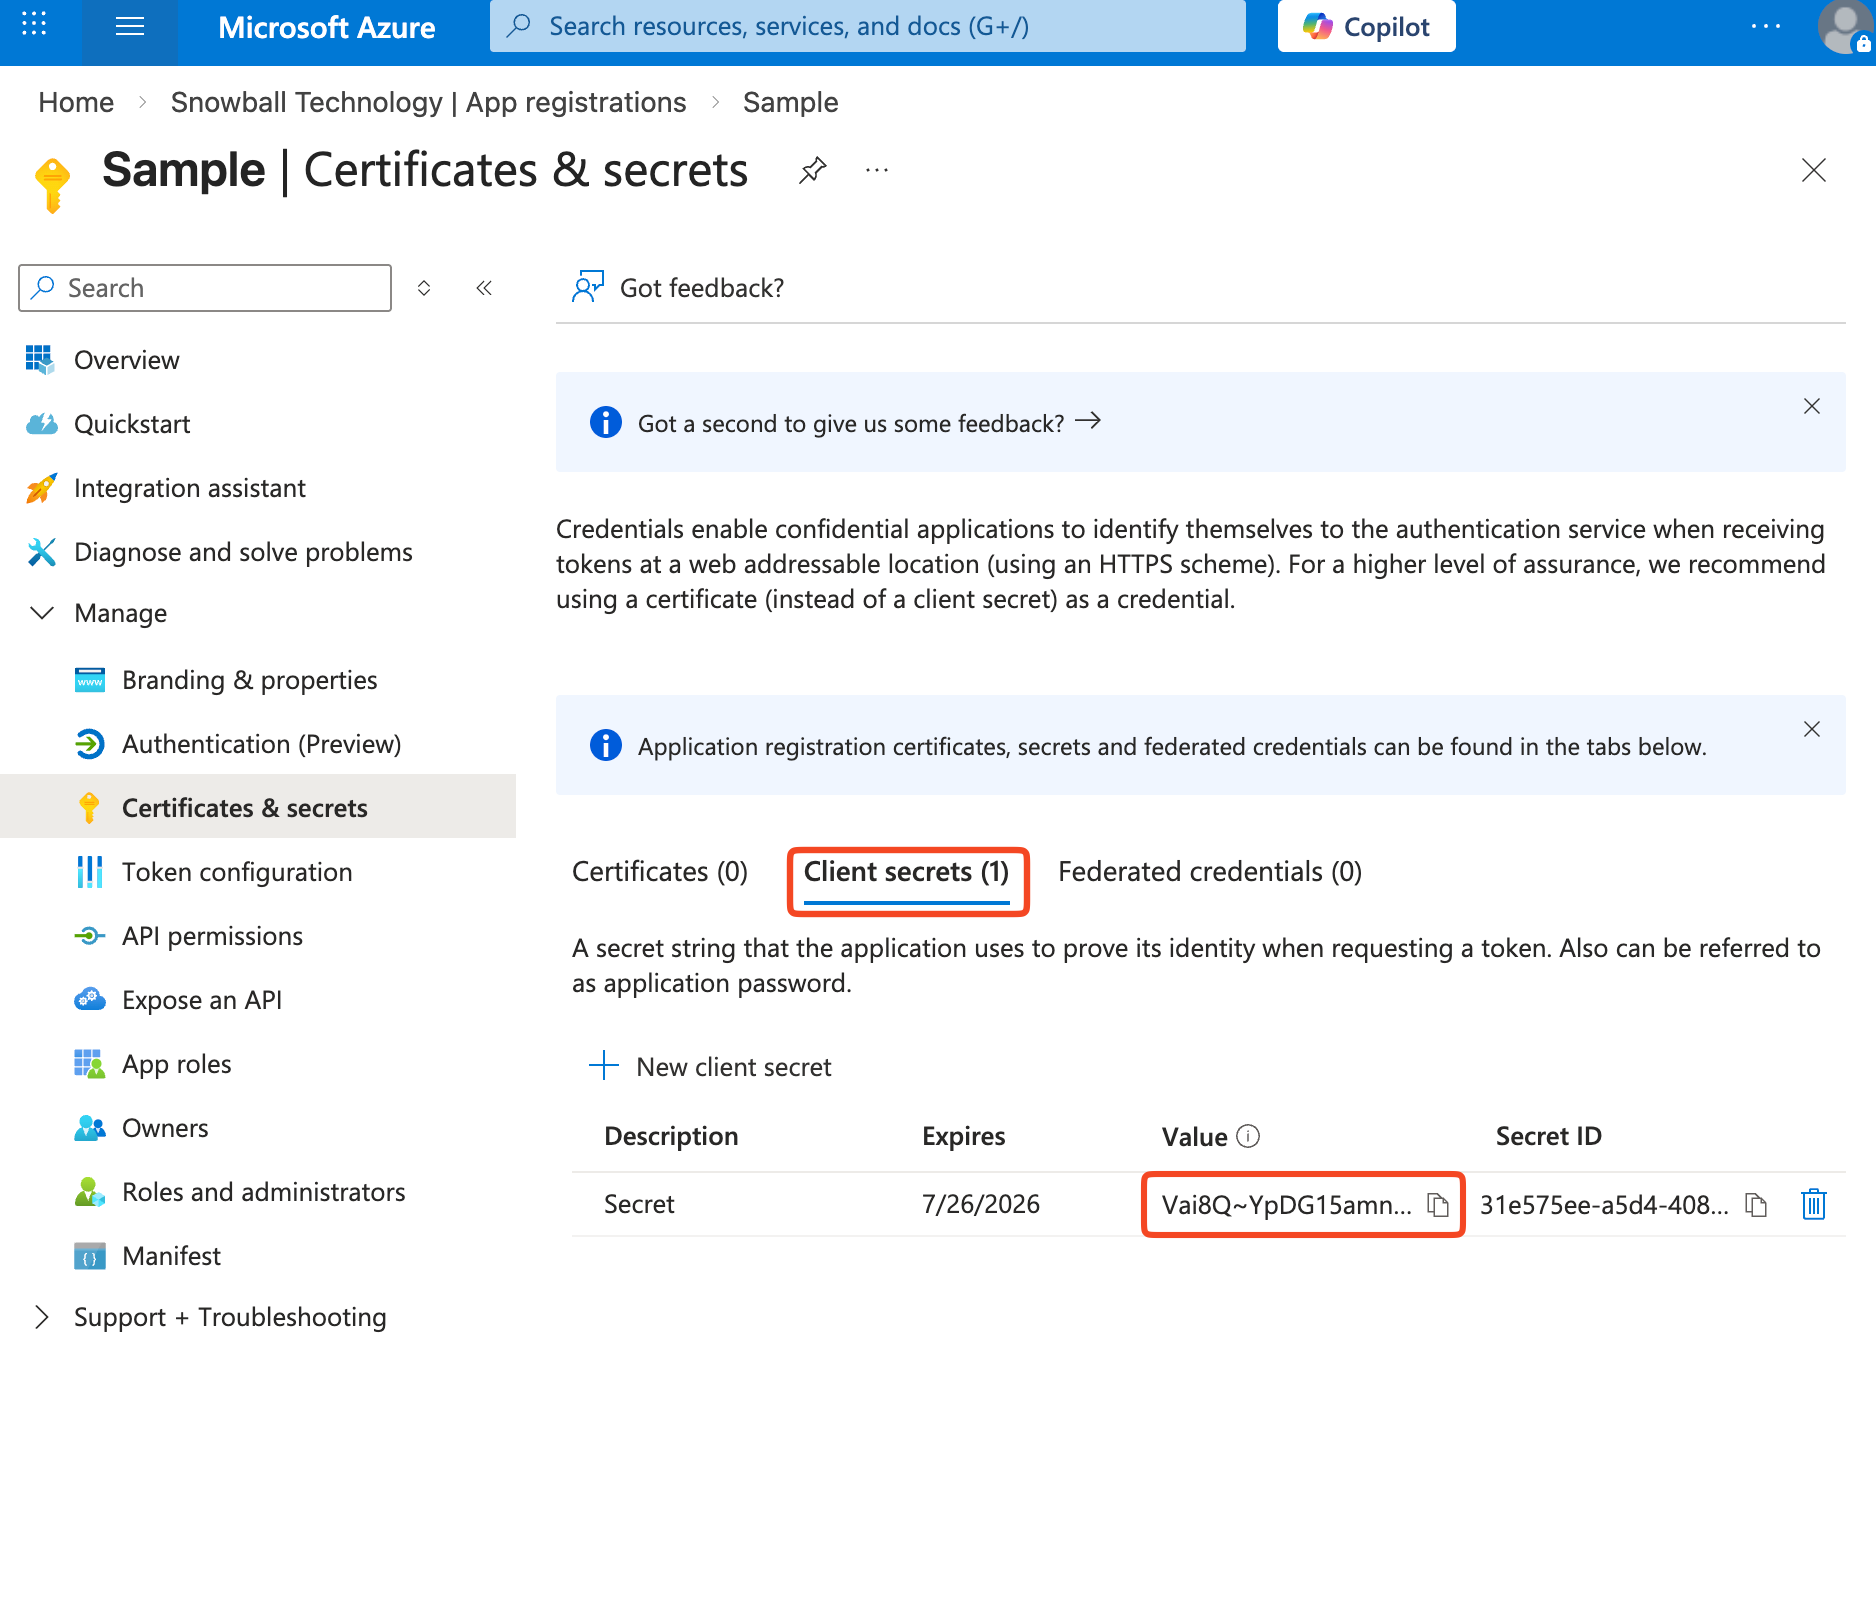
In the left menu of the application, click Manage > Certificates & secrets > Client secrets > New client secret. On the Add a client secret panel, enter the client secret description, select the expiration date, and then click Add.
-
Record the client secret value. This secret value is never displayed again after you leave this page.
tipThe client secret of the currently authorized application is used to verify application information through callbacks, ensuring that the source of the authorization request is trusted.
-
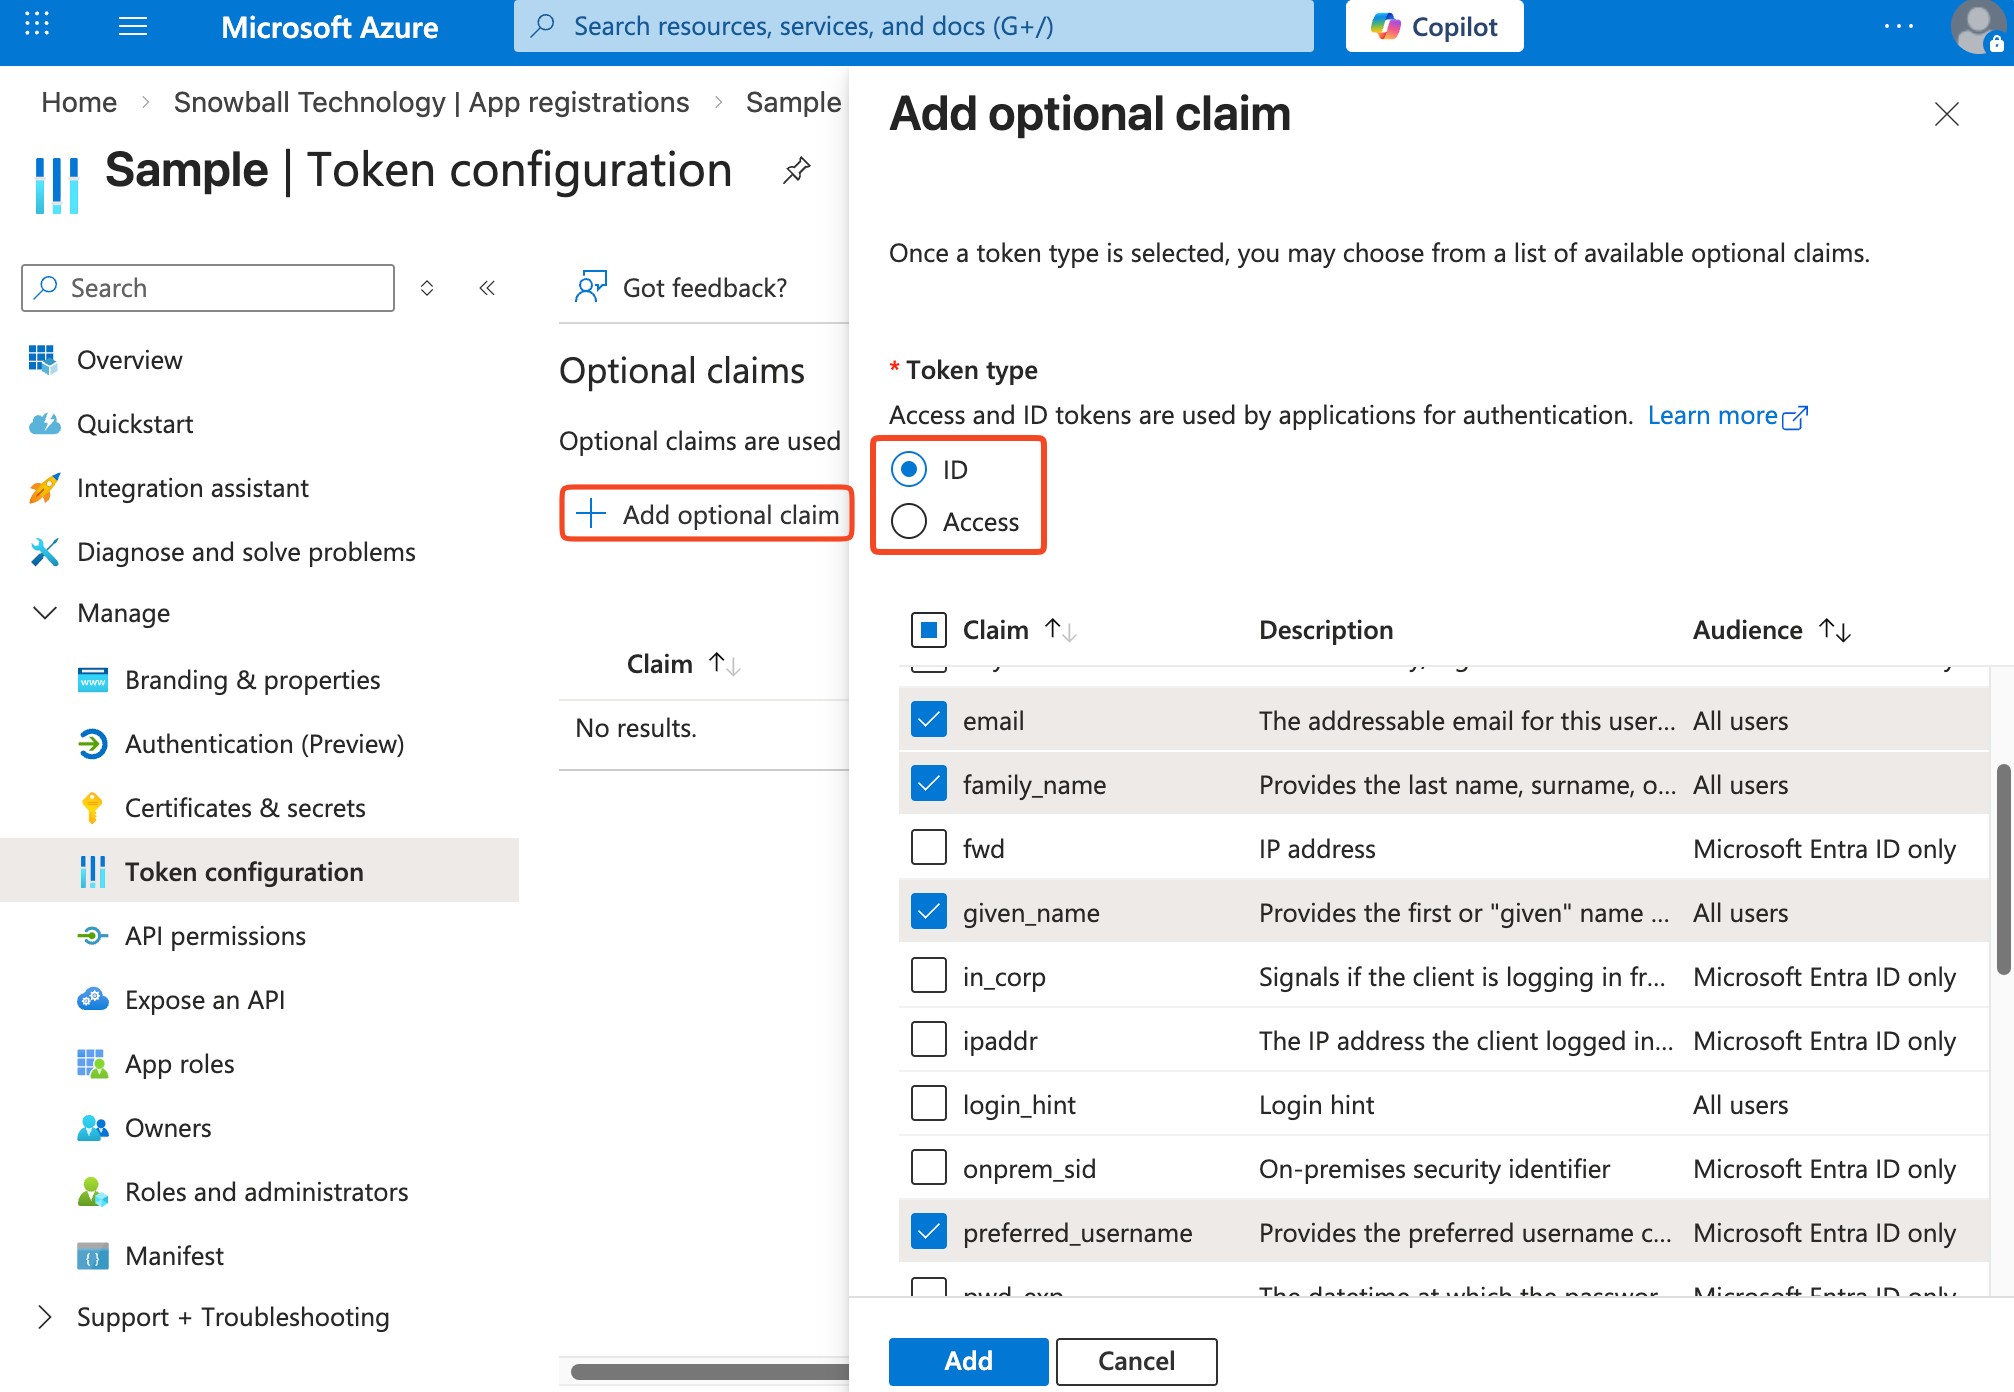
In the left menu of the application, click Manage > Token configuration > Add optional claim, then configure and add the ID token and access token separately.
tipThe optional claims correspond to the information returned by Microsoft to the platform during the authentication callback.
- Select ID as the Token type, and then select email, family_name, given_name, and preferred_username
- Select Access as the Token type, and then select email, family_name, given_name, and preferred_username
-
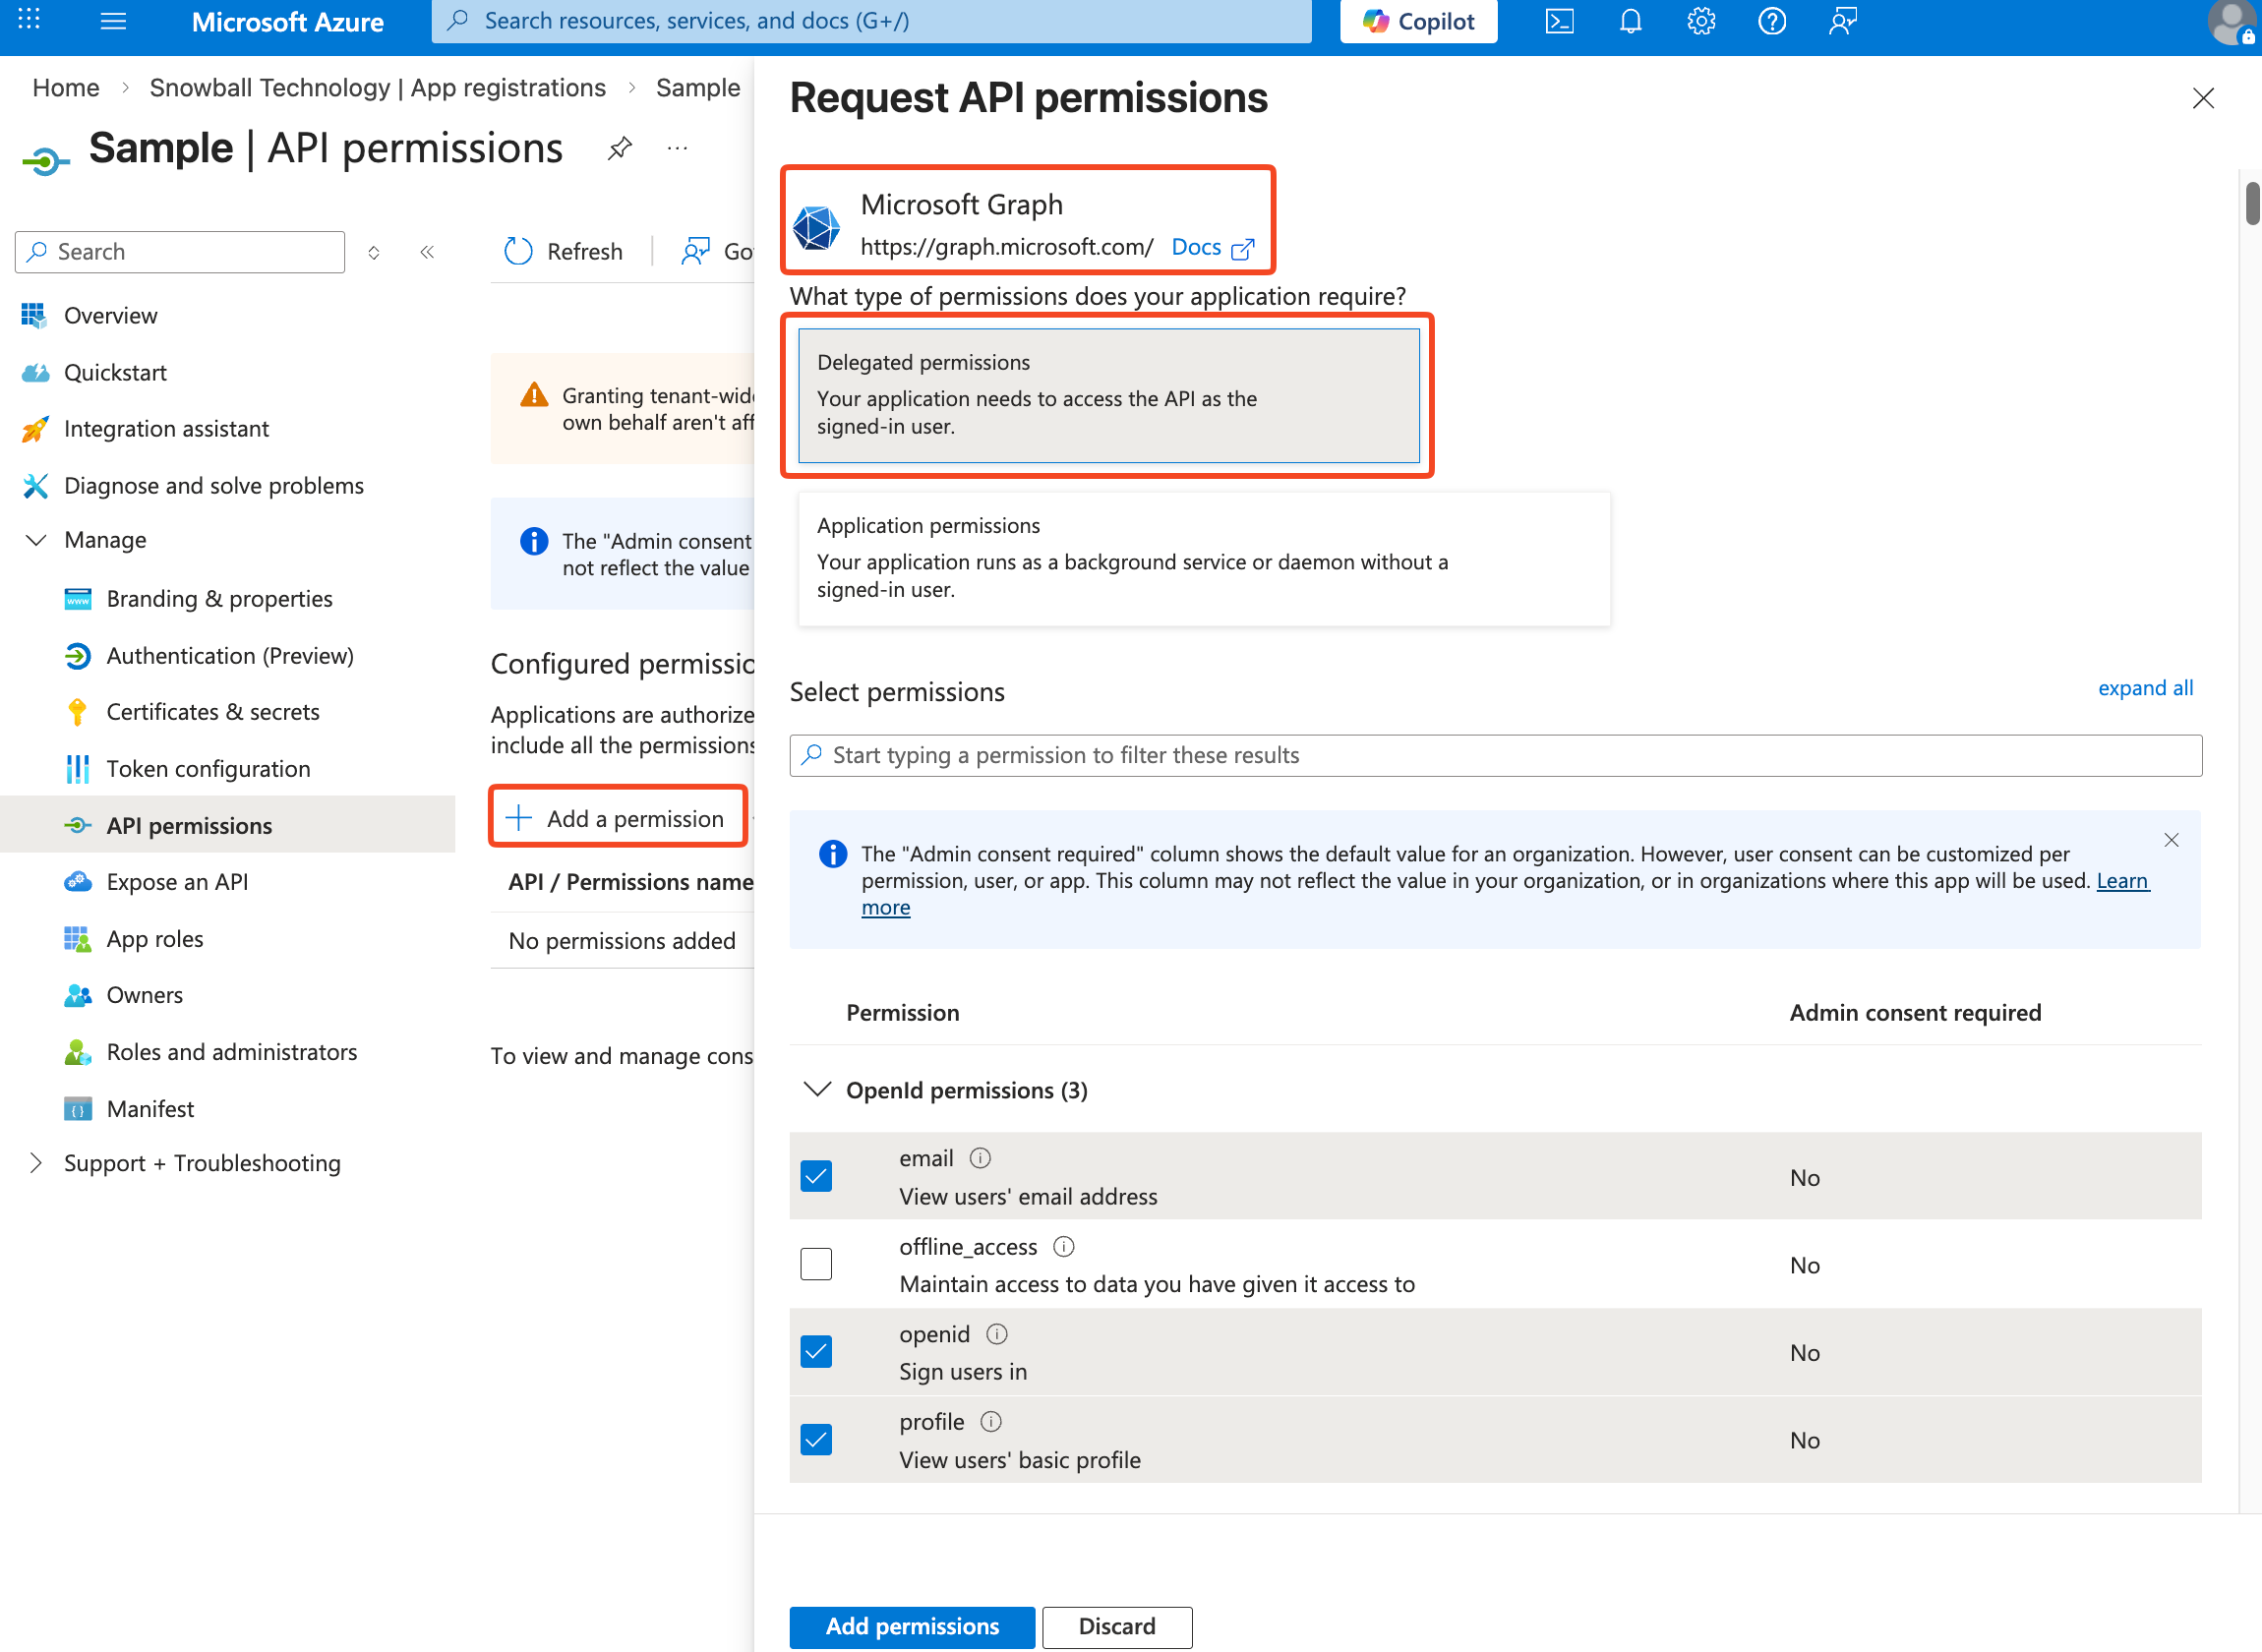
In the left menu of the application, click Manage > API permissions > Add a permission. On the Request API permissions panel, select Microsoft Graph > Delegated permissions. In the OpenId permissions area, select the corresponding permissions (it is recommended to select email, openid, and profile), and then click Add permissions.
tipThe API permissions configured here correspond to the scope settings in OBIS for SSO.
-
Once the application configuration is complete, please provide the following information to Snowball, so that we can enable the Sign in with SSO feature for your tenant in OBIS.
- Email Domain: The email domain of your Microsoft work account
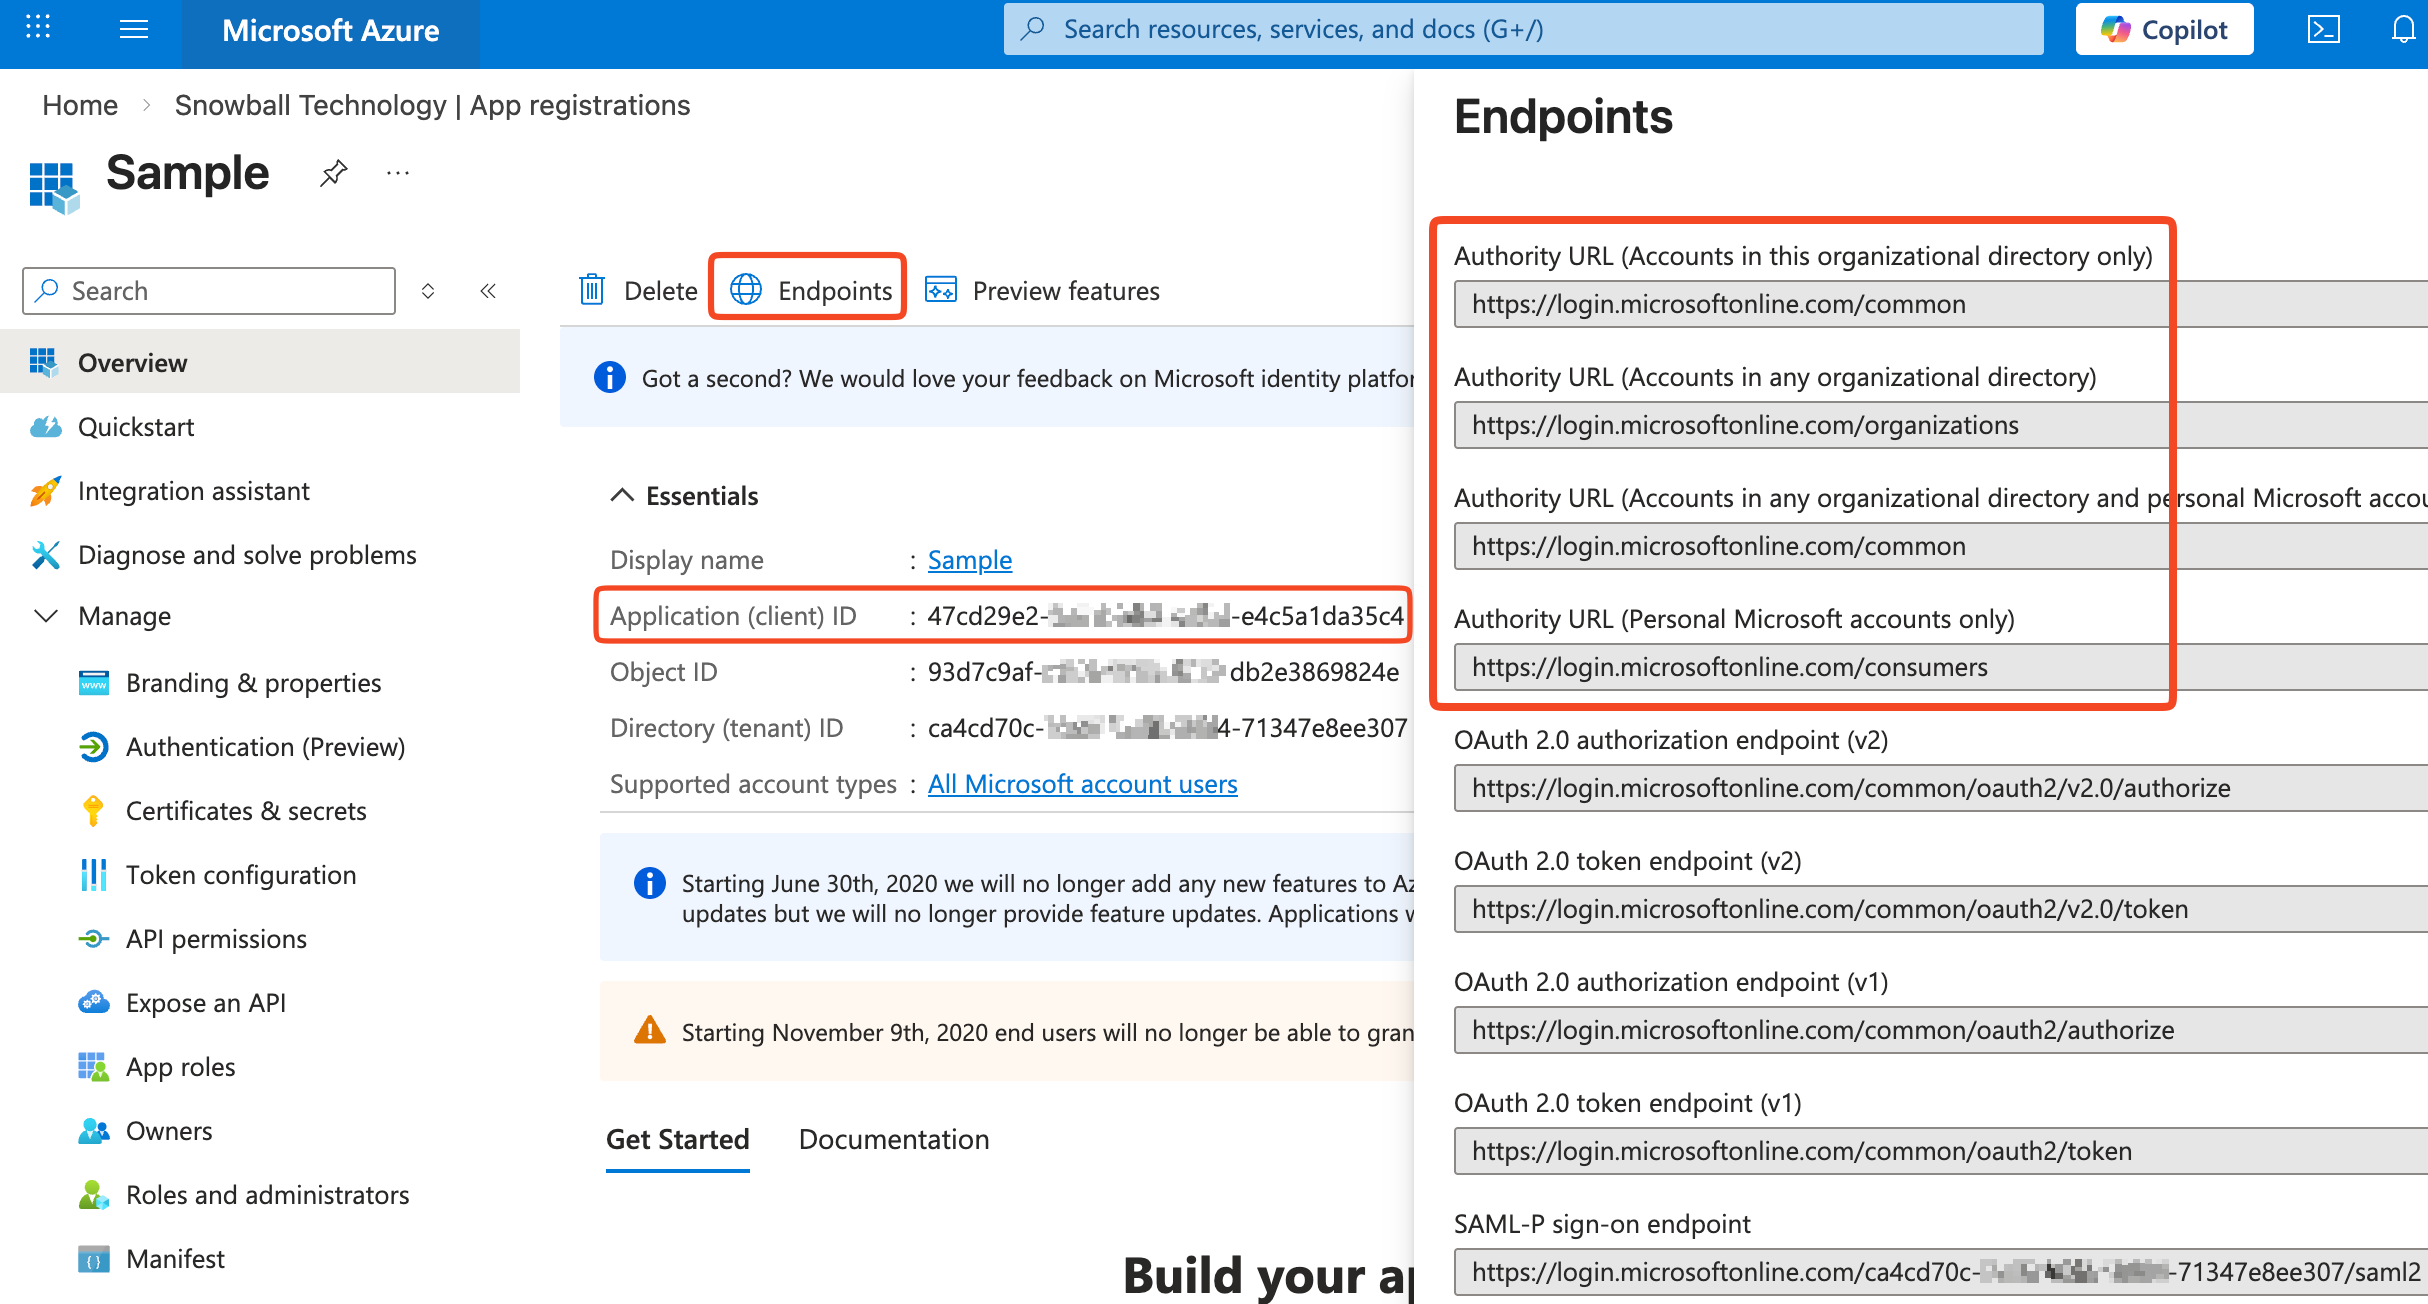
- Issuer: On the Overview page of the application, click Endpoints, and then copy the relevant Authority URL
- Client ID: On the Overview page of the application, copy the Application (client) ID
- Client Key: The client secret recorded in step 7

 Download User Manual