How to manage groups in OnBoard™ IoT Security
This article will guide you through the following operations in OnBoard™ IoT Security (OBIS) to manage the access and permissions of user group members for OBIS:
- Edit the information of a user group
- Add a user group member
- Update the user group member role
- Remove a user group member
- Delete a user group
Prerequisites
Before getting started, please ensure that you have OBIS role permissions as a System Manager.
Edit the information of a user group
-
Sign in to OBIS.
-
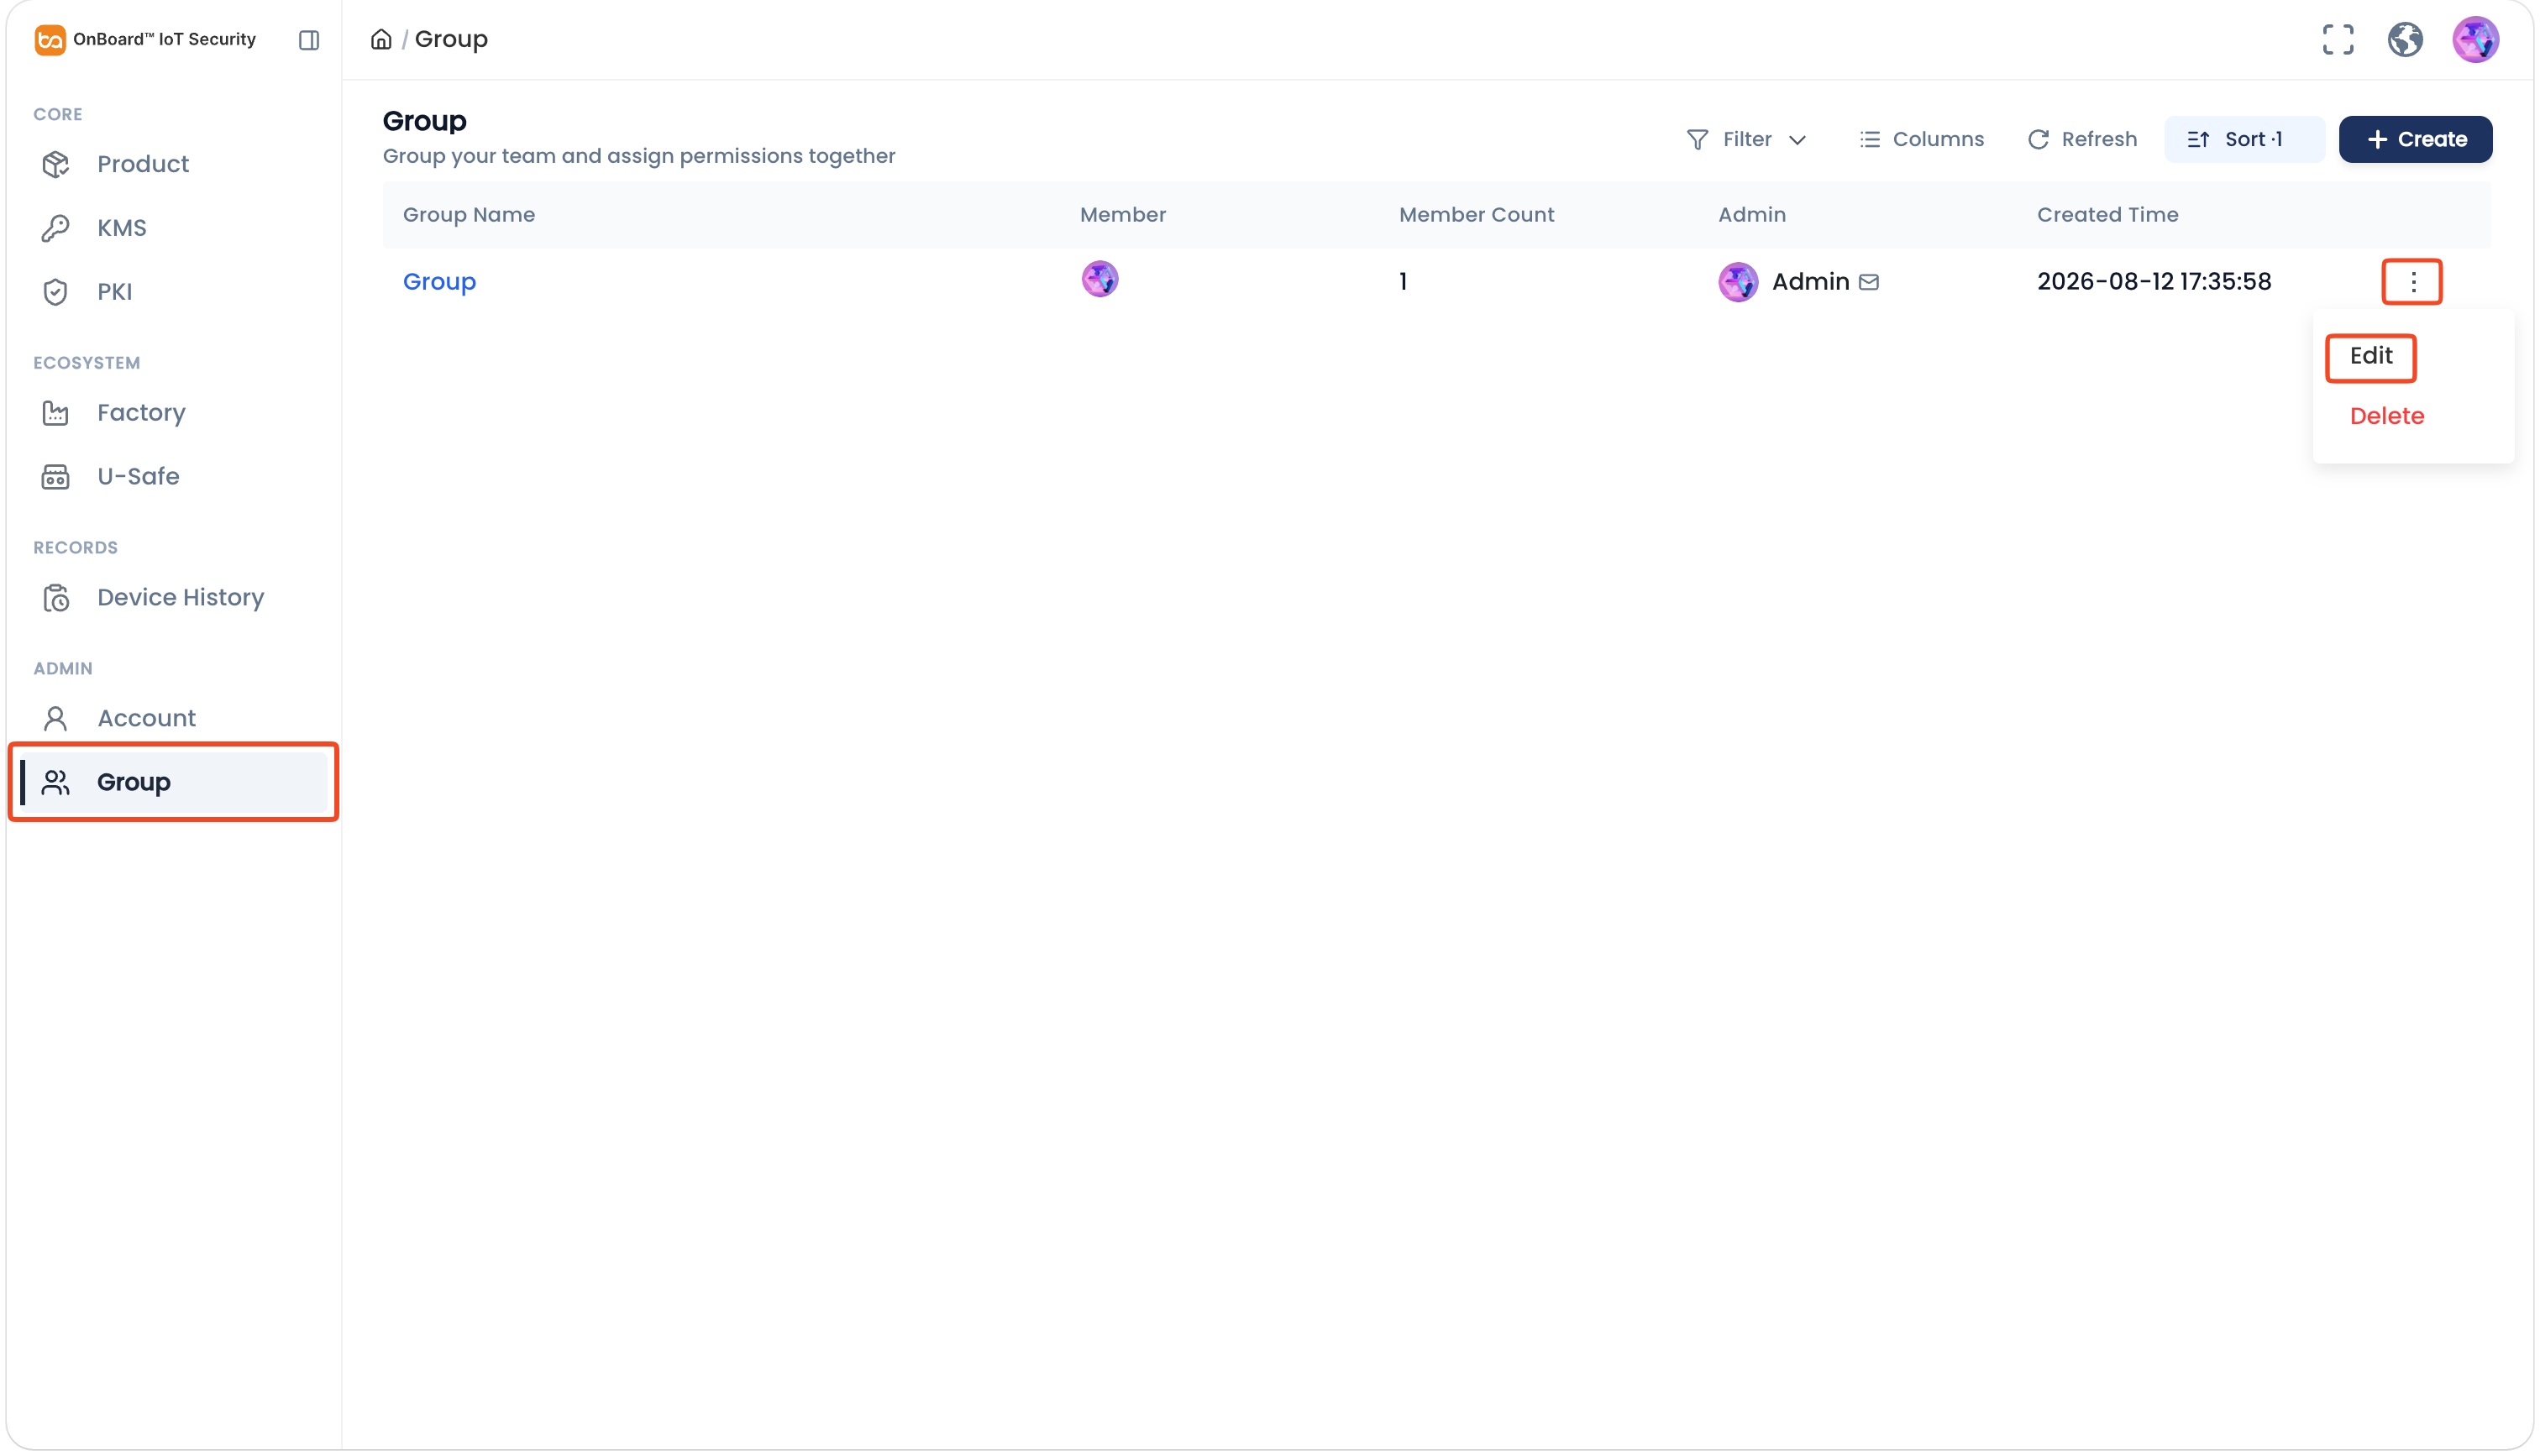
In the Admin section of the left menu, click Group to navigate to the Group page.
-
On the Group page, select the Options
 icon for the corresponding user group and select Edit.
-
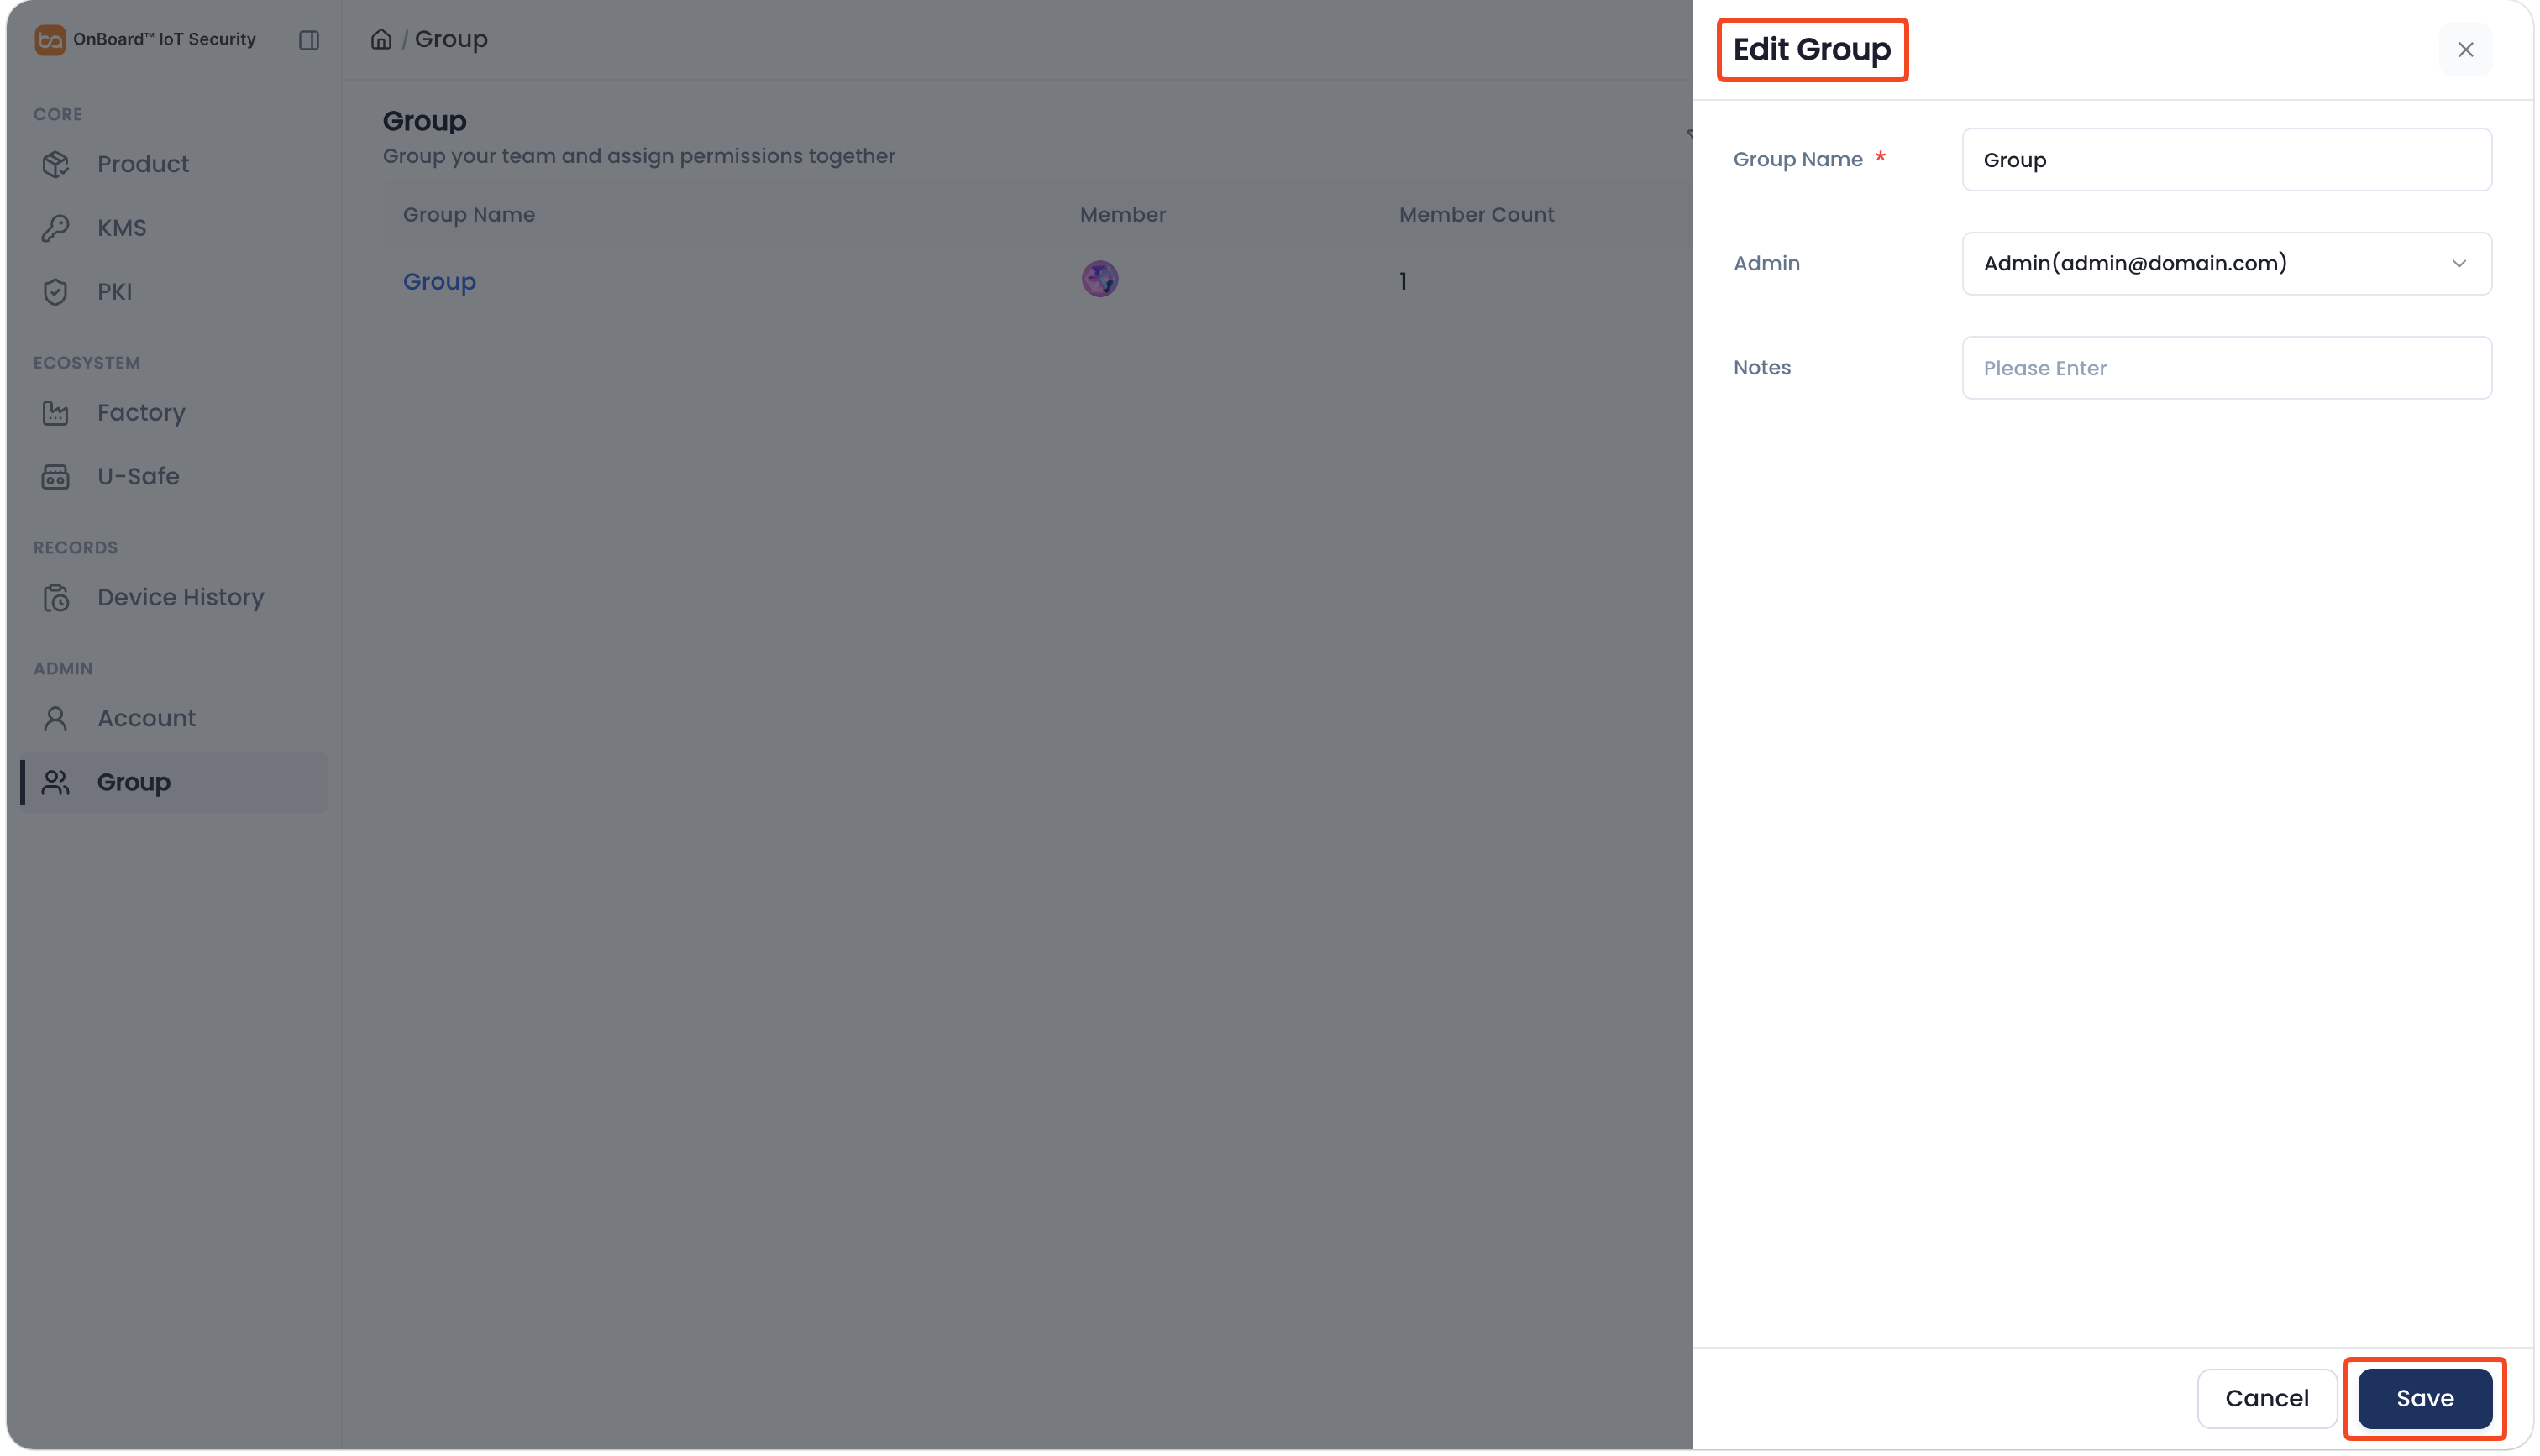
On the Edit Group panel, change the user group information (Group Name, Admin, and Notes), and then click Save.
Add a user group member
-
Sign in to OBIS.
-
In the Admin section of the left menu, click Group to navigate to the Group page.
-
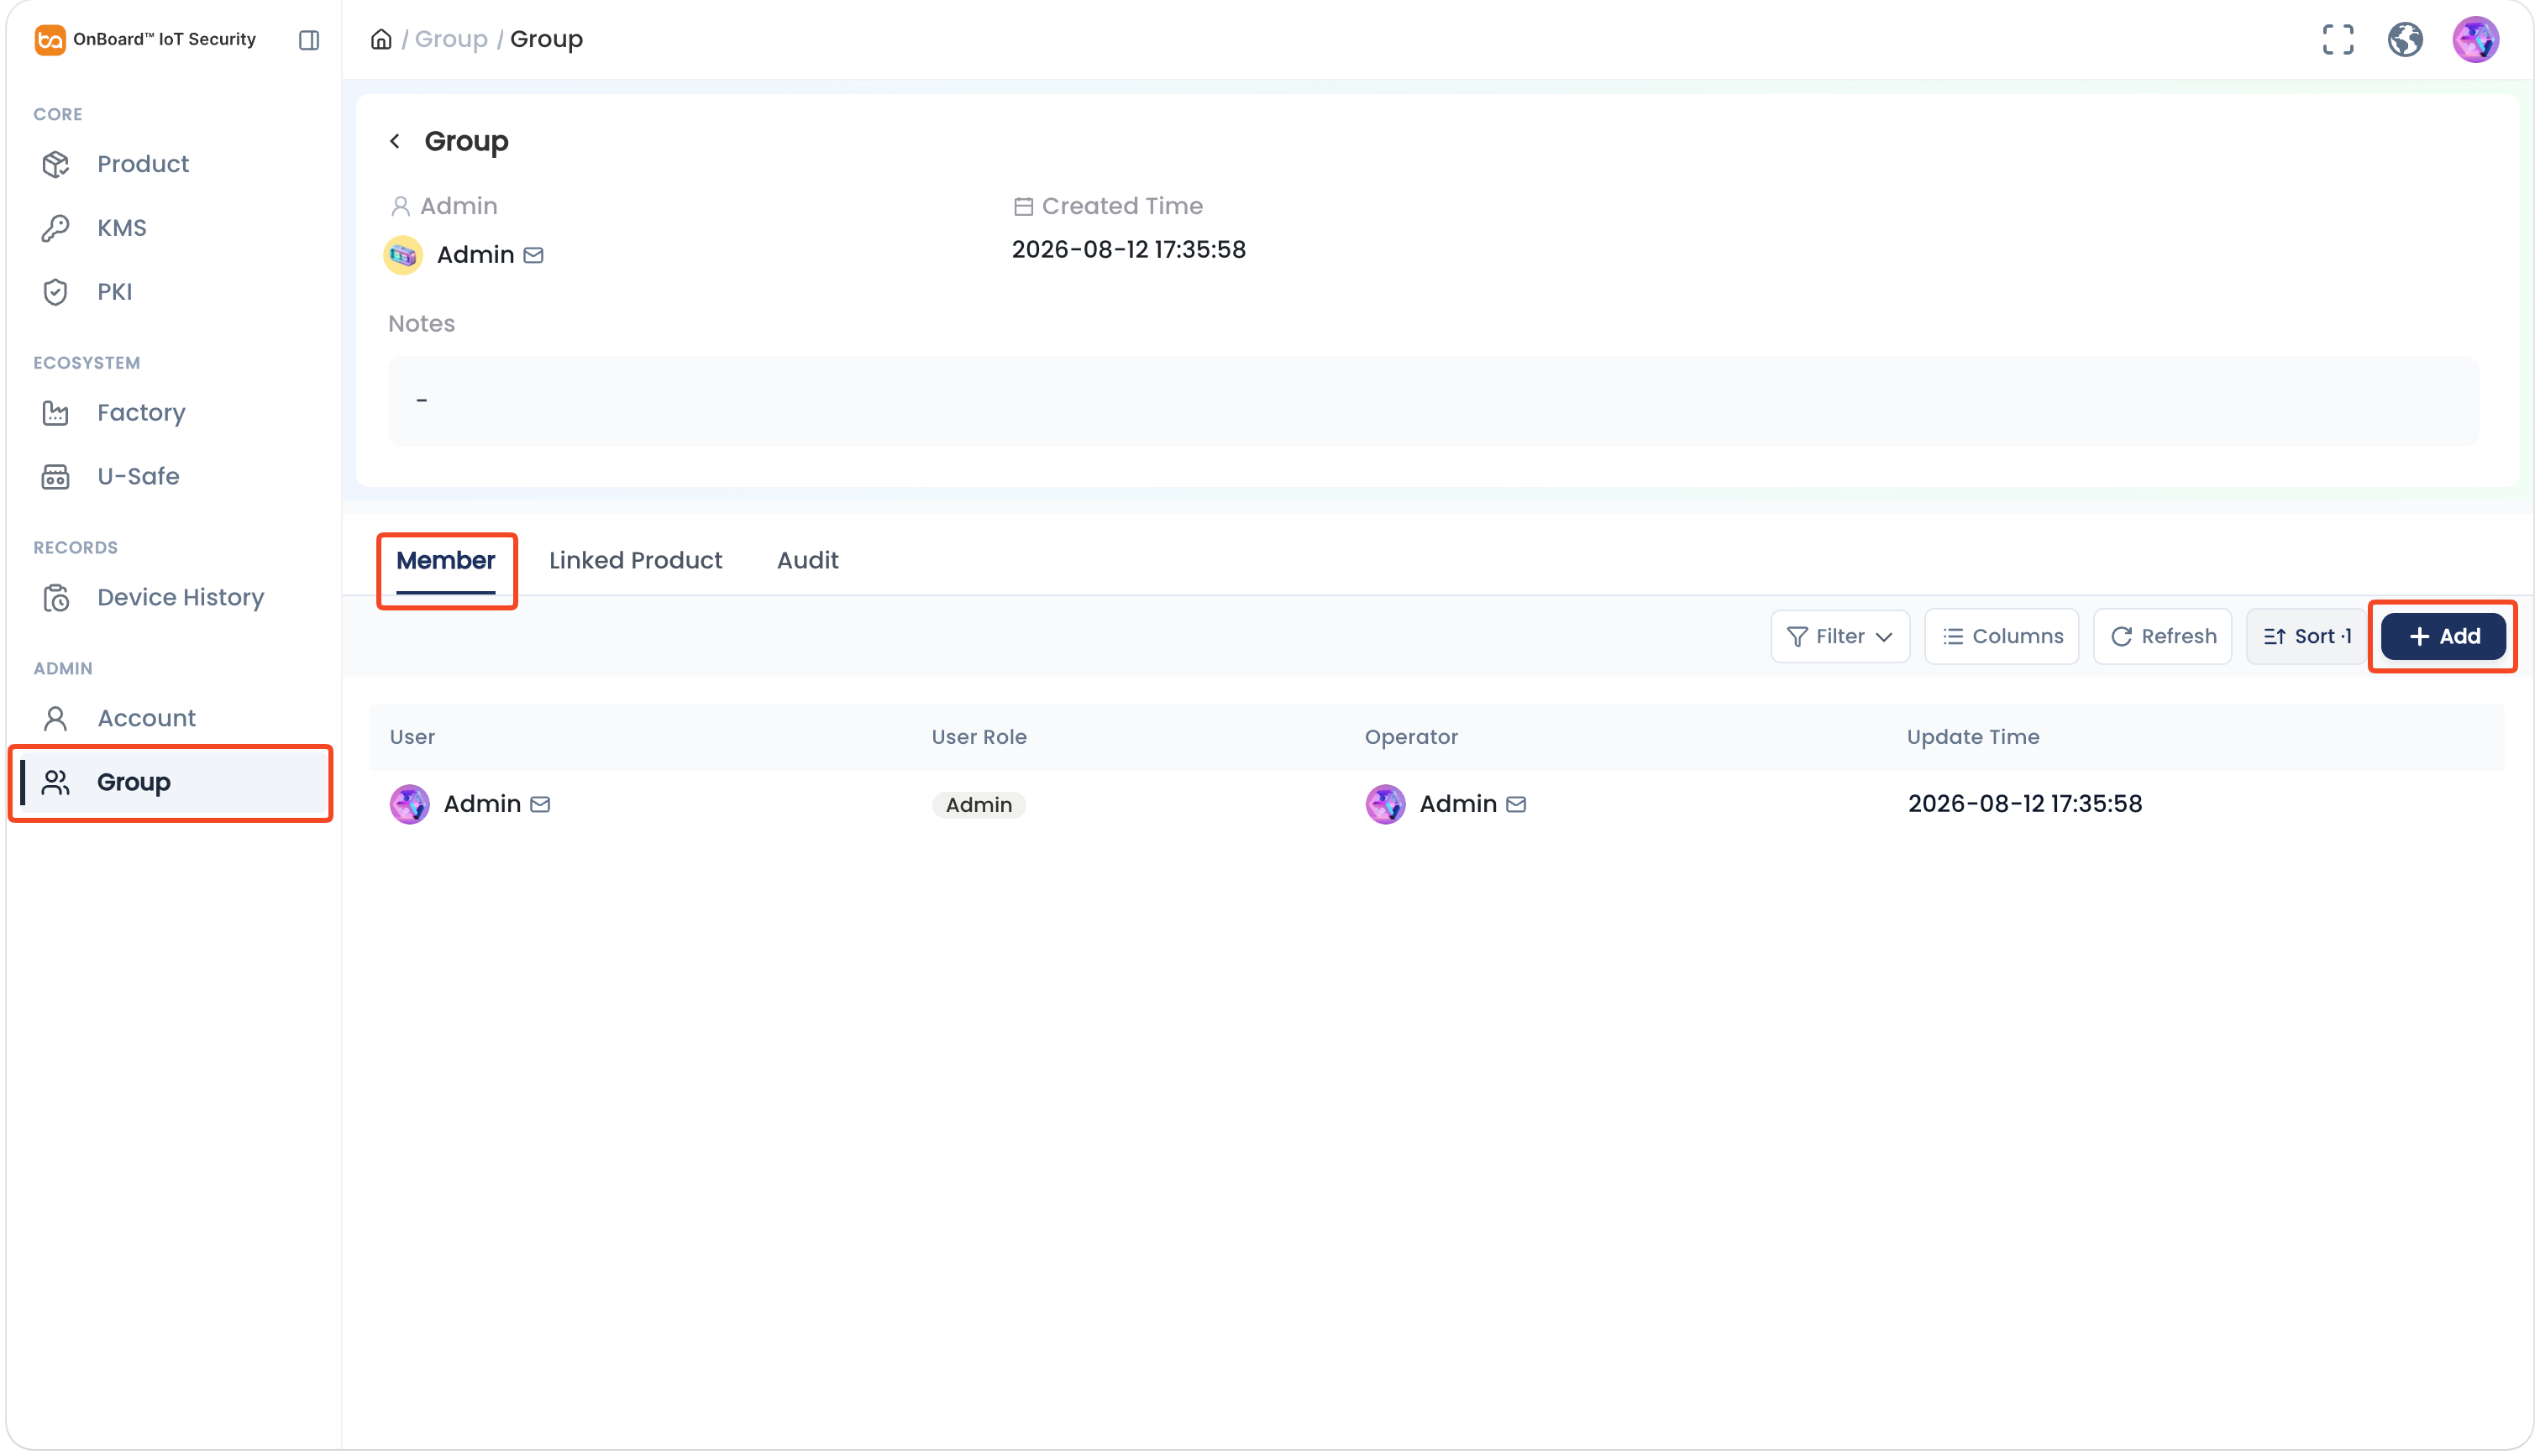
On the Group page, select the corresponding user group.
-
On the group page, click Add.
-
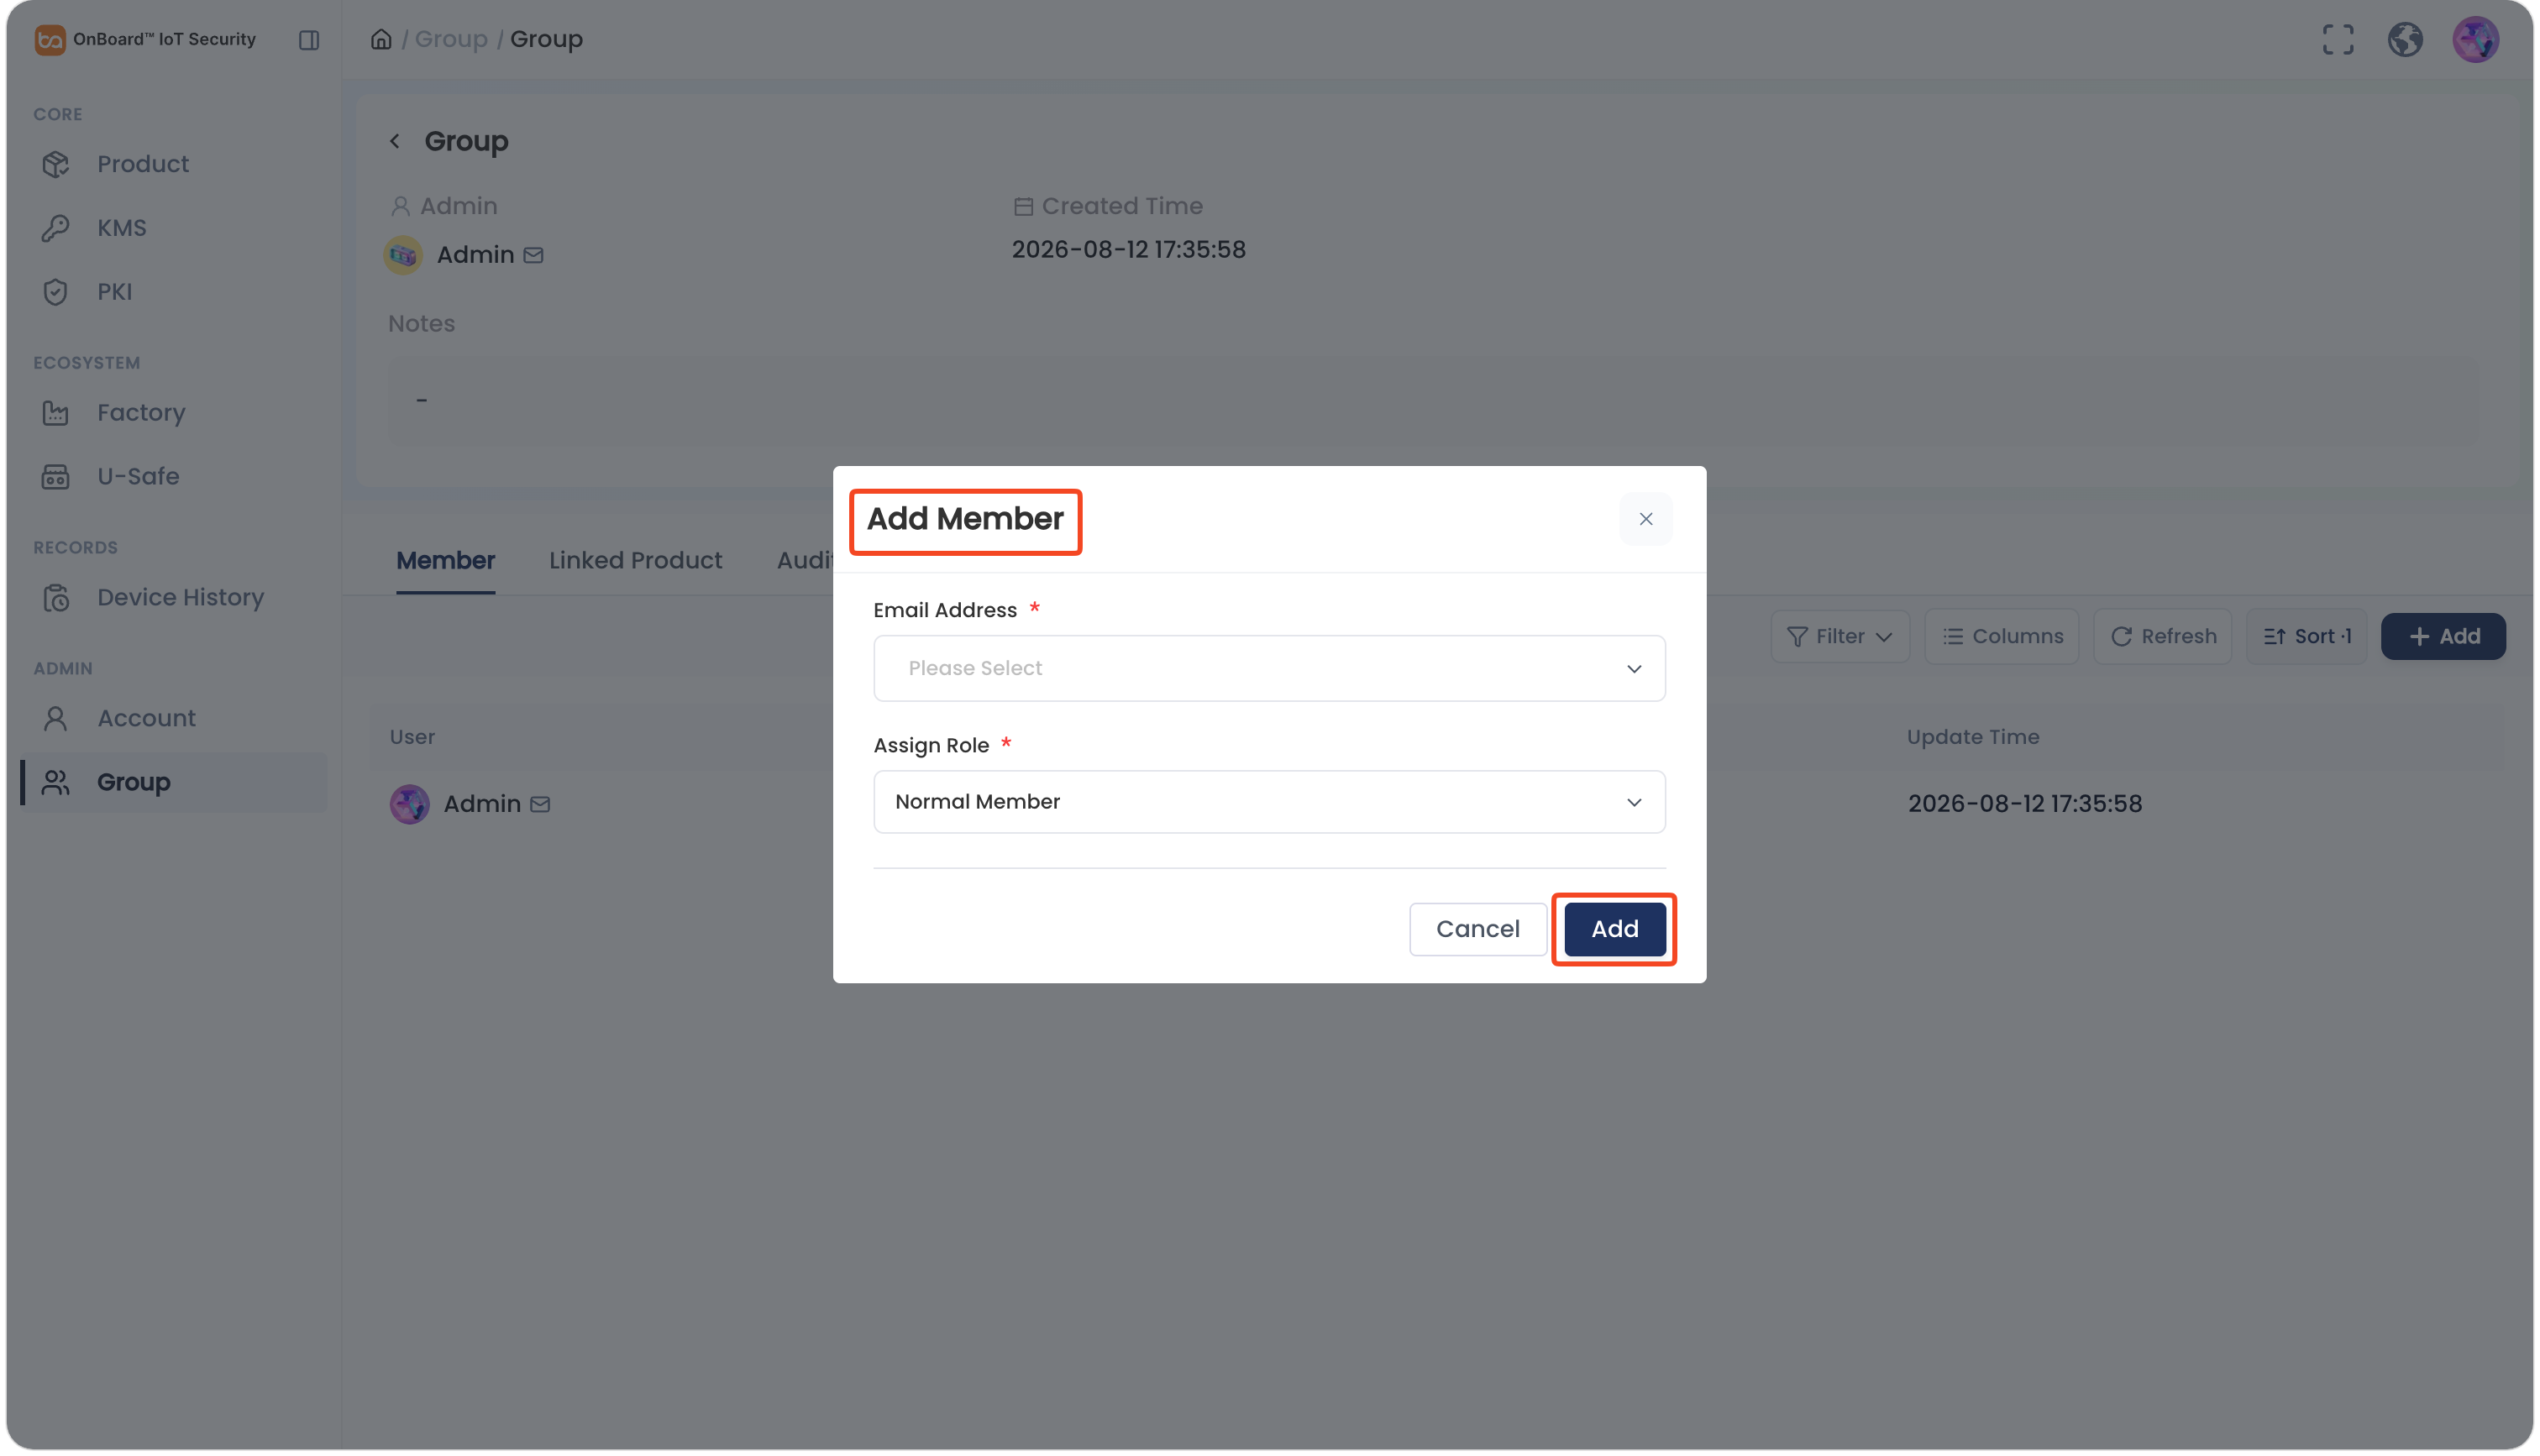
In the Add Member window, enter the email address and assign the corresponding roles. Then, click Add to complete adding the user group member.
Update a user group member role
-
Sign in to OBIS.
-
In the Admin section of the left menu, click Group to navigate to the Group page.
-
On the Group page, select the corresponding user group.
-
On the group page, click the Options
icon for the corresponding member and select Edit Role.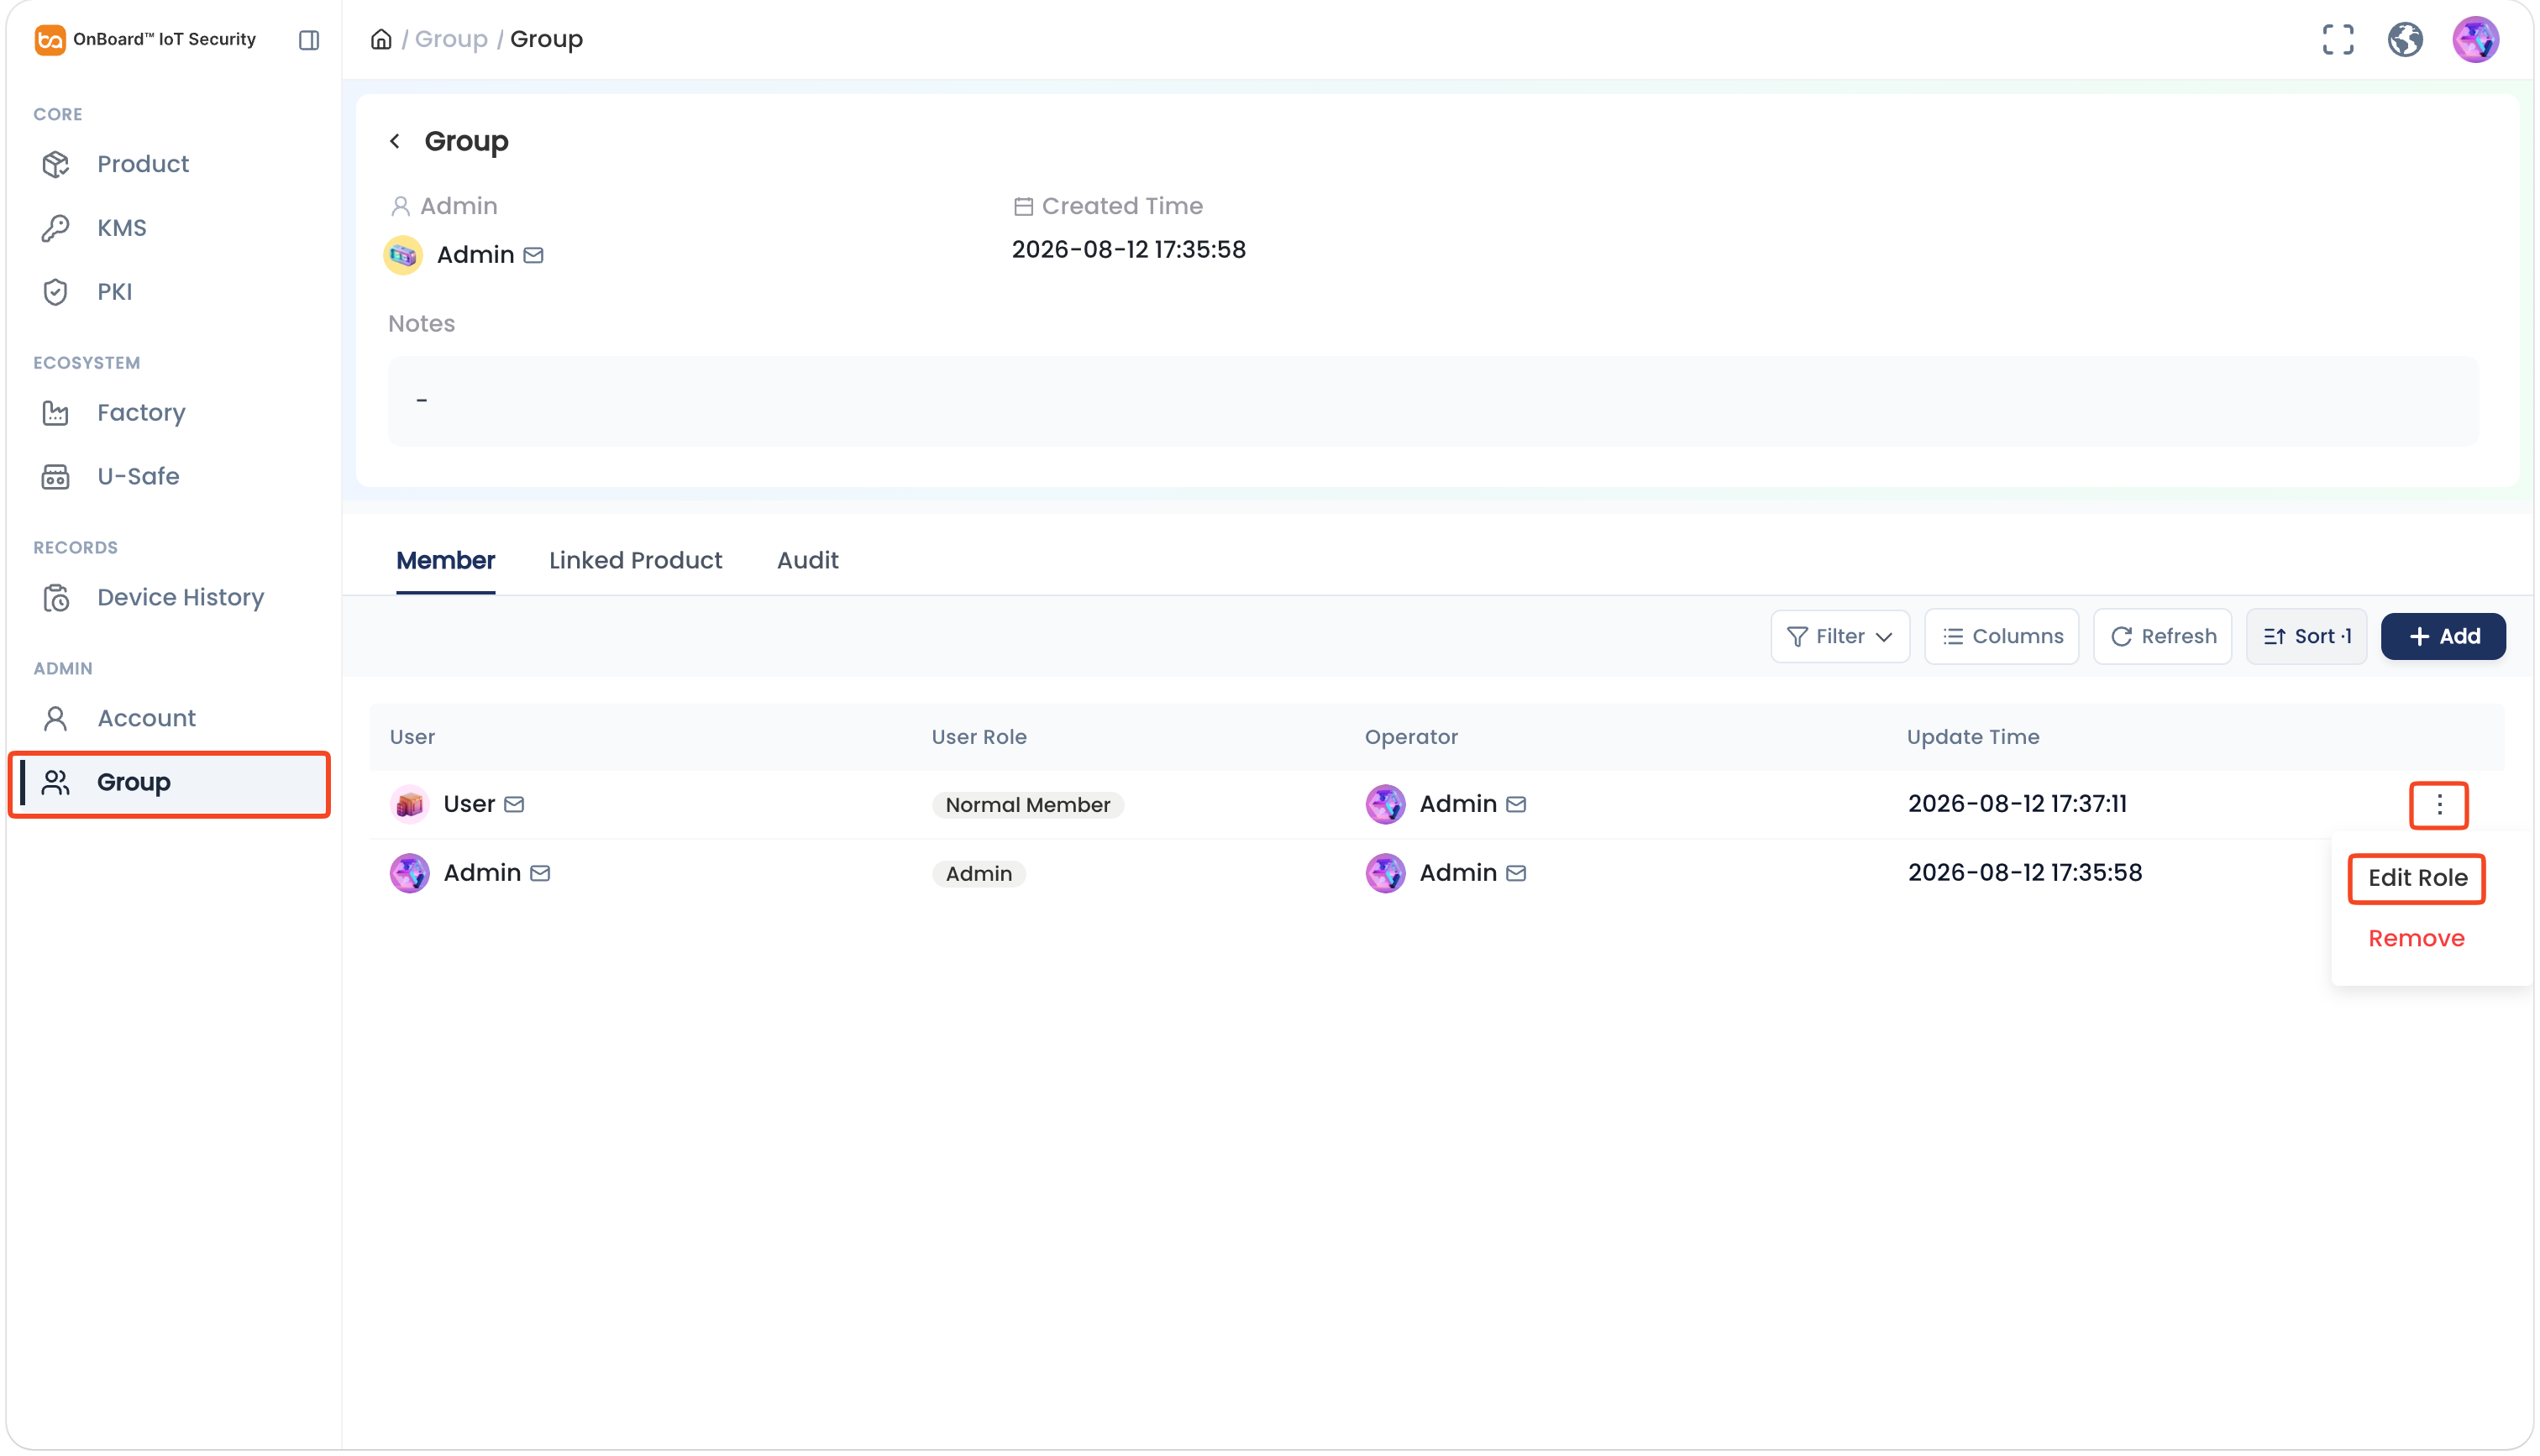
-
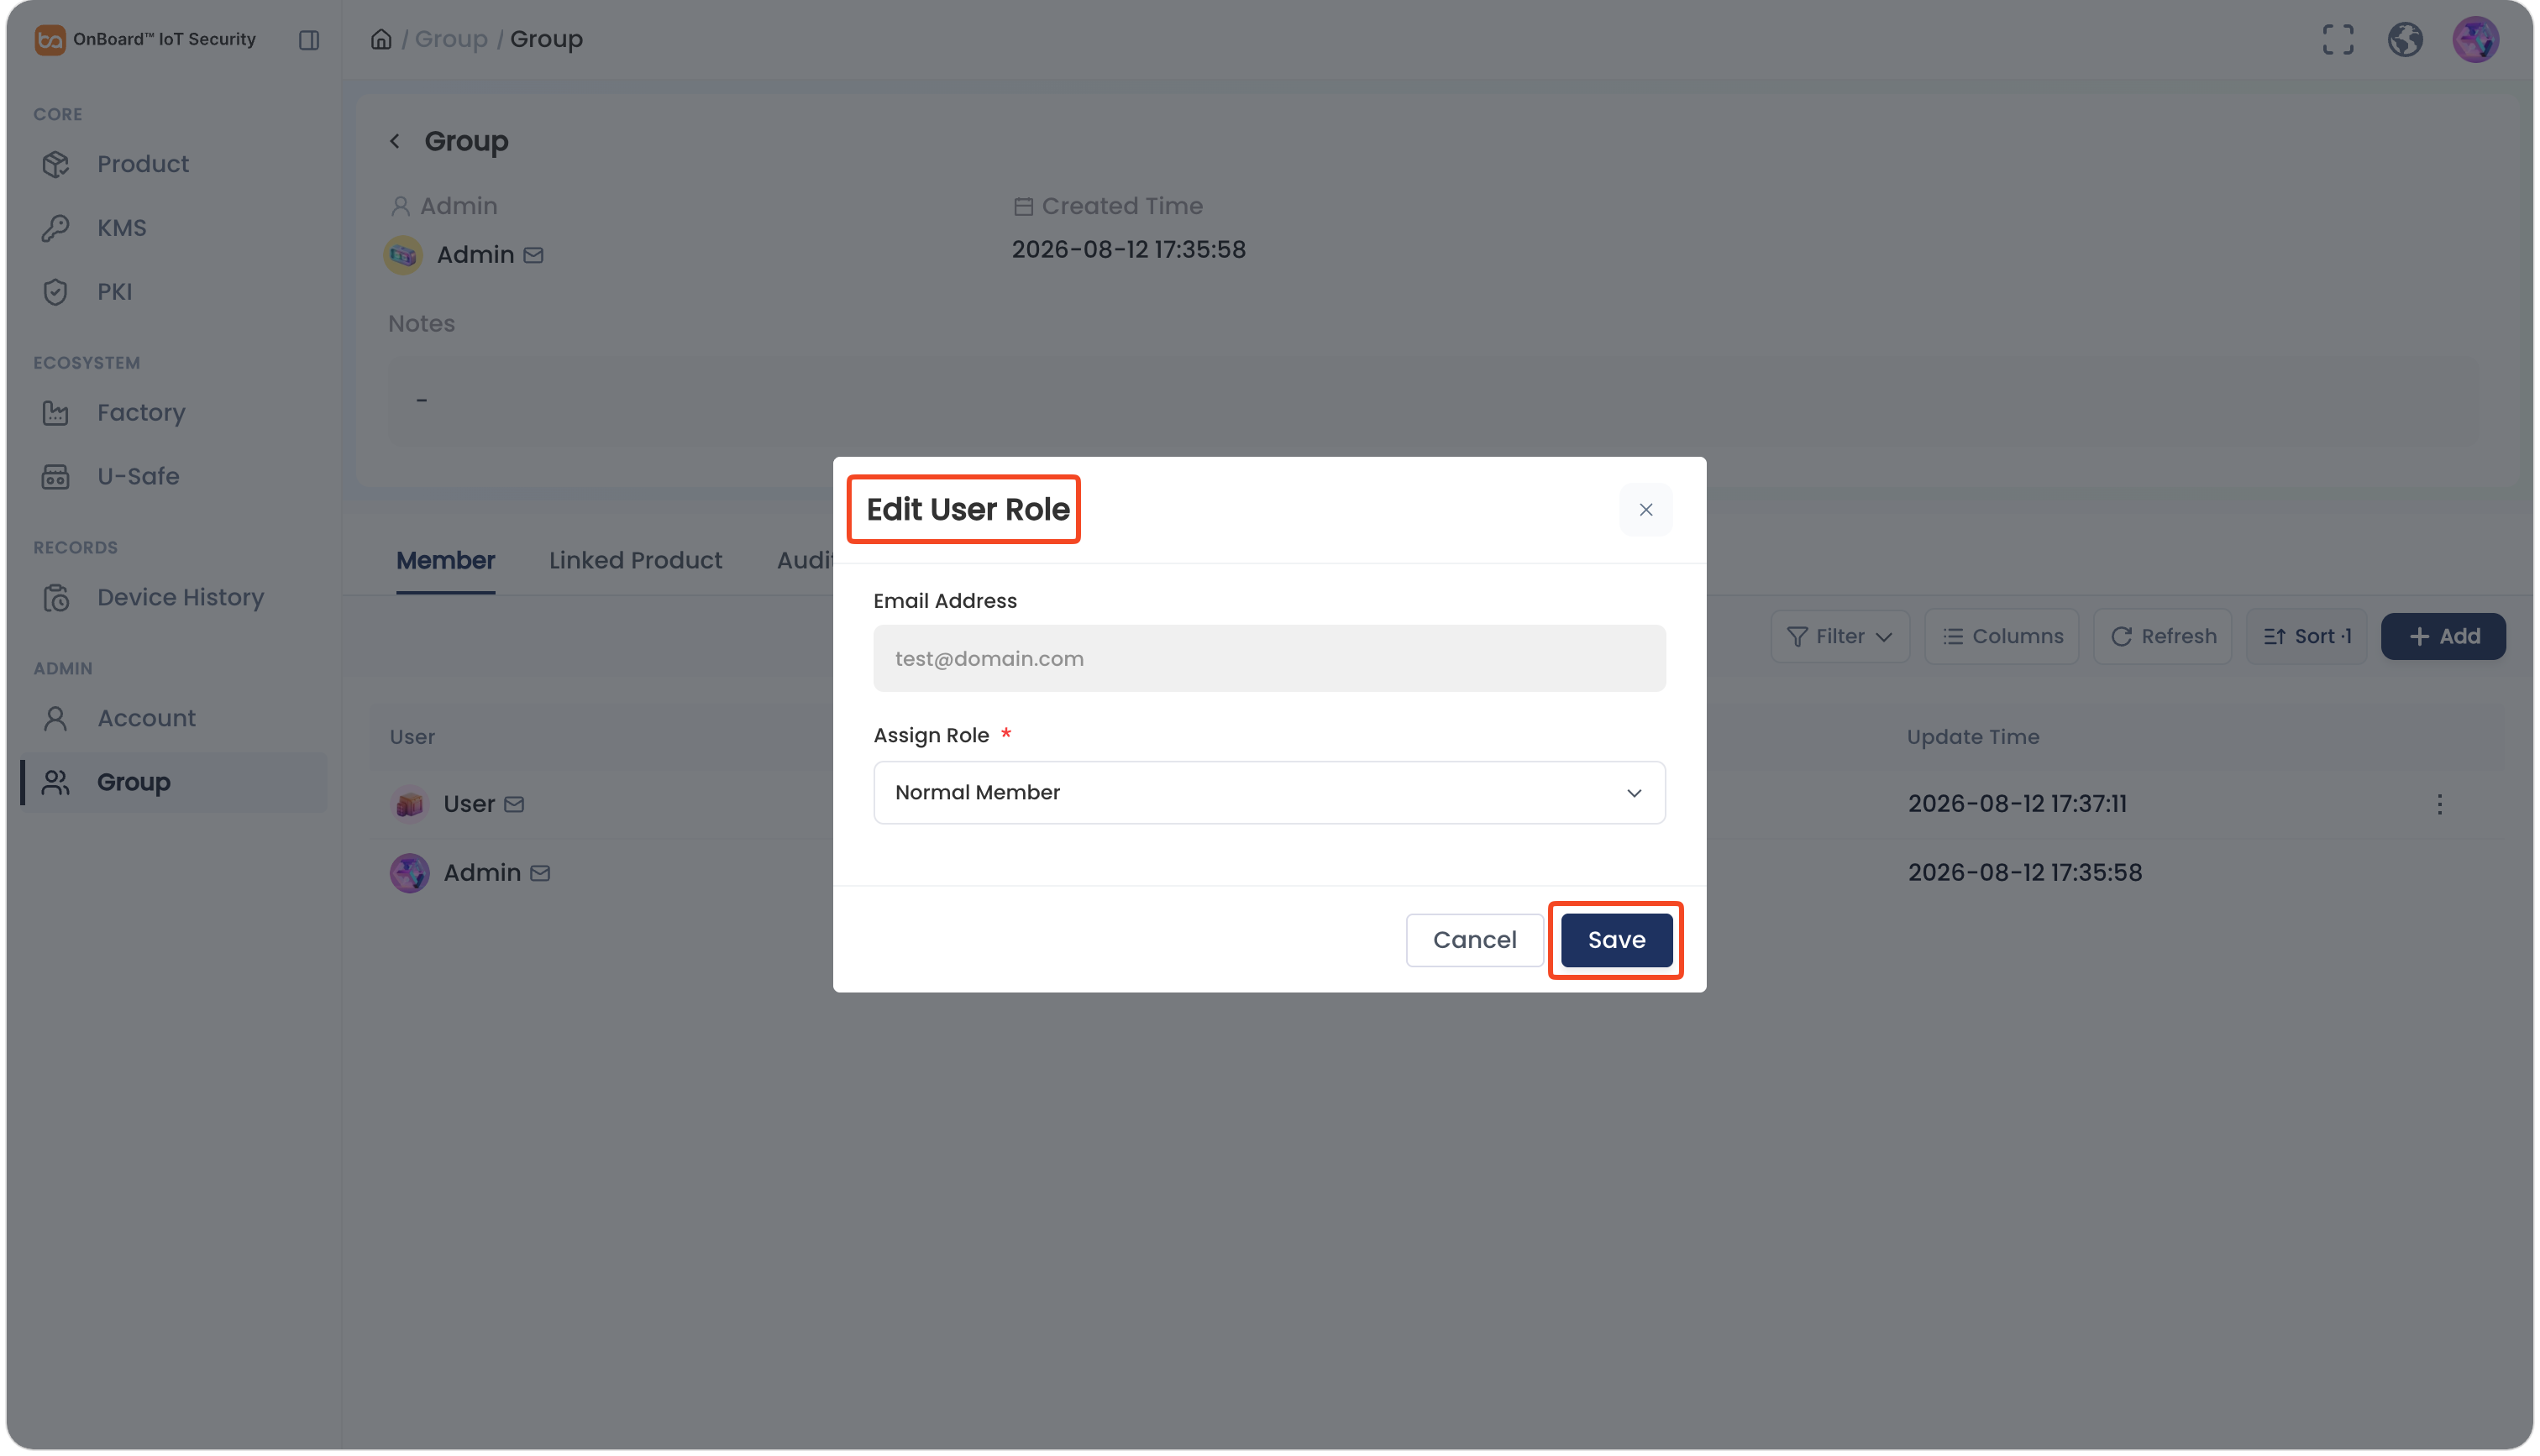
In the Edit User Role window, select the corresponding roles. Then, click Save to update the user group member role.
Remove a user group member
-
Sign in to OBIS.
-
In the Admin section of the left menu, click Group to navigate to the Group page.
-
On the Group page, select the corresponding user group.
-
On the group page, locate the Group Member section and then click the Options
icon for the corresponding member and select Remove.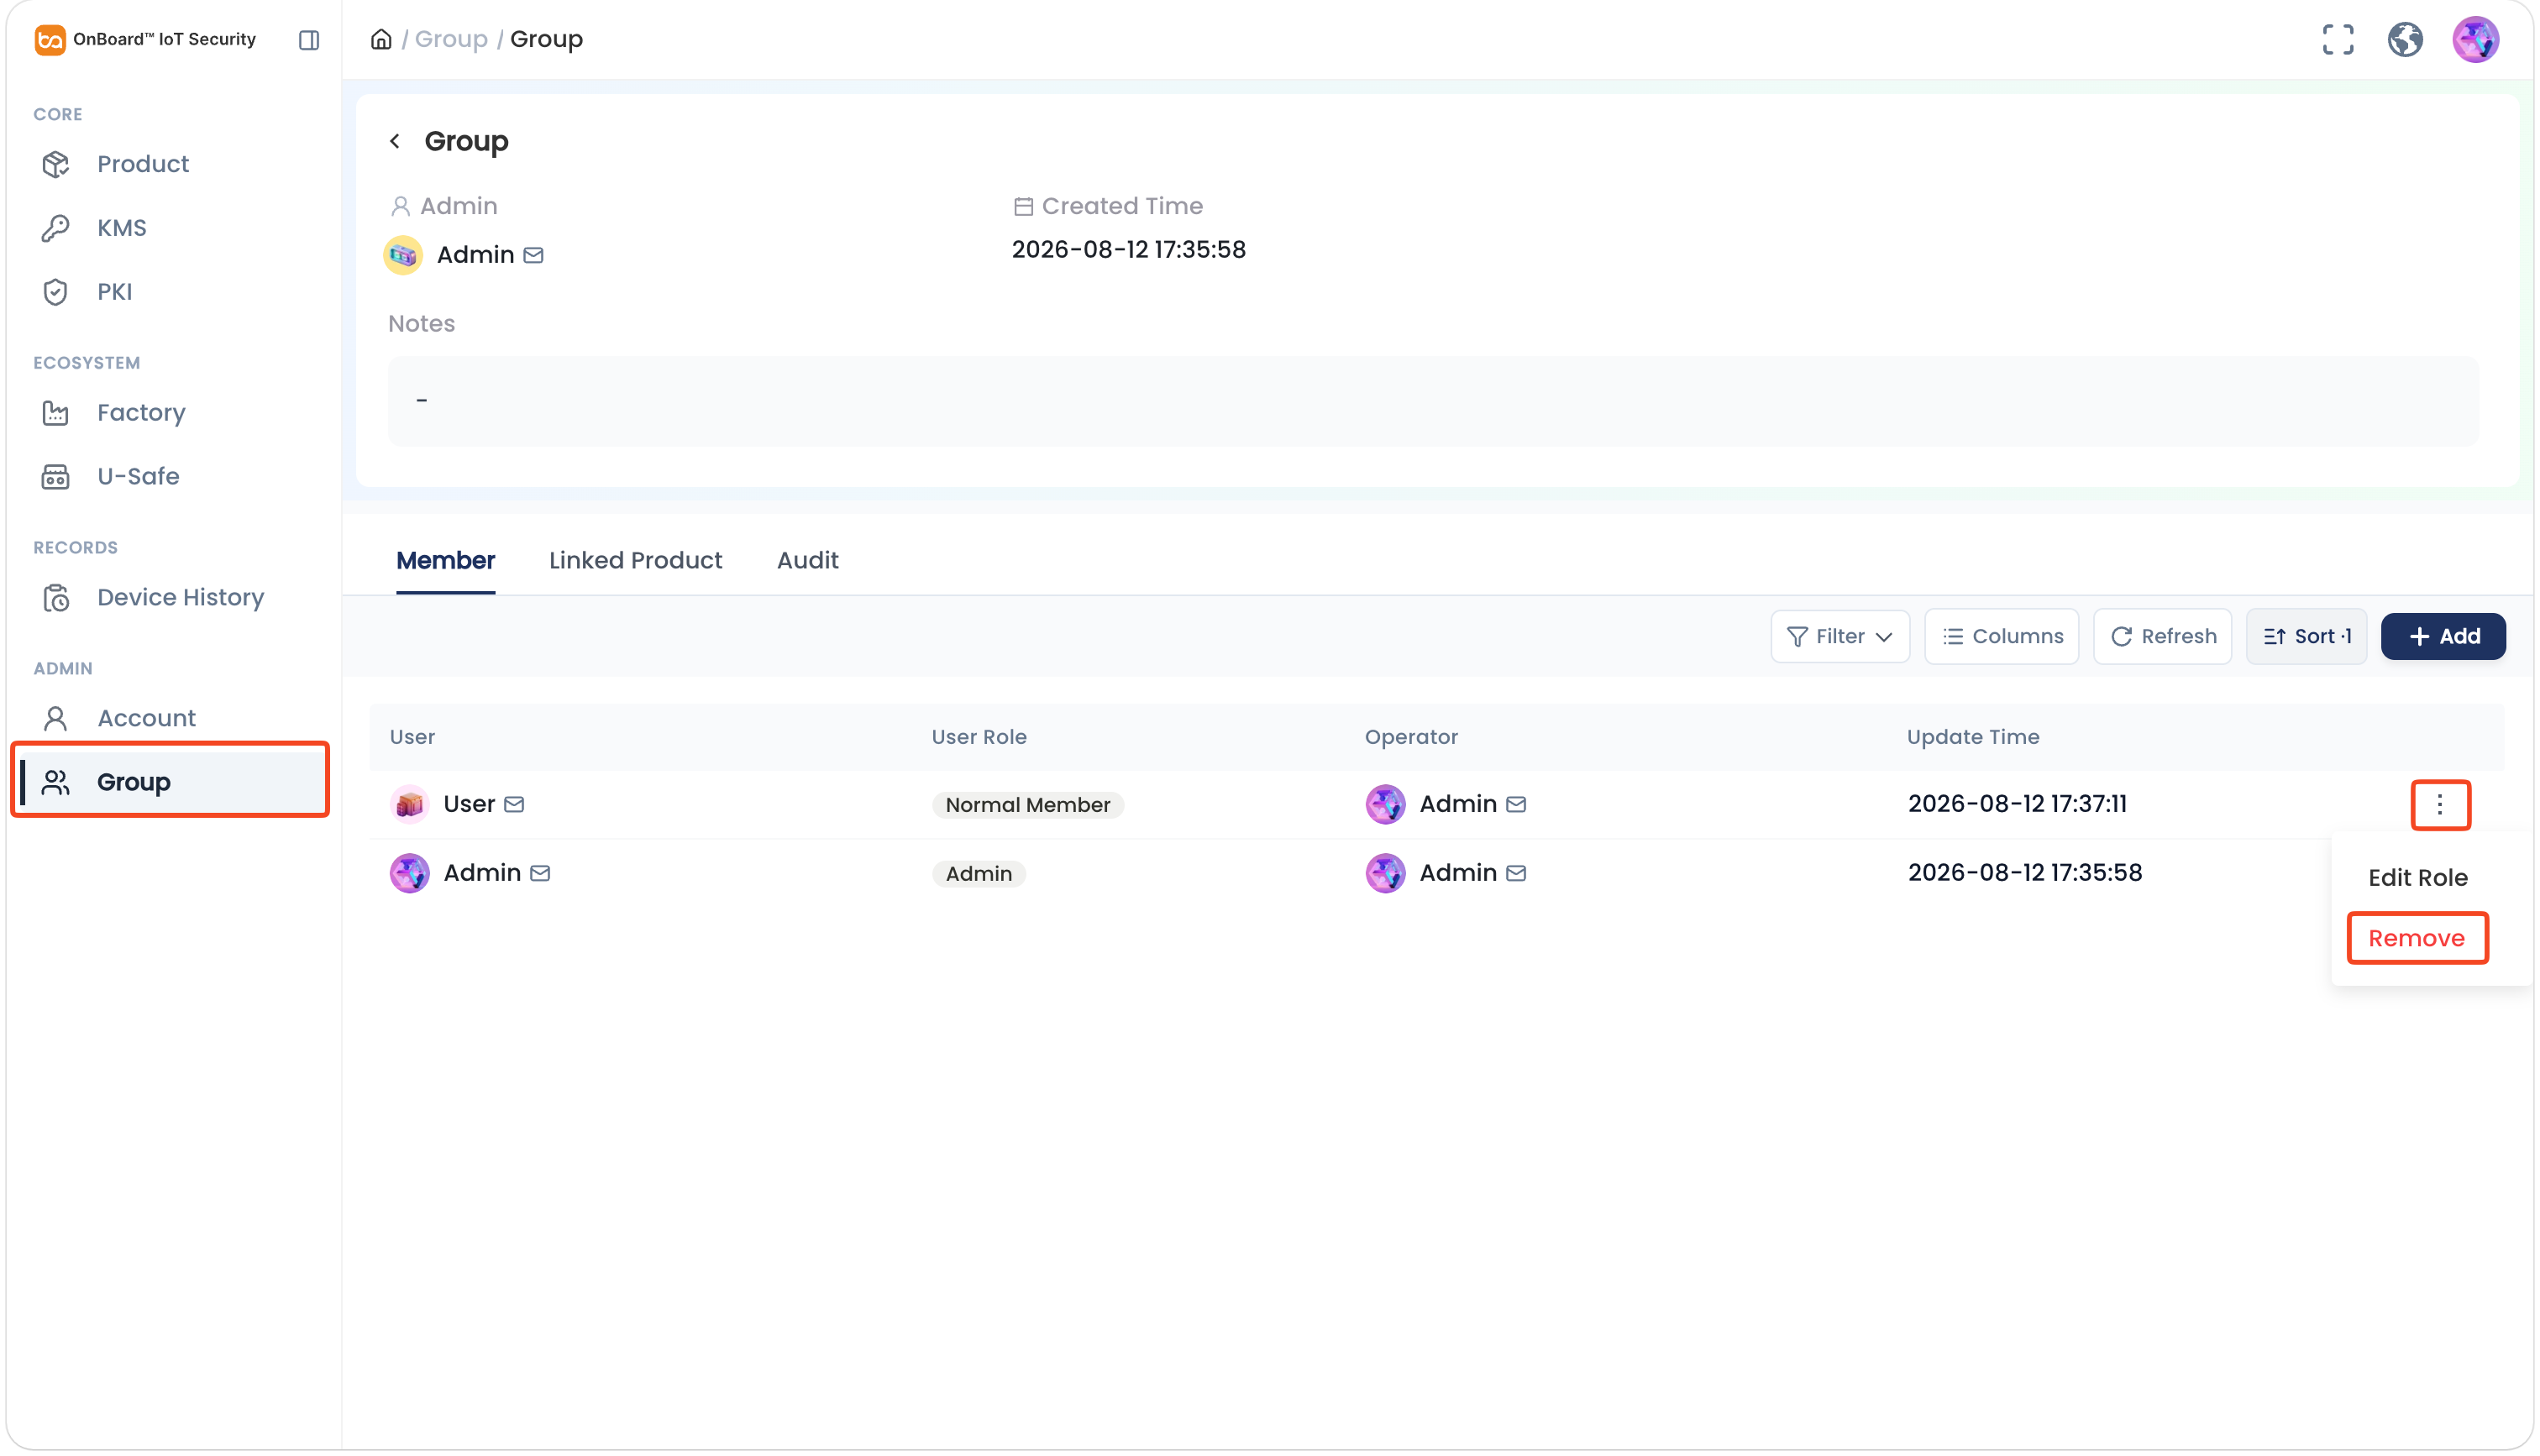
-
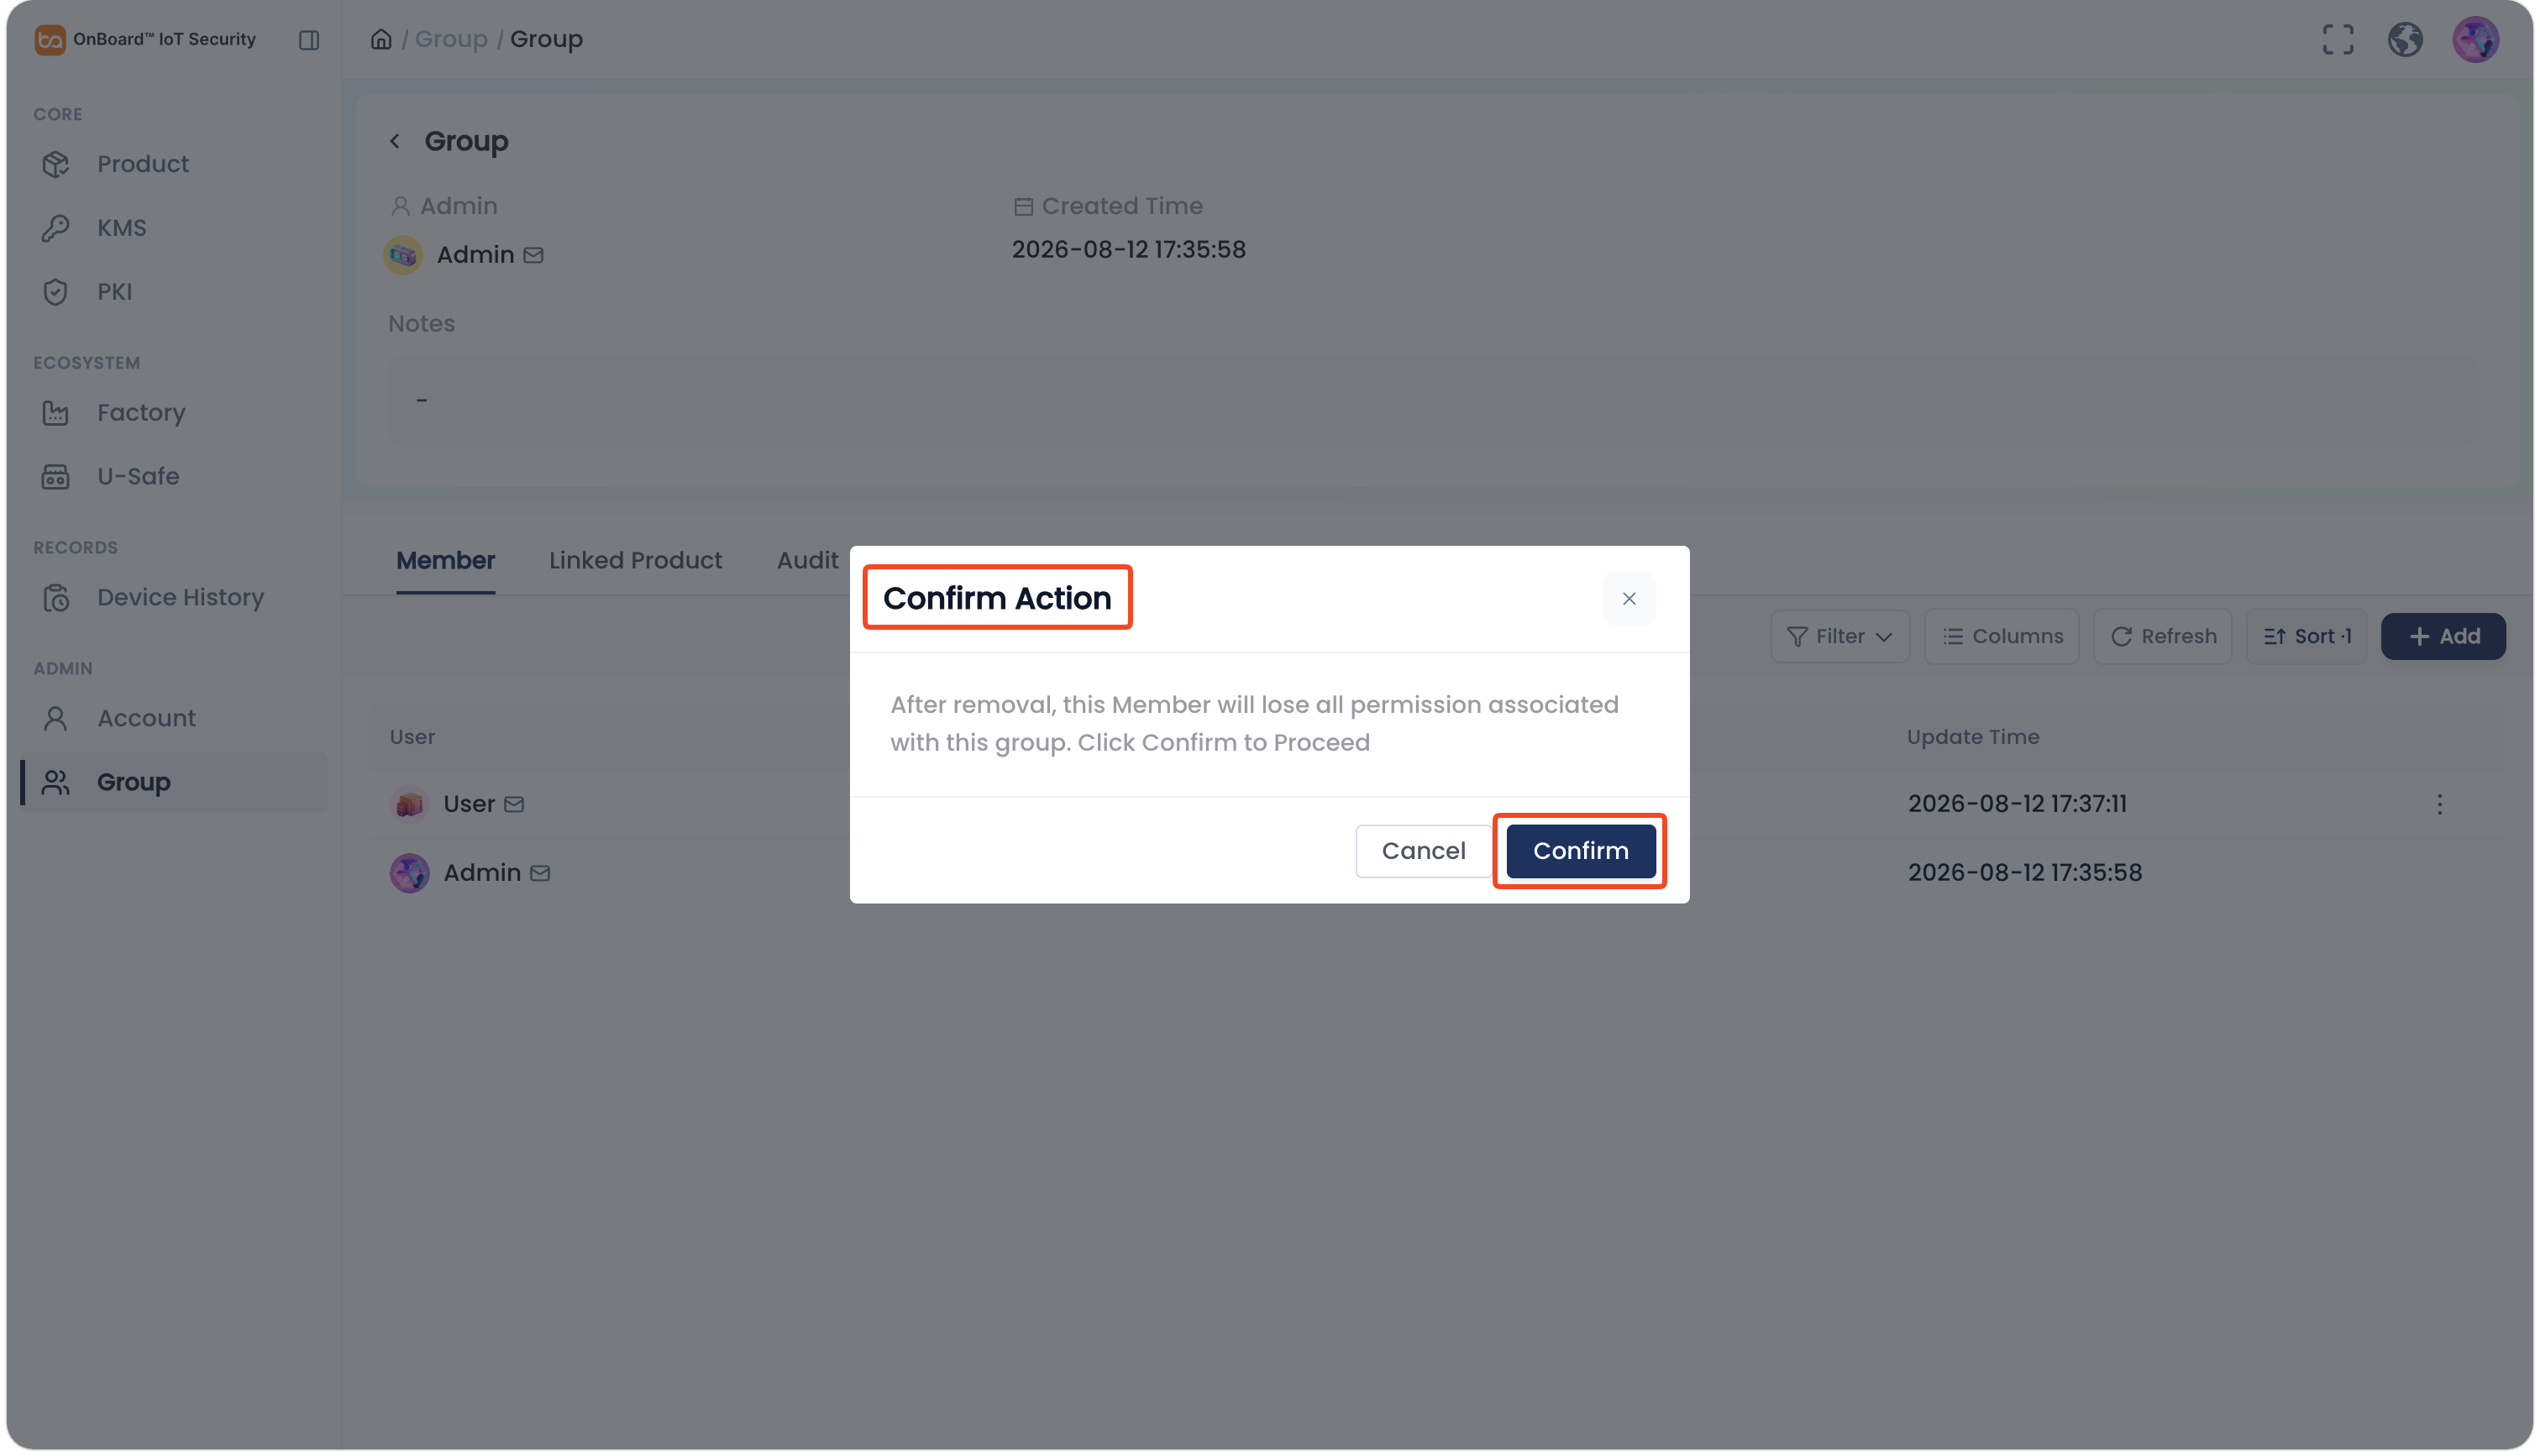
After verifying that the information is correct in the pop-up window, click Confirm to remove the user group member.
Delete a user group
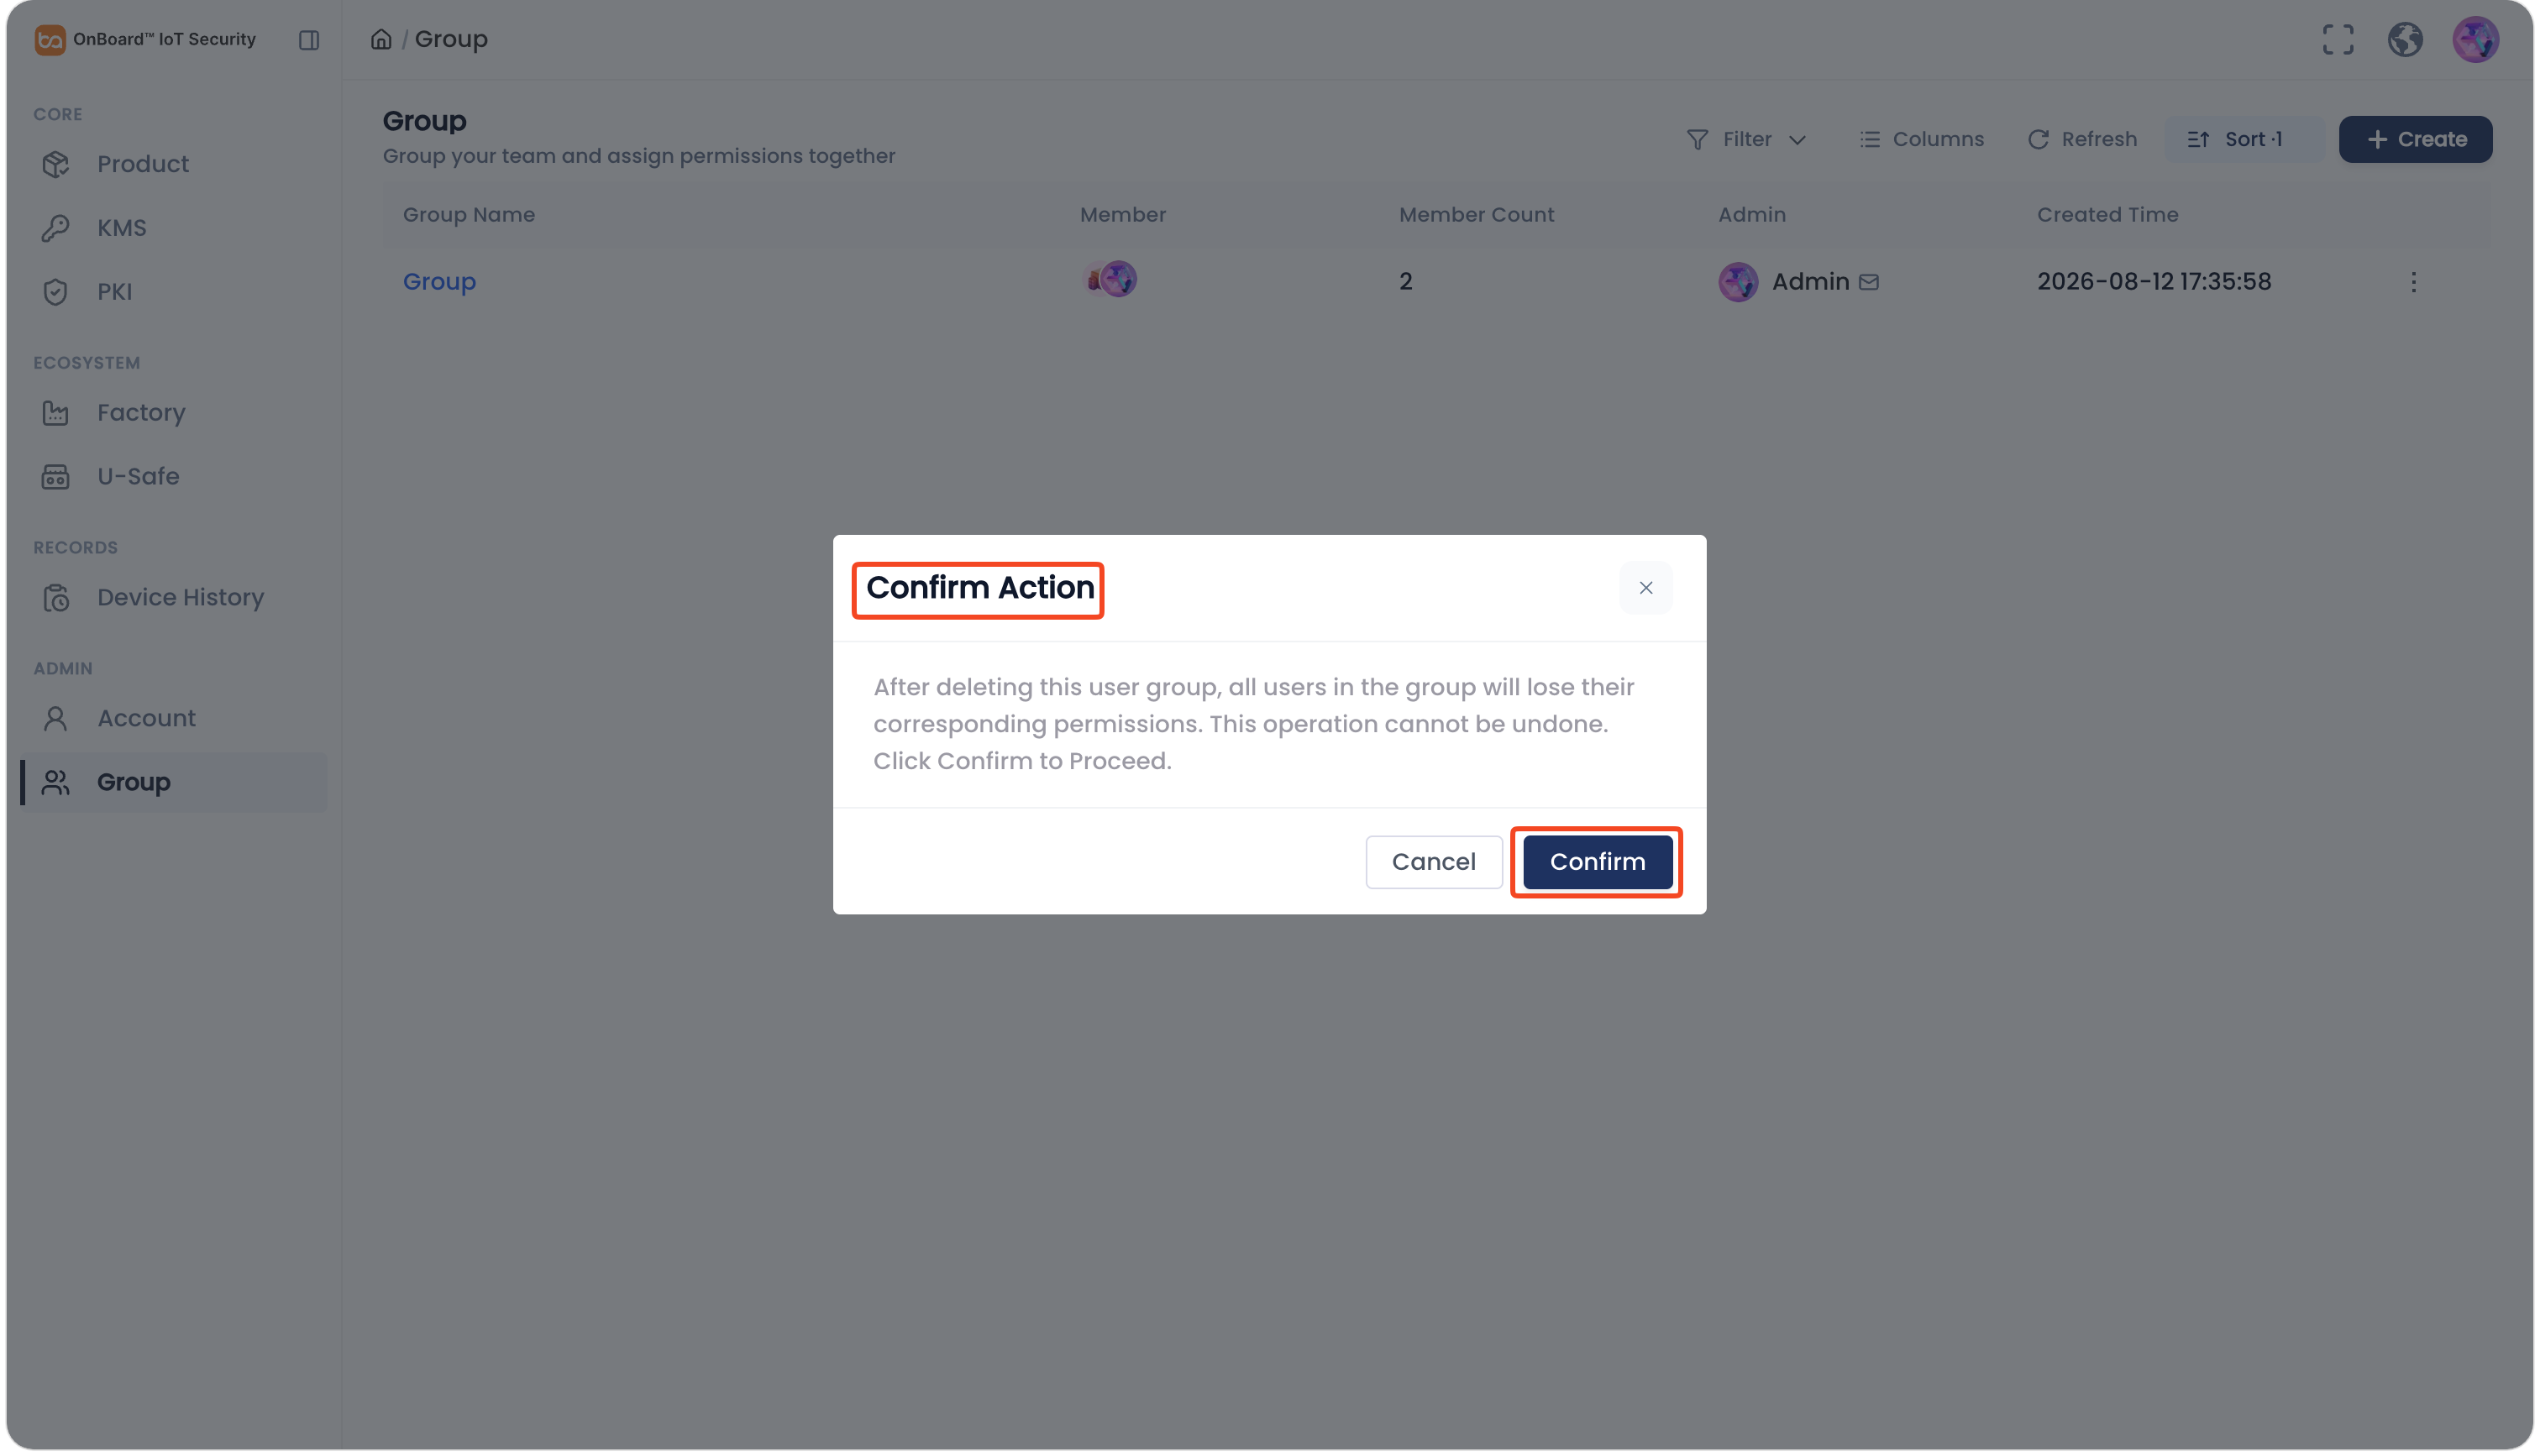
Deleted user groups cannot be recovered. Please proceed with caution.
-
Sign in to OBIS.
-
In the Admin section of the left menu, click Group to navigate to the Group page.
-
On the Group page, click the Options
icon for the corresponding user group and select Delete.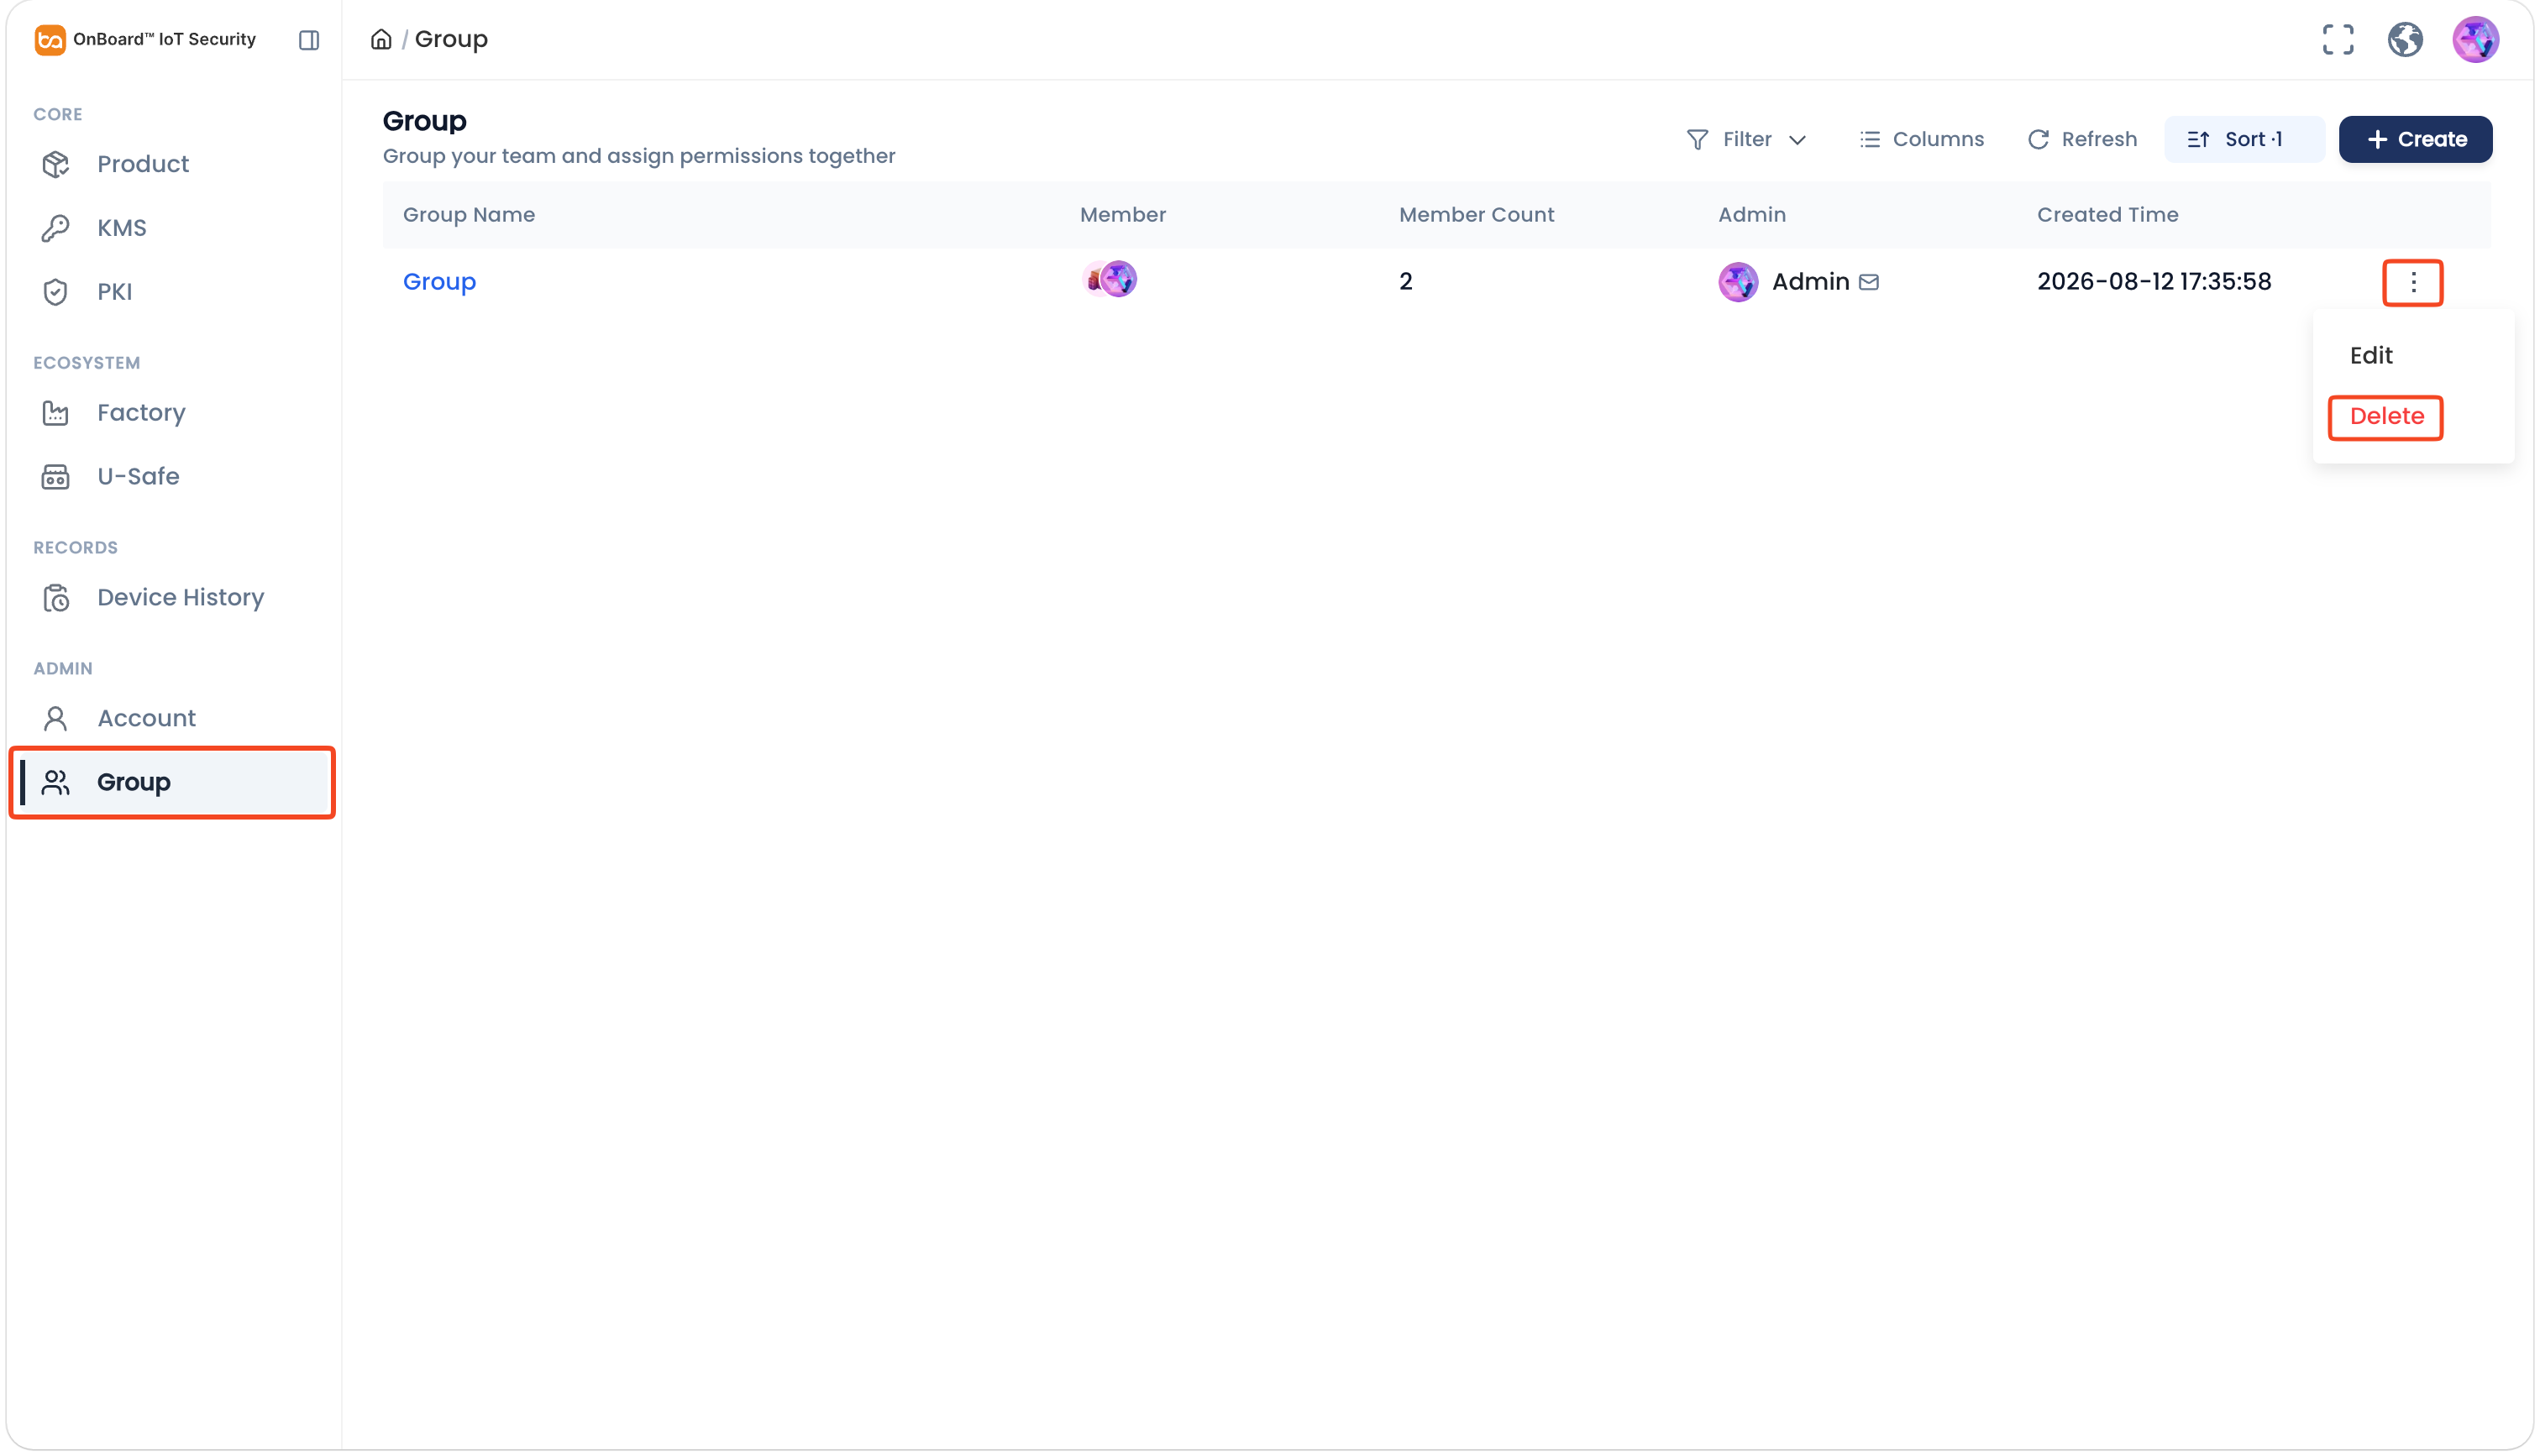
-
In the Confirm Action window, click Confirm to delete the user group.

 Download User Manual