Product creation and device programming
Welcome to OnBoard™ IoT Security (OBIS)! This article provides a quick-start guide for the following steps:
- Creating and configuring a product
- Creating a version and batch
- Assigning a programming station to the batch and completing device programming
By following these steps, you'll quickly get started with OBIS and complete the entire process—from product creation to device programming.
Prerequisites
Before starting product creation and device programming, ensure that the following conditions are met:
-
Your account has the permissions to complete the process—from product creation to device programming in OBIS.
-
Contact Snowball to obtain the HSM U-Safe and Identity U-Safe.
-
You have completed the creation and configuration of the factory. For detailed instructions, refer to the following steps:
- Creating a factory
- Configuring a factory (local factory & cloud factory)
- Configuring a programming station (local factory & cloud factory)
Operational diagram
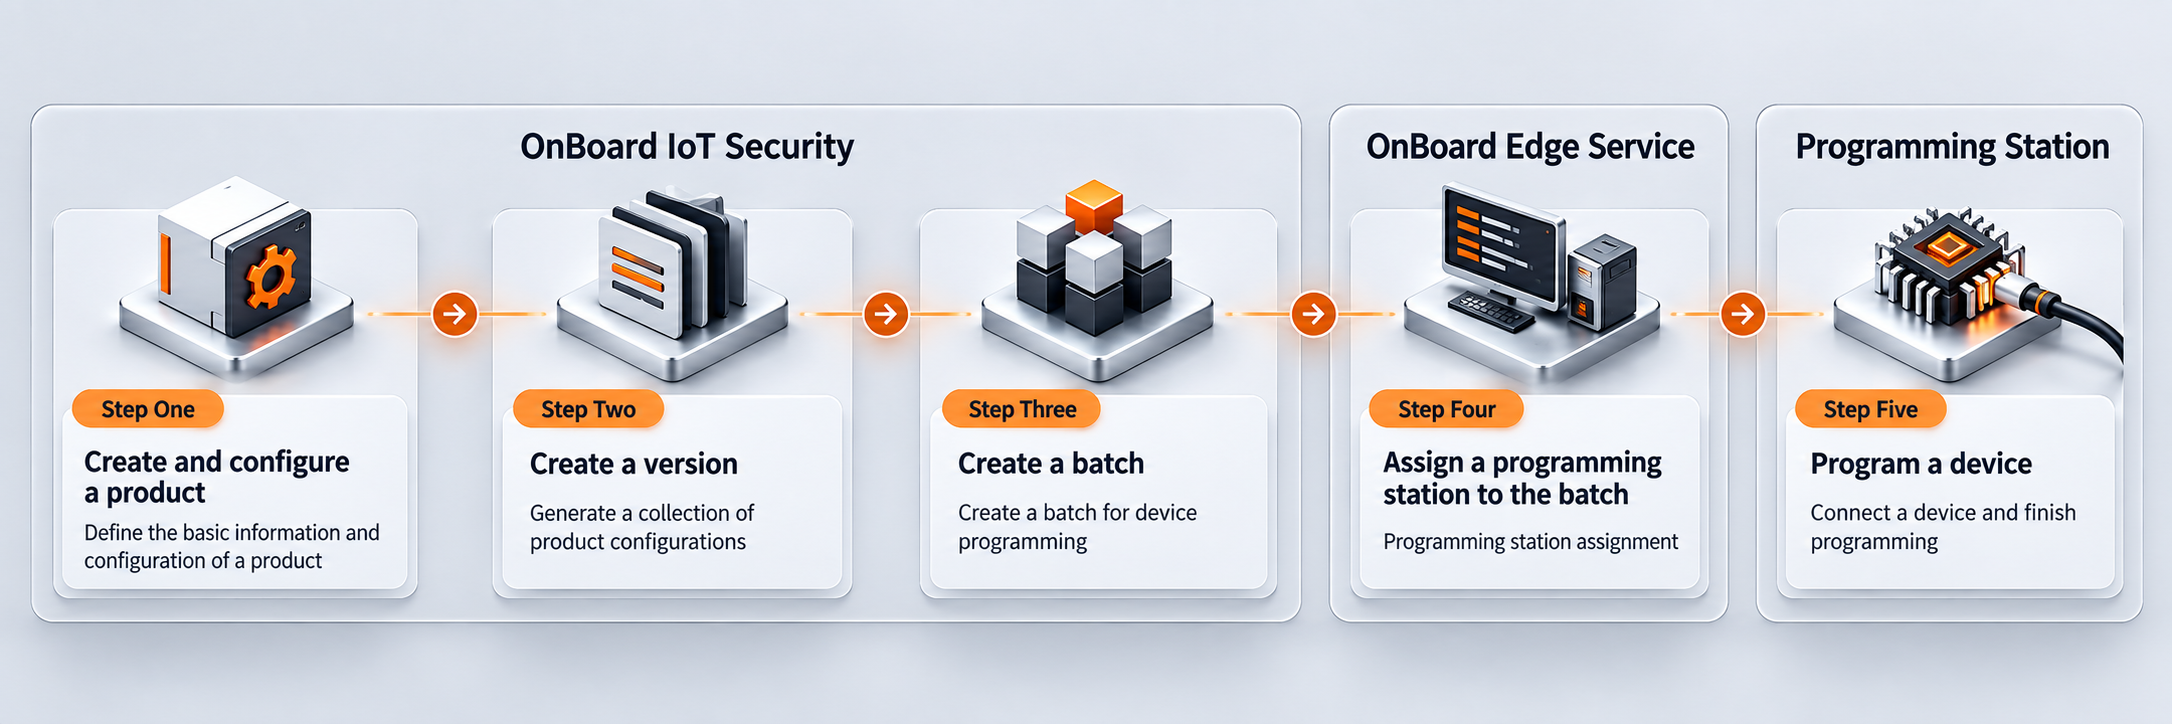
Step one: Create and configure a product
Refer to the steps below to create and configure your product in OBIS:
-
Sign in to OBIS.
-
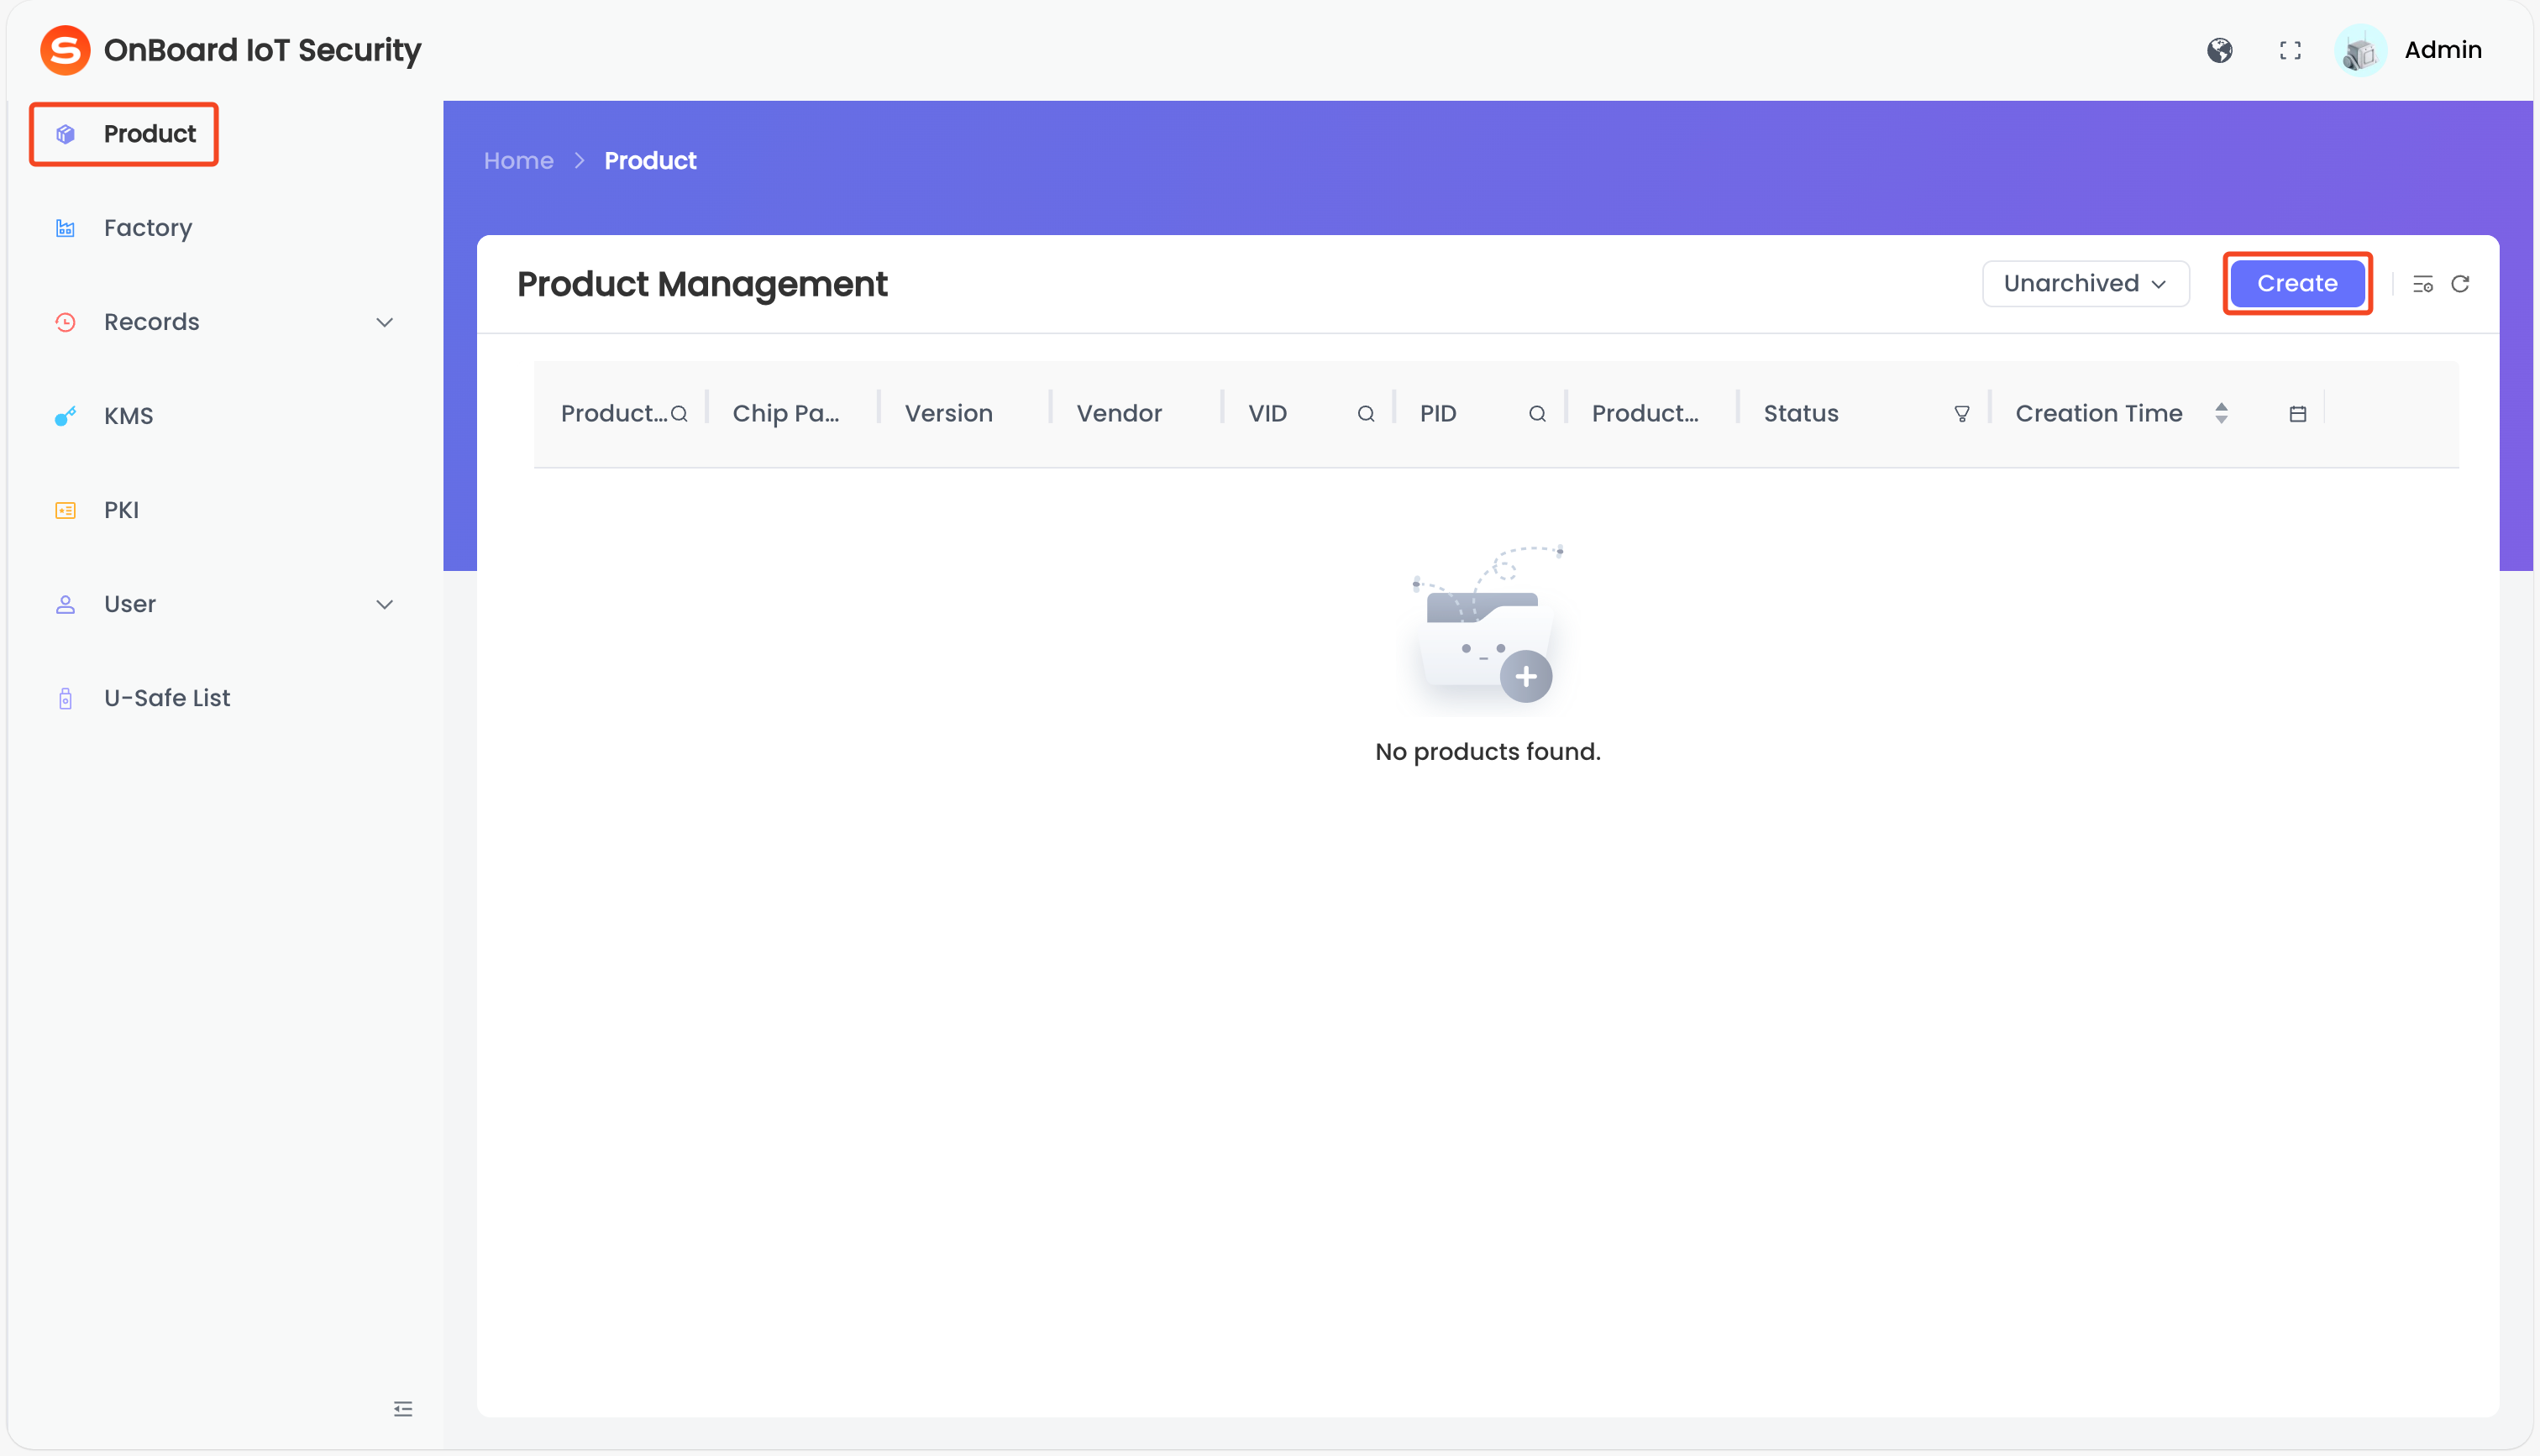
In the left menu, click Product, and then click Create.
-
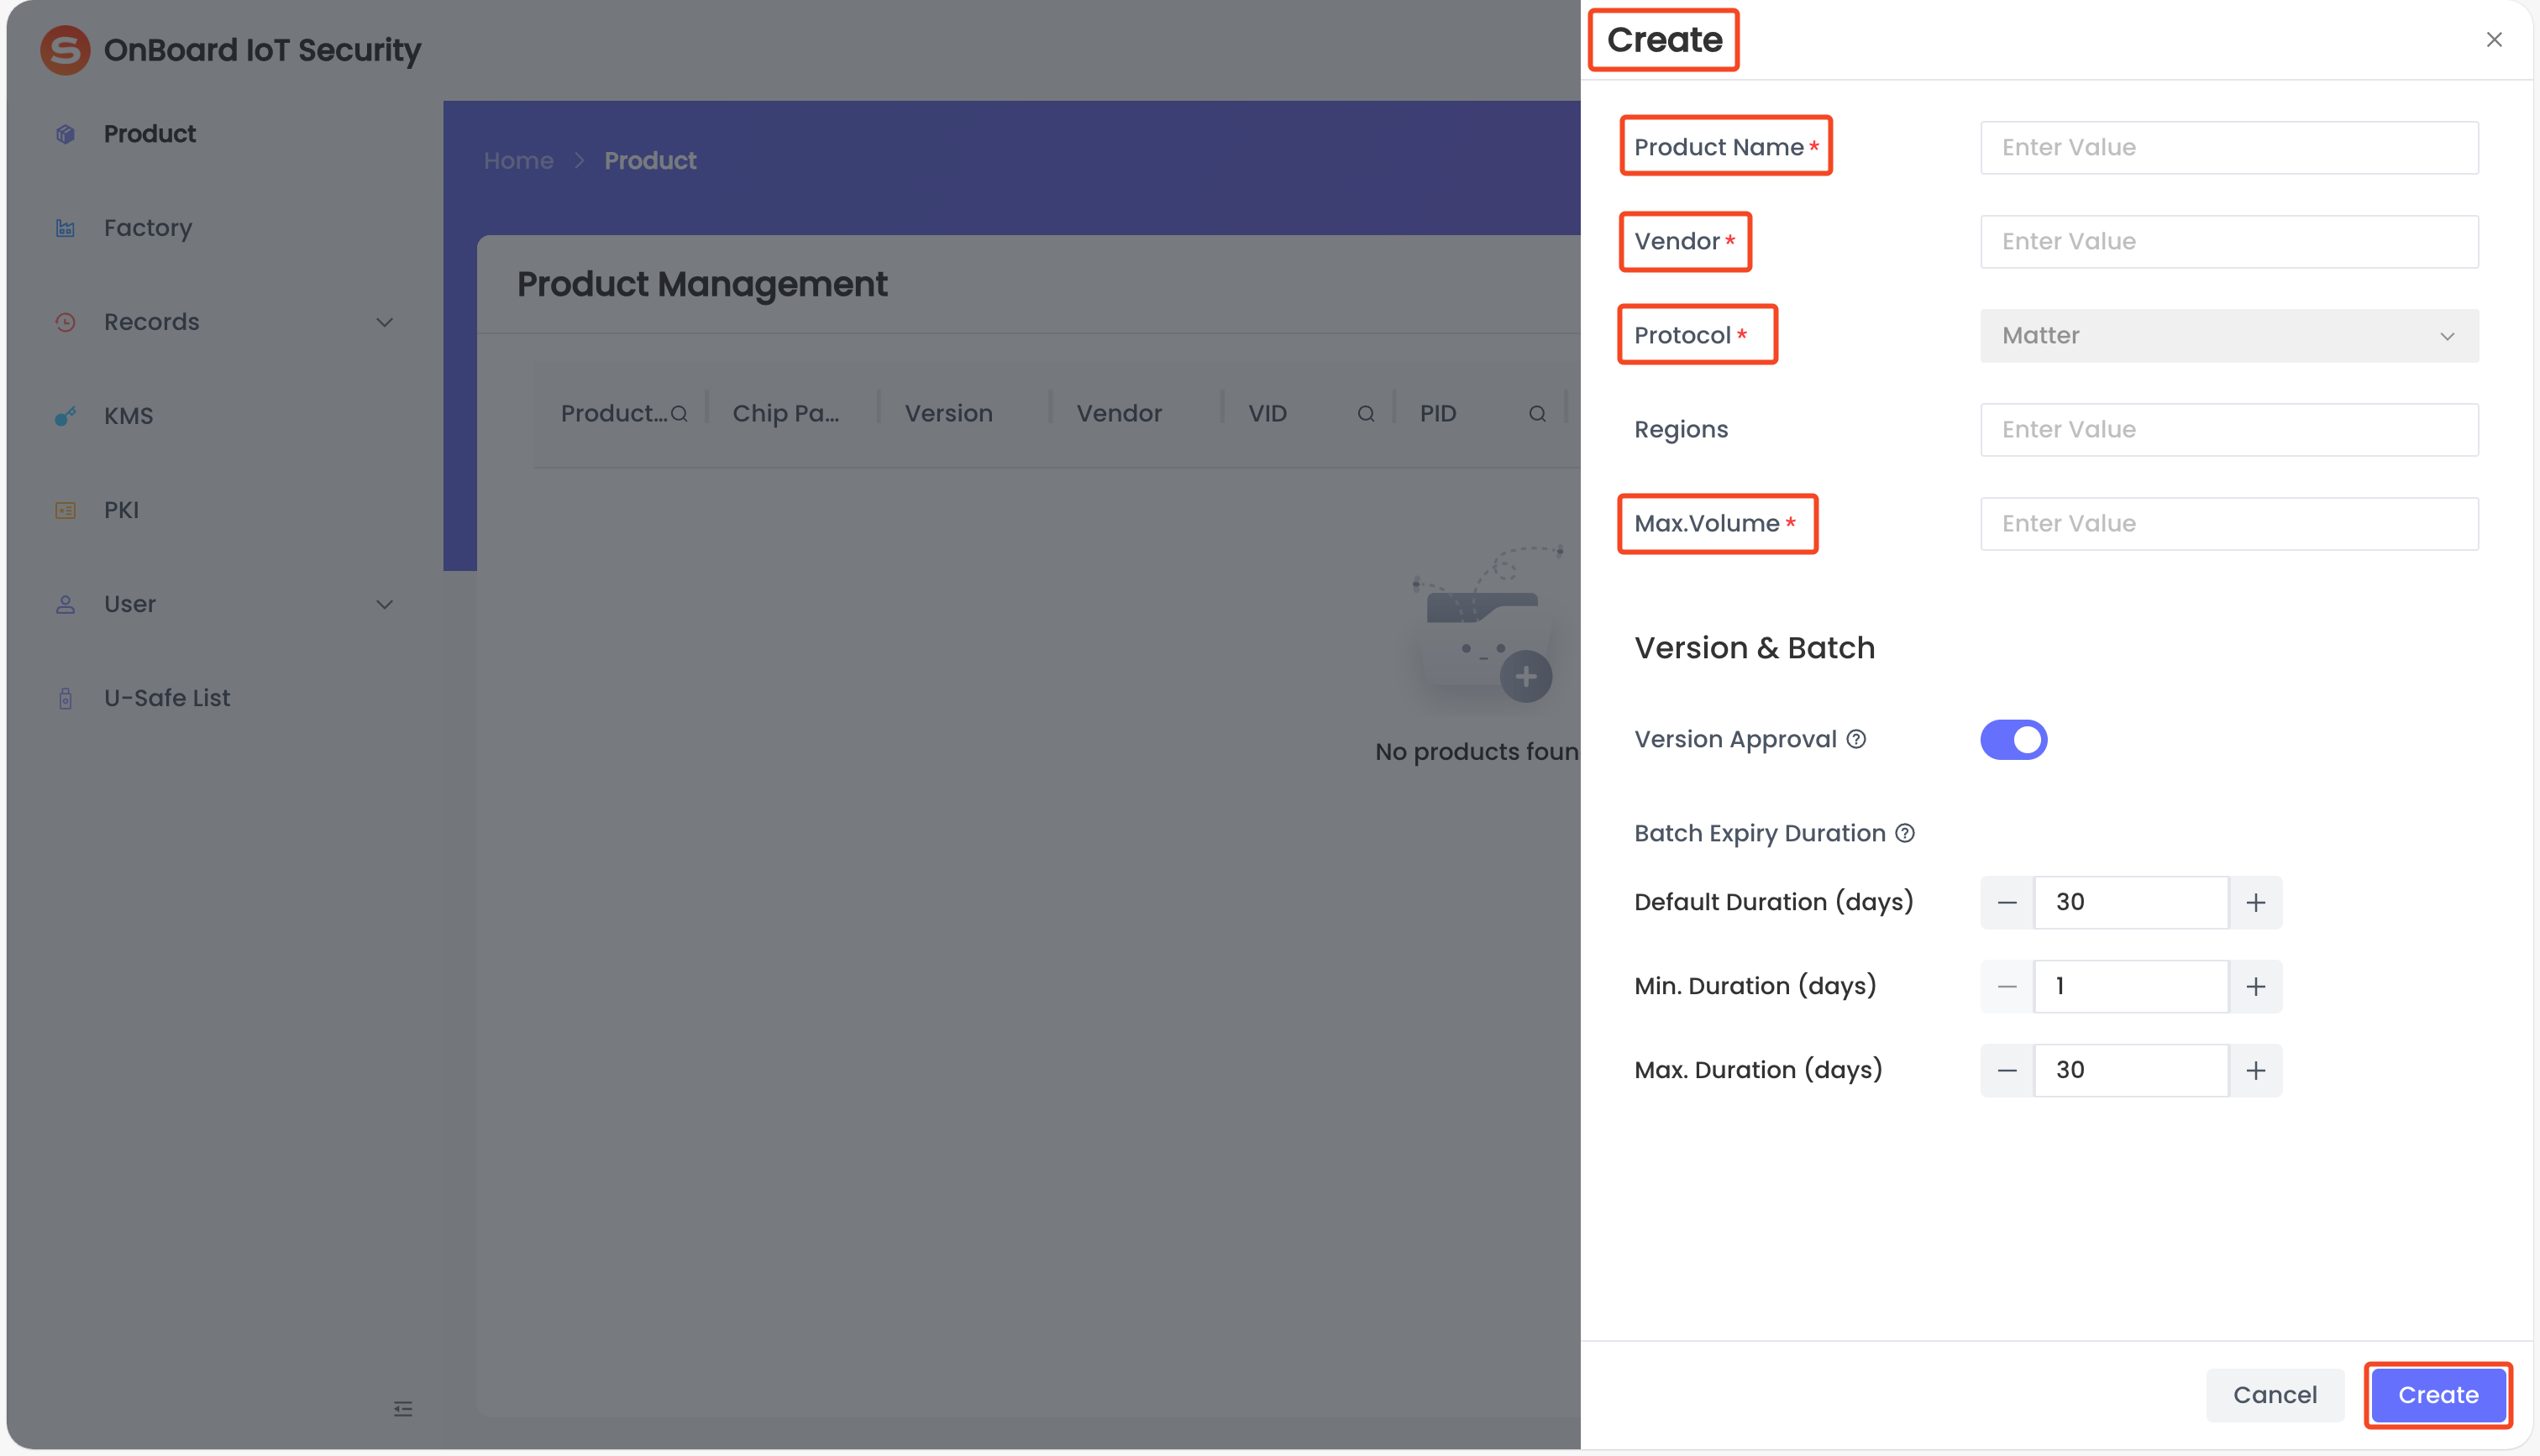
On the Create panel, enter the required basic information:
- Product Name
- Vendor
- Protocol
- Max.Volume
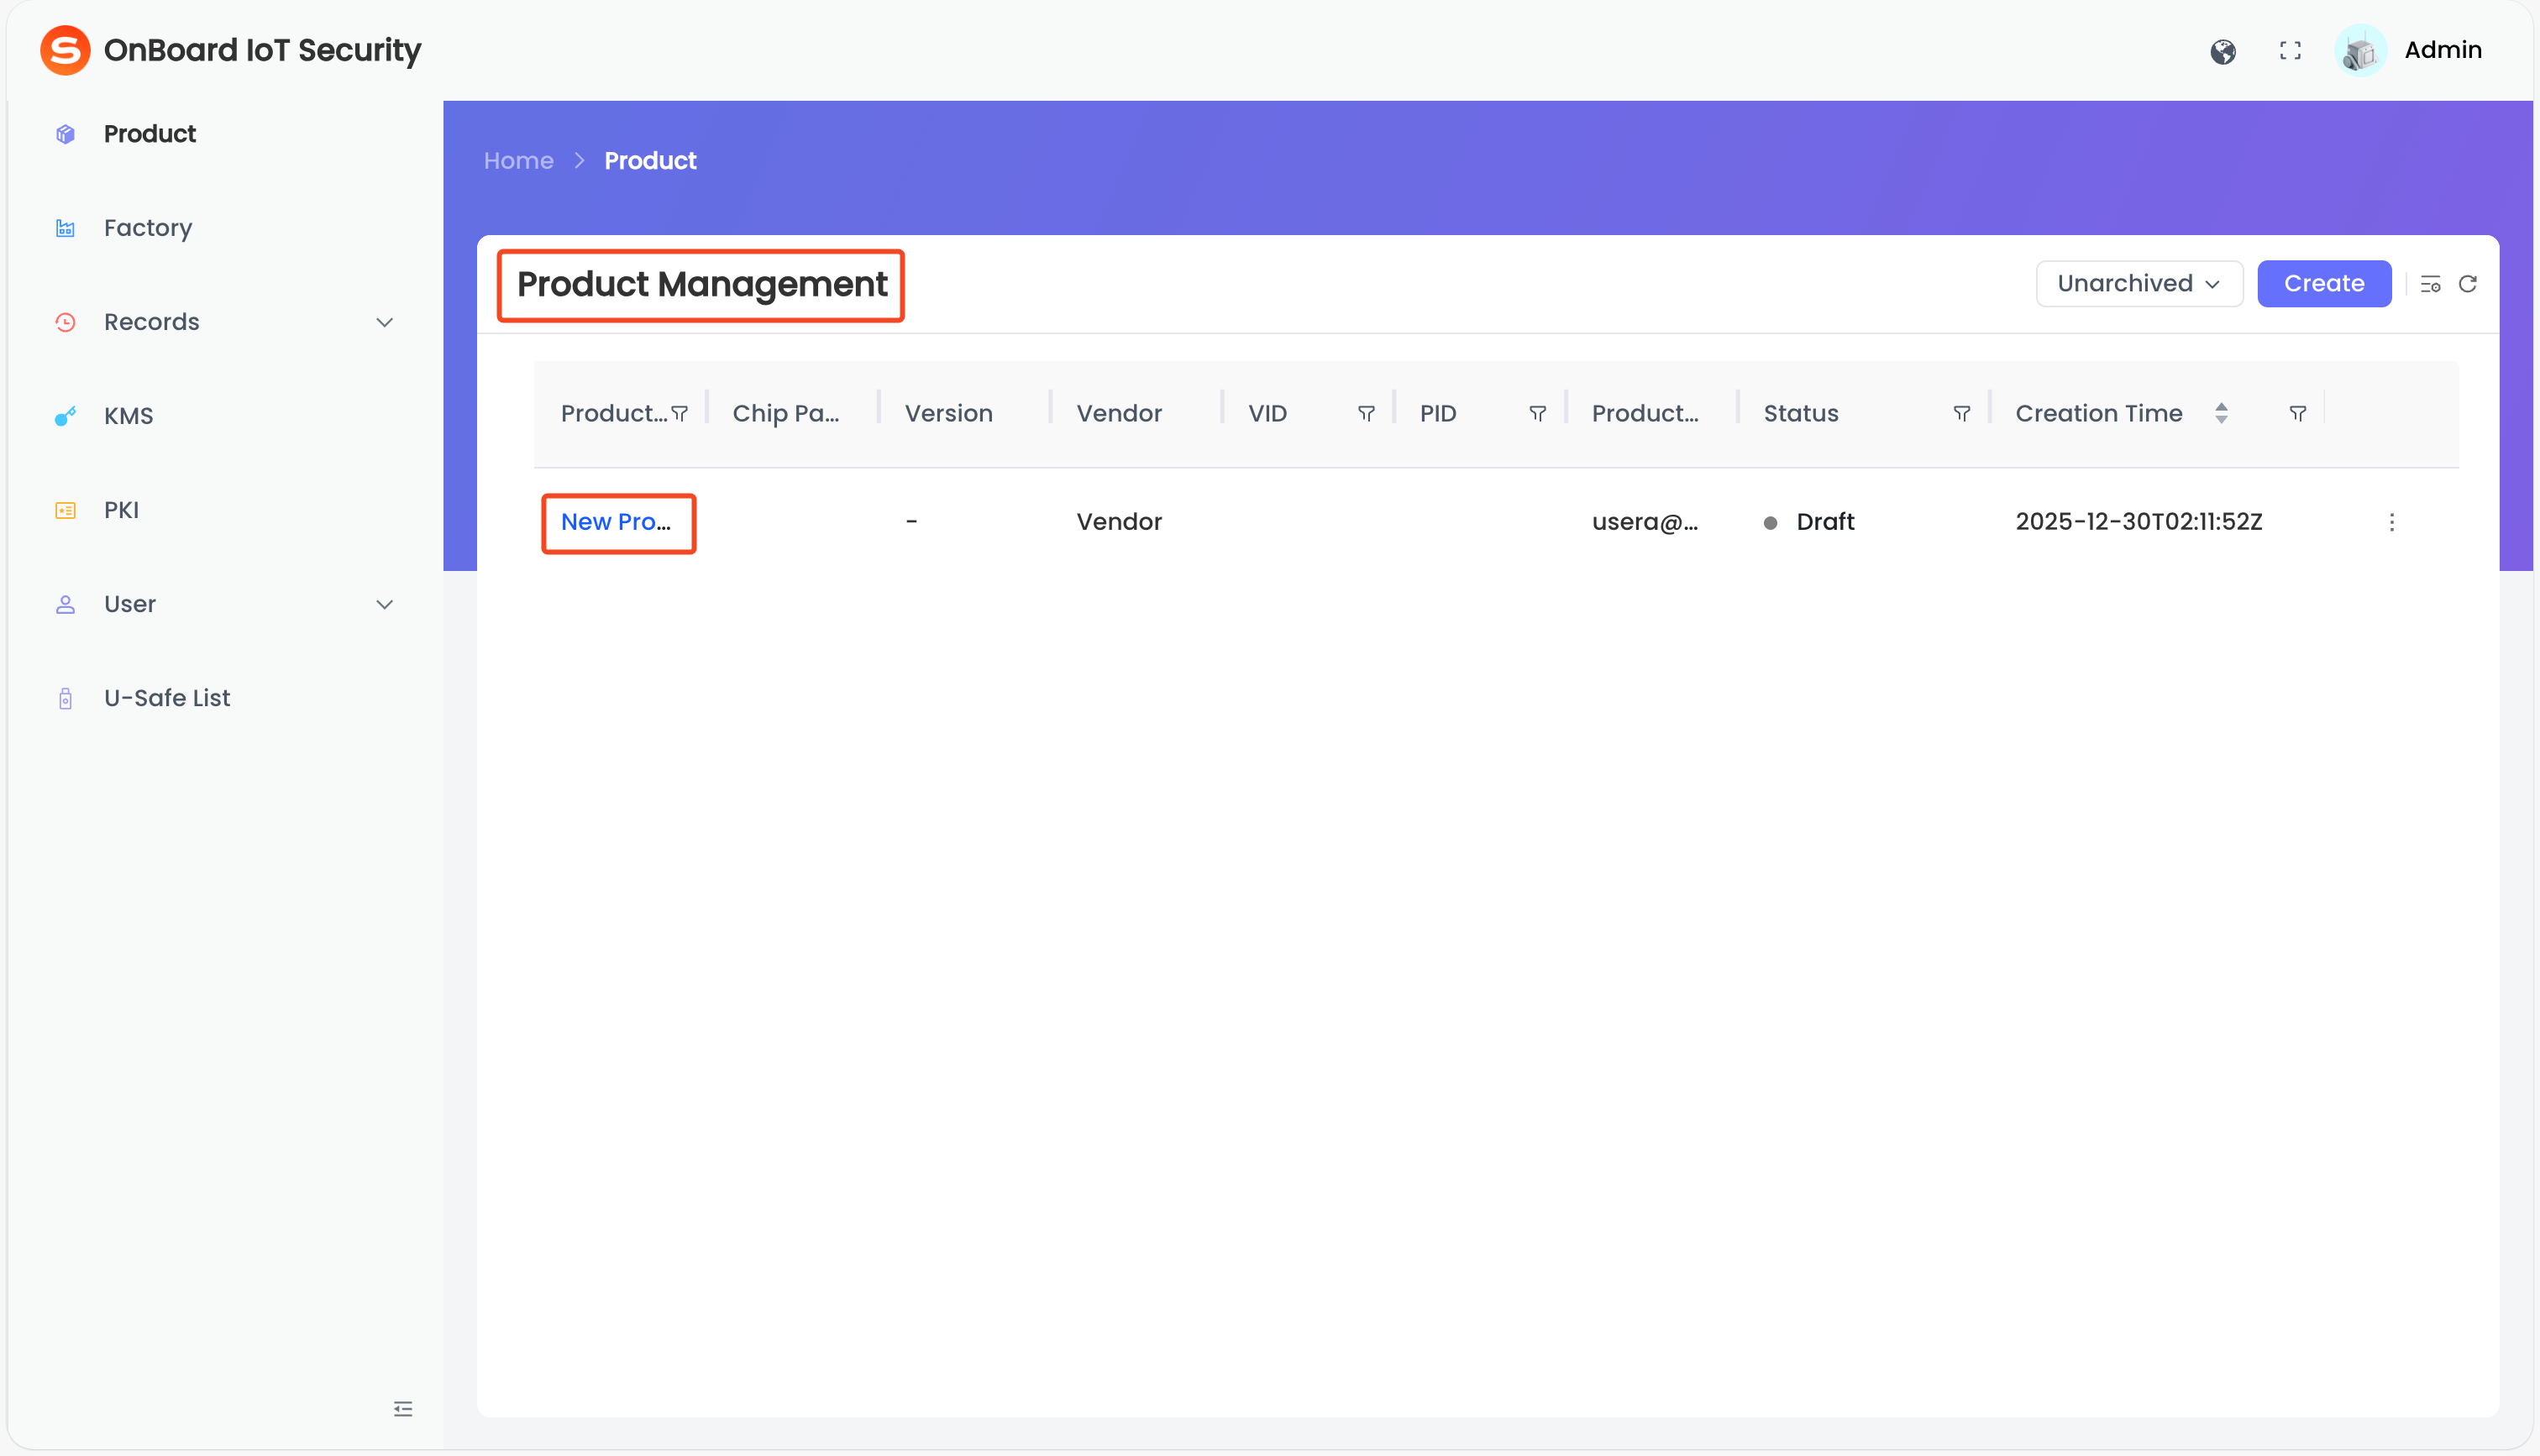
Then, click Create. After your product is created, the page will navigate to the Product Management page.
noteFor more information, refer to the description of product basic information.
-
On the Product Management page, select the created product.
-
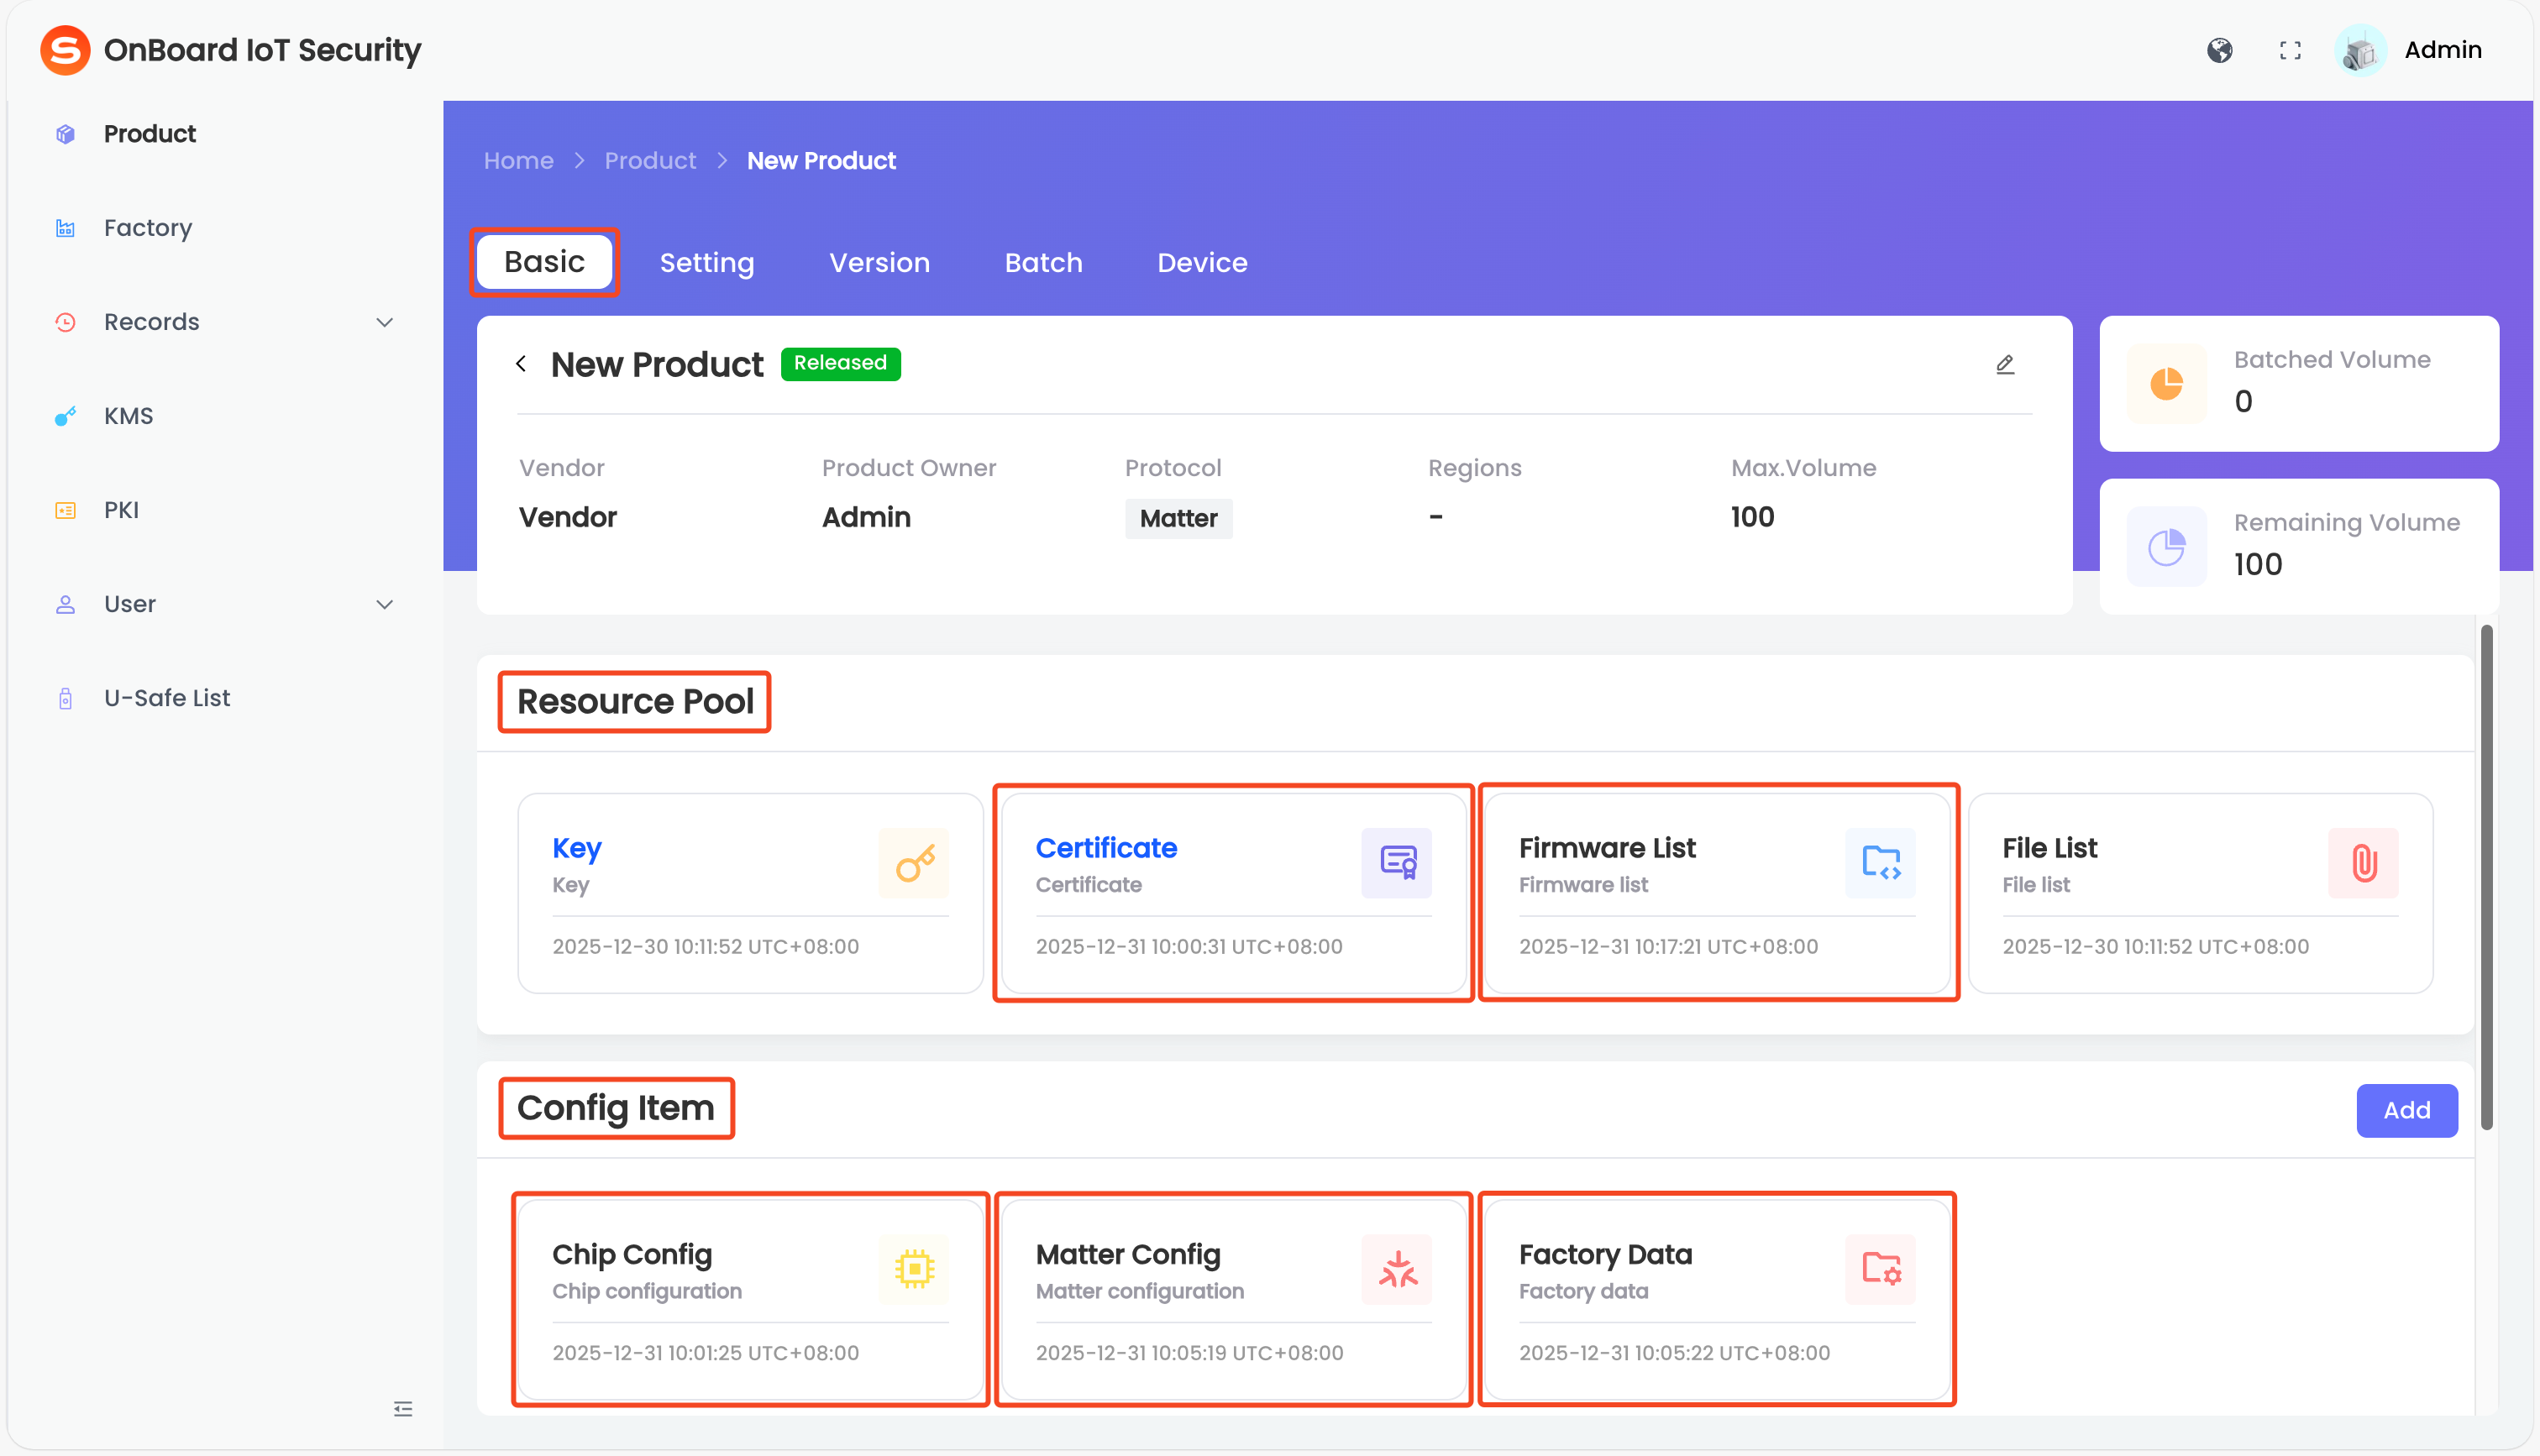
On the product page, select the Basic tab, locate the Resource Pool and Config Item areas. Then, select and configure the required items:
- Certificate
- Firmware List
- Chip Config
- Matter Config
- Factory Data
tipThe configurations of the Resource Pool and Config Item areas will be used for version creation. For more information, refer to the steps for configuring a product. The files uploaded when configuring Firmware List, Matter Config, and Factory Data can be downloaded at any time from the configuration page of the corresponding resource.
- Certificate
- Firmware List
- Chip Config
- Matter Config
- Factory Data
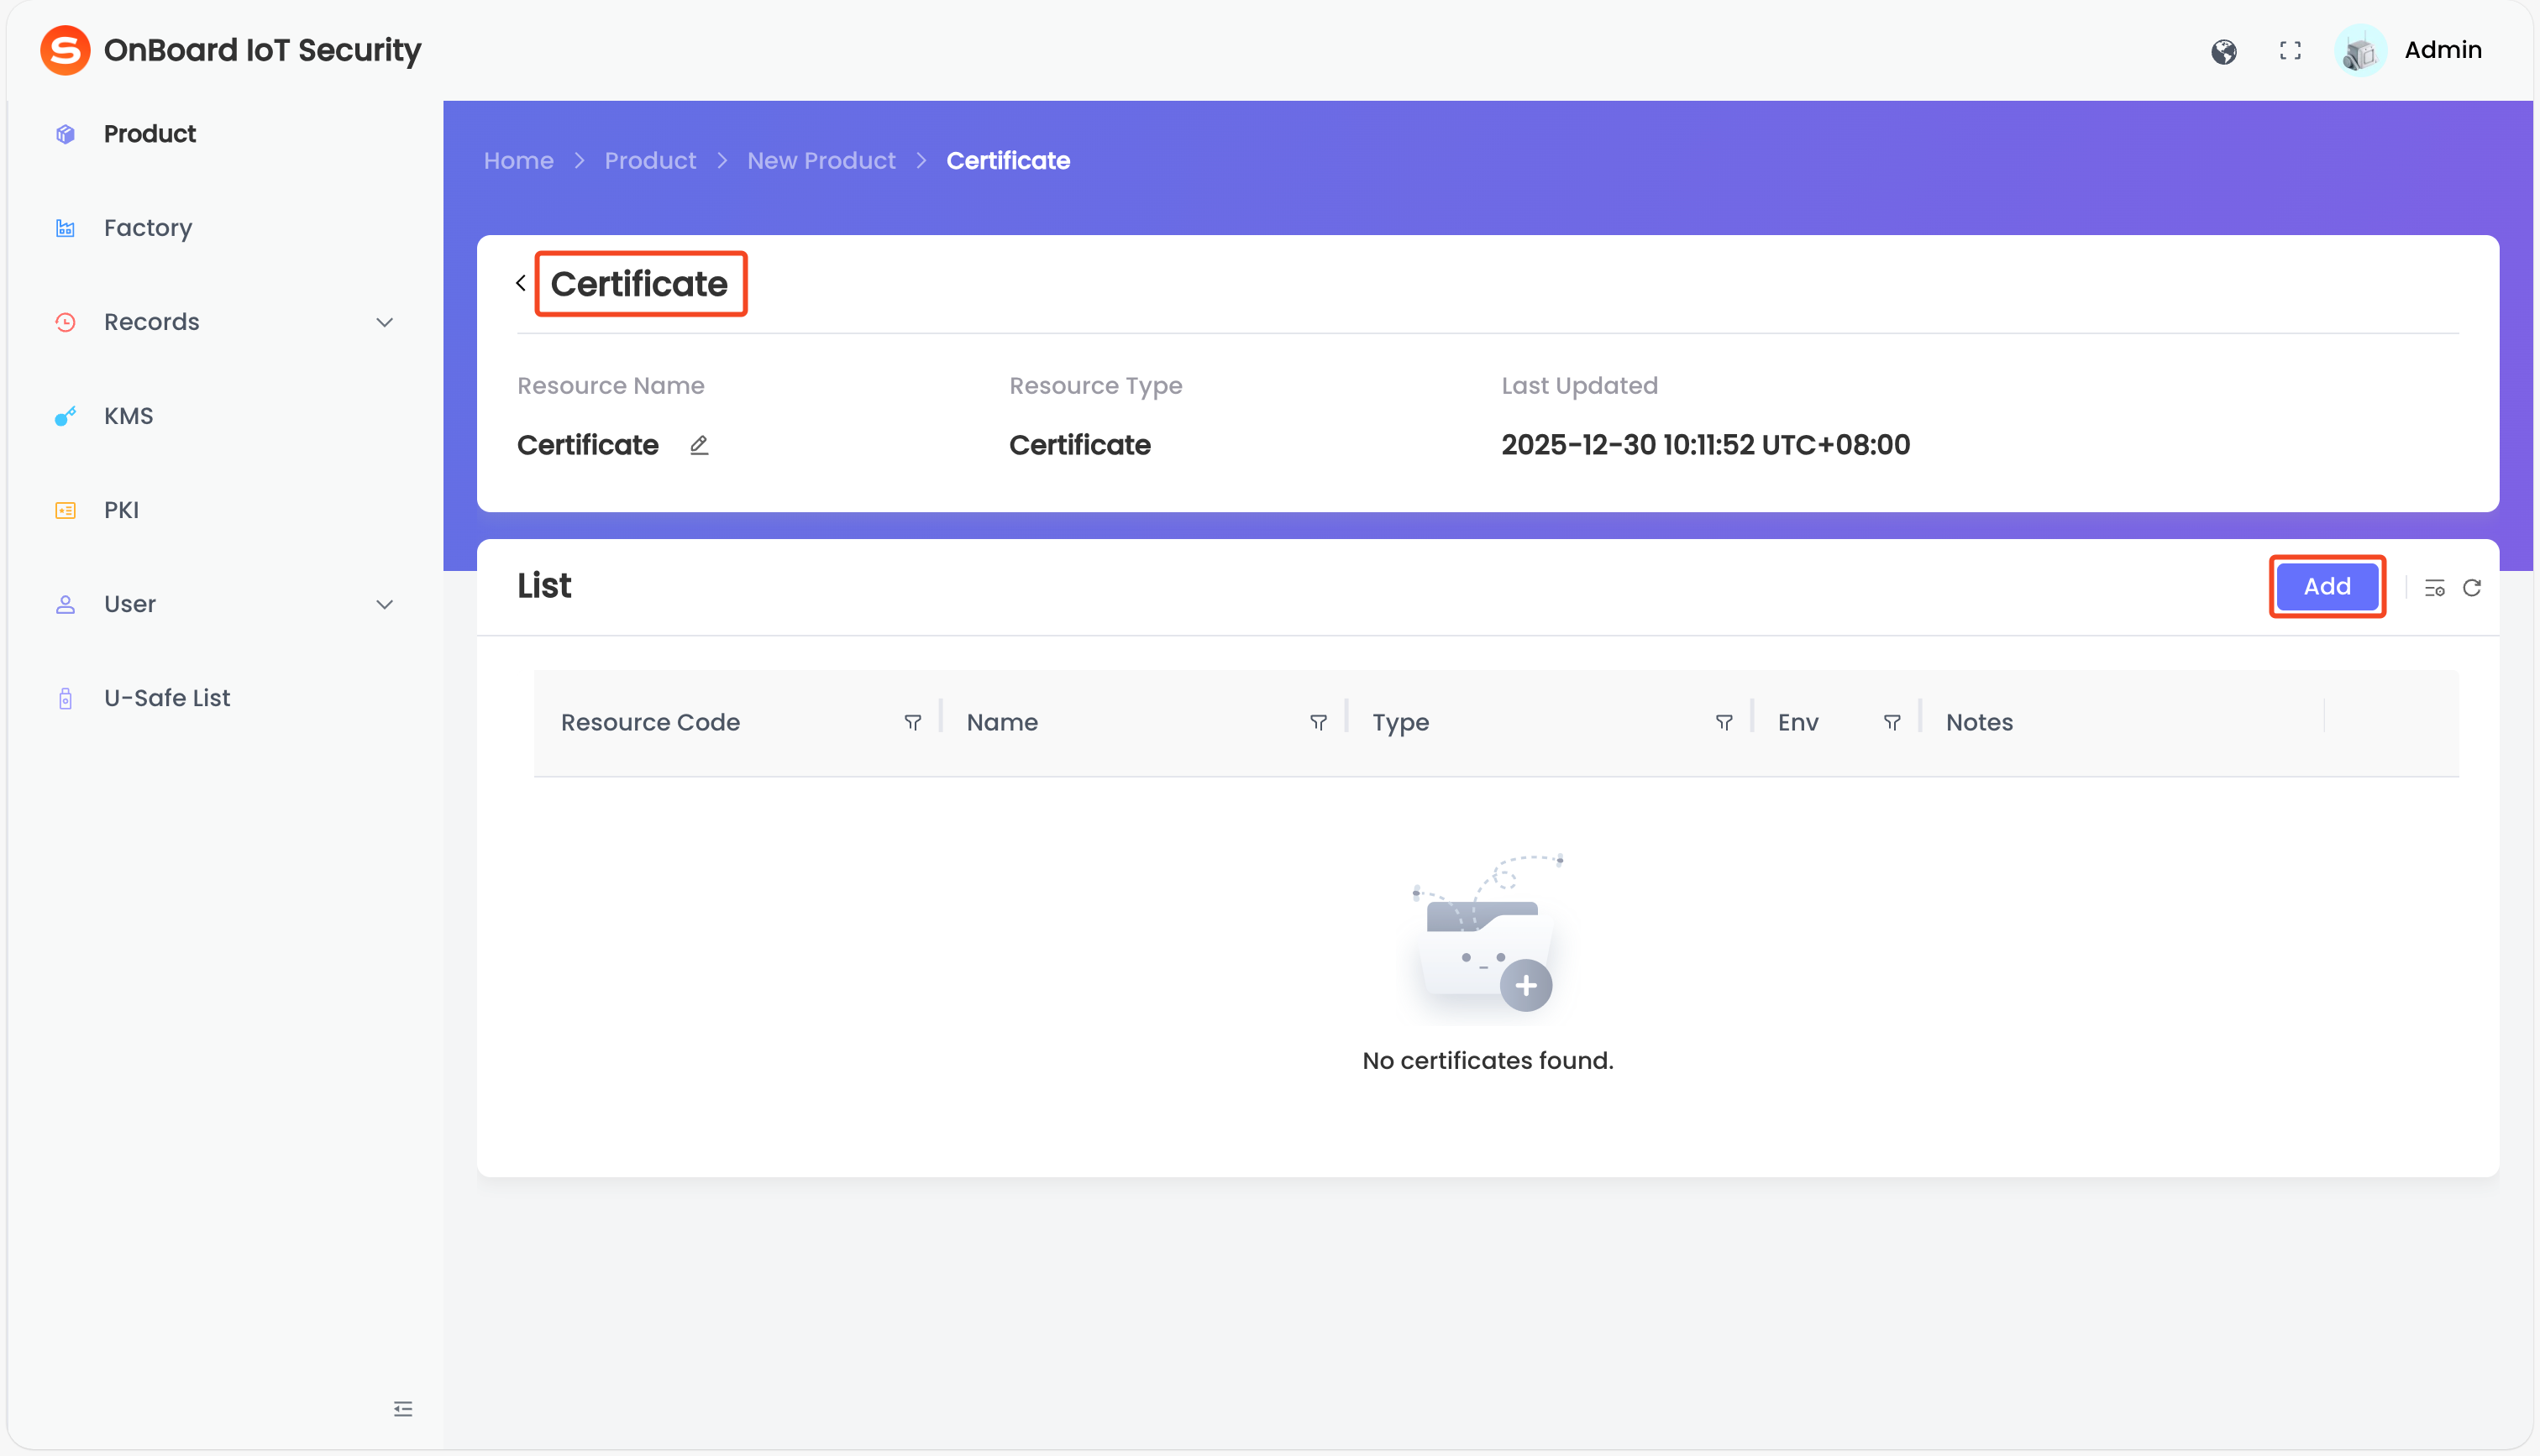
tipCertificate allows you to add a DAC template from PKI to your product, making it available for selection during the Matter Config.
DAC templates can be created in PKI. For more information, refer to the steps for creating a certificate.
On the Certificate page, click Add. Then, select and add the CA Template.
 tip
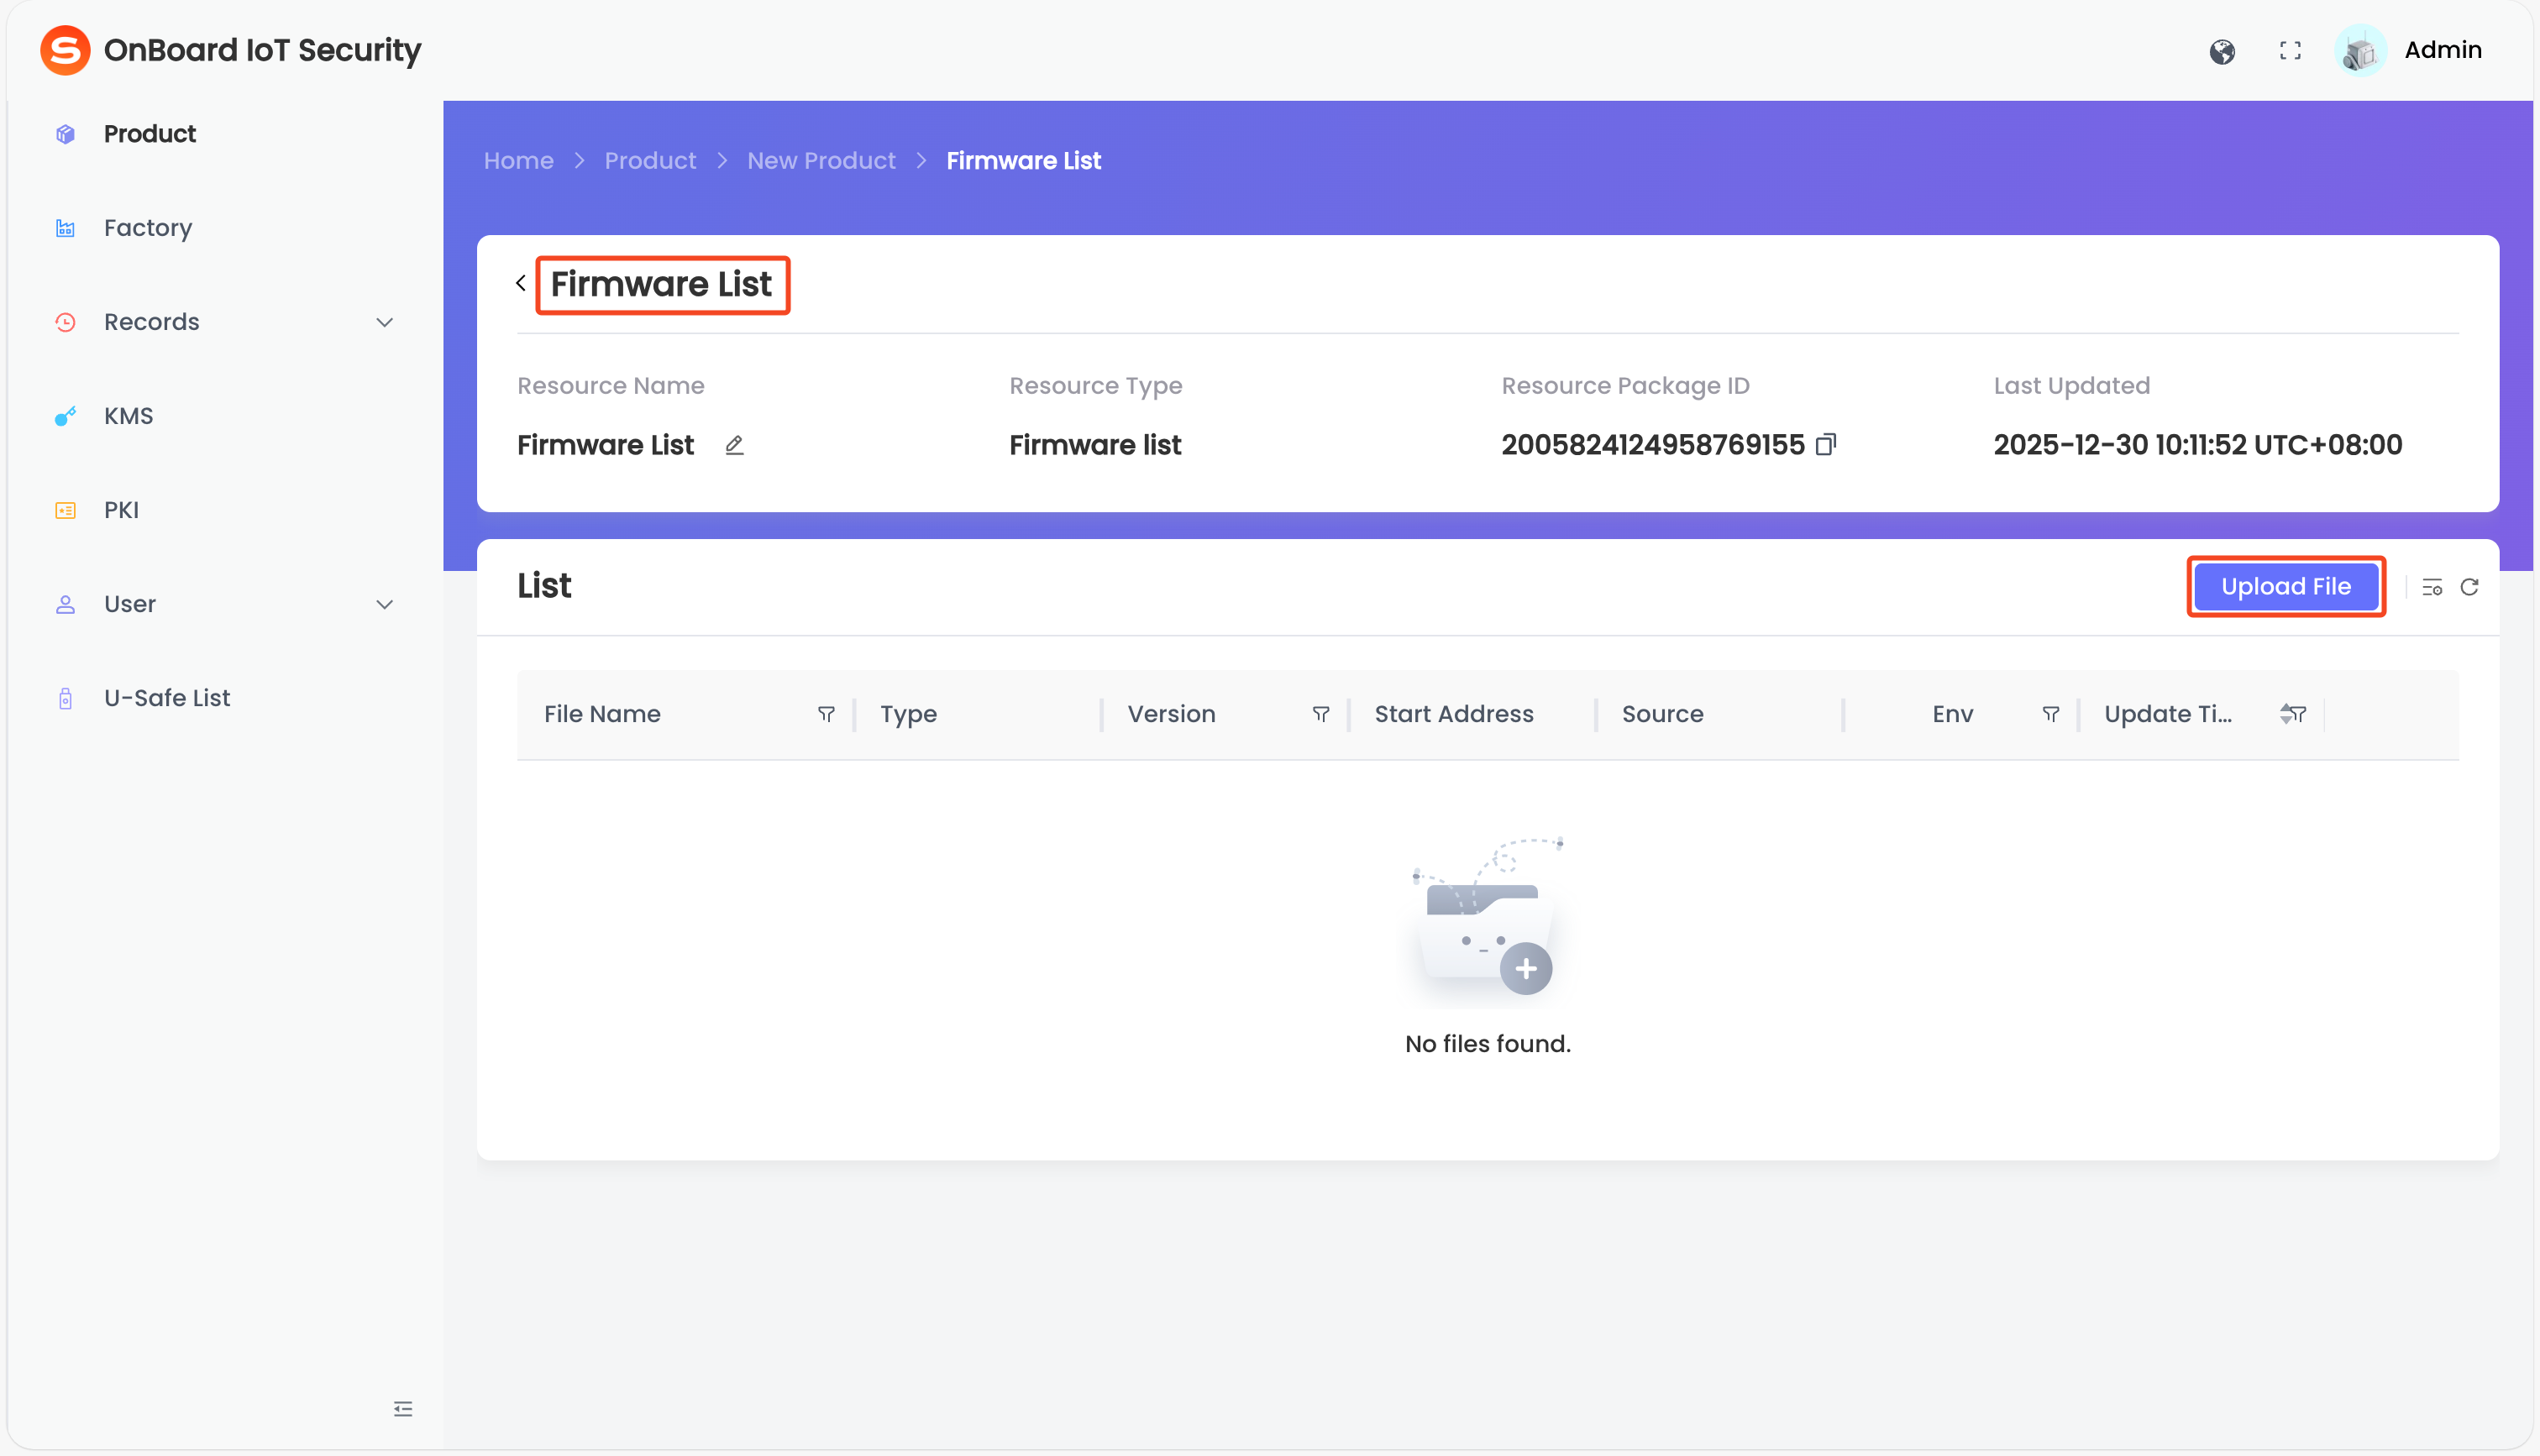
Firmware List allows you to upload the firmware files required for programming the product. Firmware formats supported: .bin, .hex, and .s37. Then, the uploaded firmware can be selected when creating a version.
-
On the Firmware List page, click Upload File.
-
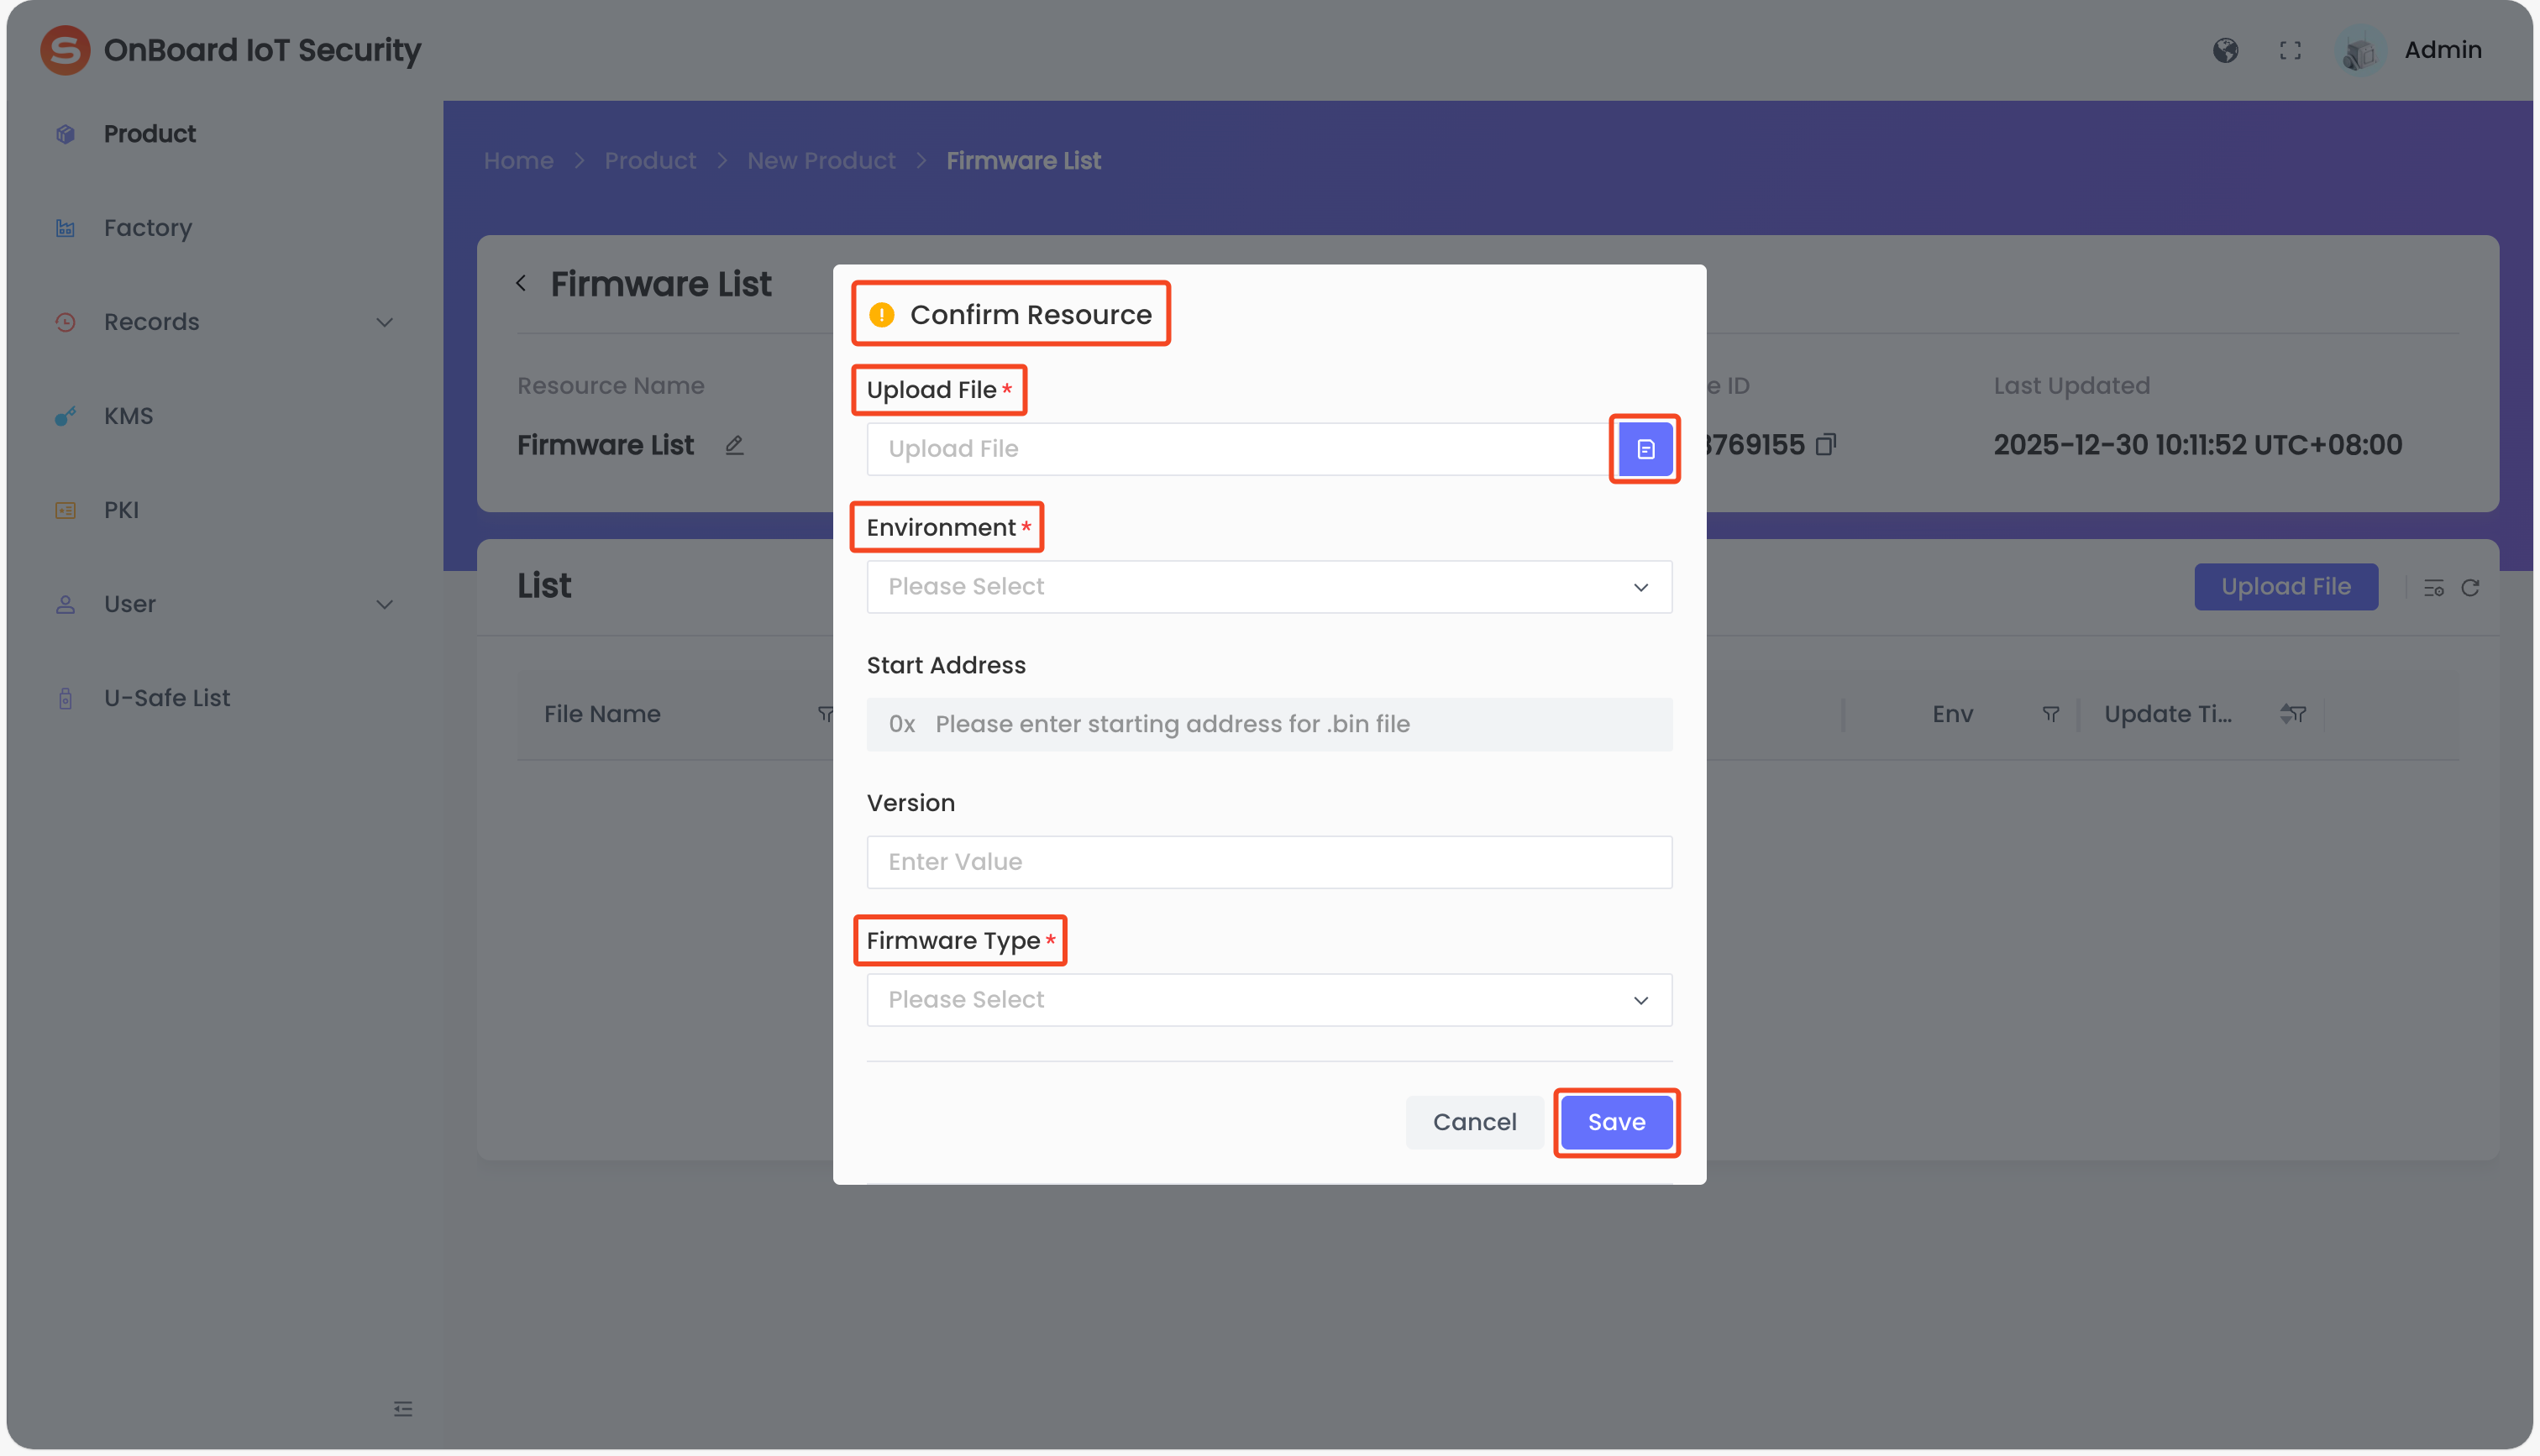
In the Confirm Resource window, click the File
 icon to upload the firmware files. Then, select the Environment (TEST or PROD) and Firmware Type (Application or Bootloader), and click Save.note
For more information, refer to the description of Firmware information.
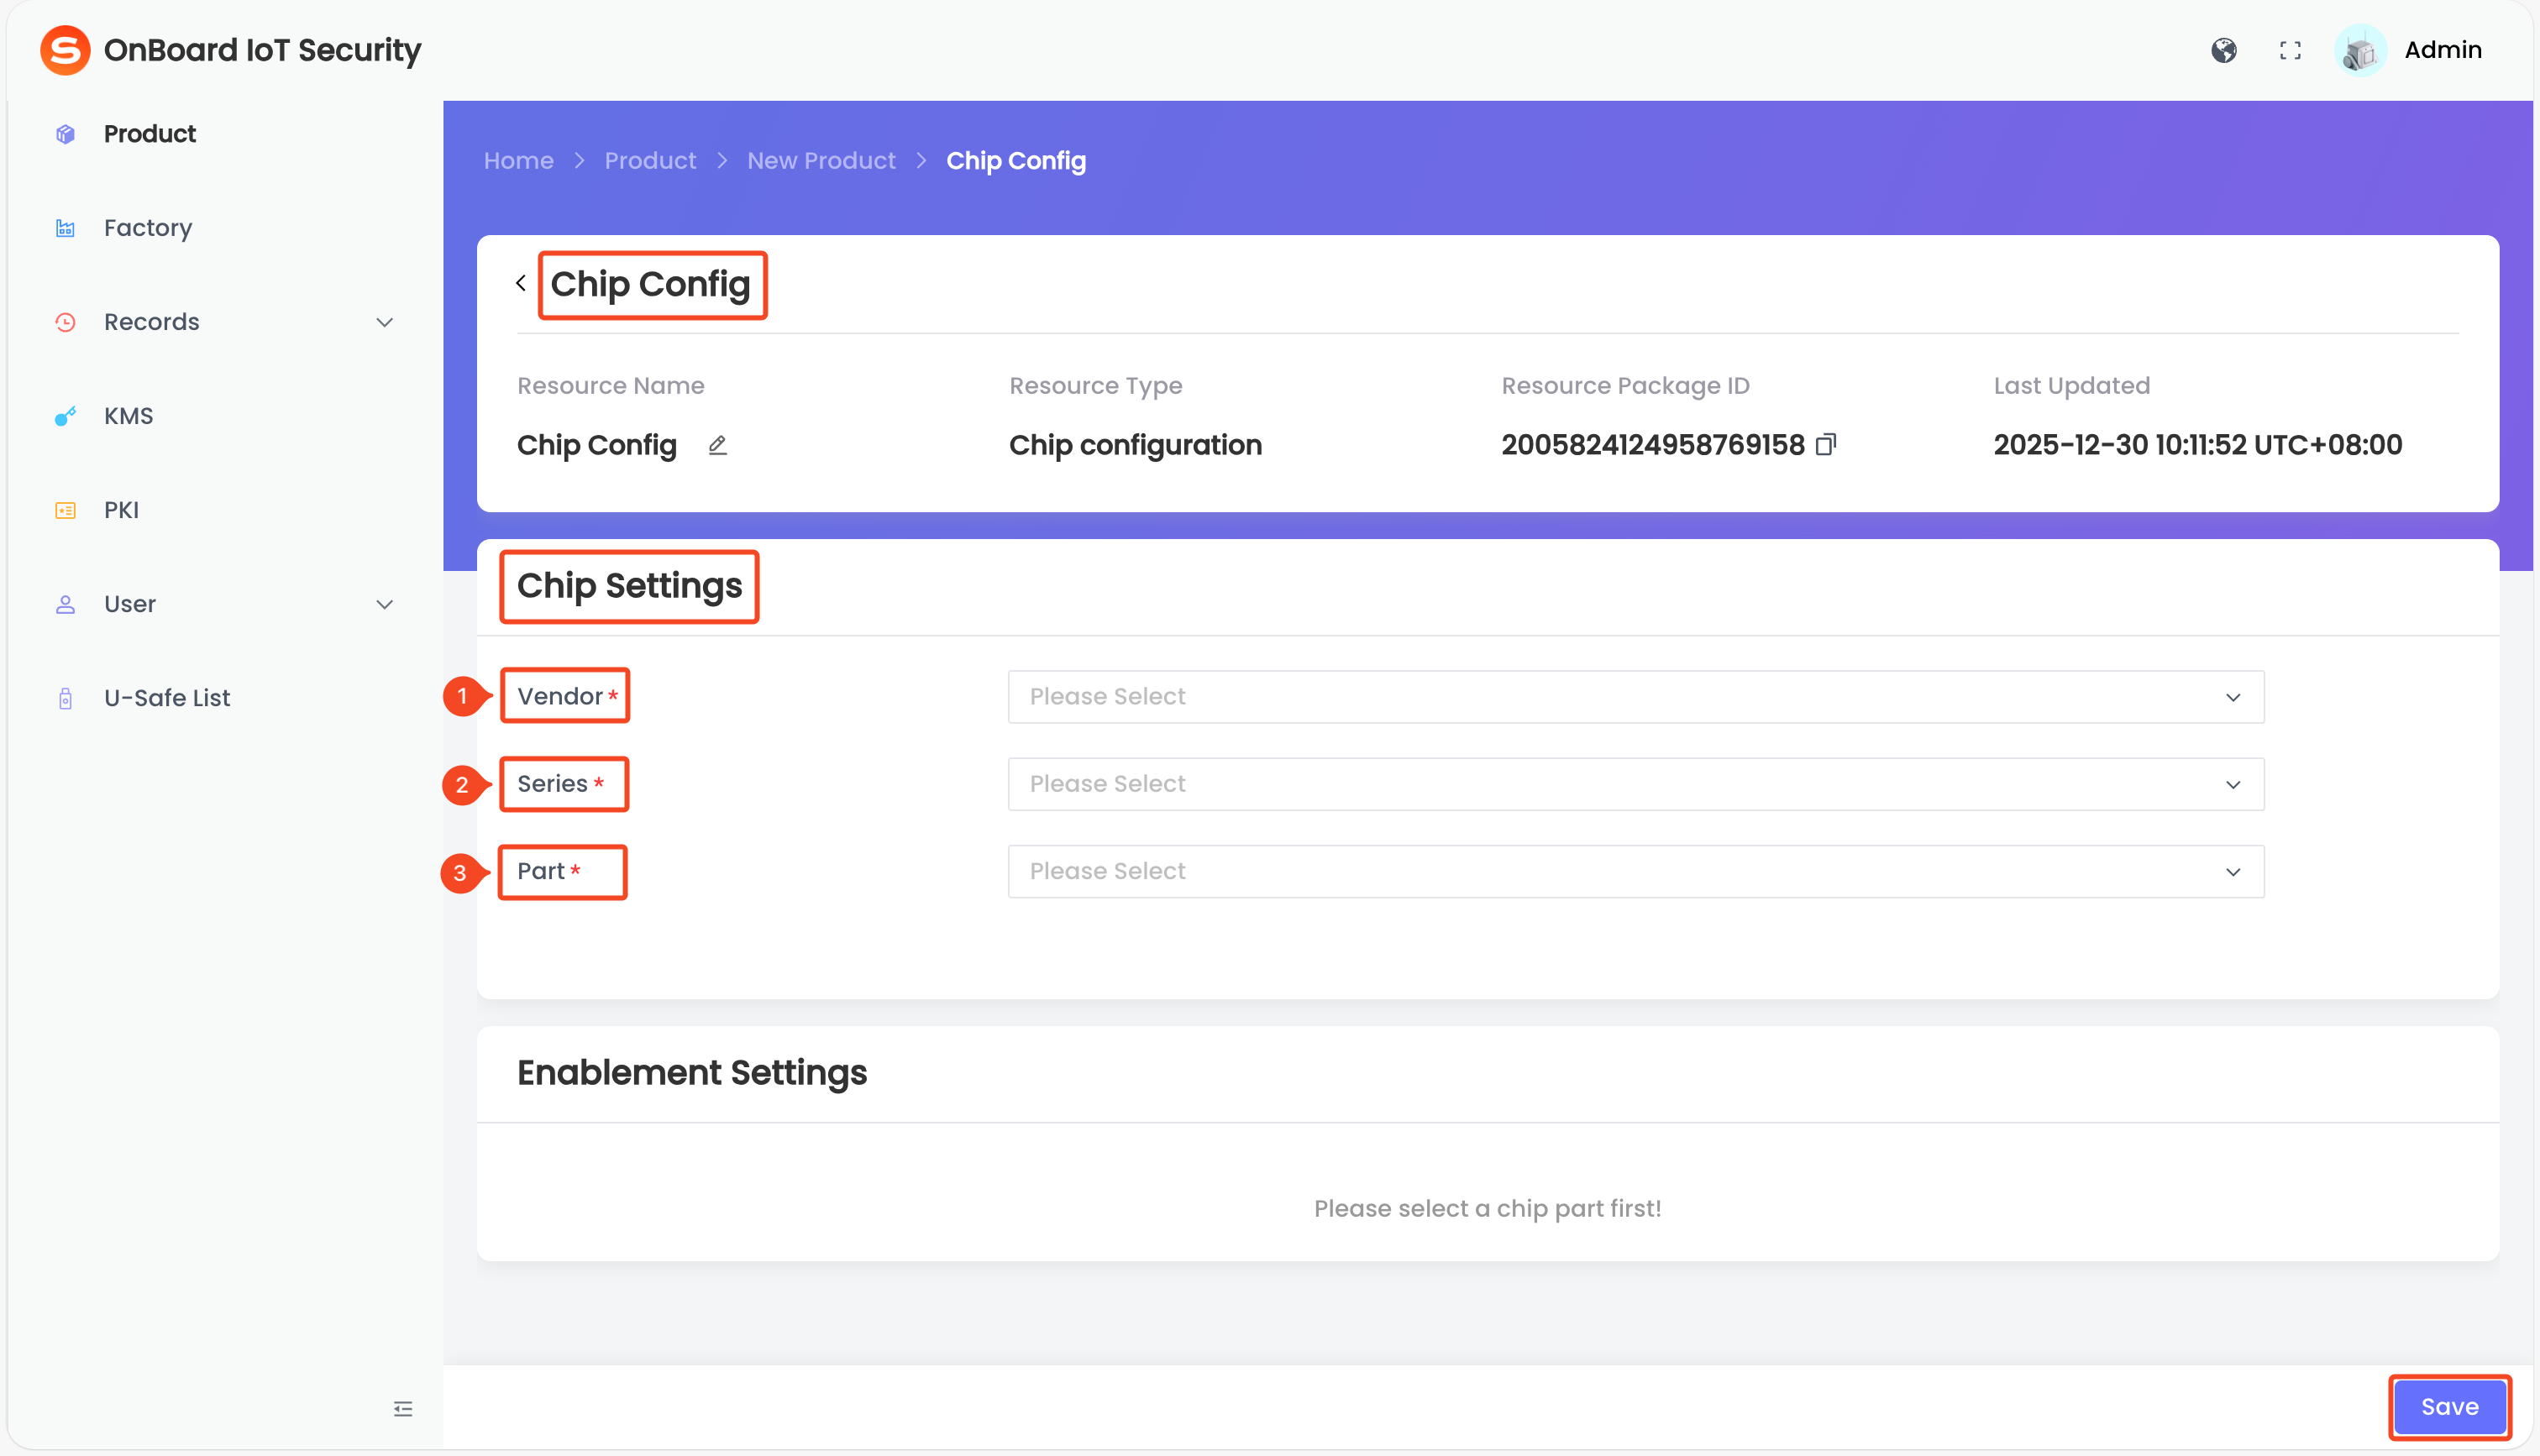
tipChip Config allows you to select the chip part and security options used by your product.
Please refer to the supported chip settings for the current list. Additional chip vendors, series, and parts will be added based on demand.
For more information, refer to the steps for setting Chip Config.
On the Chip Config page, locate the Chip Setting area, select the Vendor, Series, and Part, and then click Save.
 tip
Matter Config allows you to select and configure settings related to the Matter protocol.
In this step, you need to upload the CD file and select the DAC template that was added when configuring Certificate. Please ensure that the VID (Vendor ID) and PID (Product ID) in the CD file match those in the DAC template.
You can replace the CD file as needed when creating a version later.
For more information, refer to the description of Matter Settings information.
On the Matter Config page, locate the Matter Settings area, click the File
icon to select and upload the CD file. Then, select PID, TEST DAC Template, Spike2Iteration, Commissioning Flow, and Discovery Mode, and click Save.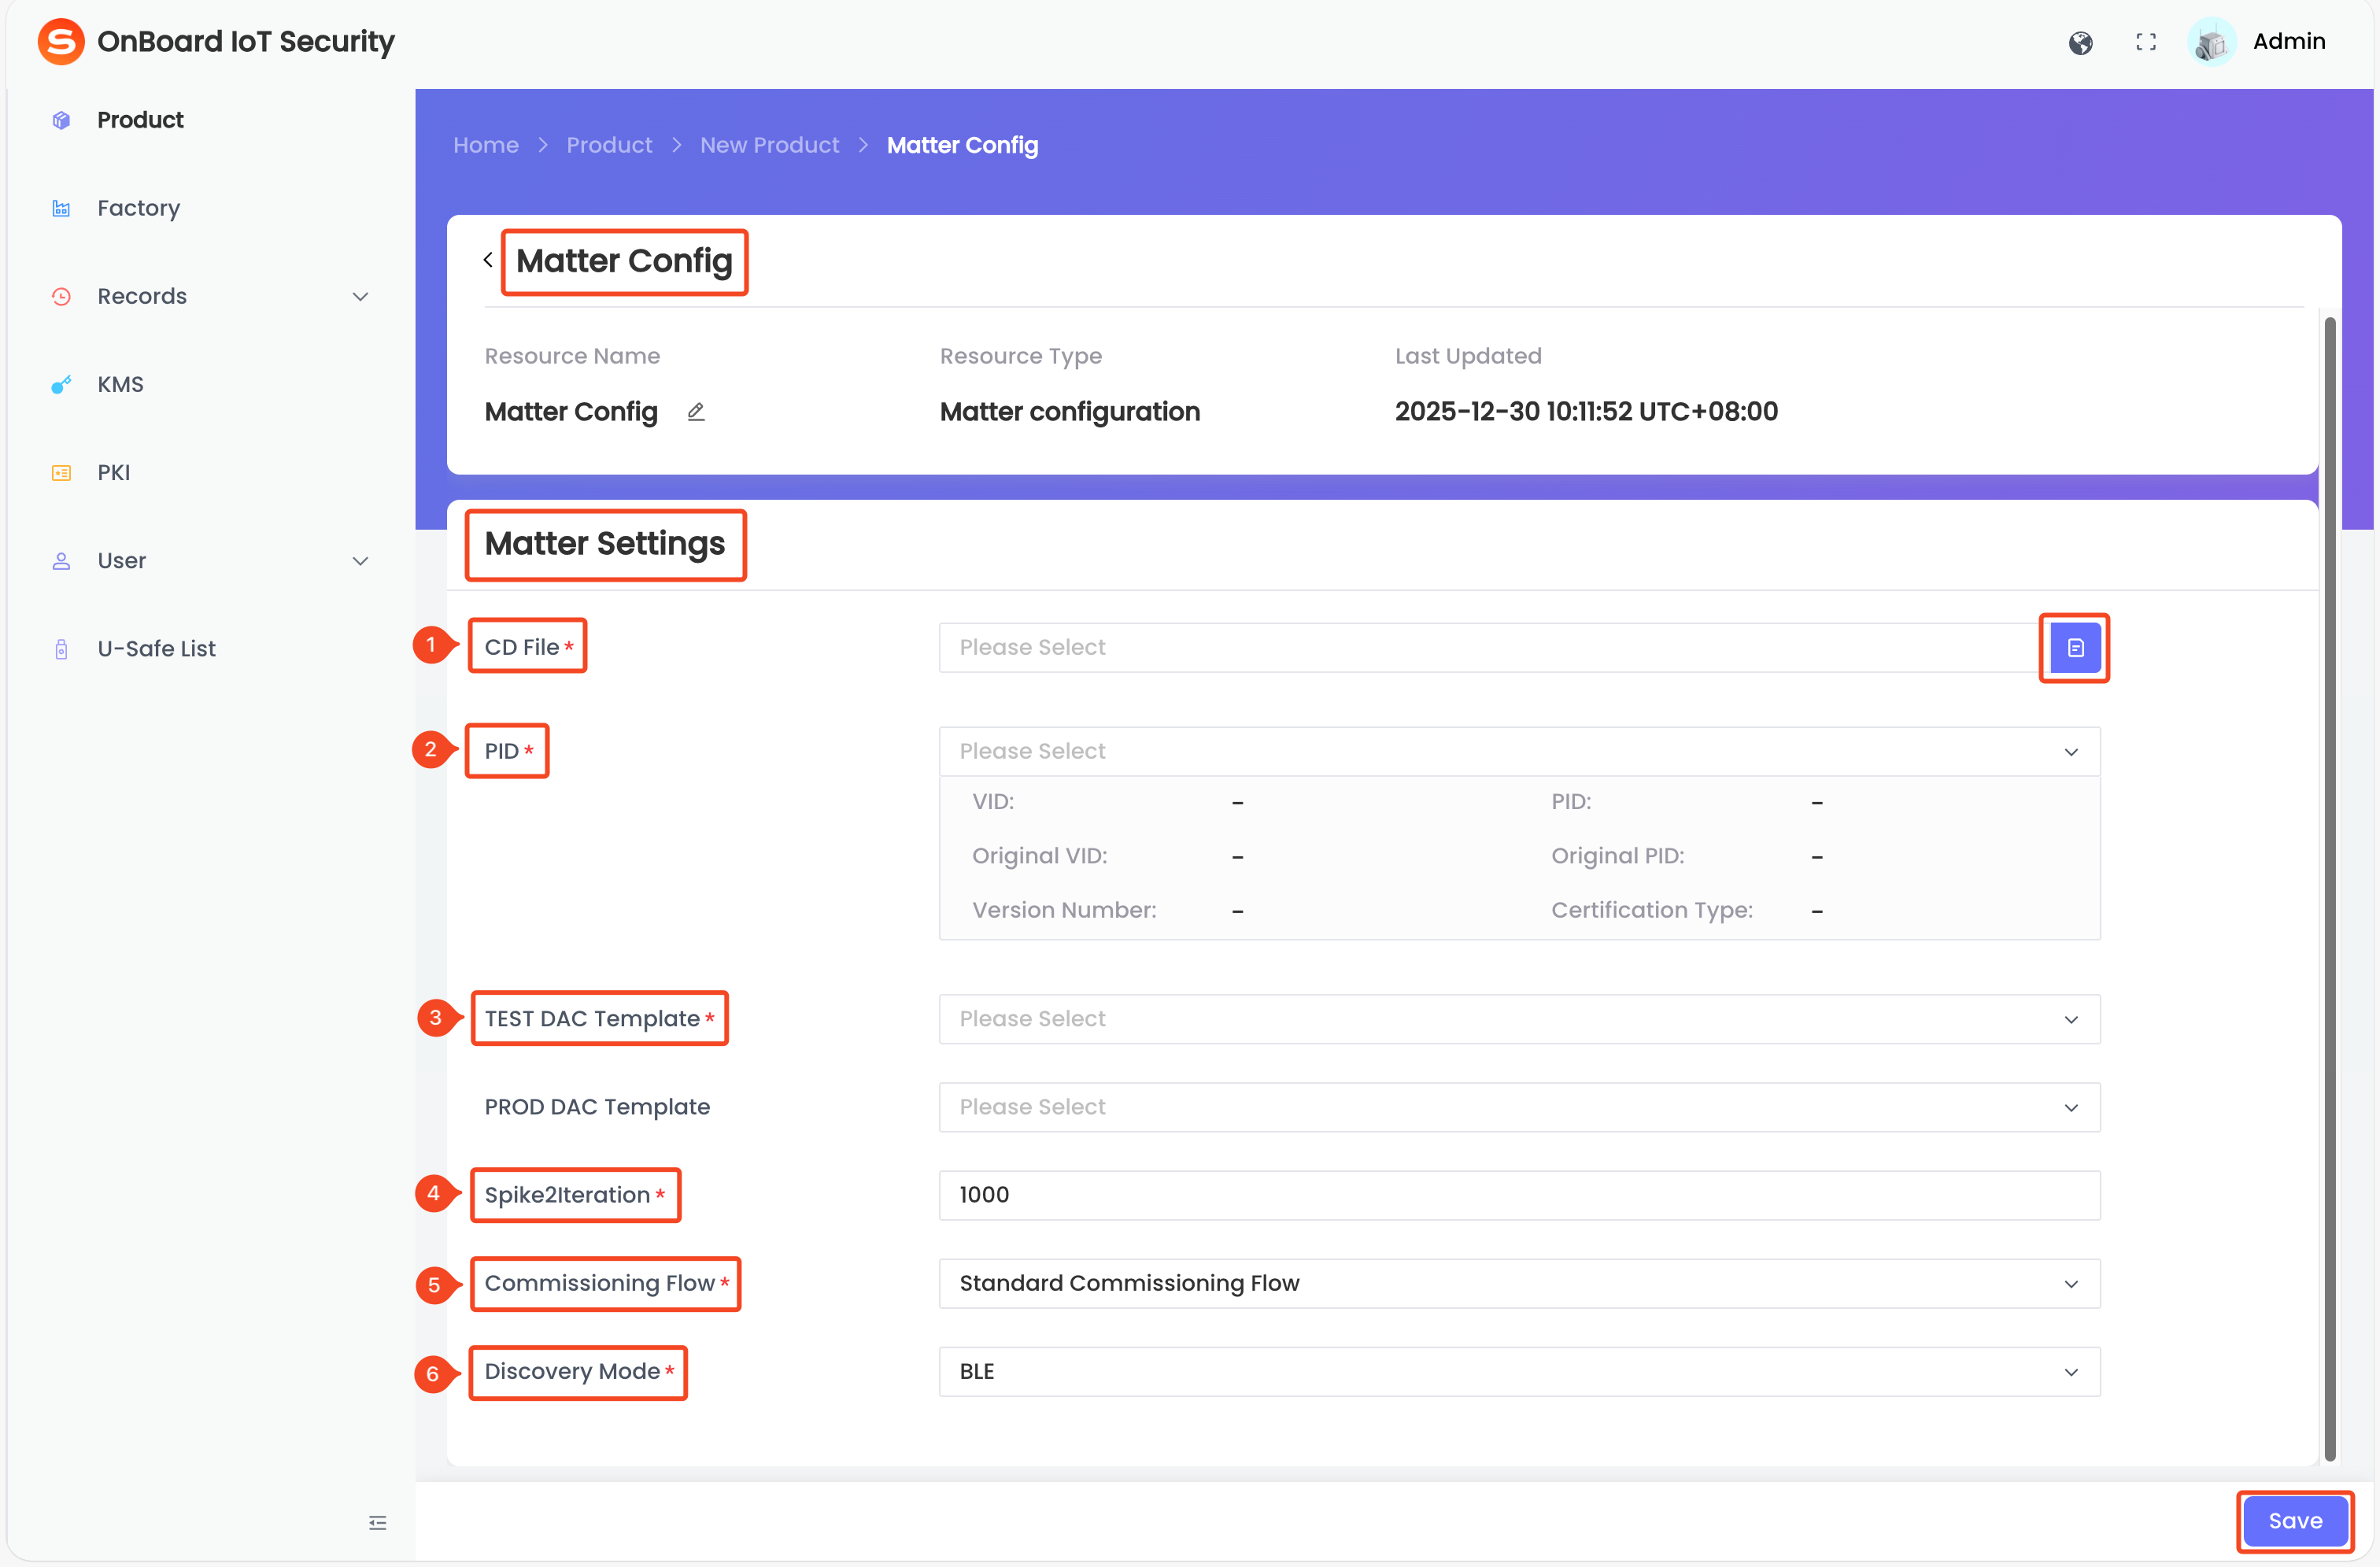 tip
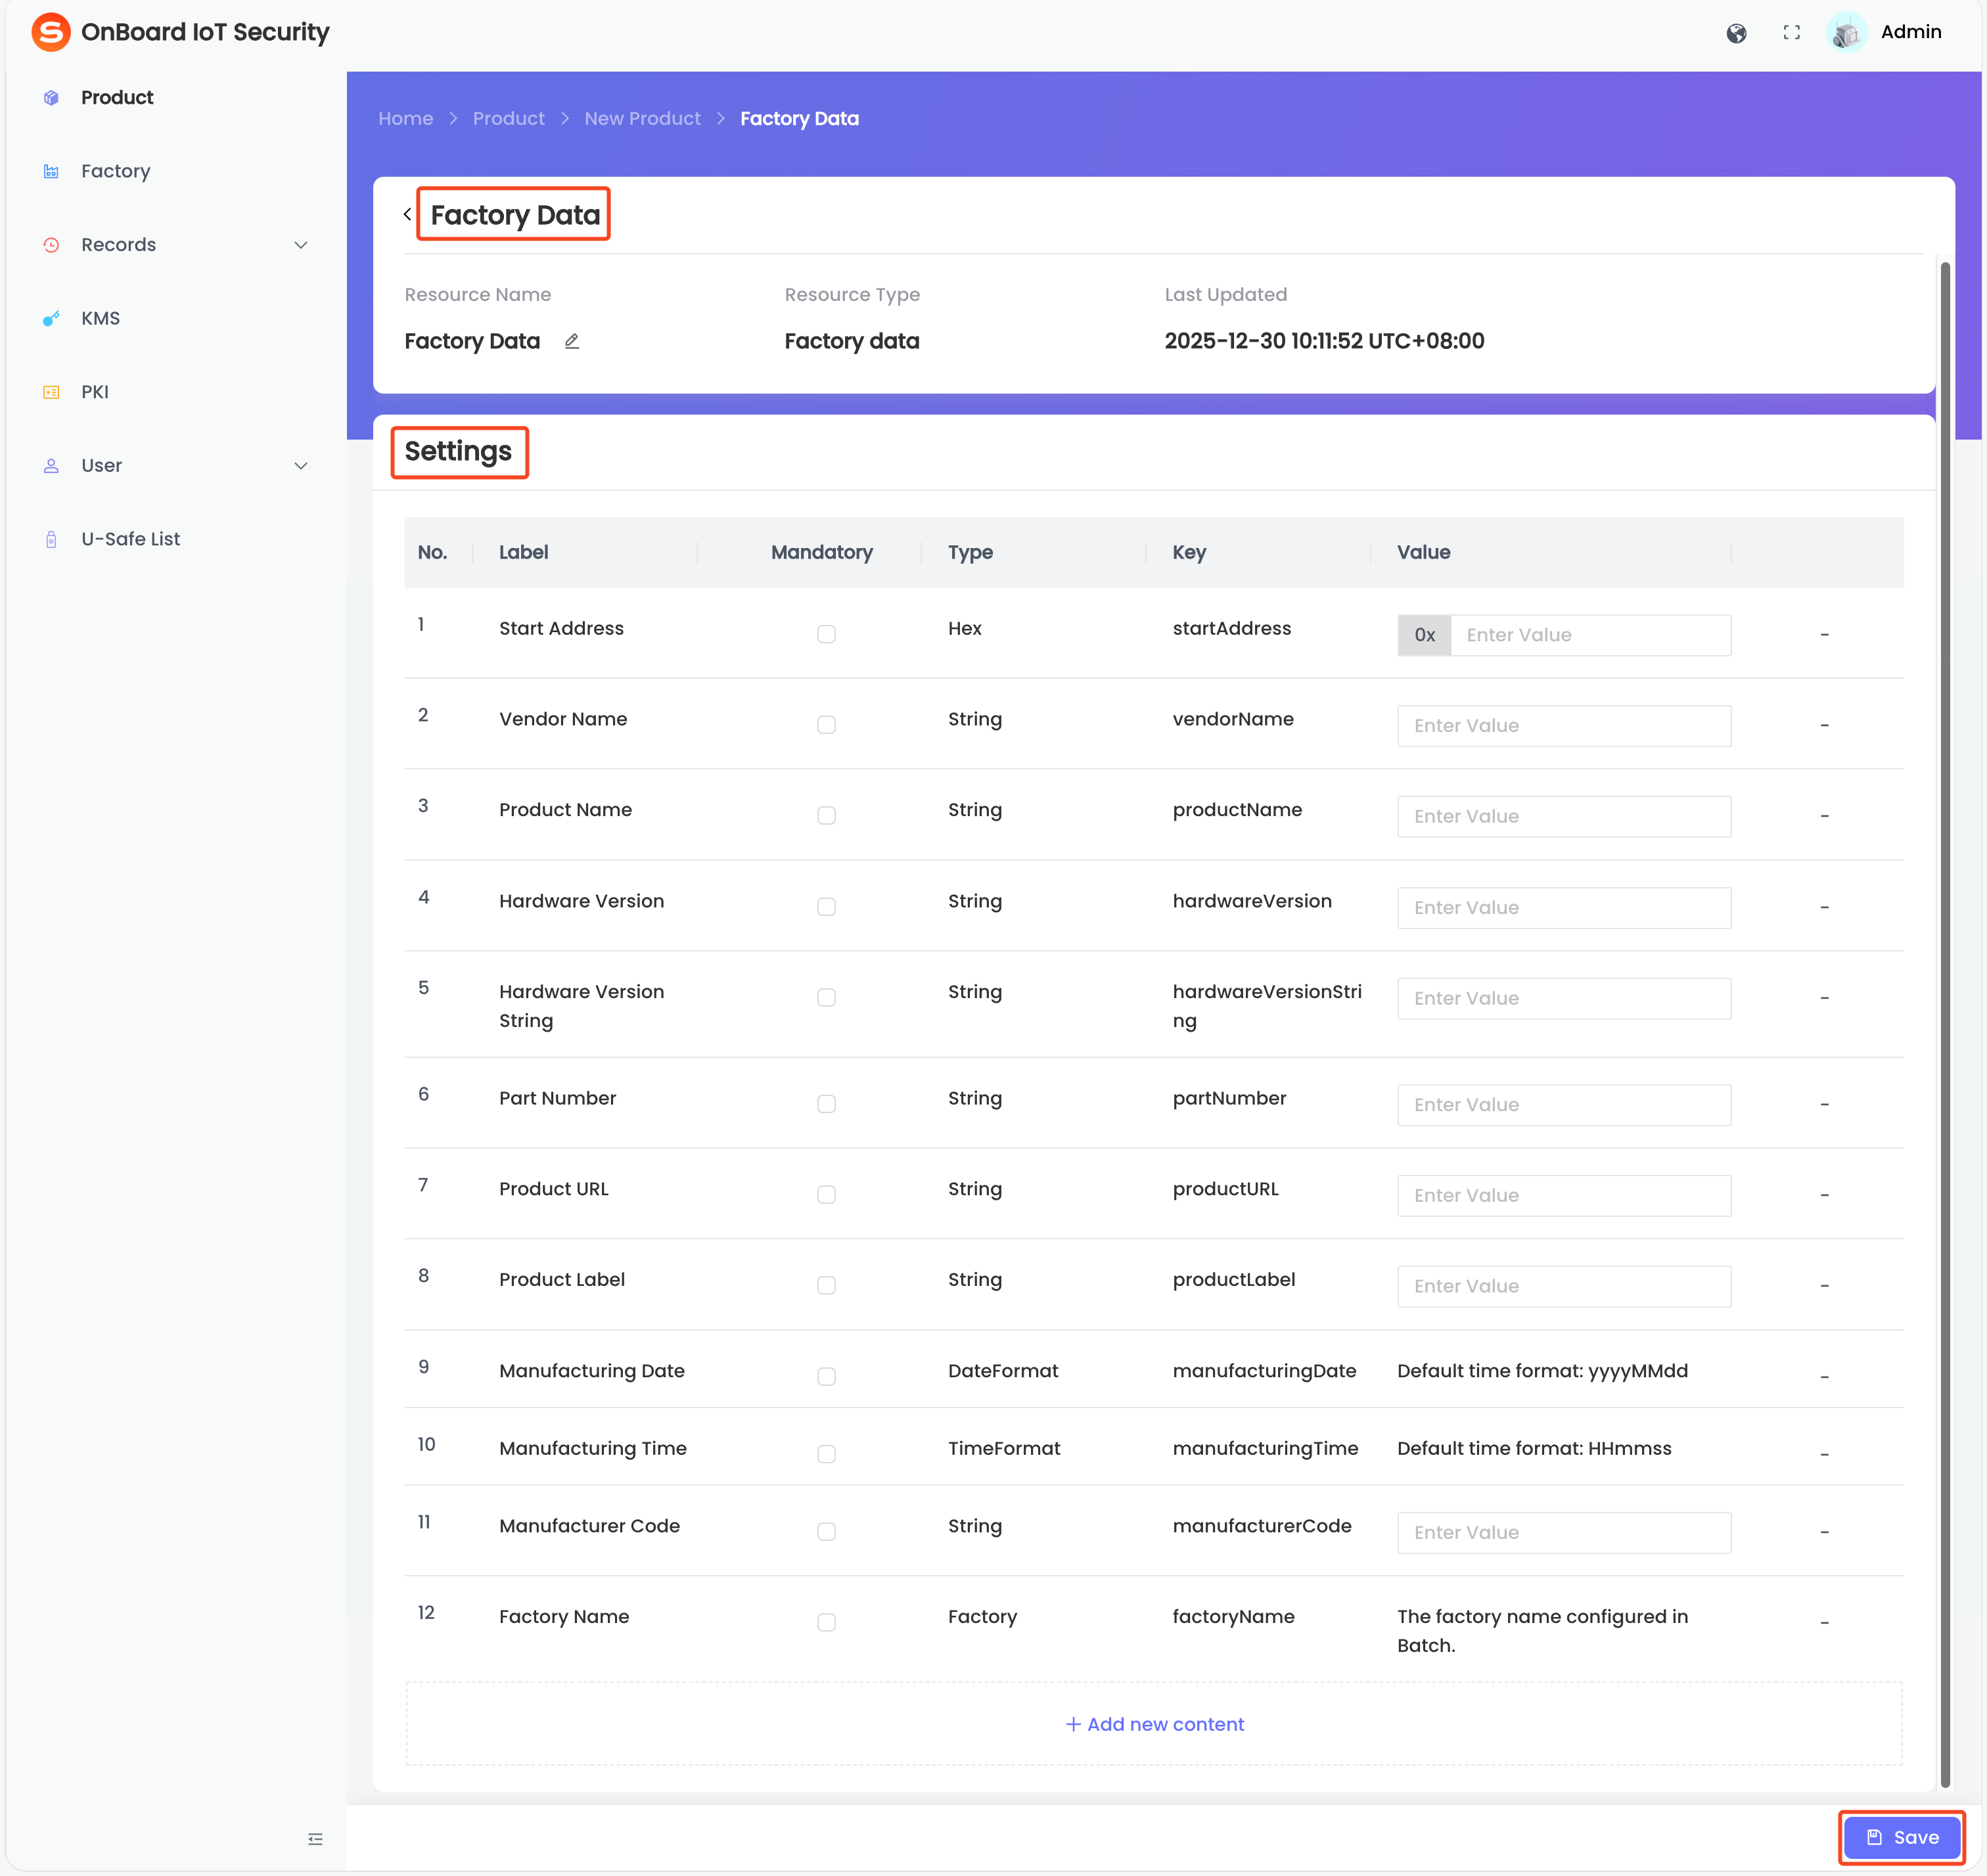
Factory Data allows you to configure factory-related information and supports all fields required by the Matter specification. You can update the Factory Data as needed when creating a version later.
The Factory Data selected here will be used as a required field when creating a version. For more information, refer to the description of Factory Data information.
On the Factory Data page, locate the Setting area, enter the Factory Data for your product (values can be left empty), and then click Save.
-
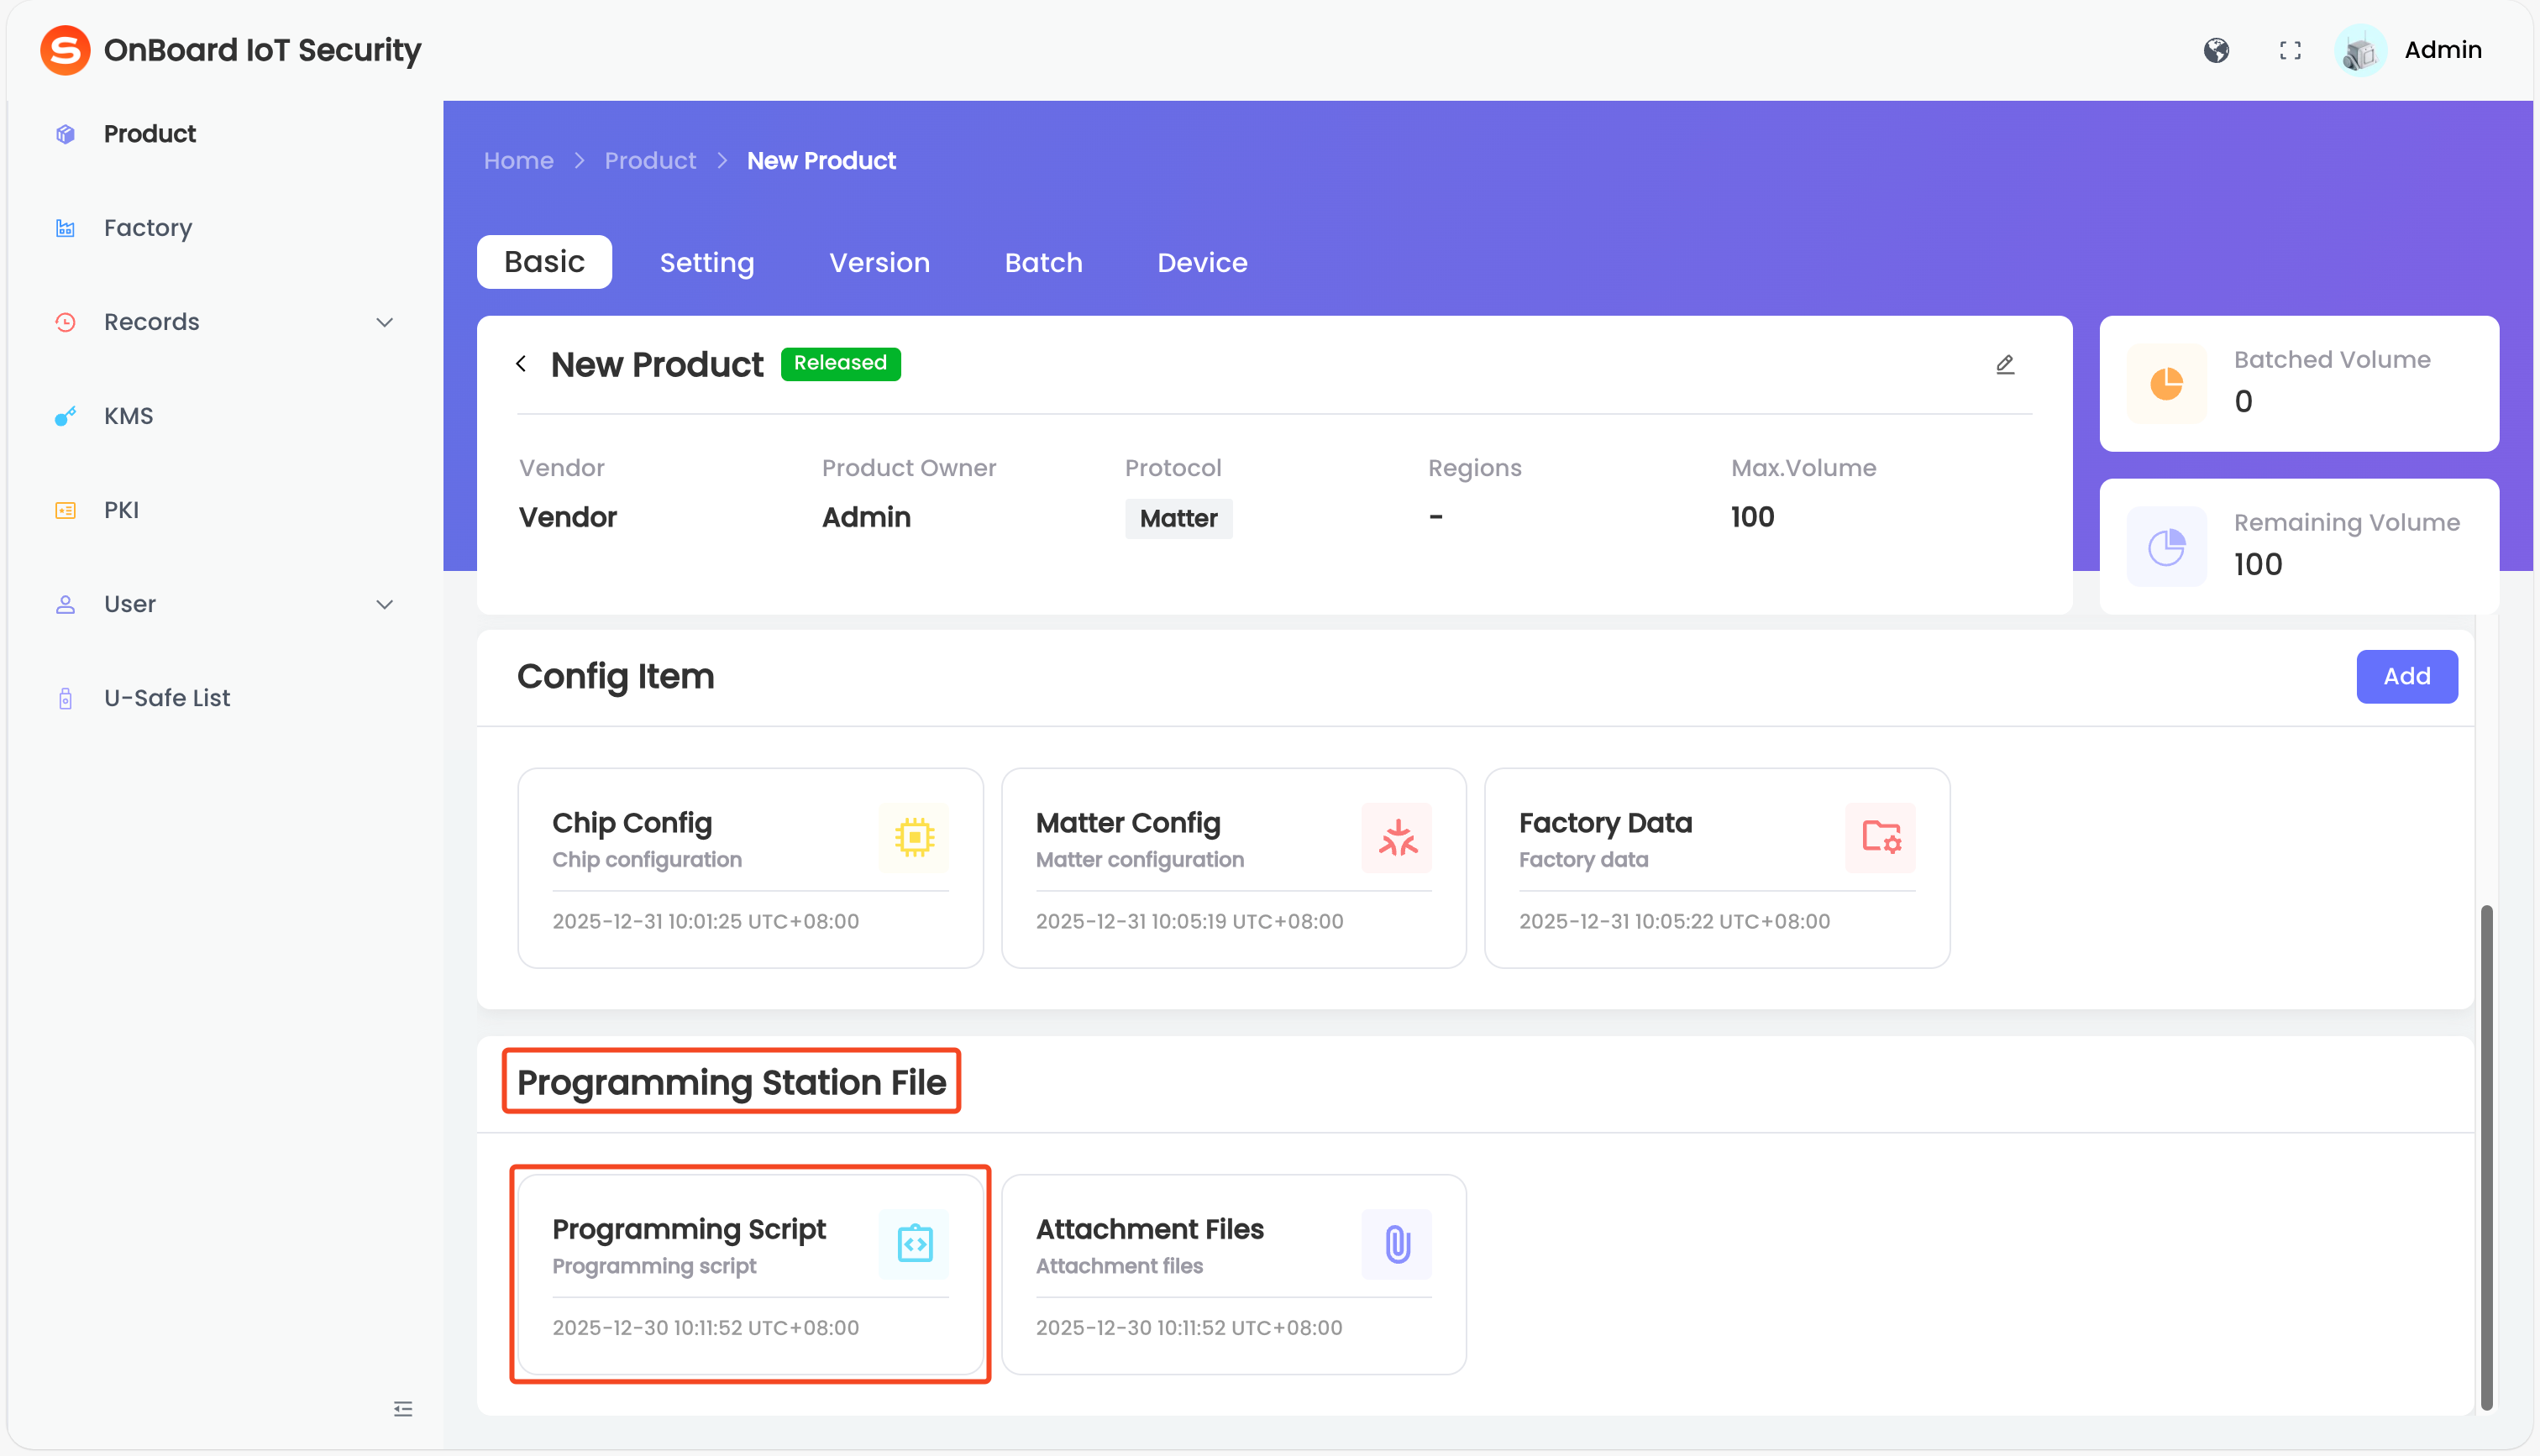
On the product page, locate the Programming Station File area and upload the corresponding files.
noteFiles in the Programming Station File area will be used for batch creation. For more information, refer to the steps for uploading Programming Station files. The files uploaded when configuring Programming Station File can be downloaded at any time from the configuration page of the corresponding resource.
For example, refer to the steps below to upload a programming script.
tipProgramming Script allows you to upload script files used for device programming (any script format is supported). The uploaded programming script can be selected when creating a batch.
You can select and upload the programming script as needed. If it is not required at the moment, you can also select it for a specific batch later in the Programming Station client.
-
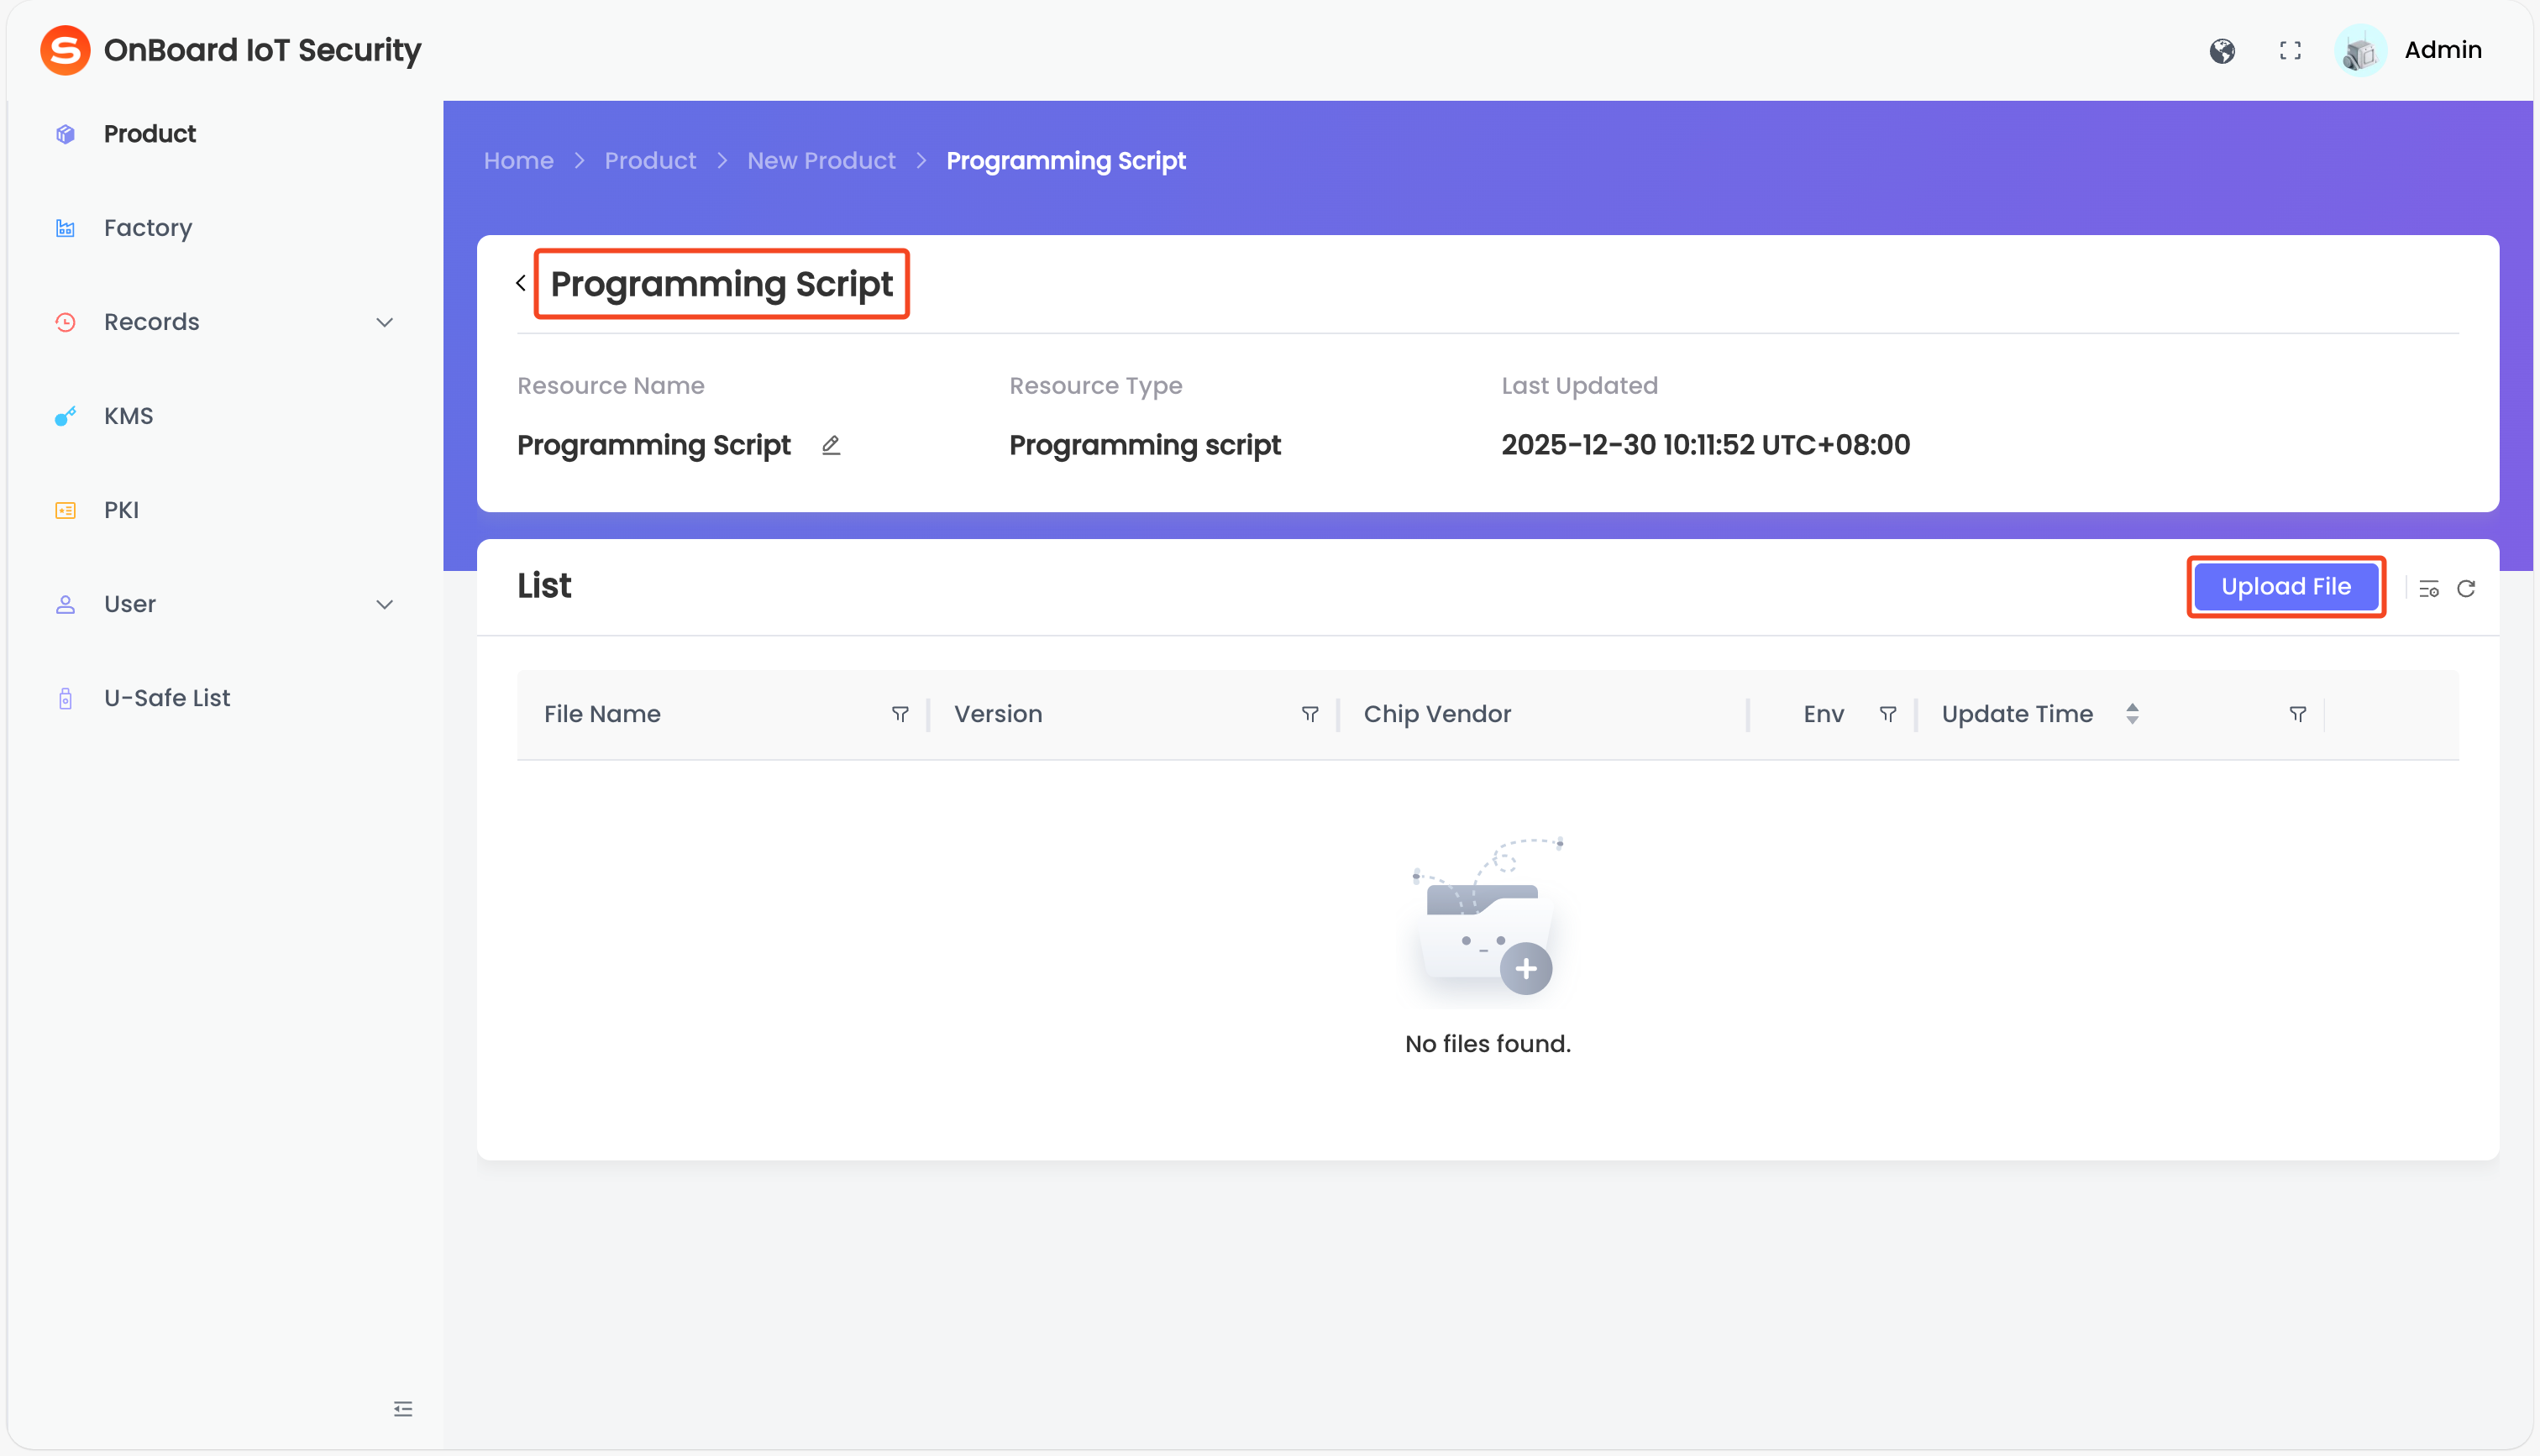
On the Programming Script page, click Upload File.
-
In the Confirm Resource window, click the File
icon to upload the script file. Then, select Environment (TEST or PROD) and click Save.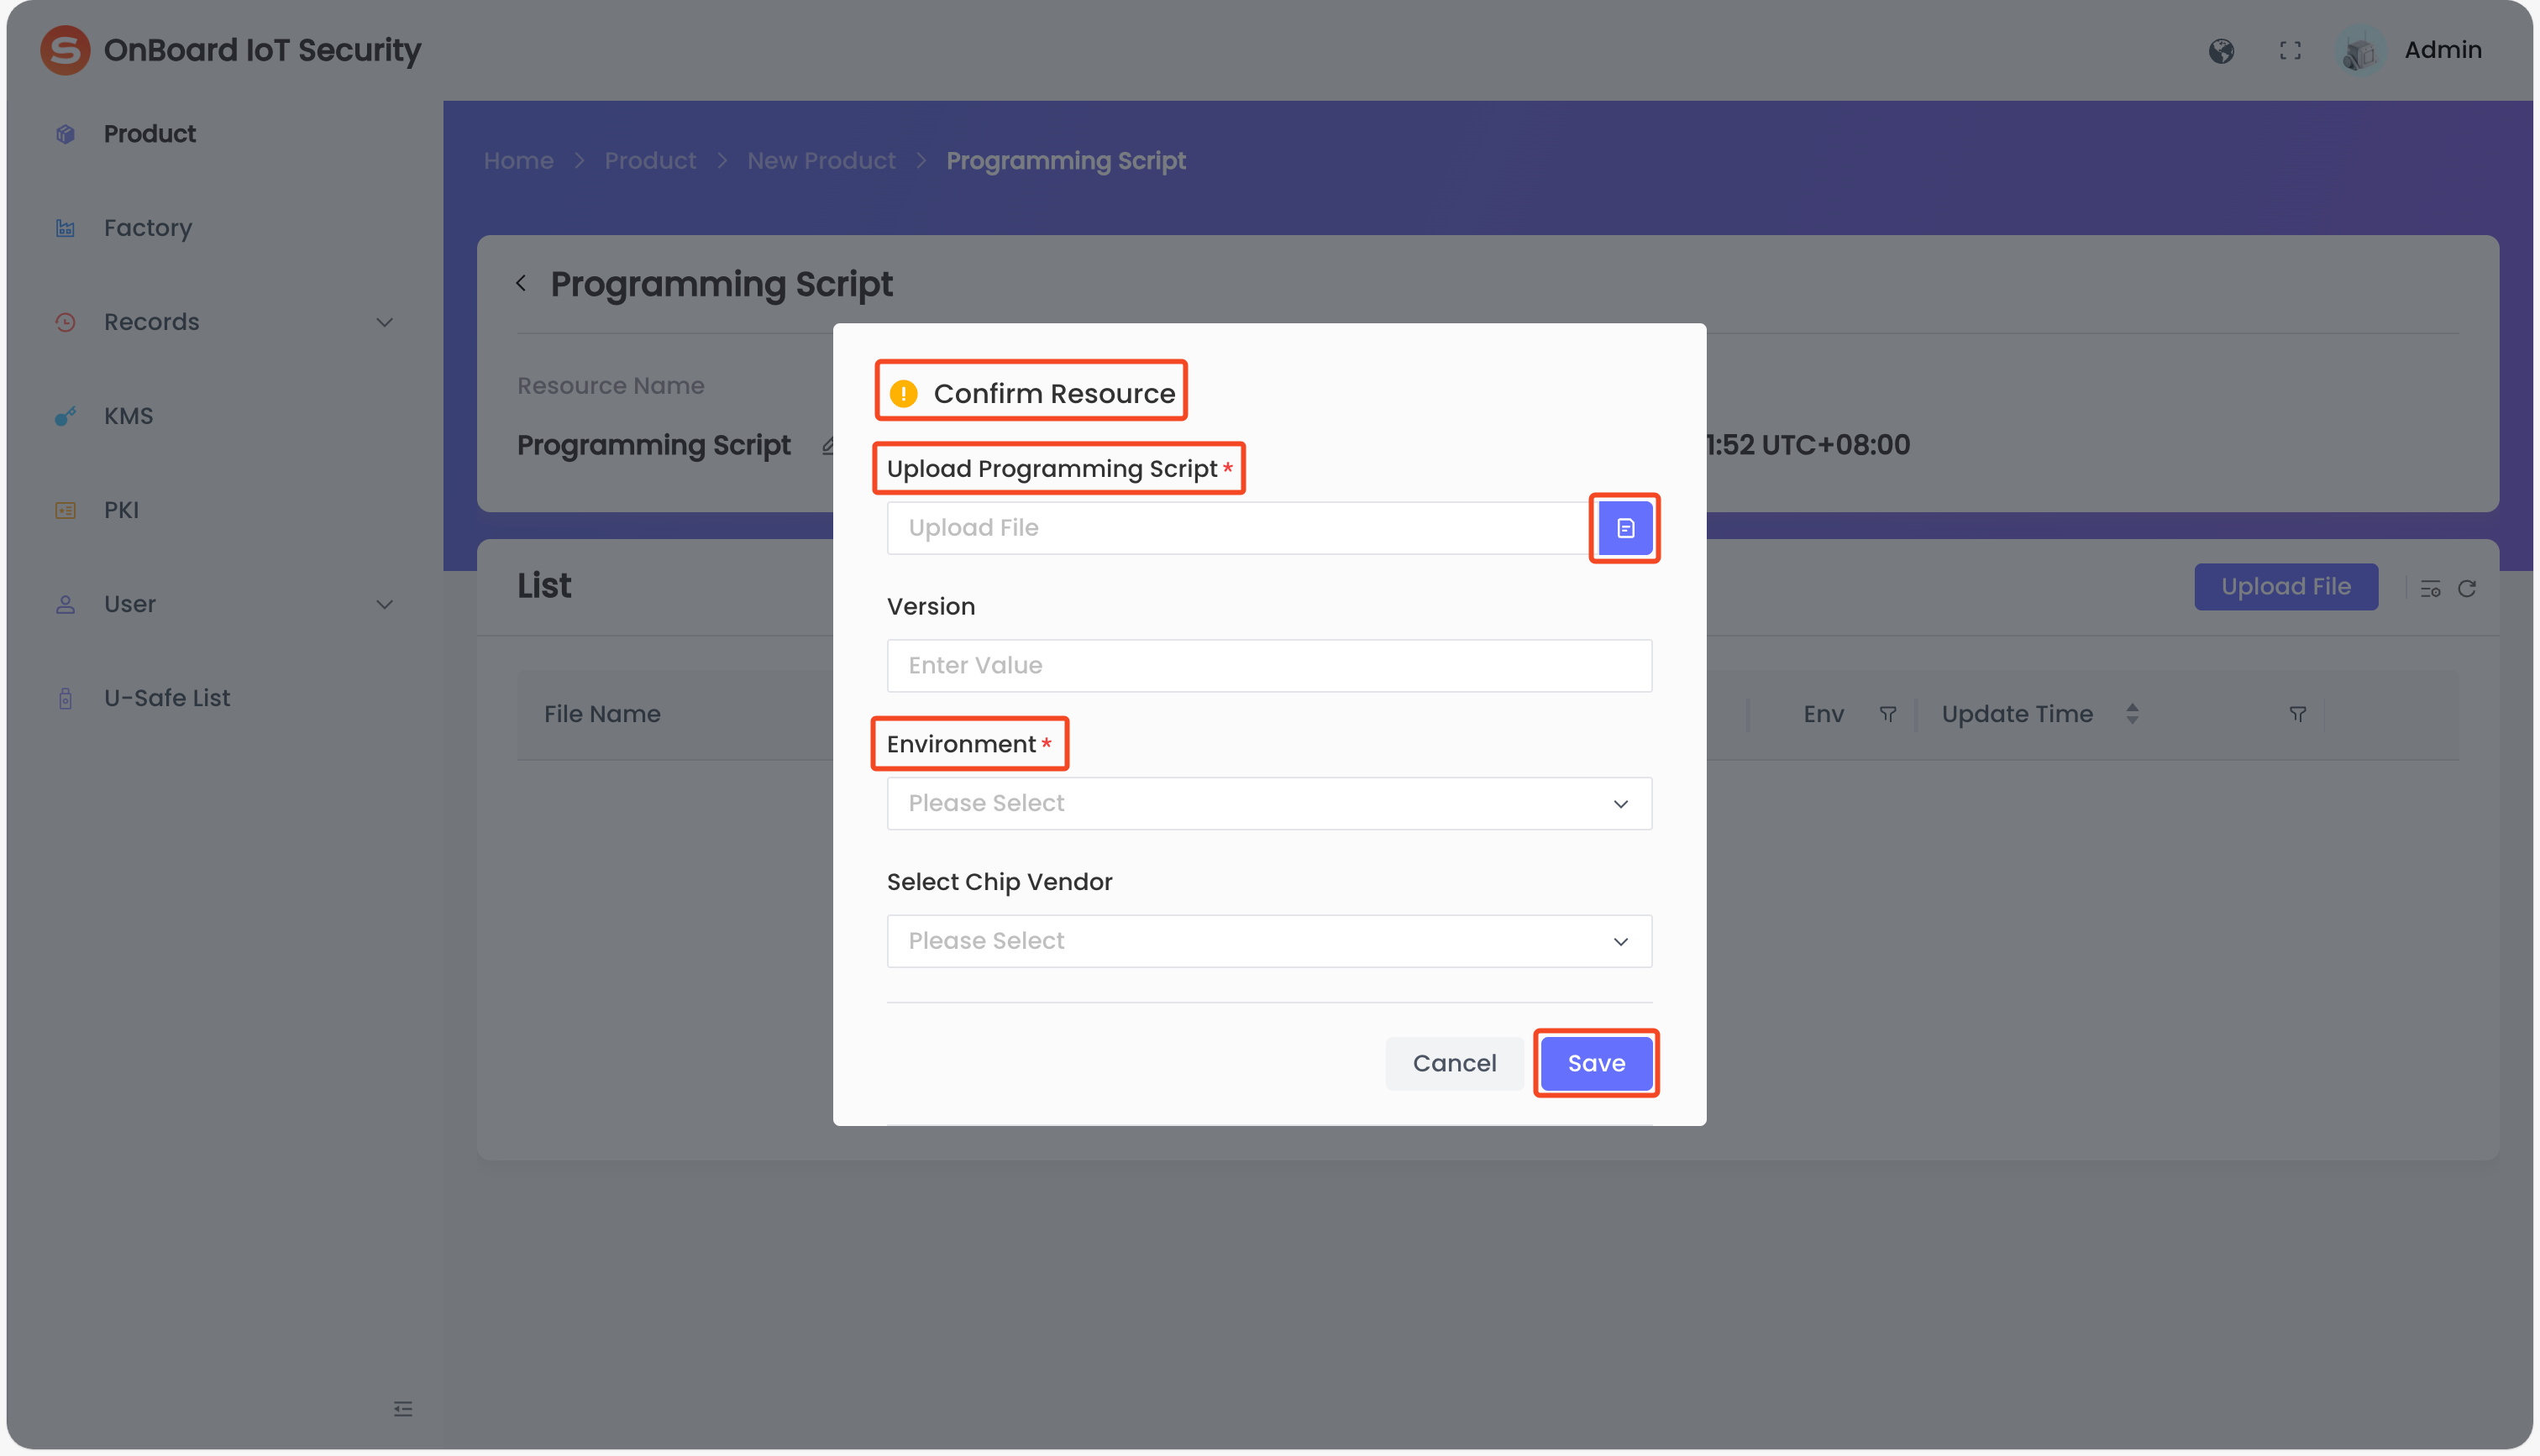
-
Step two: Create a version
Each product can create multiple versions.
After your product is created and configured, refer to the steps below to create a version in OBIS:
-
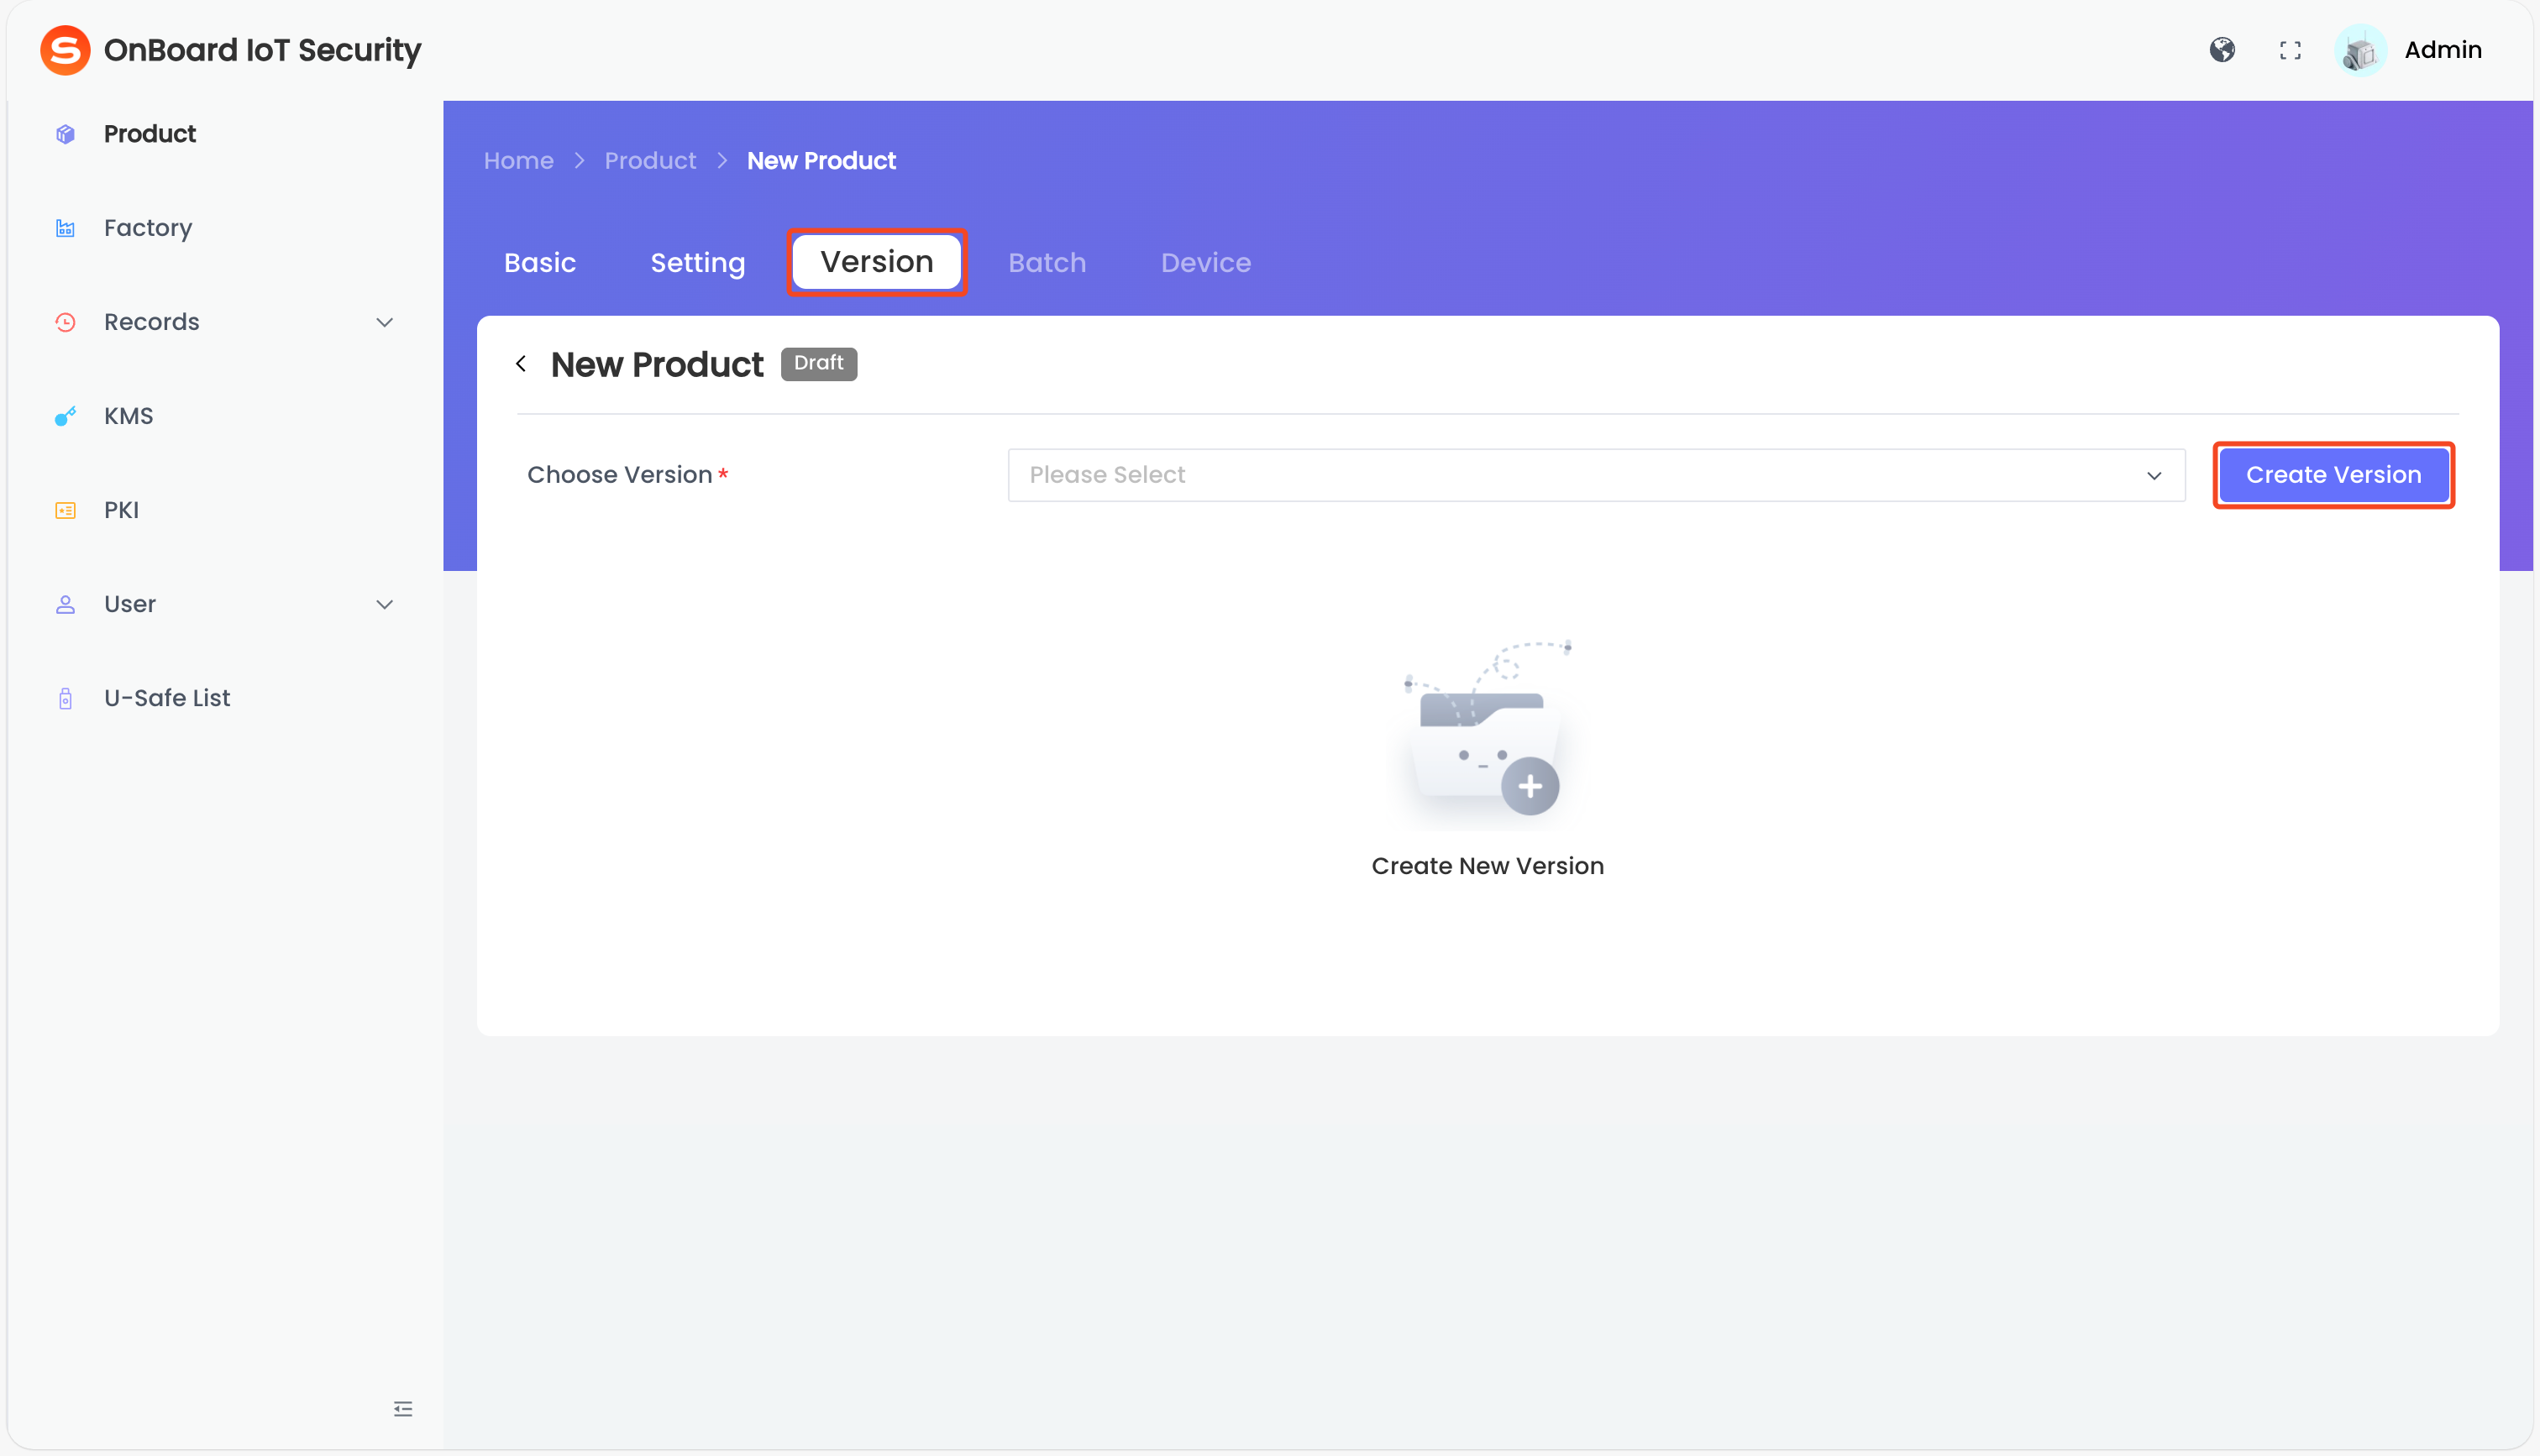
On the product page, select the Version tab, and then click Create Version. The page will navigate to the Create Version tab.
tipIf the Version tab appears grayed out, it is currently unavailable. Please check whether all required resources and configuration items for your product have been configured. Once everything is properly configured, the Version tab will be enabled automatically.
-
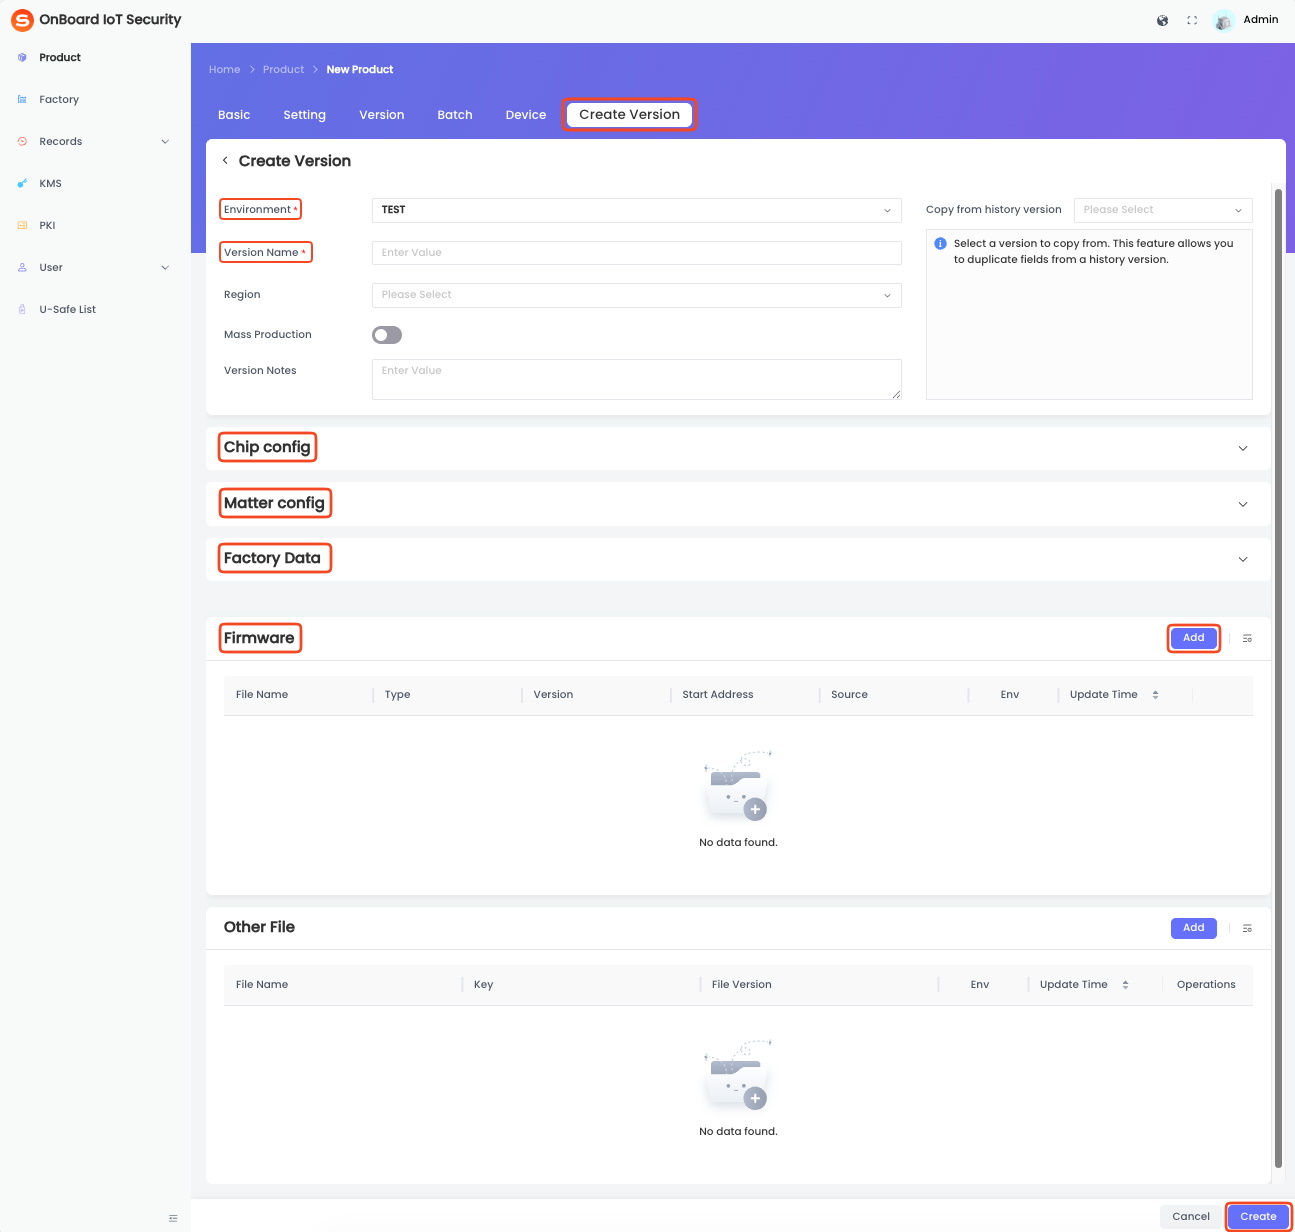
On the Create Version tab:
noteFor more information, refer to the description of version information.
-
Select the Environment, and then enter the Version Name.
-
Check the information in the Chip config, Matter config, and Factory Data areas.
-
In the Firmware area, click Add, then select and add the firmware uploaded when configuring your product.
-
Click Create. After the version is created, the page will navigate to the Version tab.
-
Step three: Create a batch
Each version can create multiple batches, and a batch represents a production plan based on that version.
After the version is created, refer to the steps below to create a batch in OBIS:
-
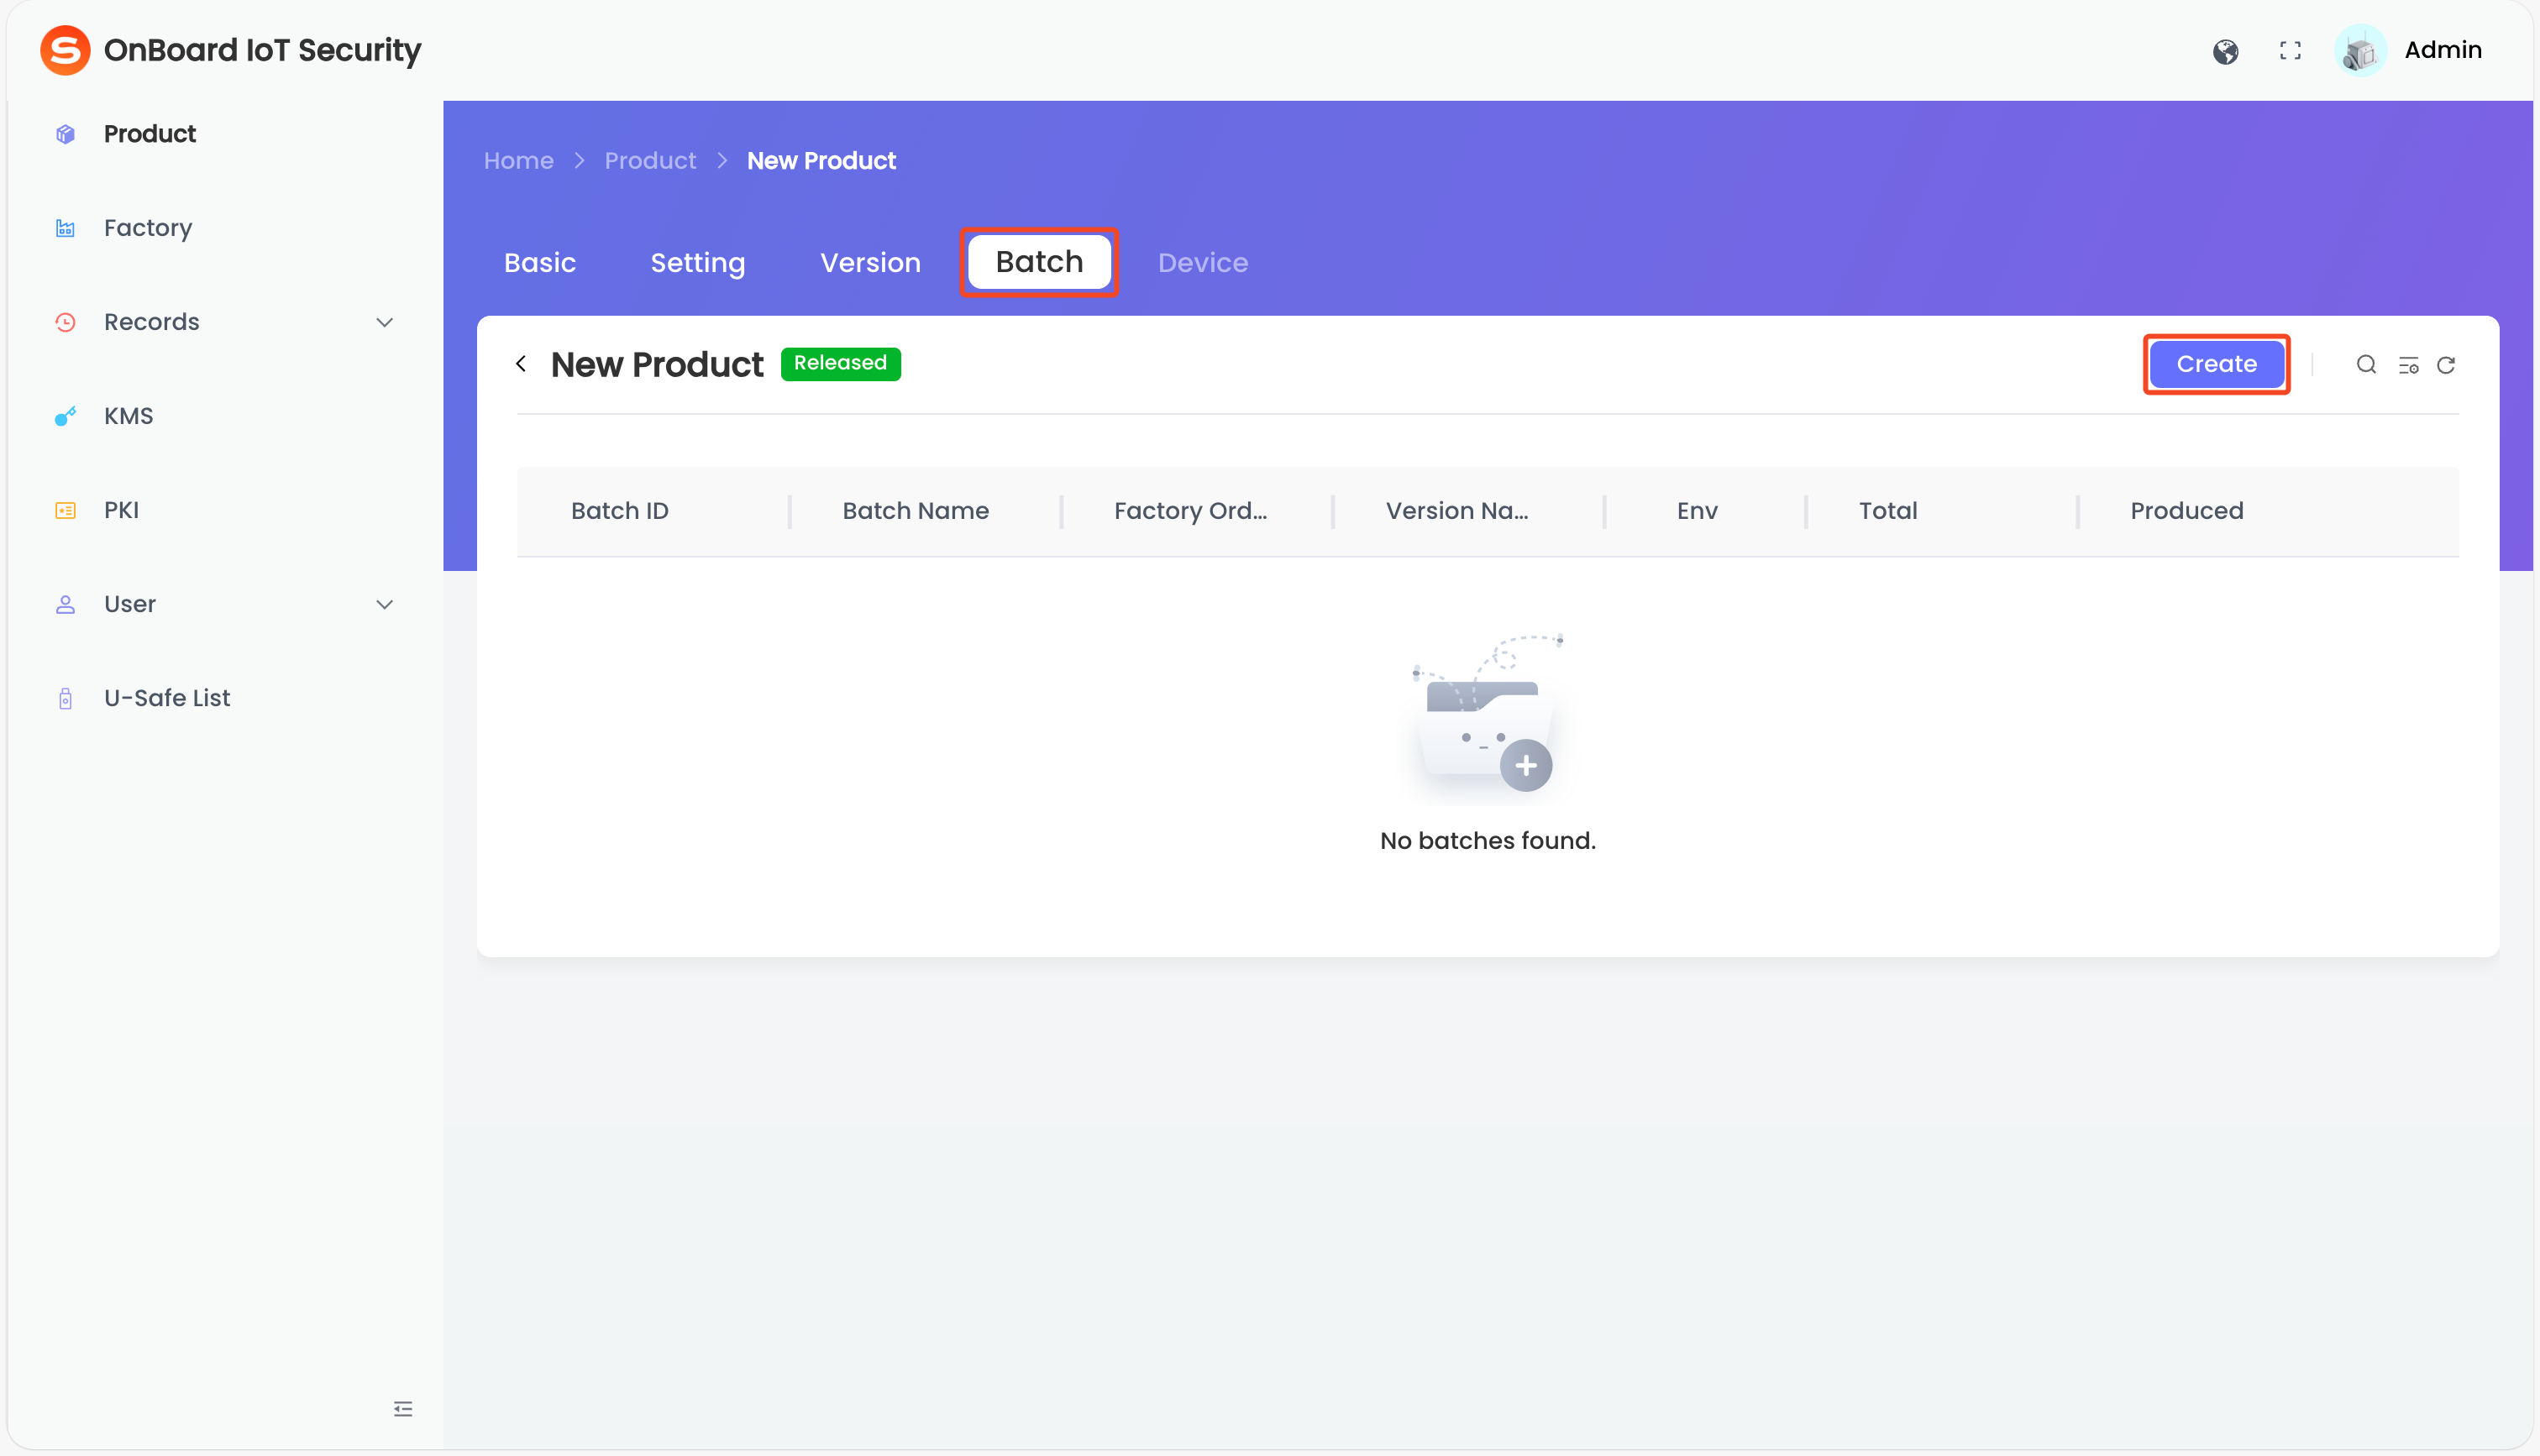
On the product page, select the Batch tab, and then click Create. The page will navigate to the Create Batch tab.
tipIf the Batch tab appears grayed out, it is currently unavailable. Please check whether a version has been created. After a version is created, the Batch tab will be enabled automatically.
-
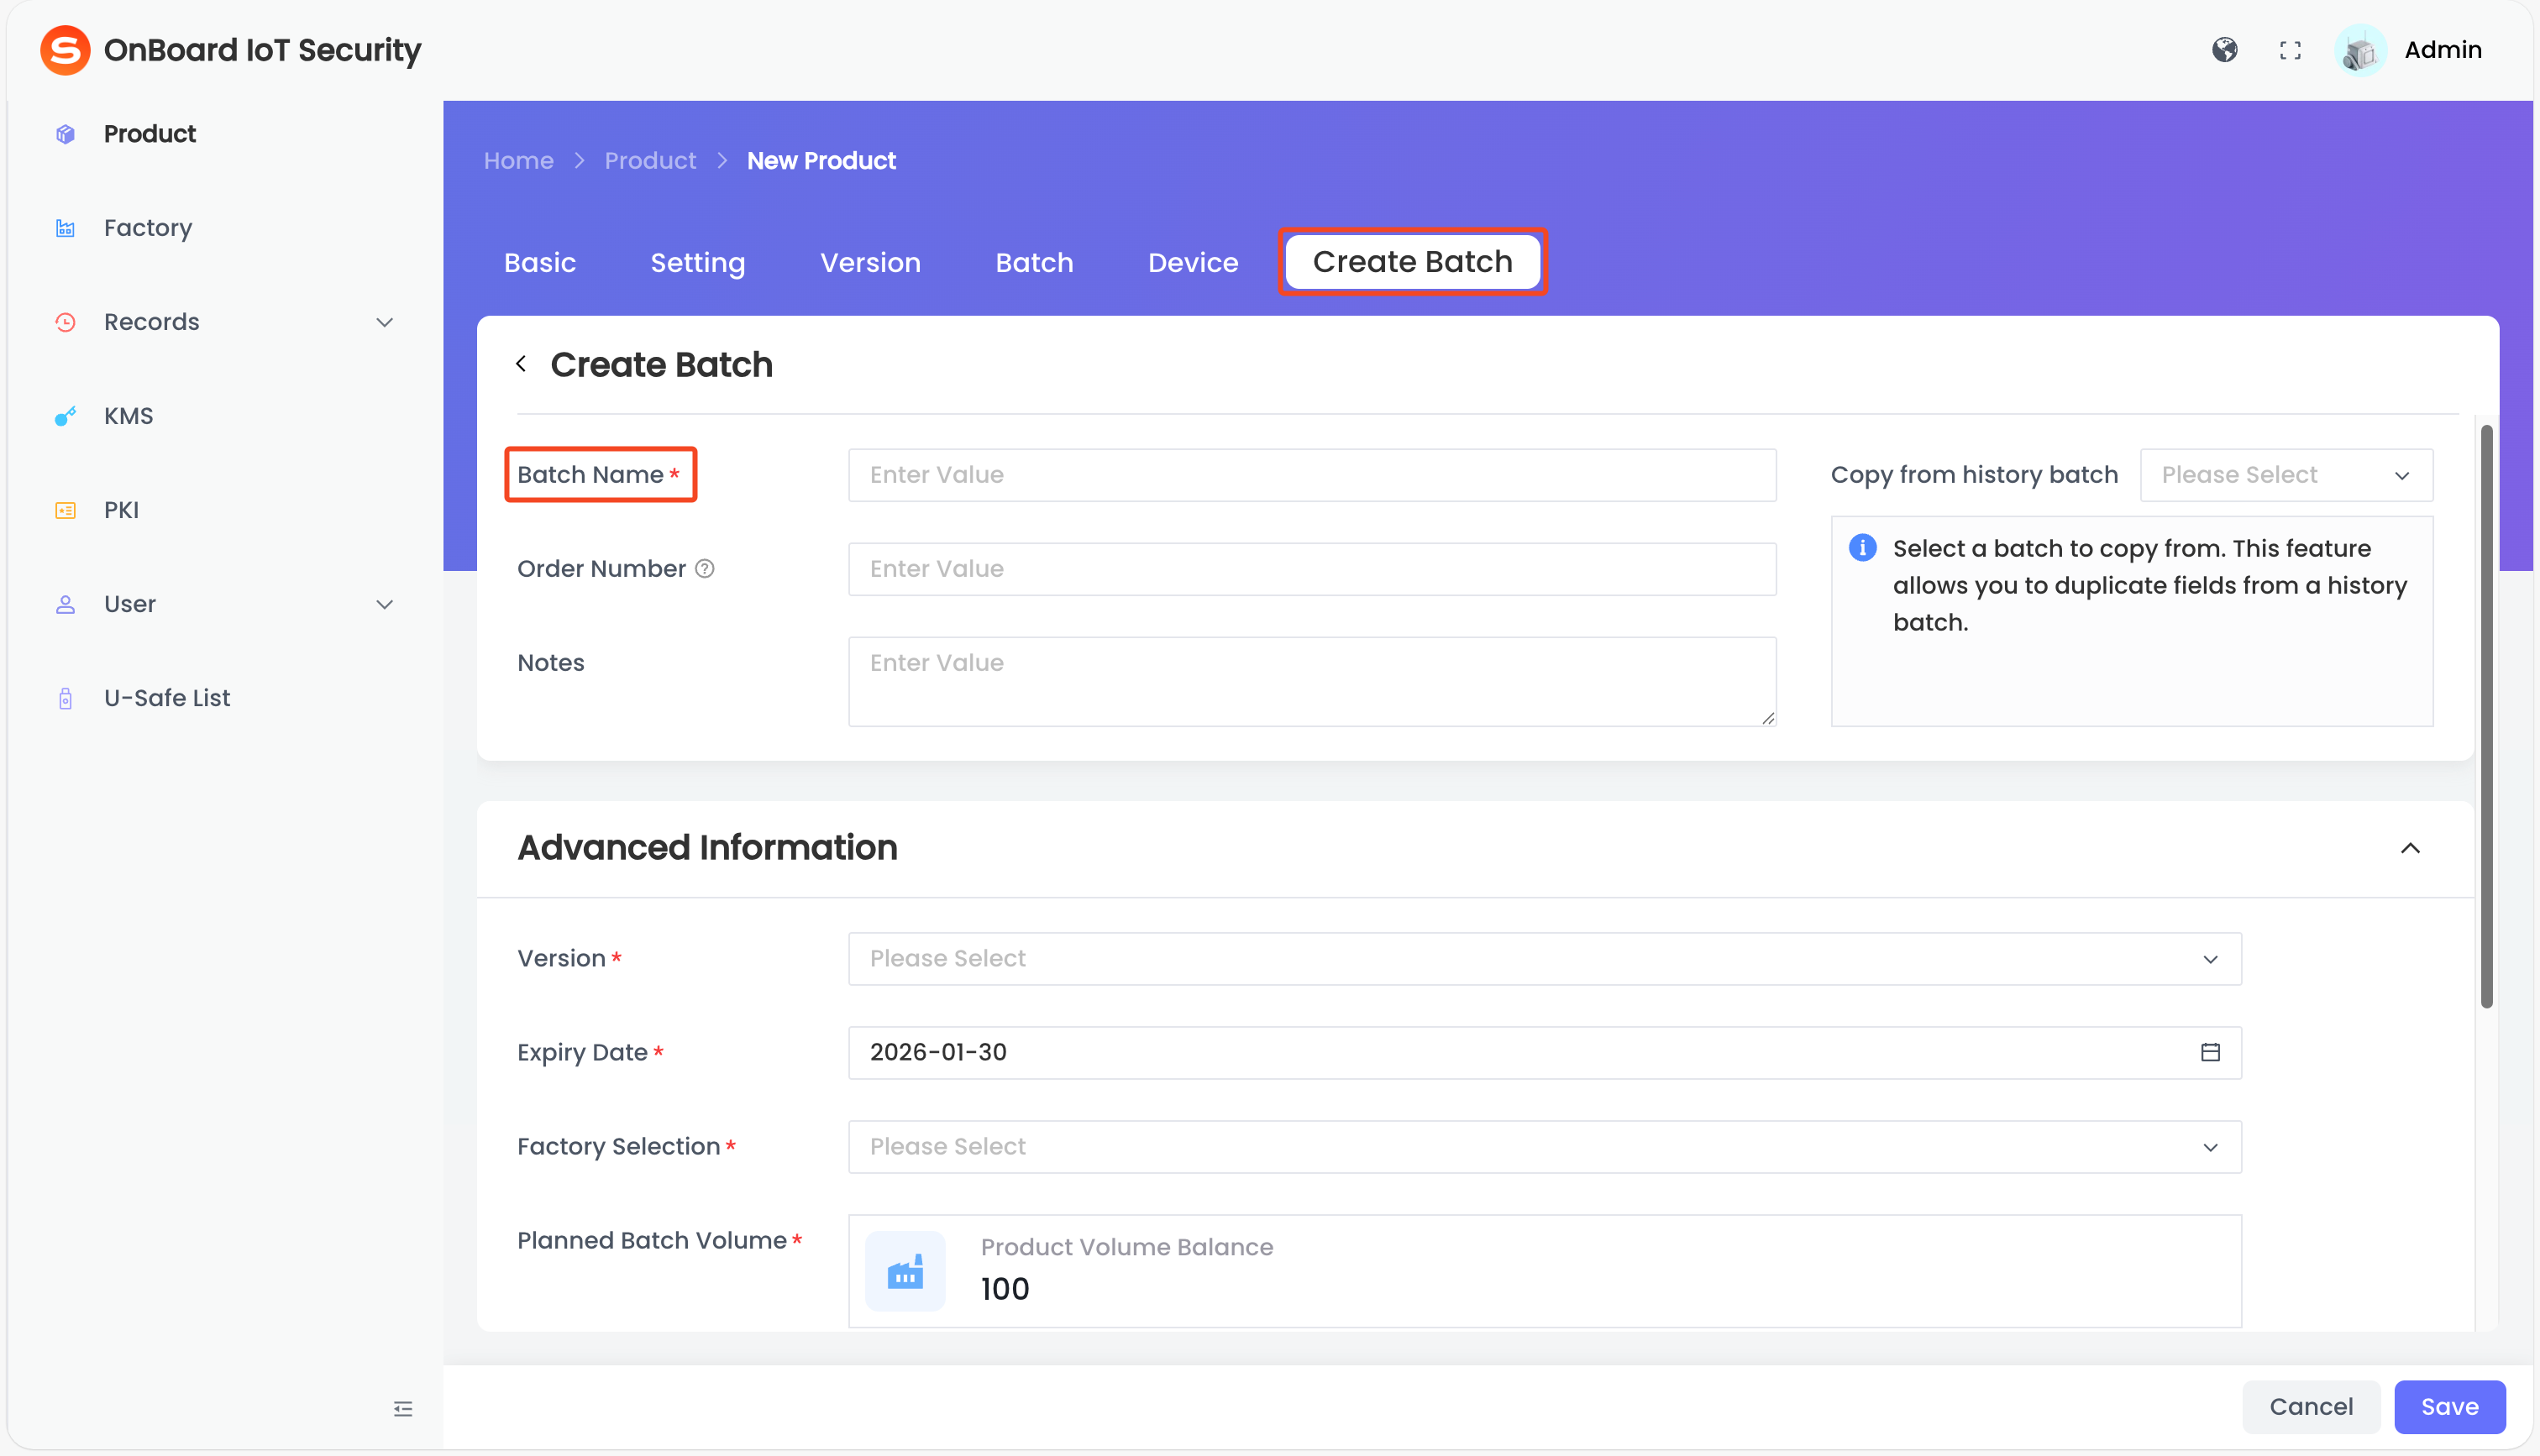
On the Create Batch tab:
noteFor more information, refer to the description of batch information.
-
Enter the Batch Name.
-
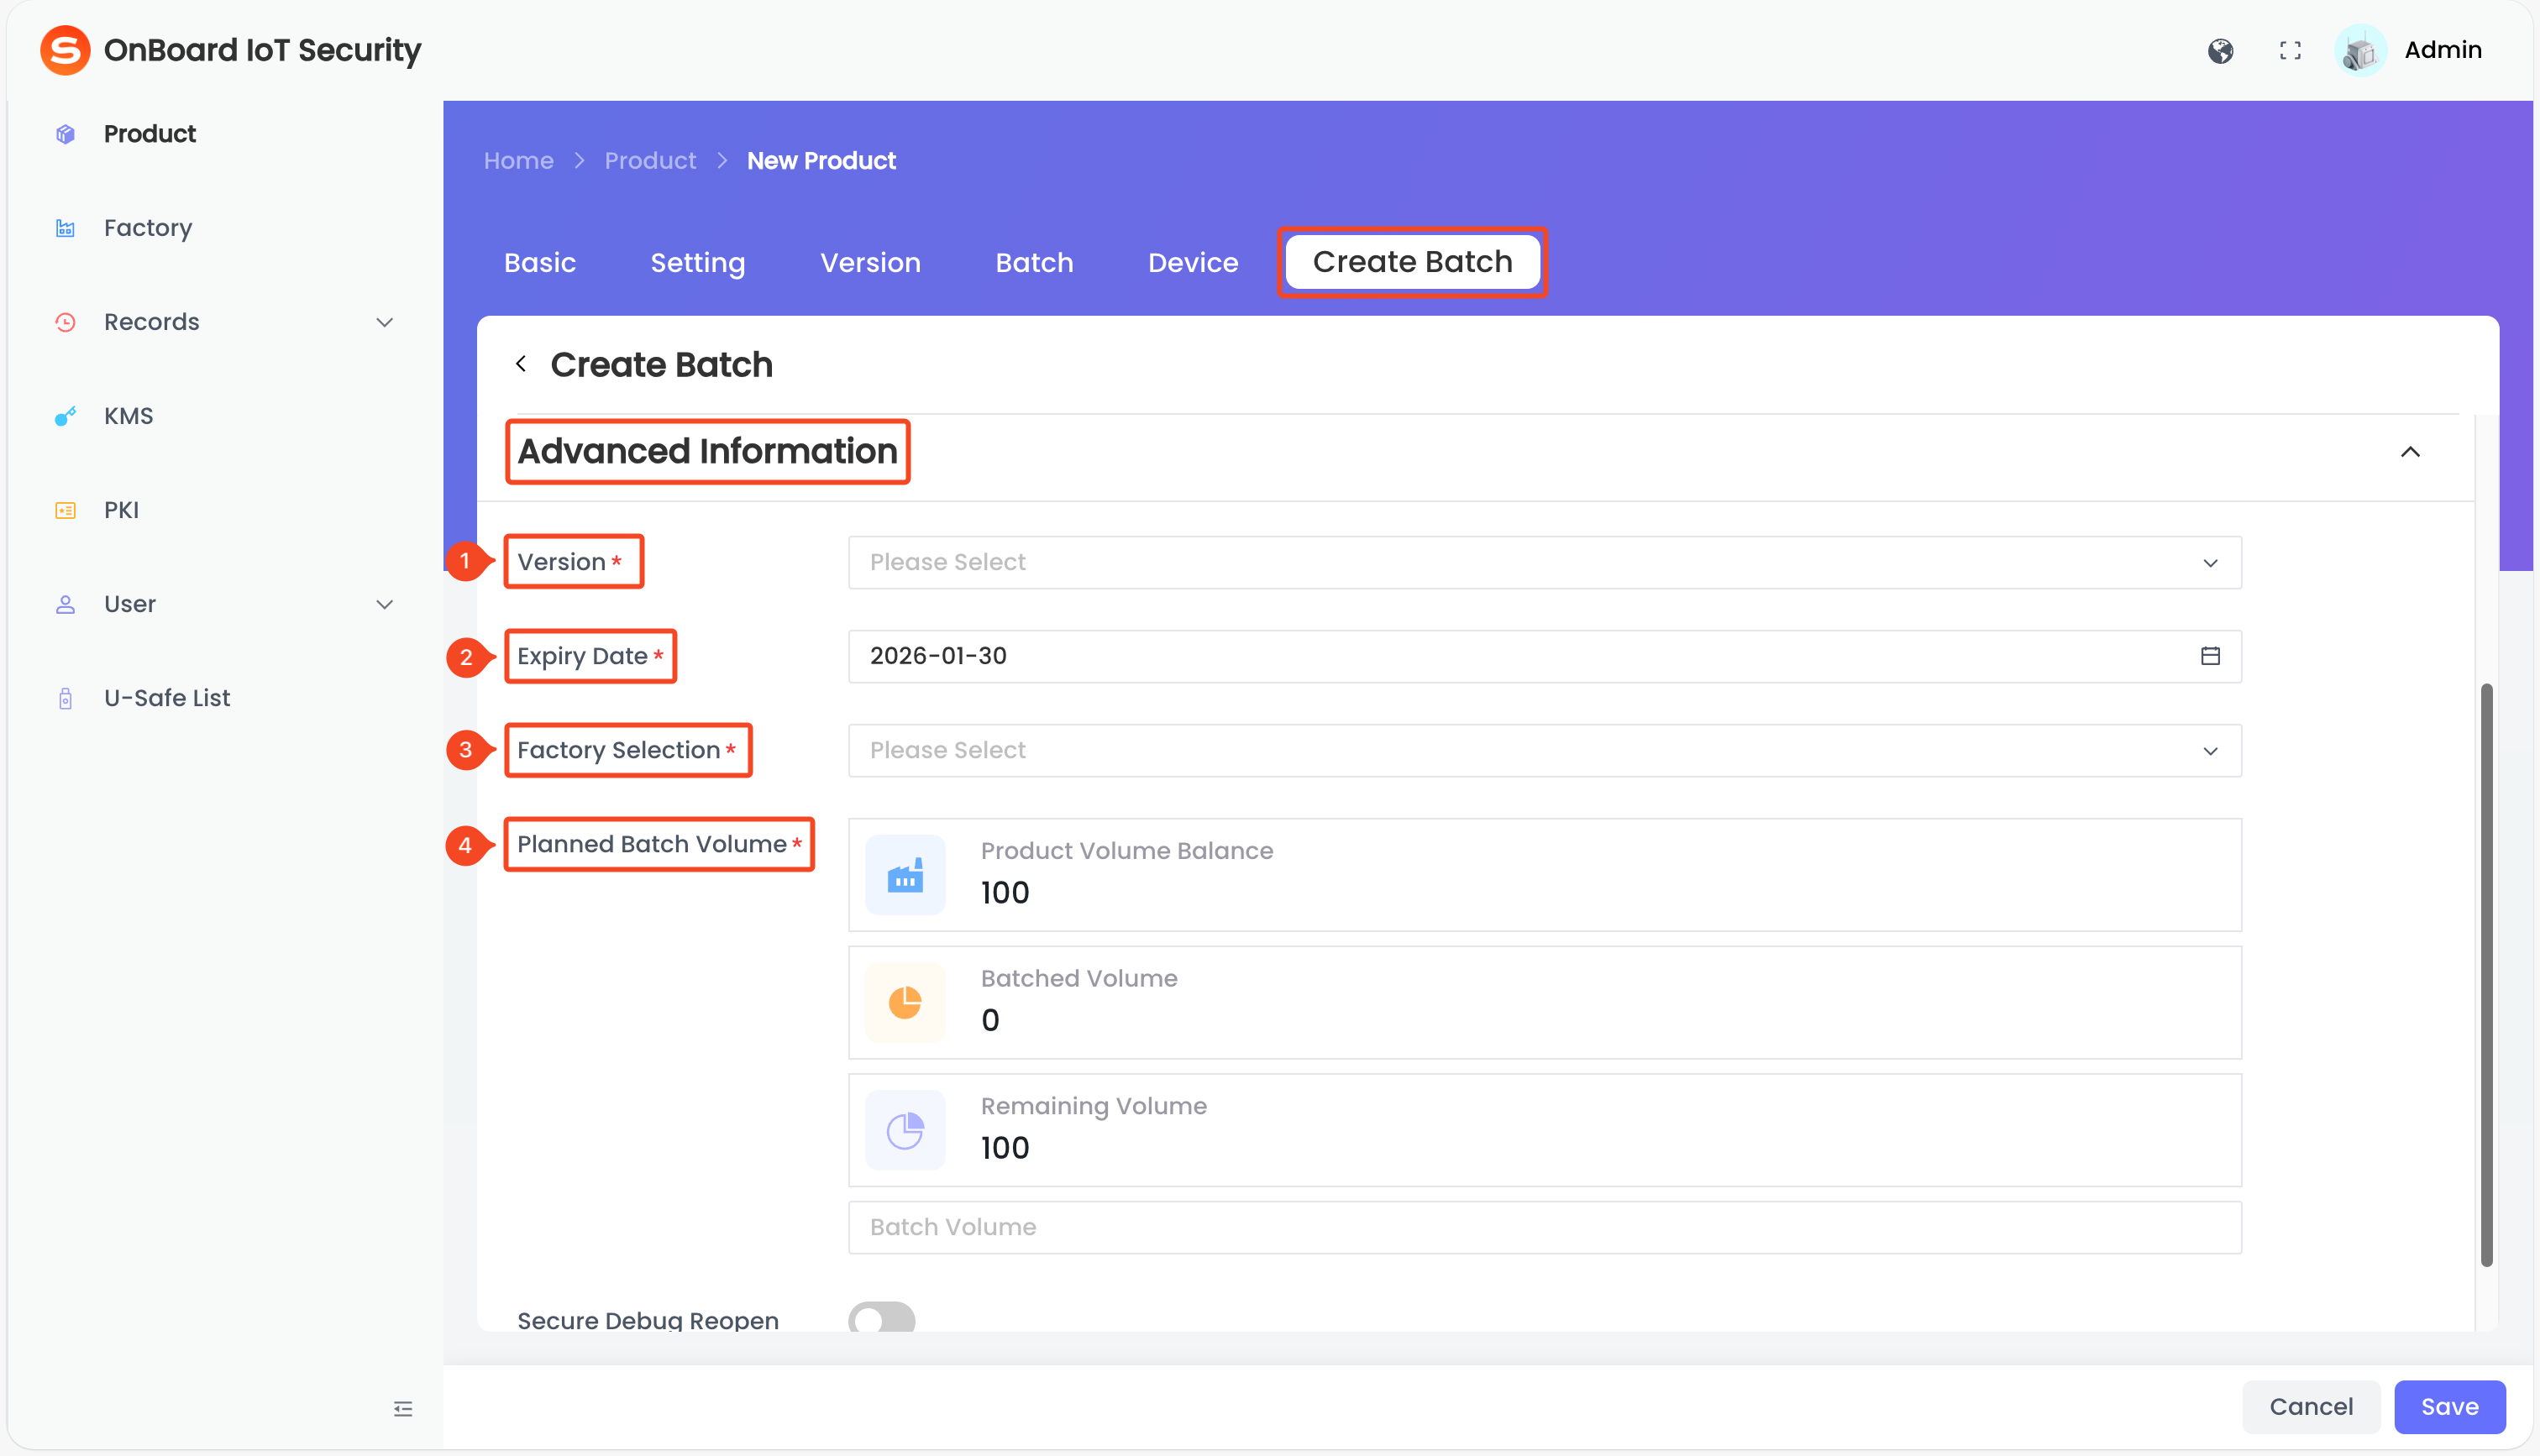
In the Advanced Information area:
-
Select the version created in step two
-
Set the Expiry Date
-
Select the factory
-
Enter the Planned Batch Volume
-
-
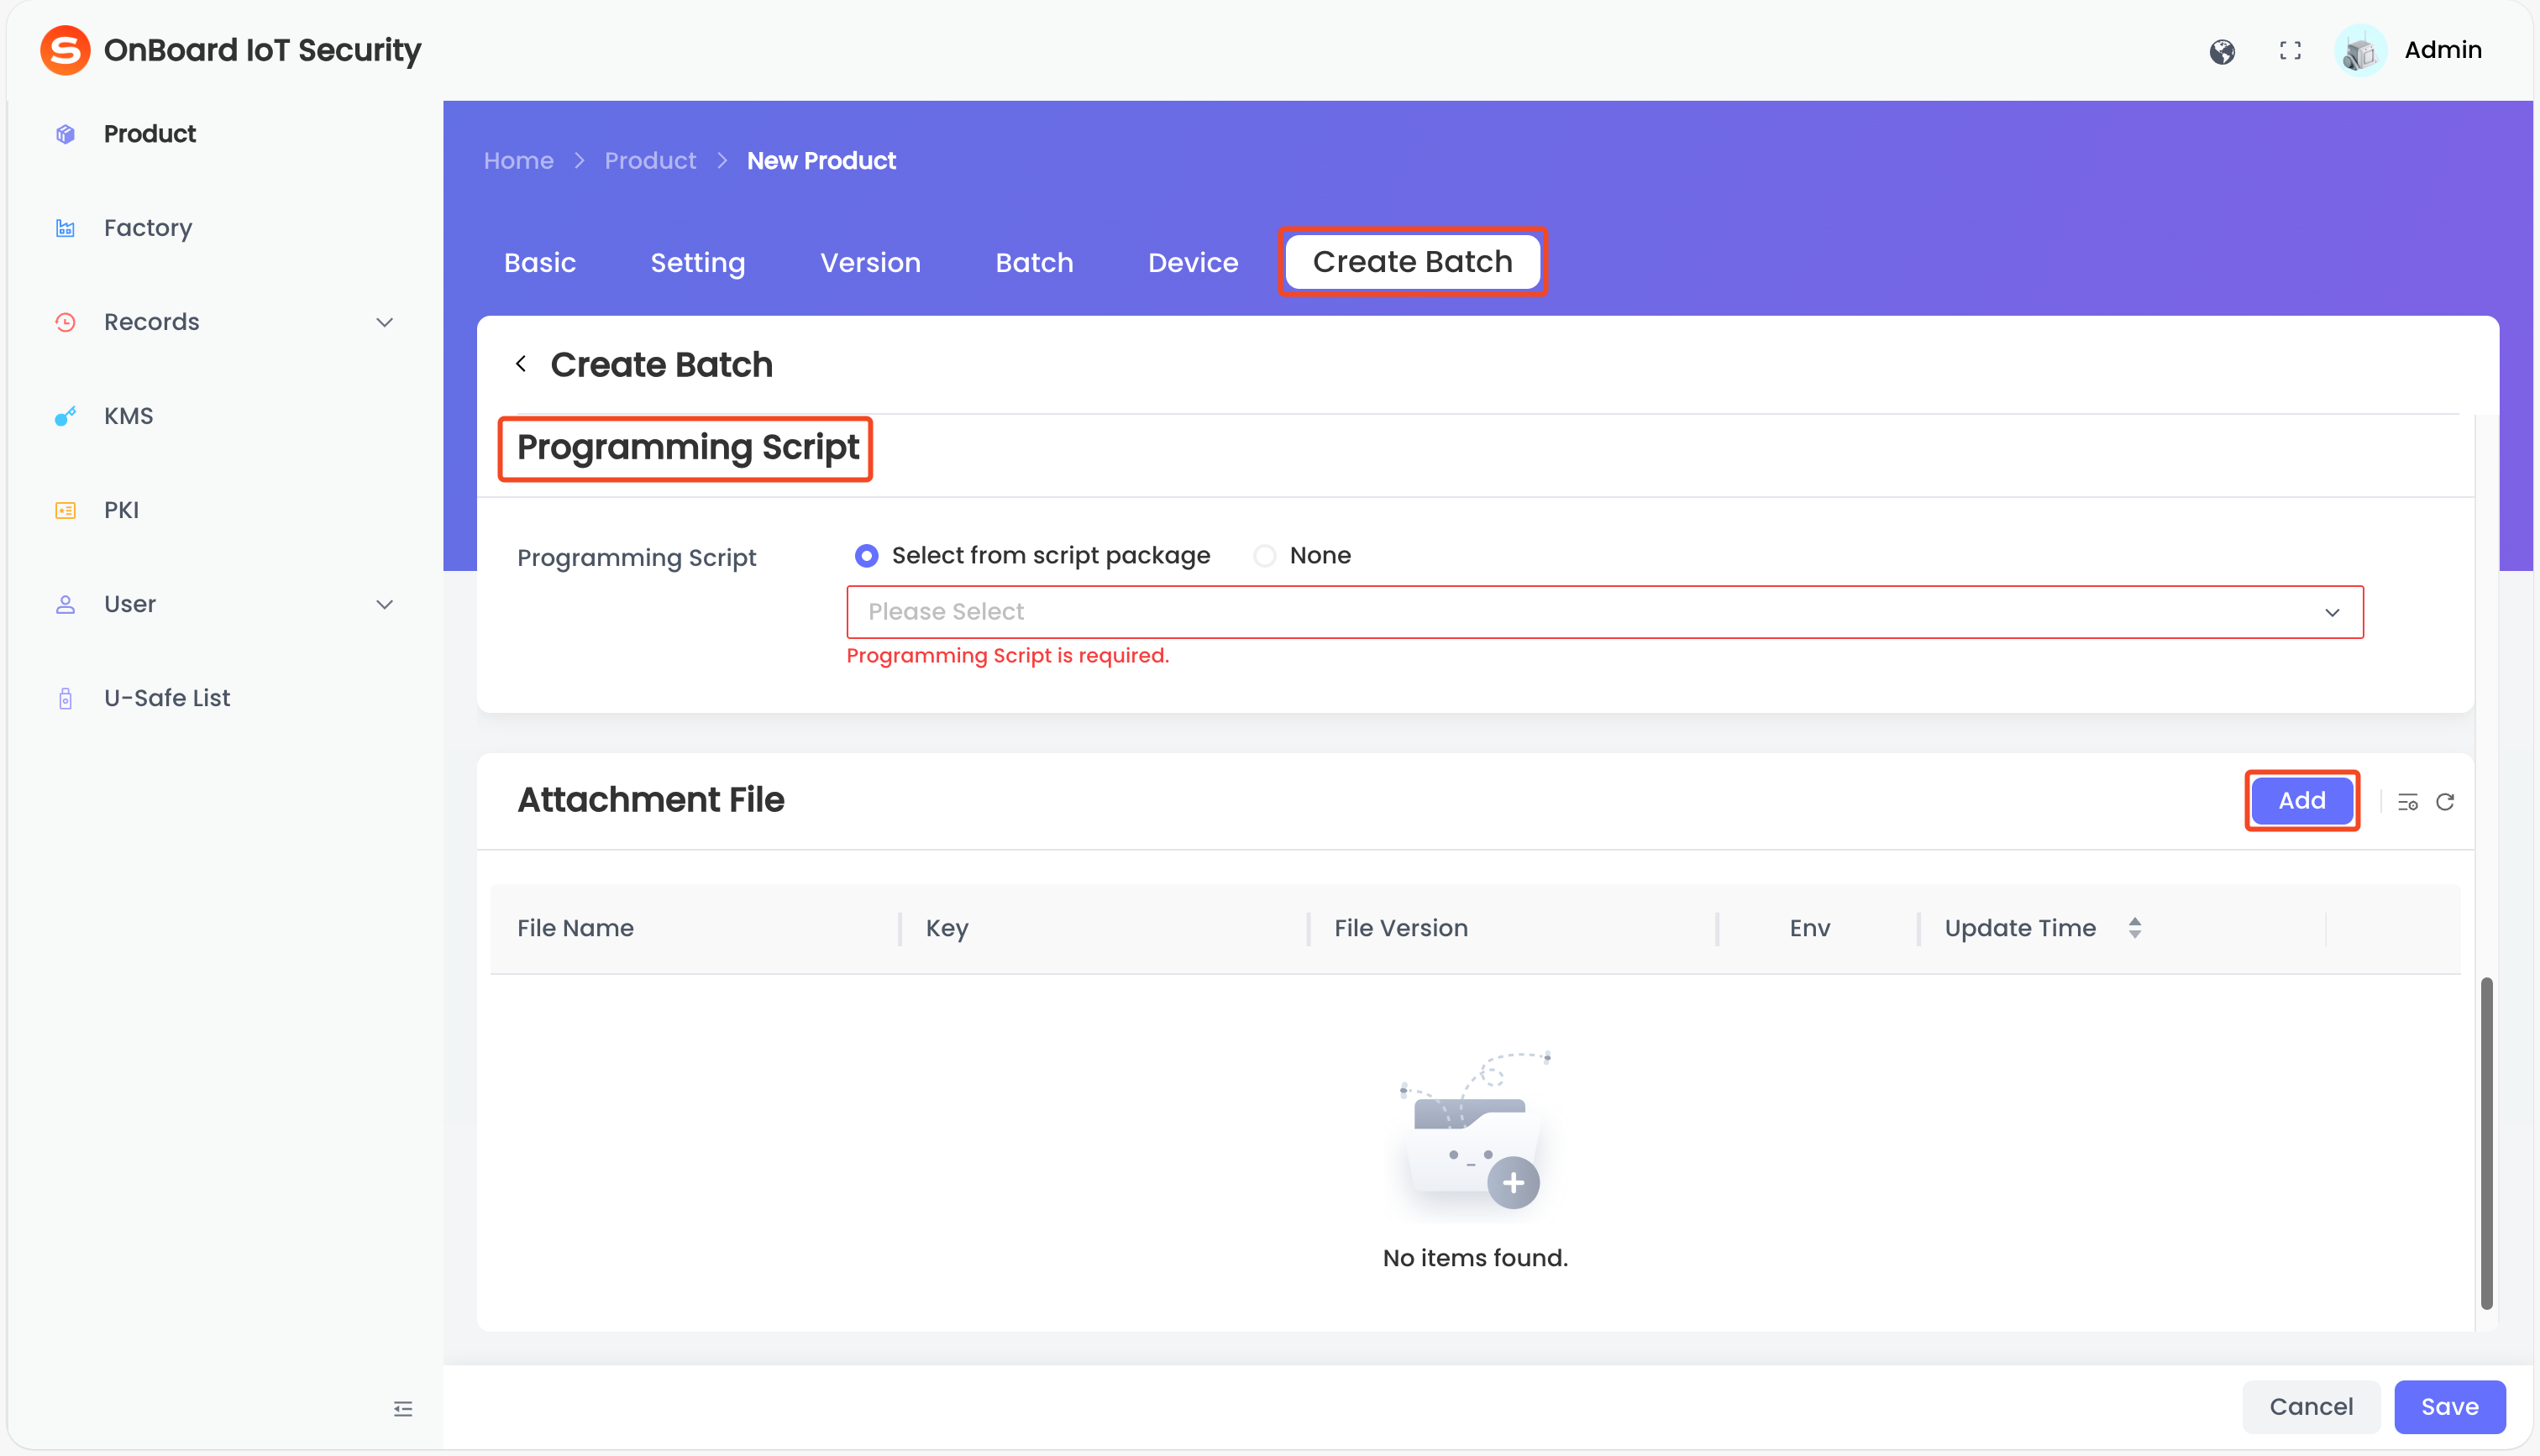
In the Programming Script area, select the programming script uploaded when configuring your product as needed. If it is not required at the moment, you can select None and select the programming script for a specific batch later in the Programming Station client.
-
Click Save. After the batch is created, the page will navigate to the Batch tab.
-
Step four: Assign a programming station to the batch
The purpose of assigning a programming station to a batch is to bind the production plan to a programming station.
- Local Factory
- Cloud Factory
Contact Snowball for assistance in deploying the OnBoard Edge Service on the factory side.
After the deployment is complete, you can sign in to the OnBoard Edge Service using the generated service address to manage factories, programming stations, and batches:
-
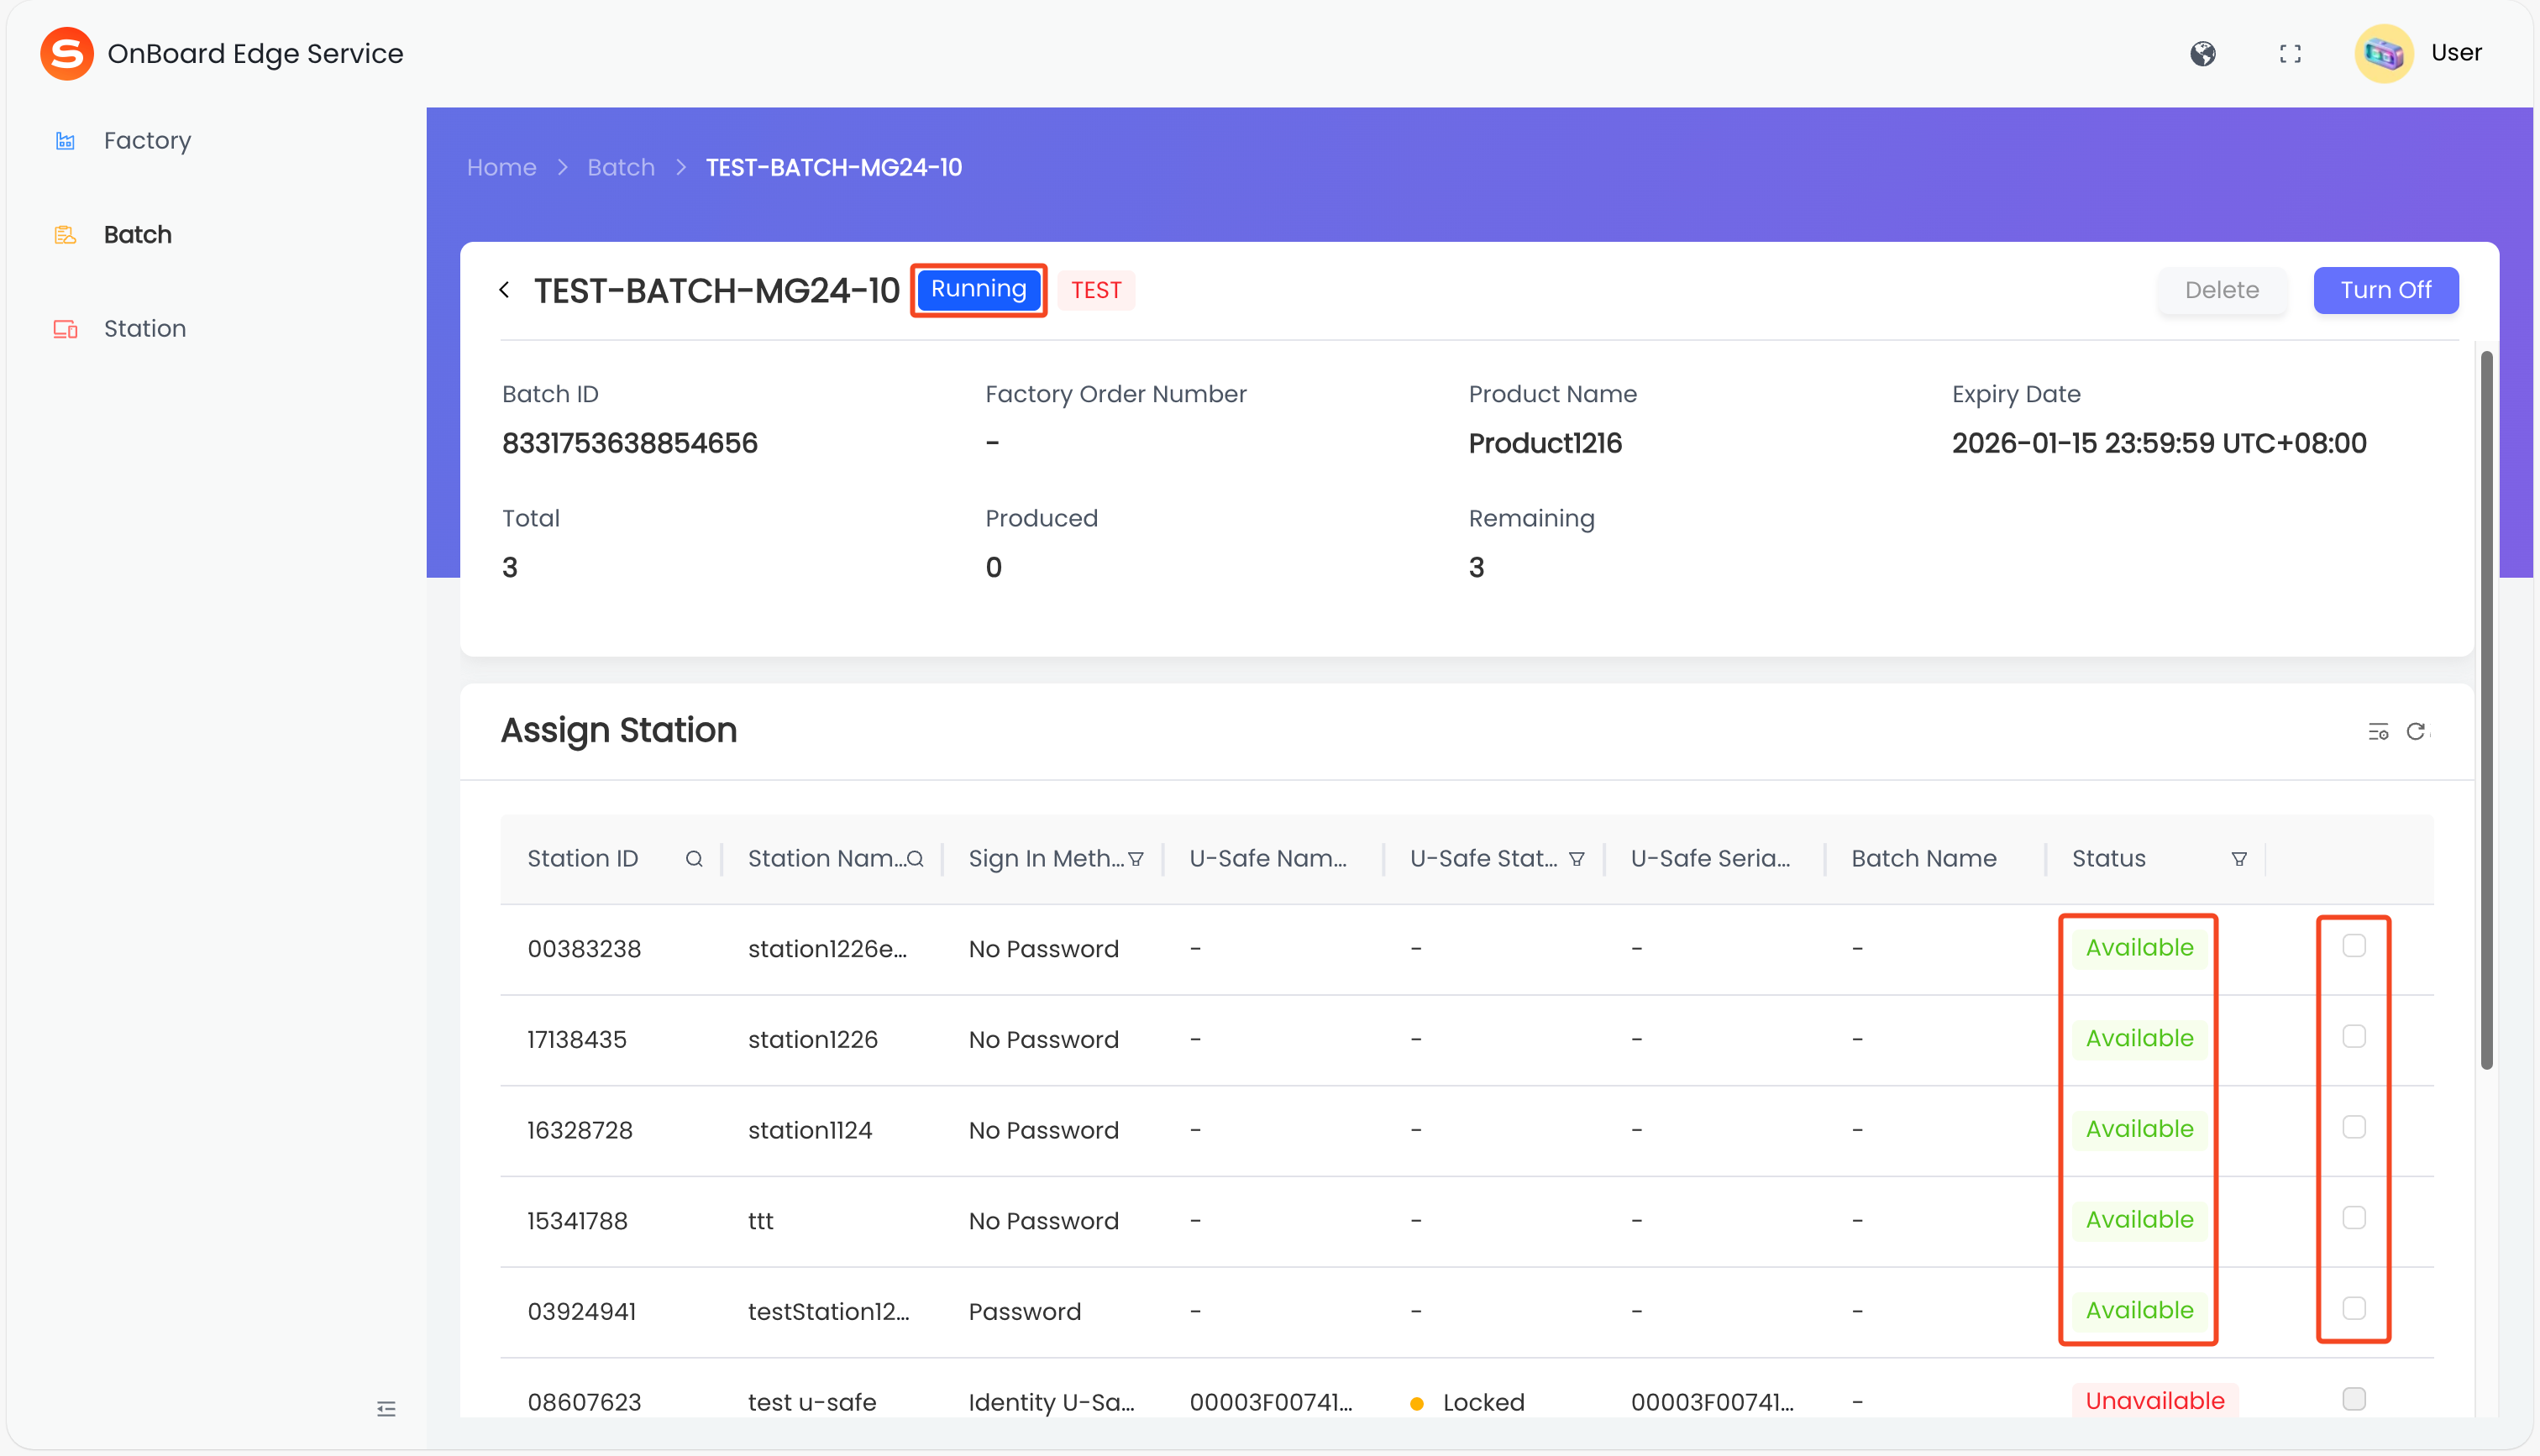
In the left menu, click Batch, and then select the batch created in step three from the Batch List.
-
On the batch page, verify that the batch status is Running, and then select a programming station with the Available status for assignment.
noteFor more information, refer to the steps for adding a programming station.
-
Sign in to OBIS.
-
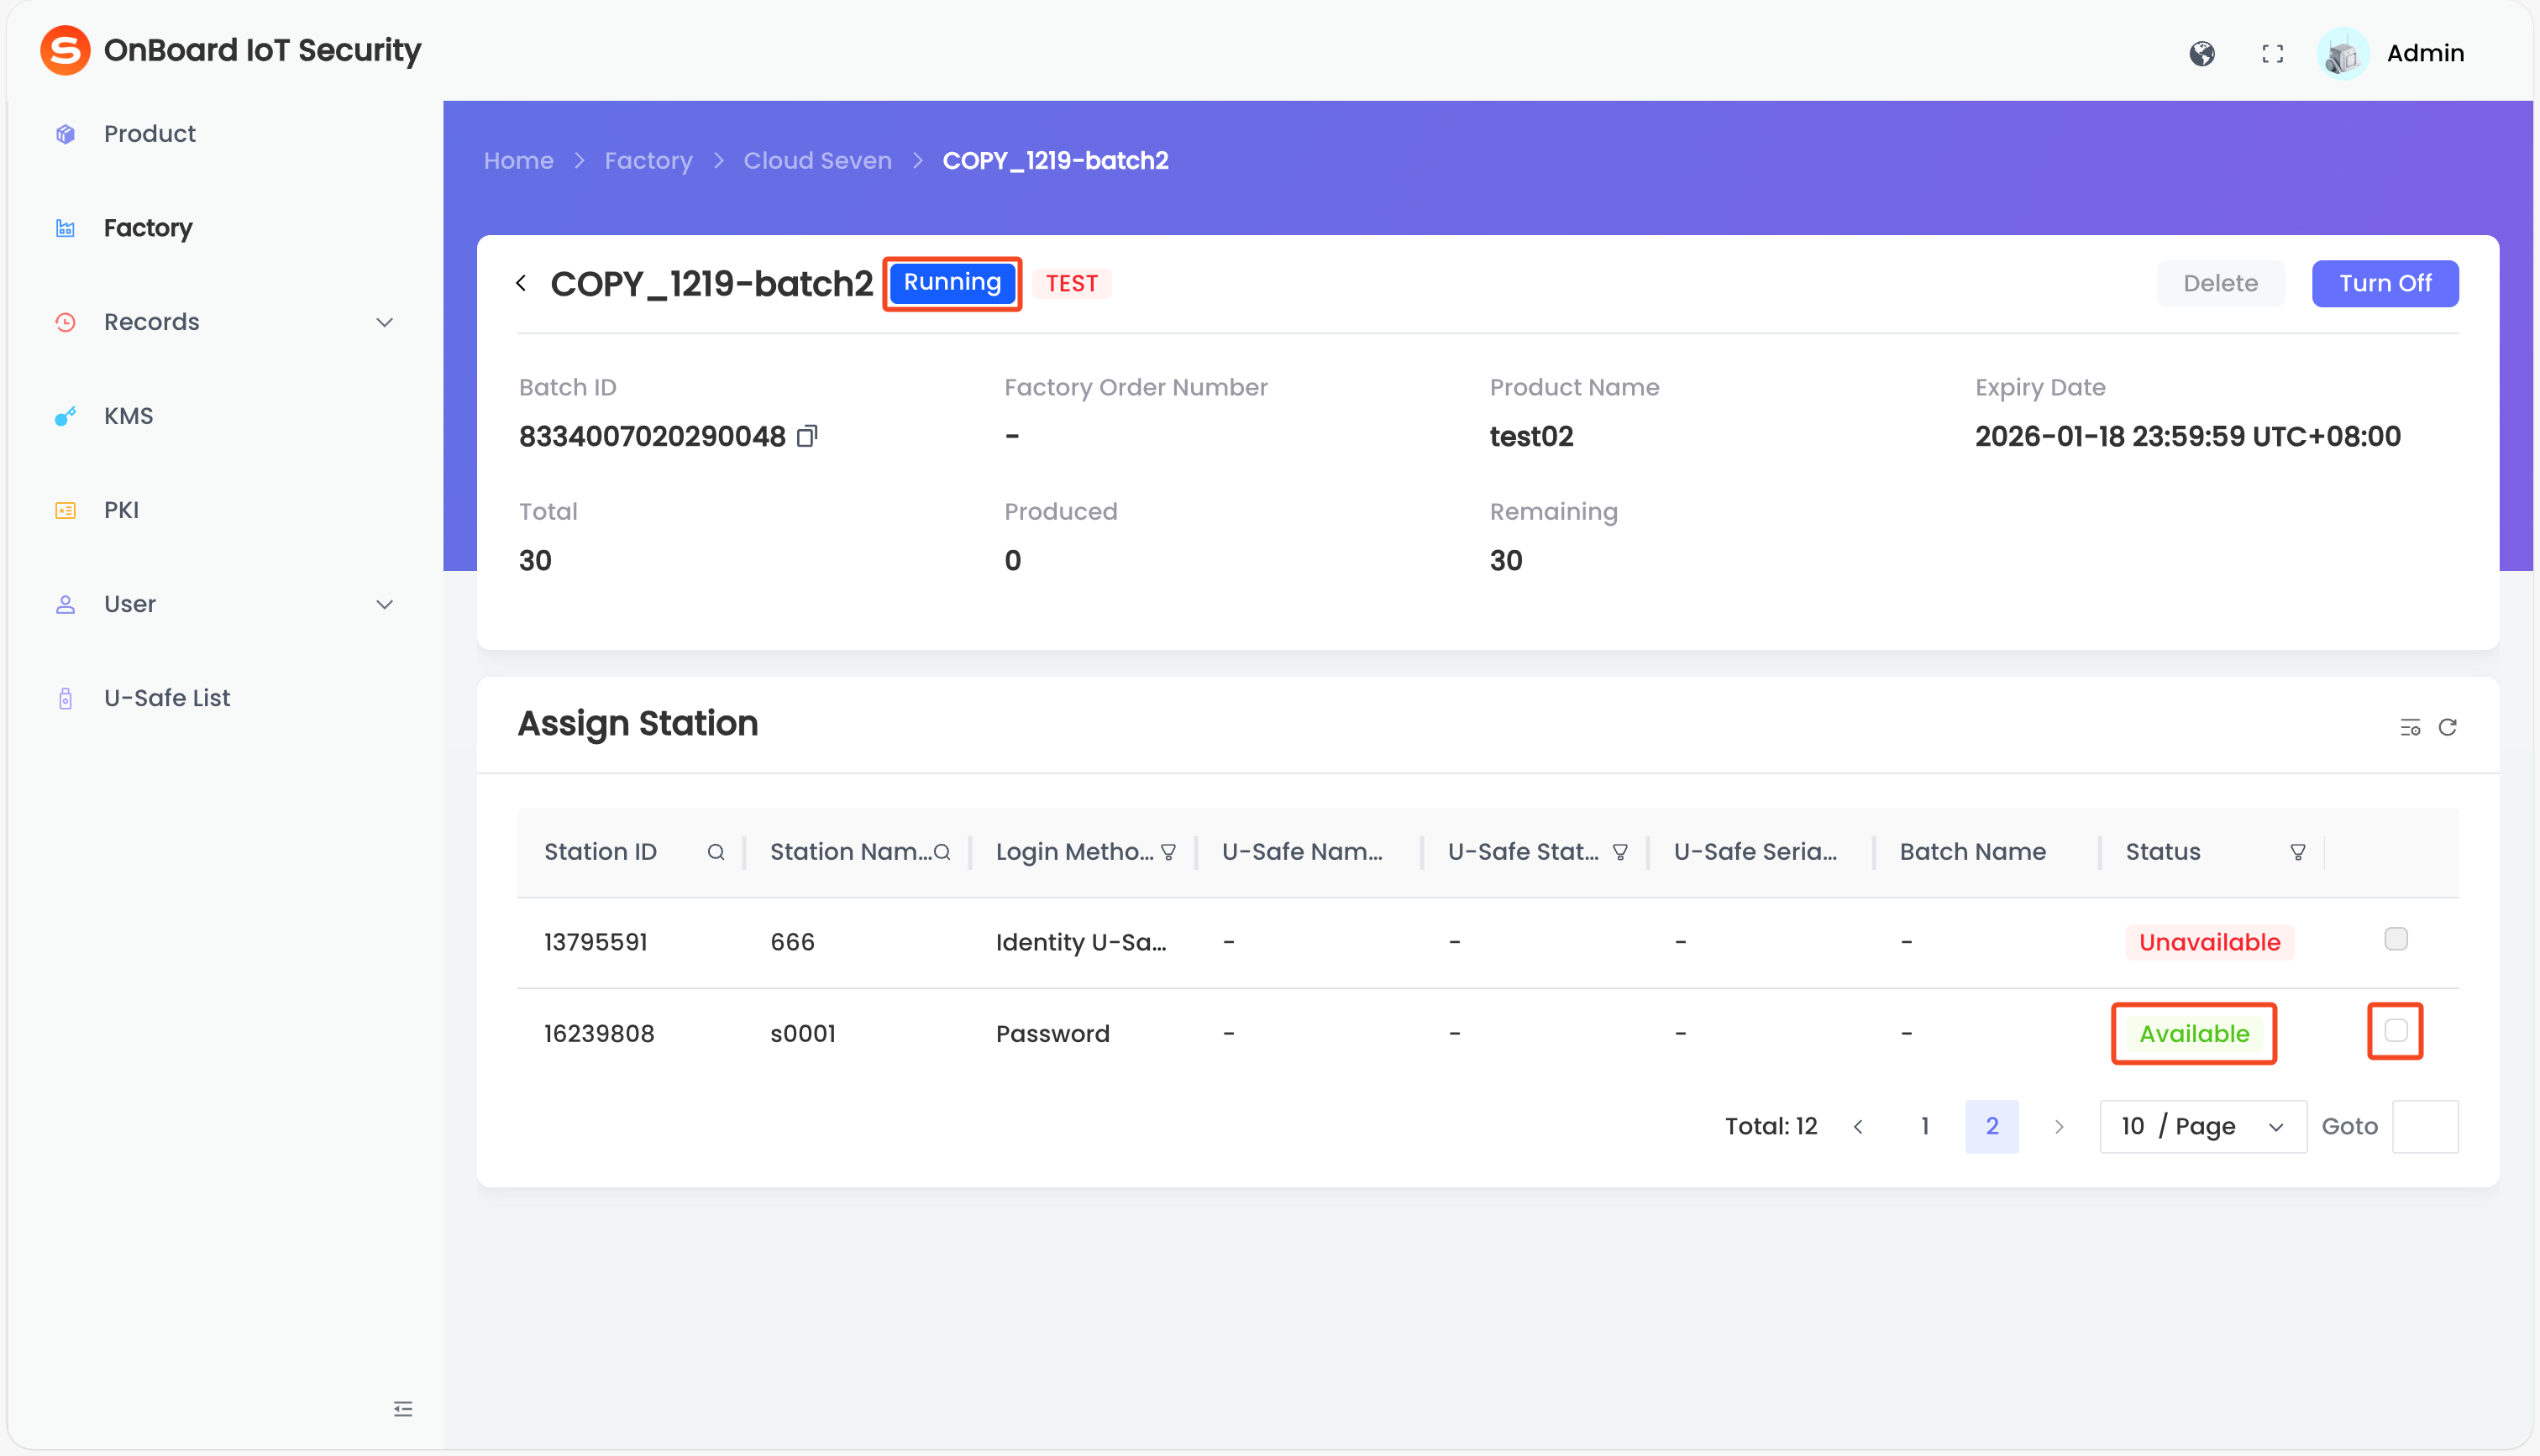
In the left menu, click Factory, and then select the corresponding factory ID to navigate to the factory page and select the Batch tab.
-
Select the batch created in step three from the Batch List, verify that the batch status is Running, and then select a programming station with the Available status for assignment.
noteFor more information, refer to the steps for adding a programming station.
Step five: Device programming
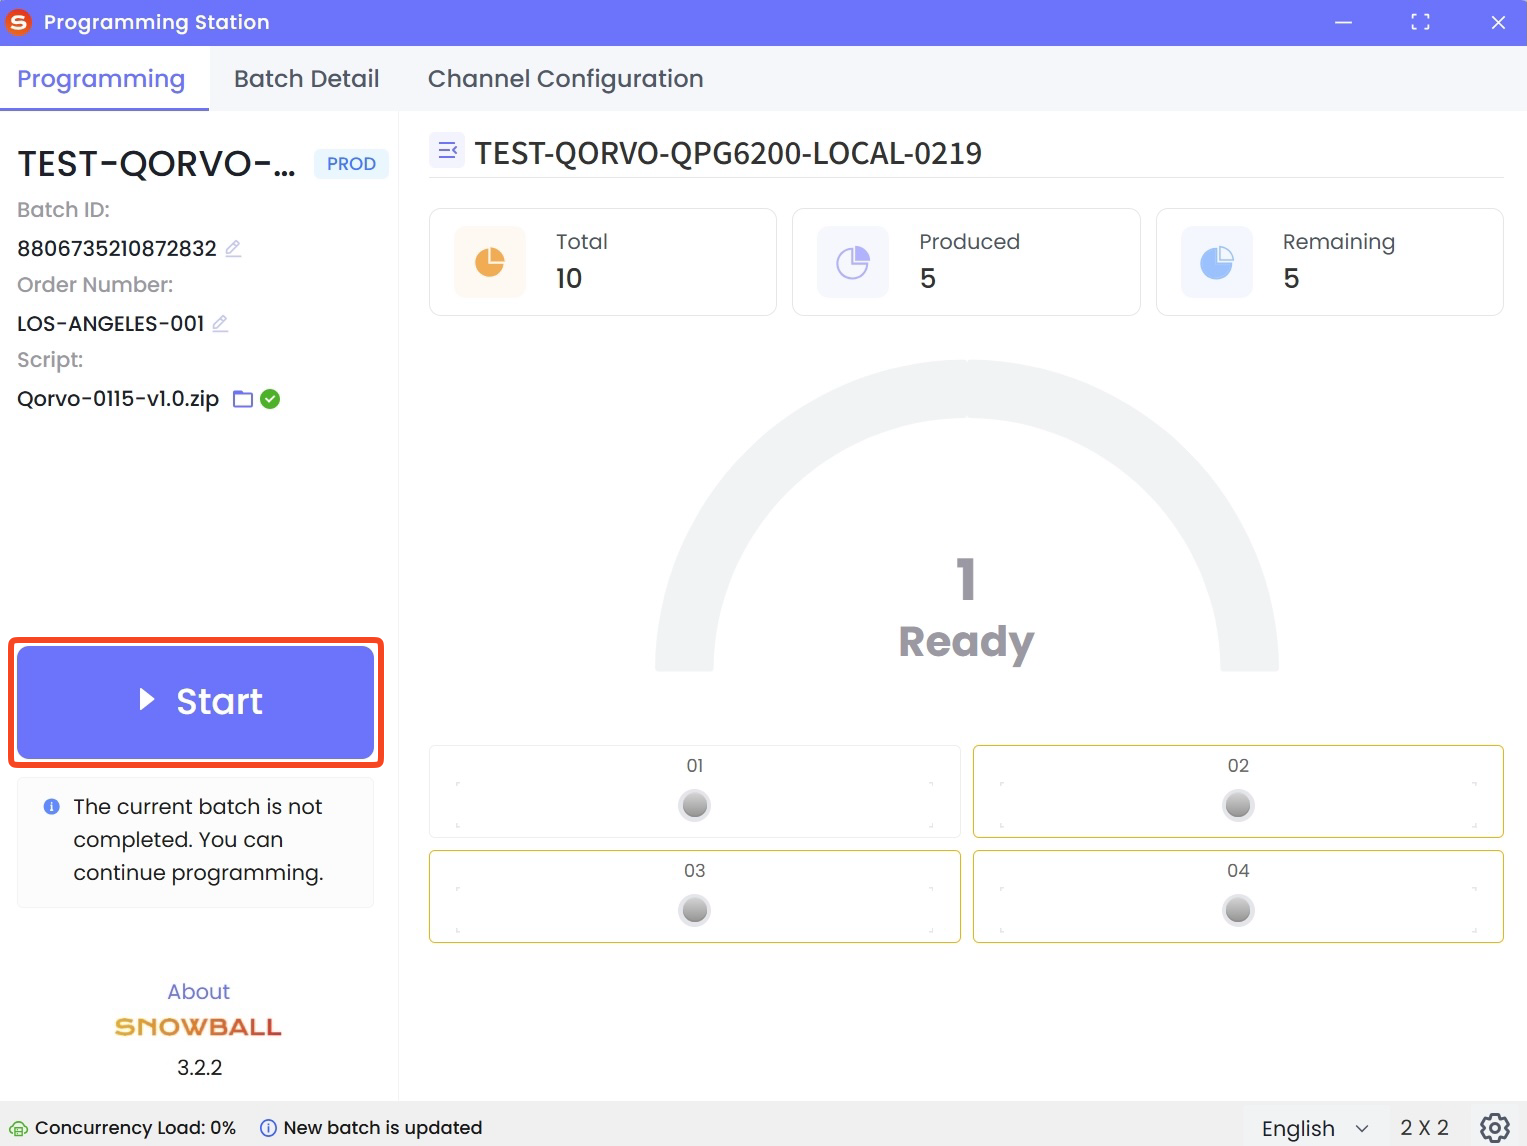
Programming Station is a client for device programming. After assigning a programming station to the batch in the OnBoard Edge Service, refer to the steps below to start programming:
-
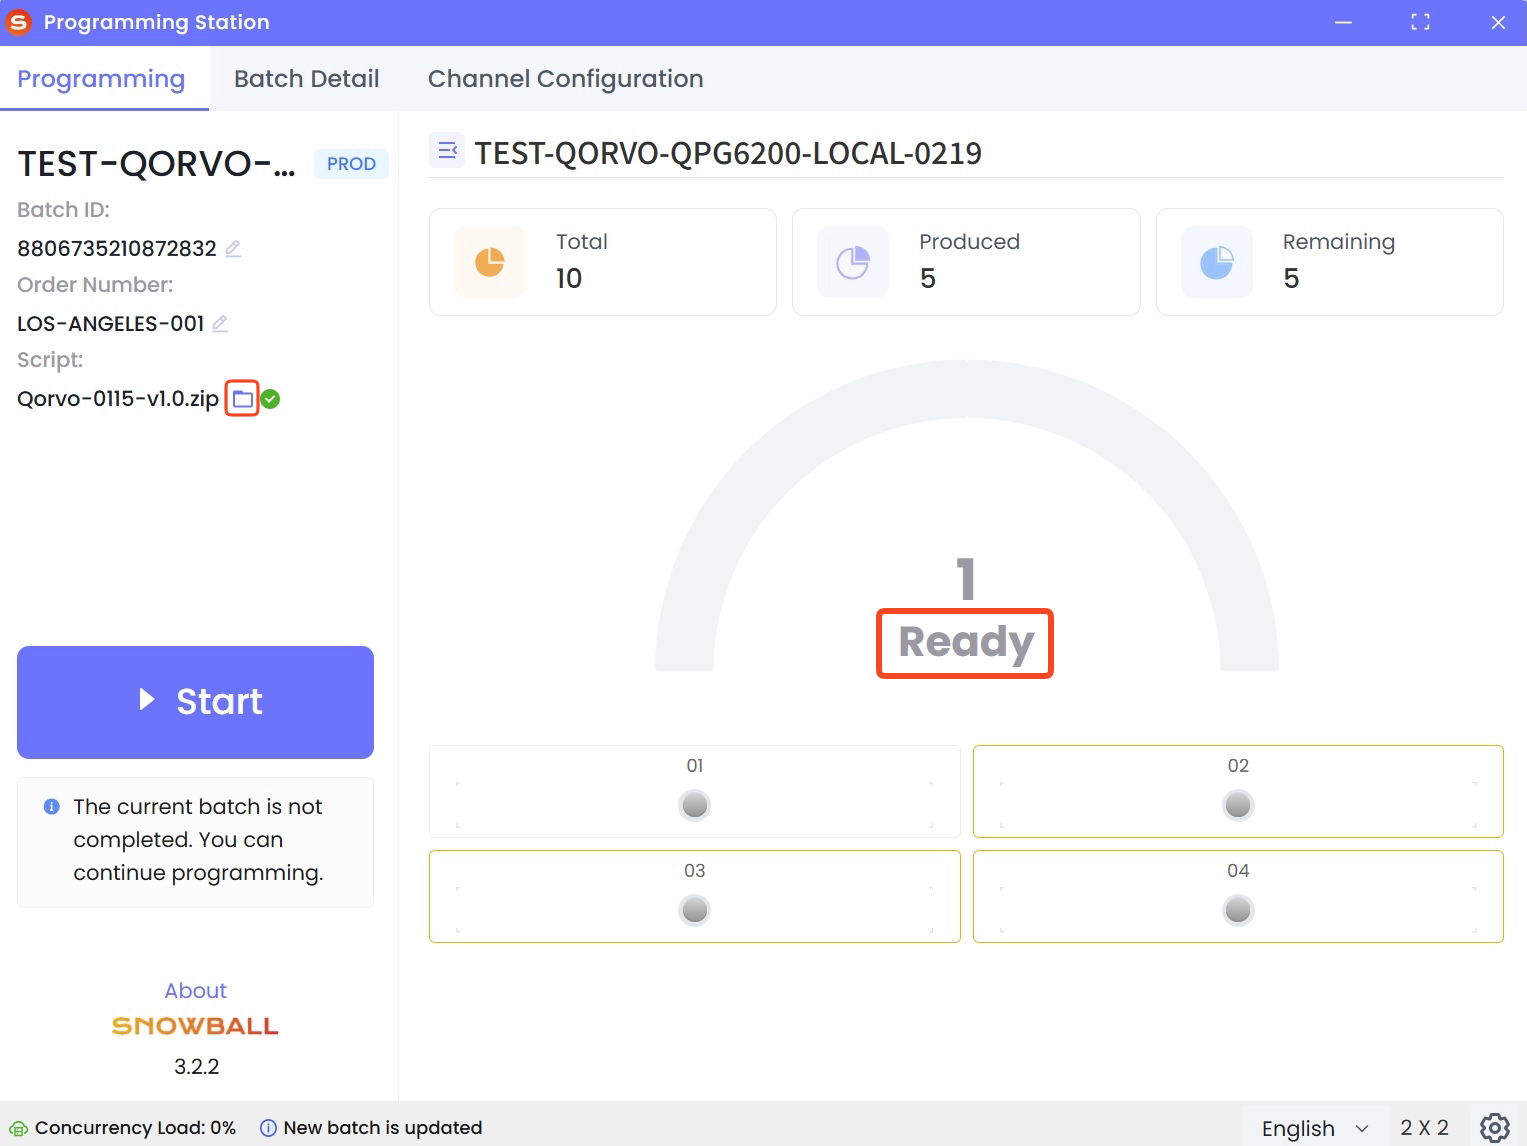
Install and sign in to the Programming Station client, verify that the device status is Ready.
tipIf the programming script is not selected when creating a batch, or if you want to select a different programming script, you can click the Folder
 icon to select the required programming script (any script format is supported).
-
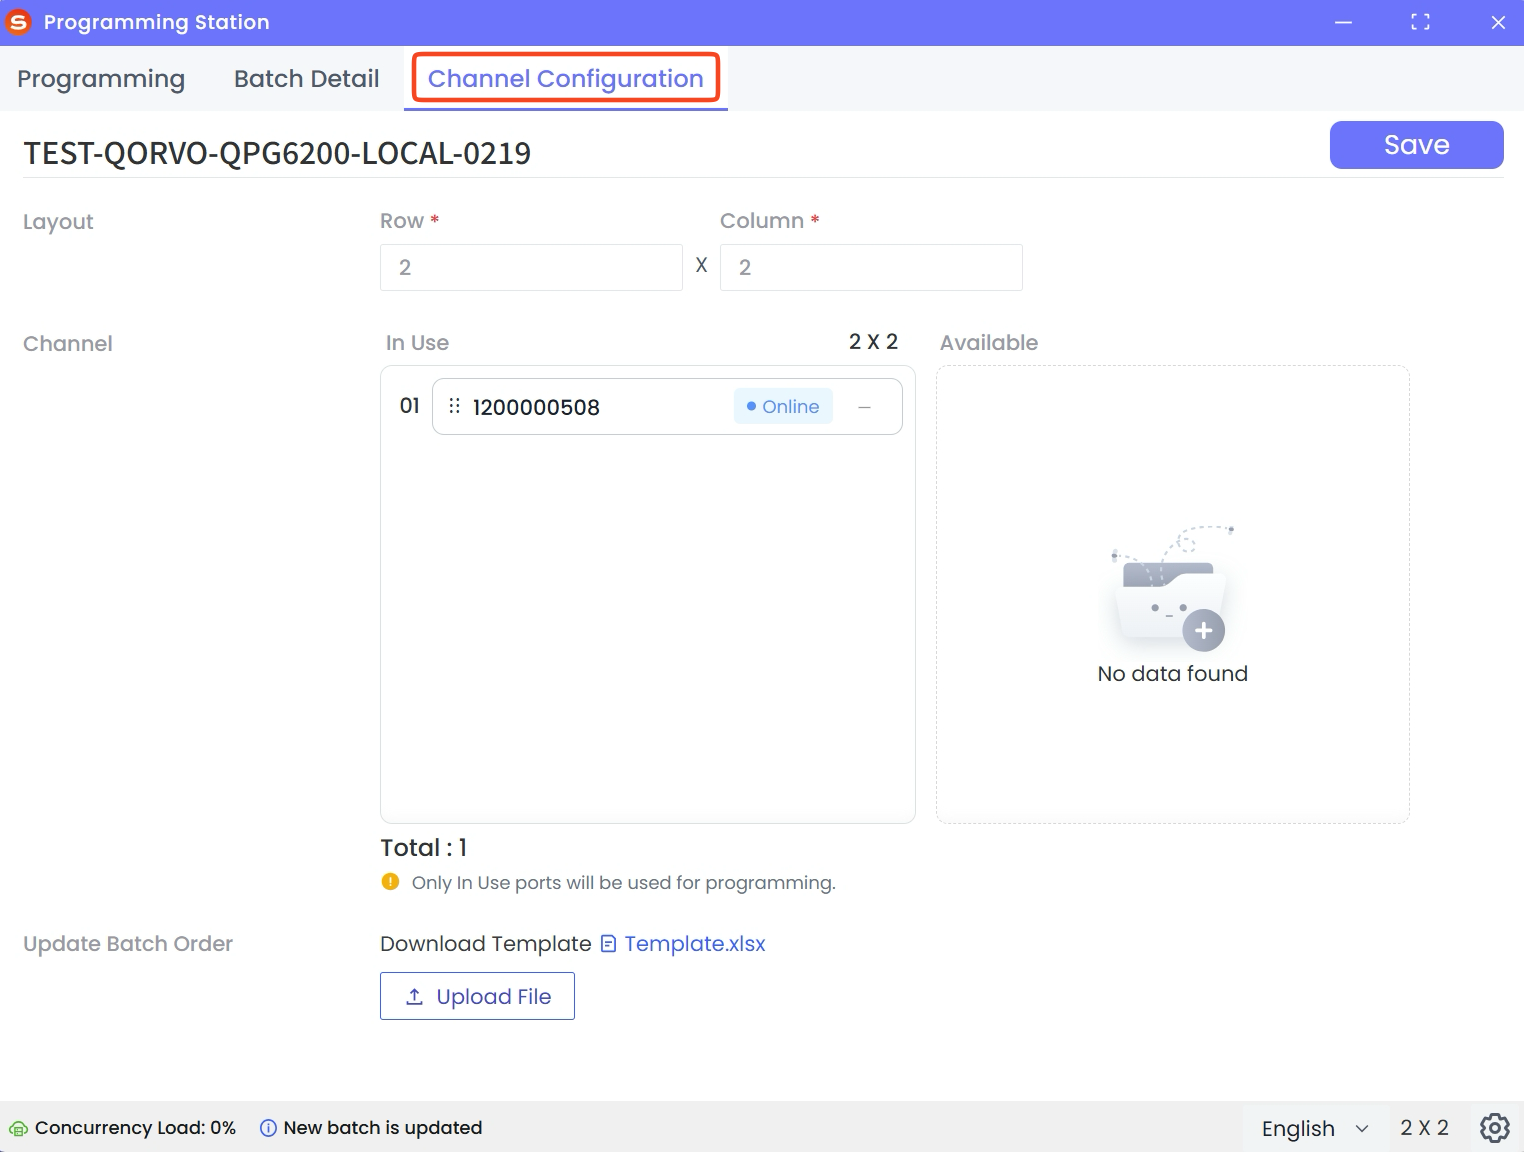
In the main window, select the Channel Configuration tab and then set the number of programmer connections in the Layout area as needed.
tipThe number of connections determines how many devices can be programmed simultaneously. The system currently supports a number of connections based on the product of rows and columns in the layout area, which must satisfy the following conditions:
- Both rows and columns must be integers.
- Rows × Columns ≤ 24.
- Neither rows nor columns may exceed 16.
- If the number of rows exceeds 4, the number of columns can only be 1 or 2.
-
In the main window of the Programming Station client, click Start to execute device programming.
-
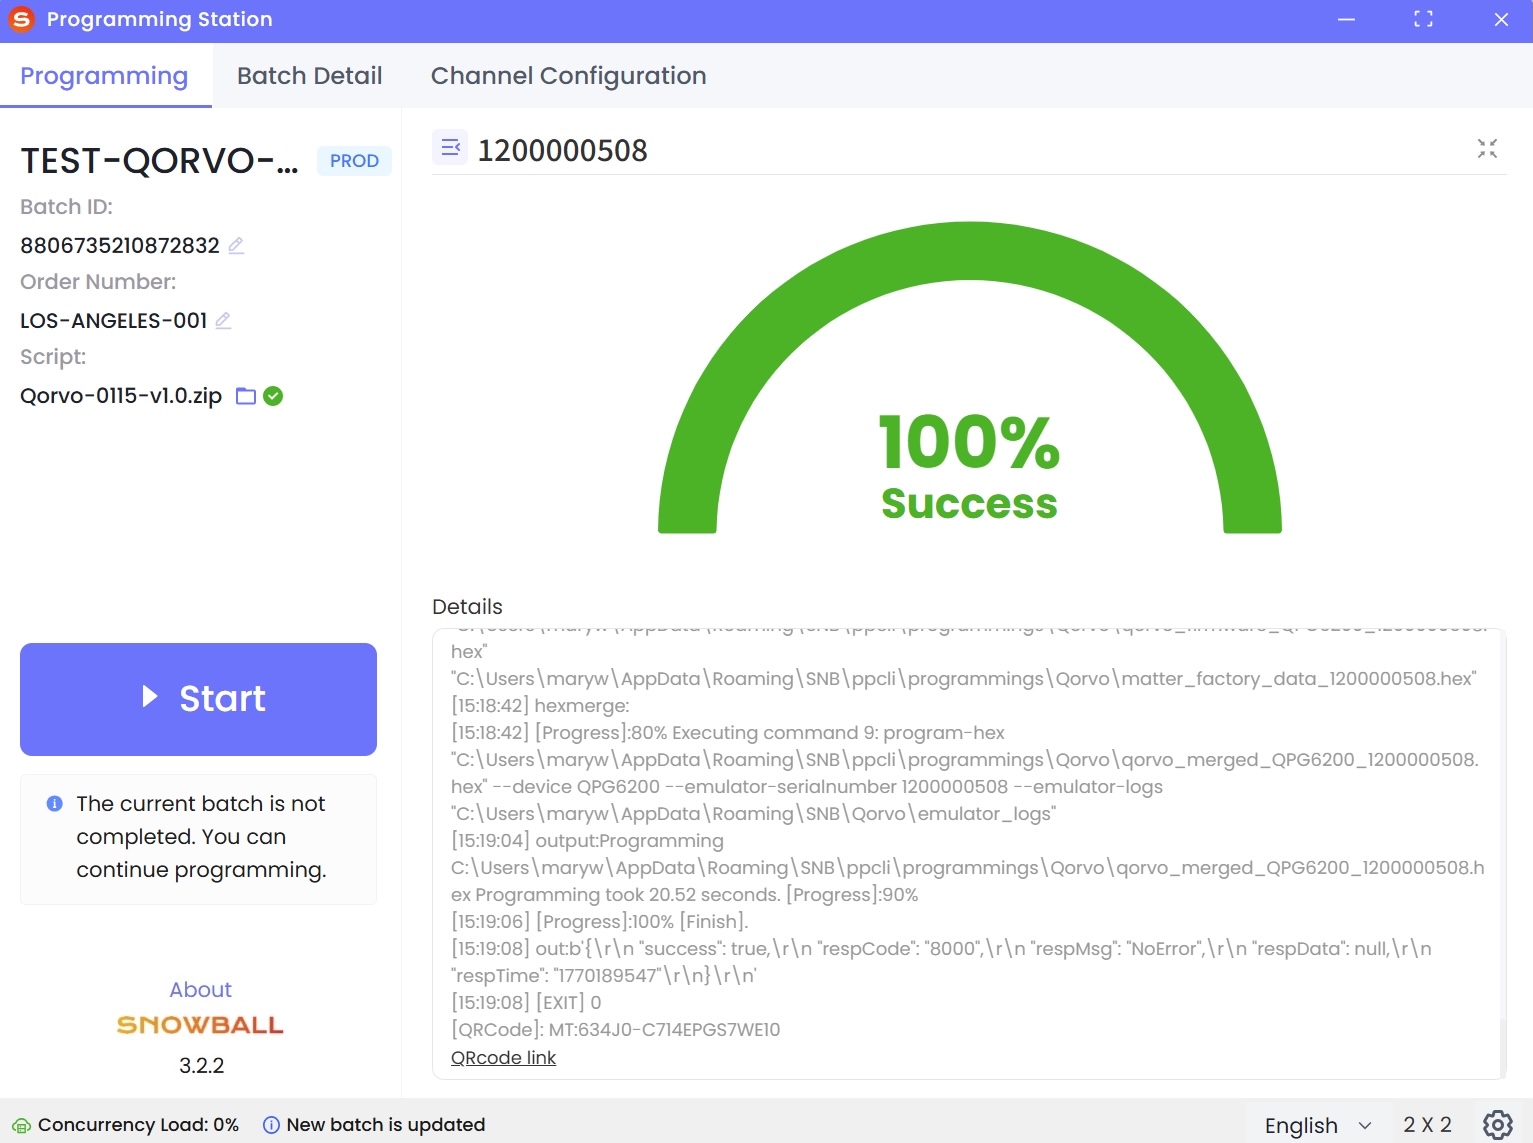
After programming is completed, click the corresponding port to check the device programming details.
tipYou can also check the device profile and related log information in OnBoard™ IoT Security (OBIS).

 Download User Manual