How to manage SE Profiles in OnBoard™ IoT Security
This article will guide you through the following operations in OnBoard™ IoT Security (OBIS):
- Manage SE Profile permissions
- Clone an SE Profile
- Edit basic information
- Edit SE Profile content
- Delete SE Profile content
- Invite AMSD members
- Lock or unlock an SE Profile
- Archive an SE Profile
- Revoke an SE Profile
- Destroy an SE Profile
Prerequisites
Before getting started, please ensure that:
- You have OBIS role permissions as a System Manager or SE Resource Manager.
- You have permissions for the corresponding SE Profile.
Manage SE Profile permissions
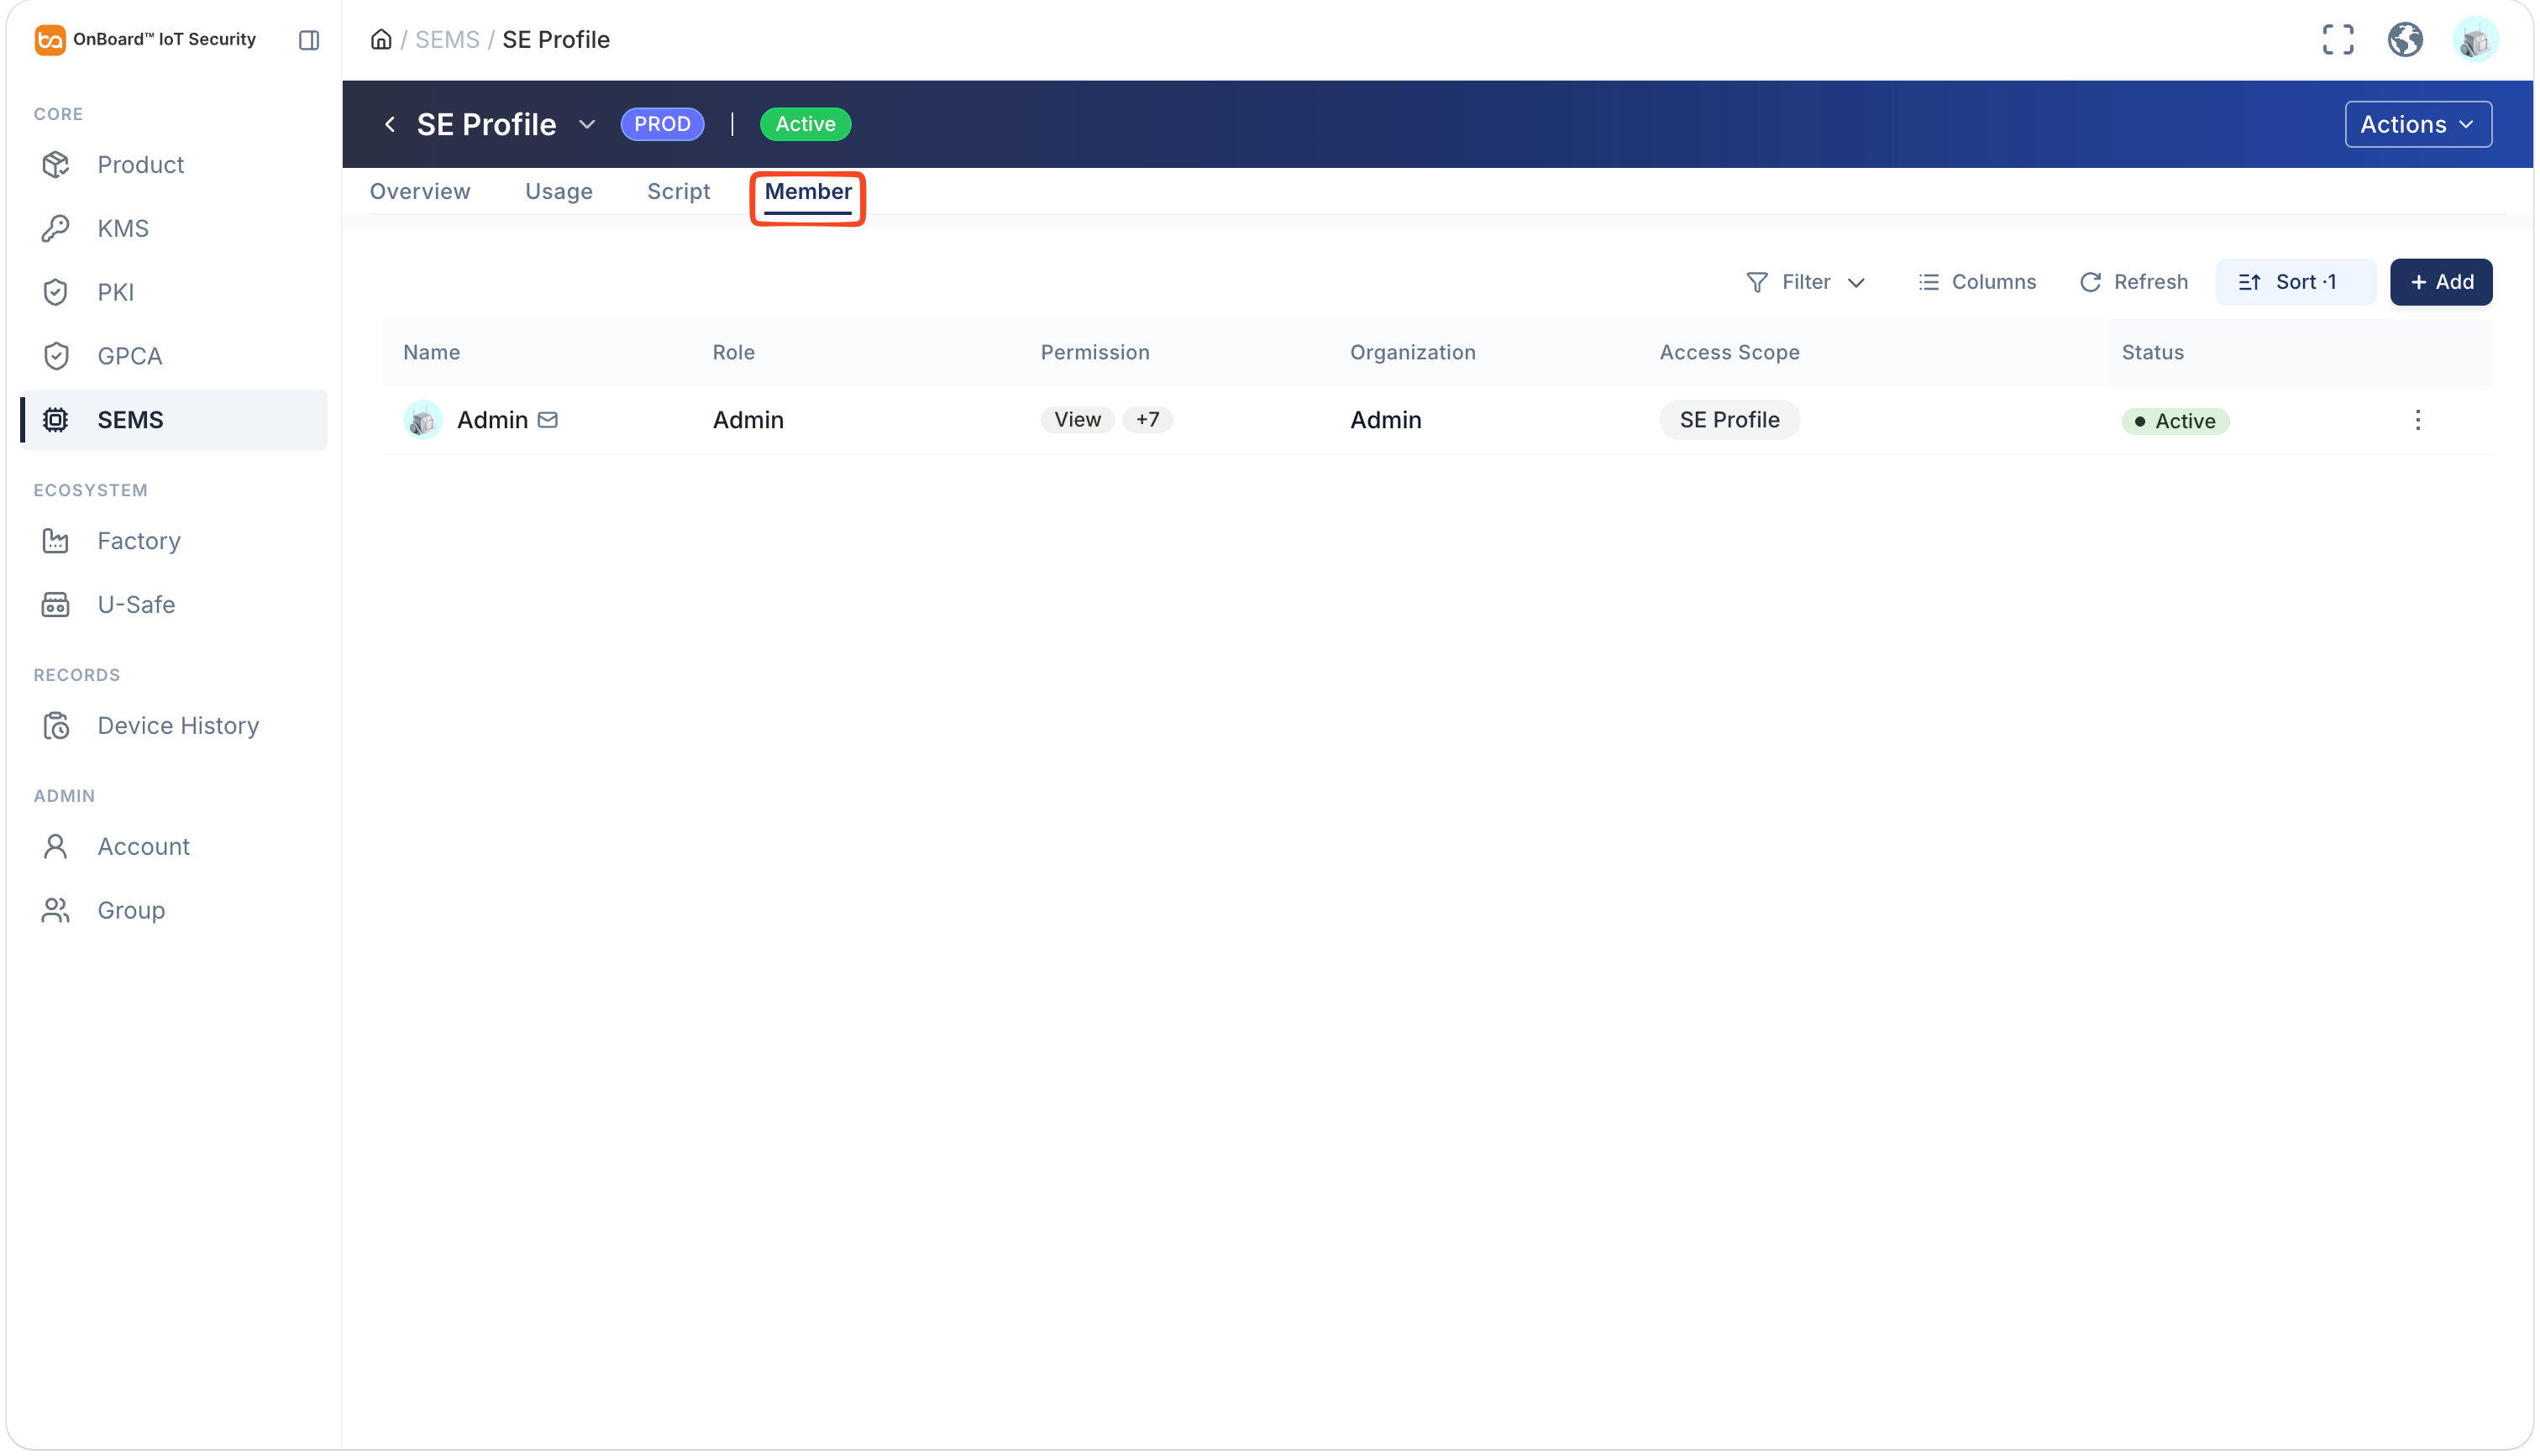
By default, the SE Profile creator is set as the Admin. To change the Admin, click the Options  icon for the Admin and select Transfer Admin on the Member tab, then choose the new Admin and click Confirm.
You can assign different operational permissions for the SE Profile to different members. The descriptions of these permissions are as follows:
| Permissions | Description |
|---|---|
| View | View SE Profile details (read-only). |
| Add Member | Add members to this SE Profile and assign them permissions that do not exceed your own permissions. |
| Edit | Allow configuring unpublished SE Profiles. |
| Publish | Publish an SE Profile. |
| Manage Scripts | Allow generating and deleting scripts. Generating scripts also requires Use permission for the OCE chain certificates referenced in the SCP11c configuration. |
| Grant | Allow an SE Profile to be referenced within product configurations. |
| Lock / Revoke / Archive | Allow locking, revoking, and archiving operations to be performed on an SE Profile. |
| Destroy | Destroy an SE Profile. |
You can adjust and set user permissions for SE Profiles by following these steps:
-
Sign in to OBIS.
-
In the Core section of the left menu, click SEMS, and then select the corresponding SE Profile.
-
On the SE Profile page, you can manage the user permissions for the SE Profile on the Member tab.
Clone an SE Profile
When cloning an SE Profile, the configuration content for which you have permissions will be copied, but membership associations will not be included. When cloning across environments, cryptographic references (such as key references or GPCA certificates) will be cleared. These references must be reconfigured in the target environment before the SE Profile can be published.
-
Sign in to OBIS.
-
In the Core section of the left menu, click SEMS, and then click the Options
icon for the corresponding SE Profile and select Clone.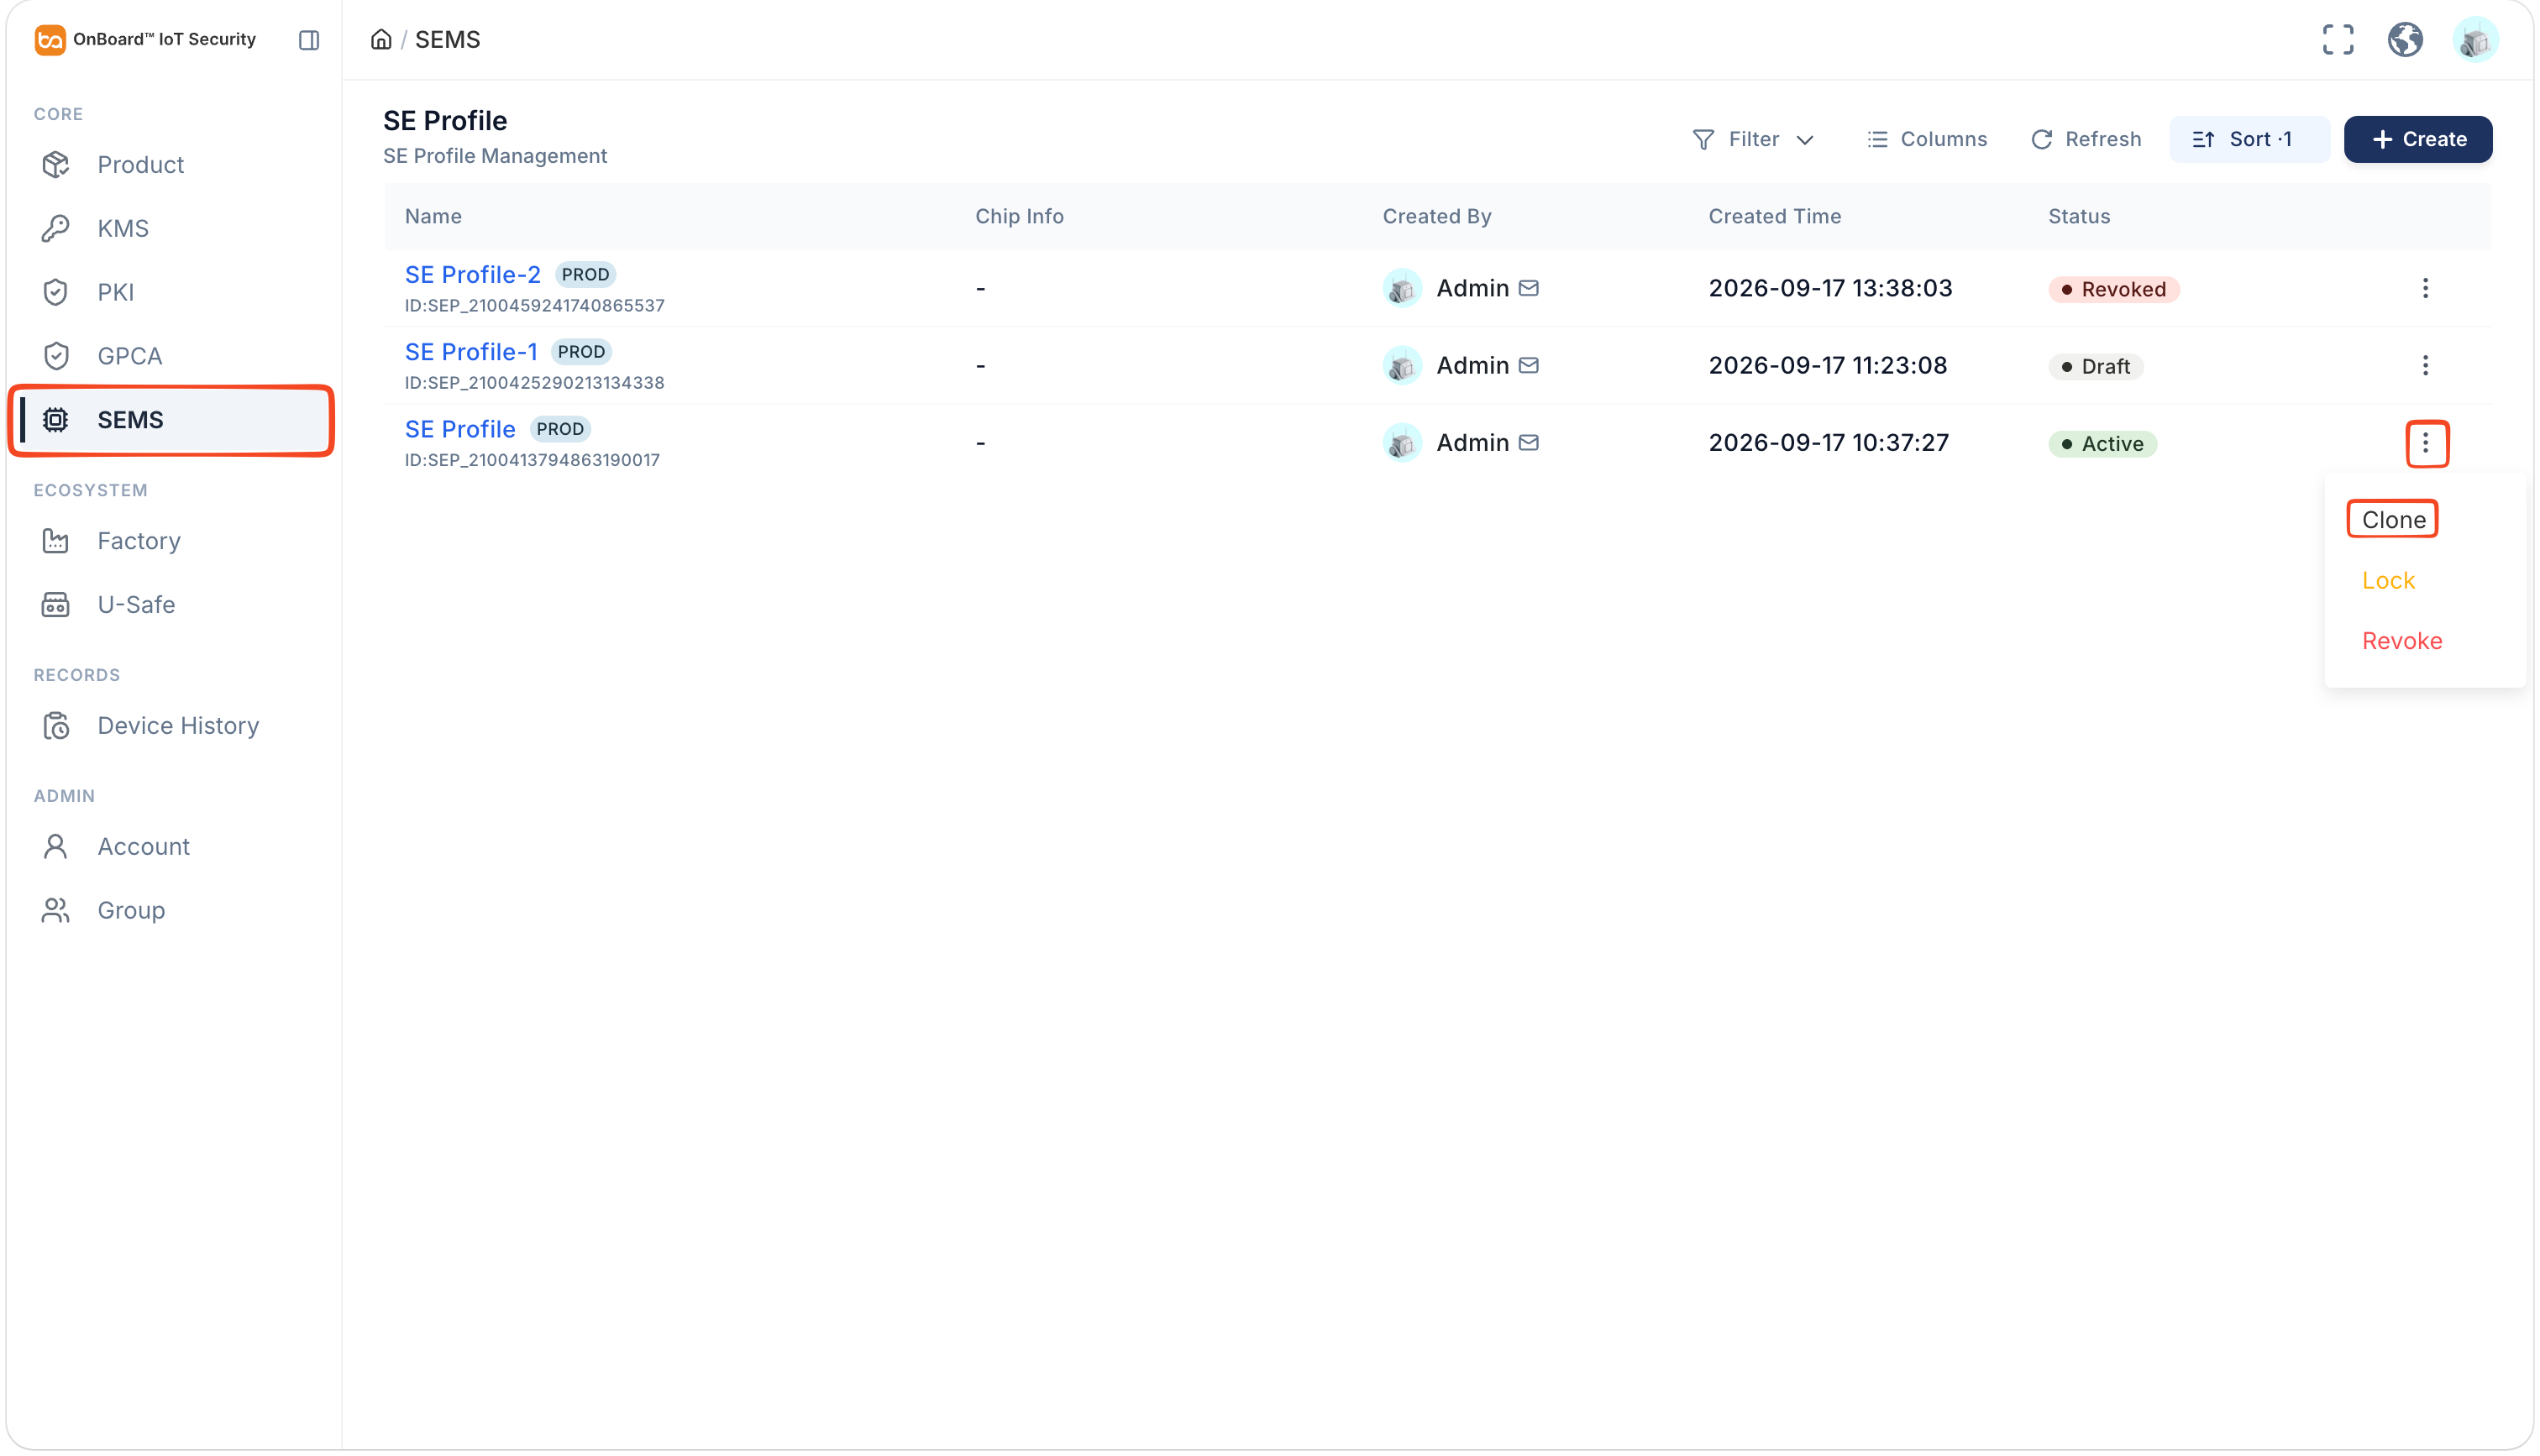
-
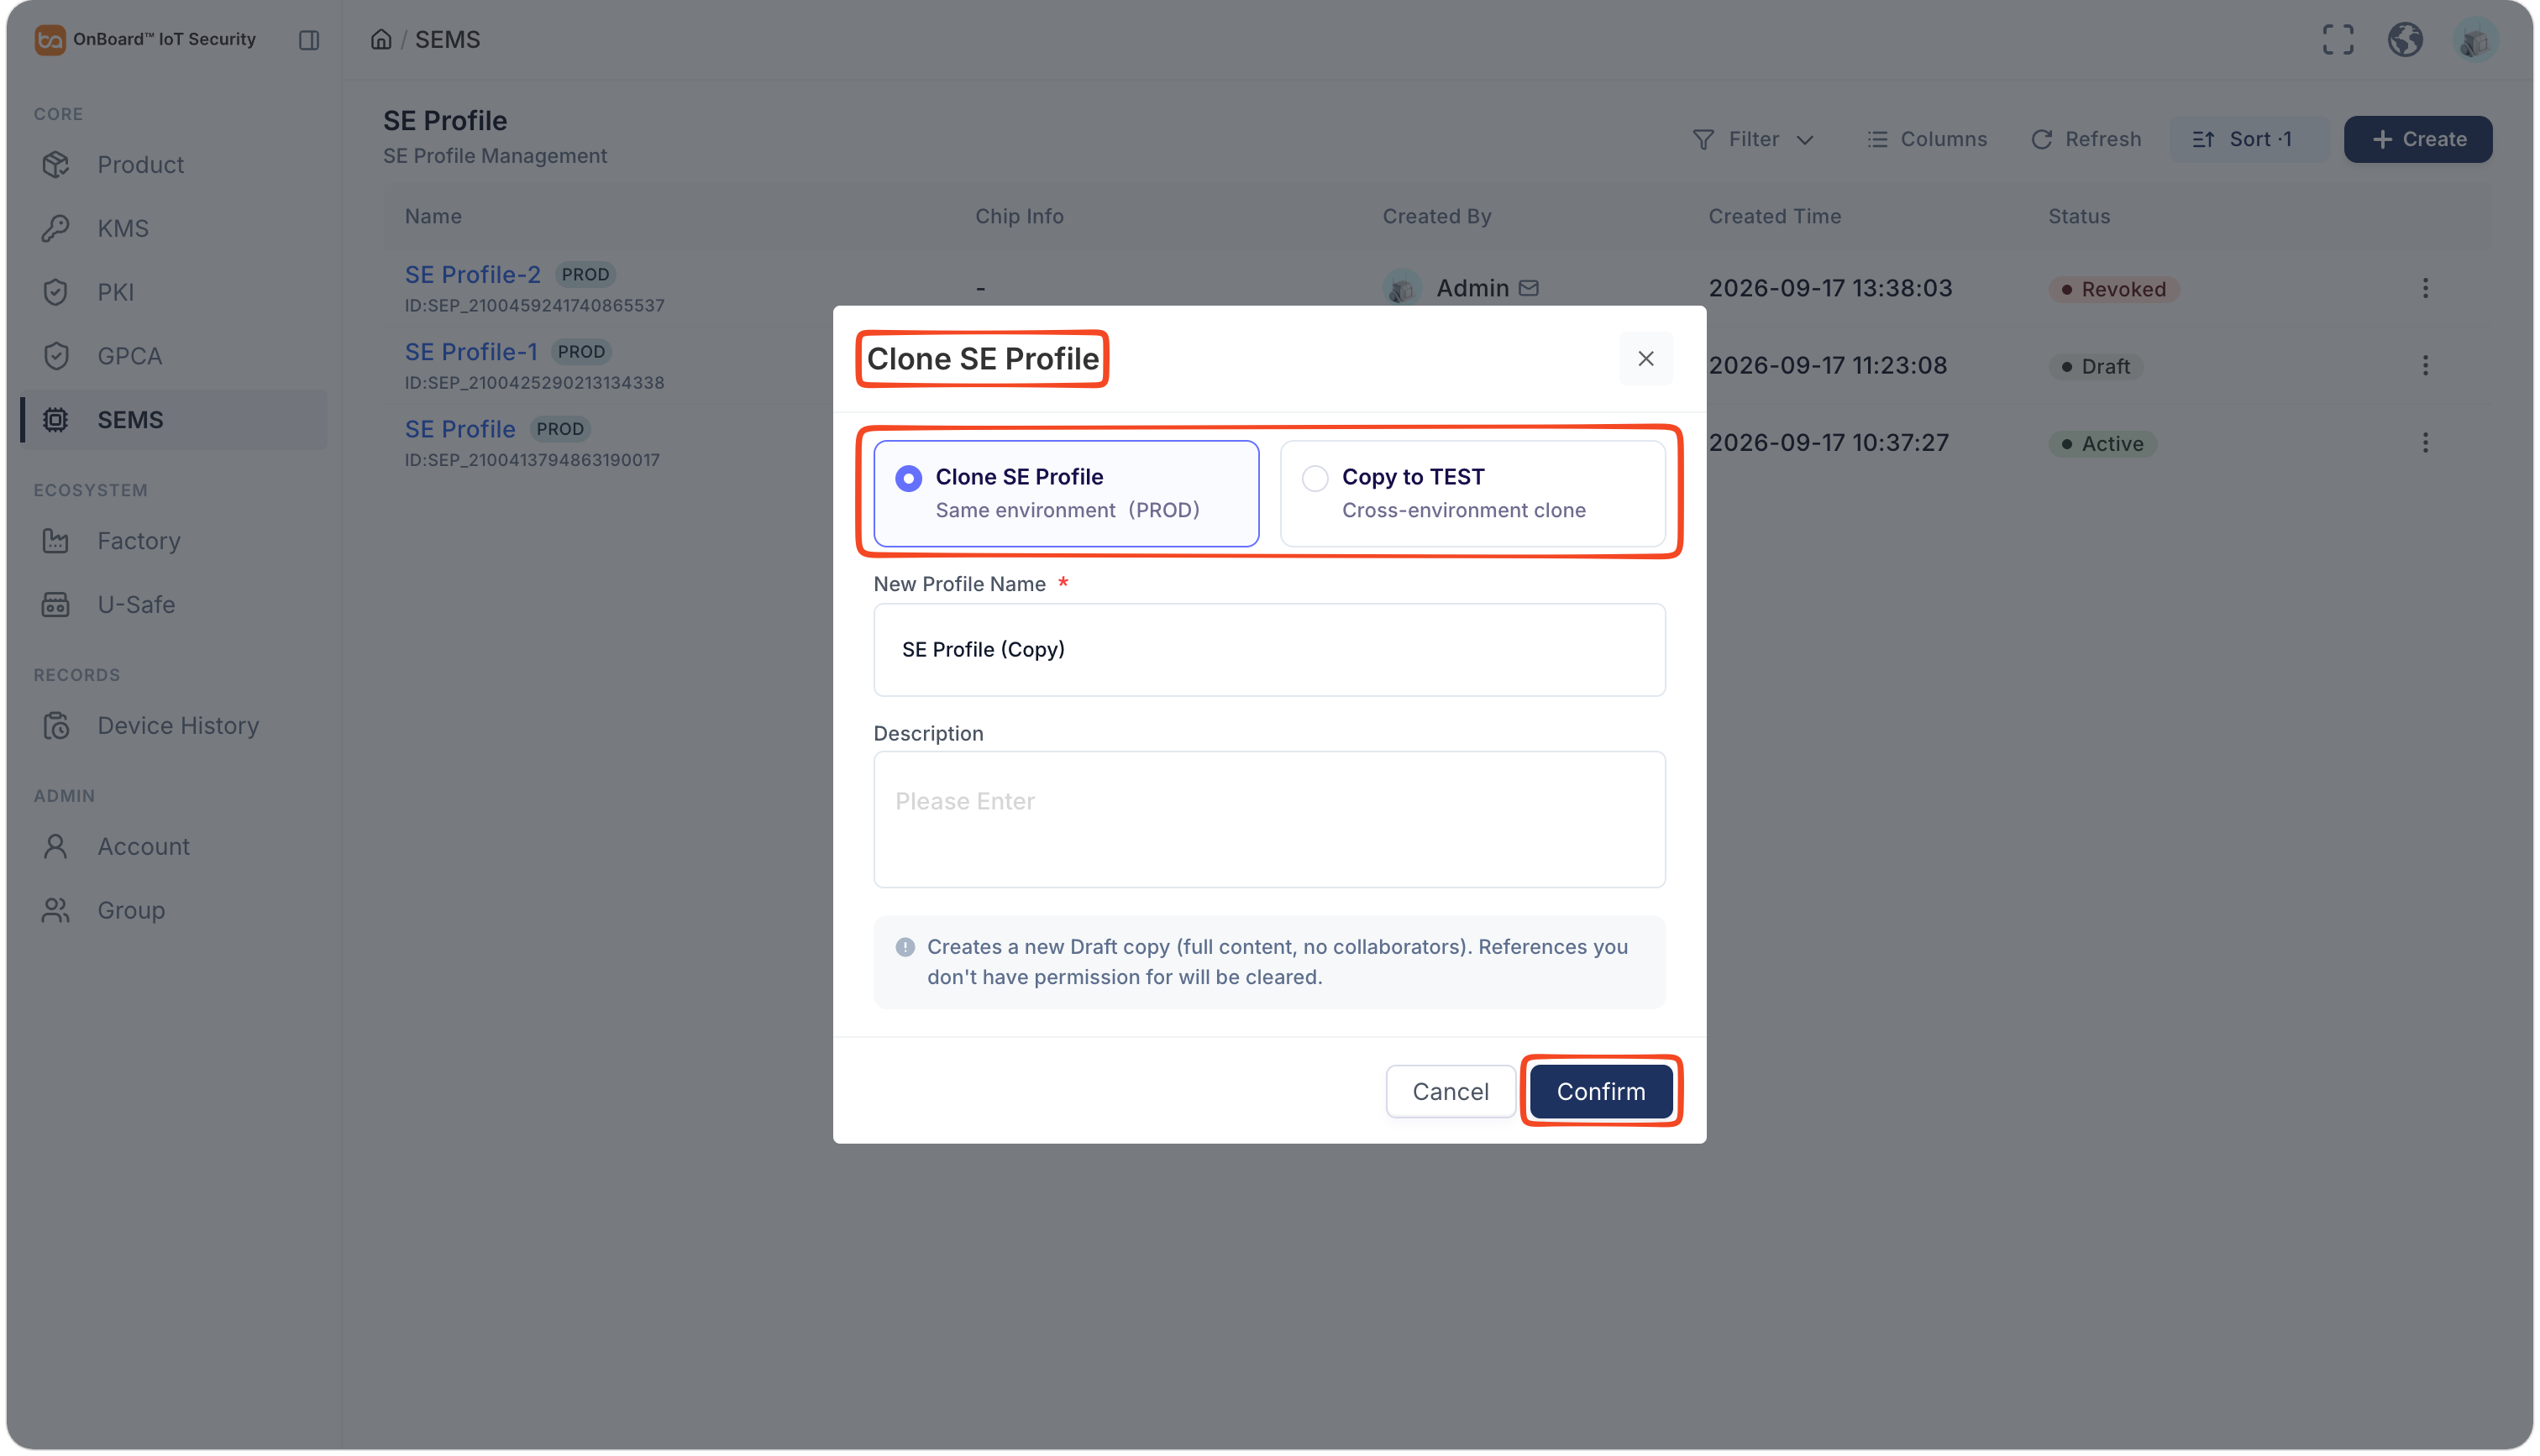
In the Clone SE Profile window, select the option to clone the SE Profile or copy it to another environment, then enter a new name and description.
-
After verifying that the information is correct, click Confirm to clone the SE Profile.
Edit basic information
You can configure the SE Profile basic information only when it is in the Draft state.
-
Sign in to OBIS.
-
In the Core section of the left menu, click SEMS, and then select the corresponding SE Profile.
-
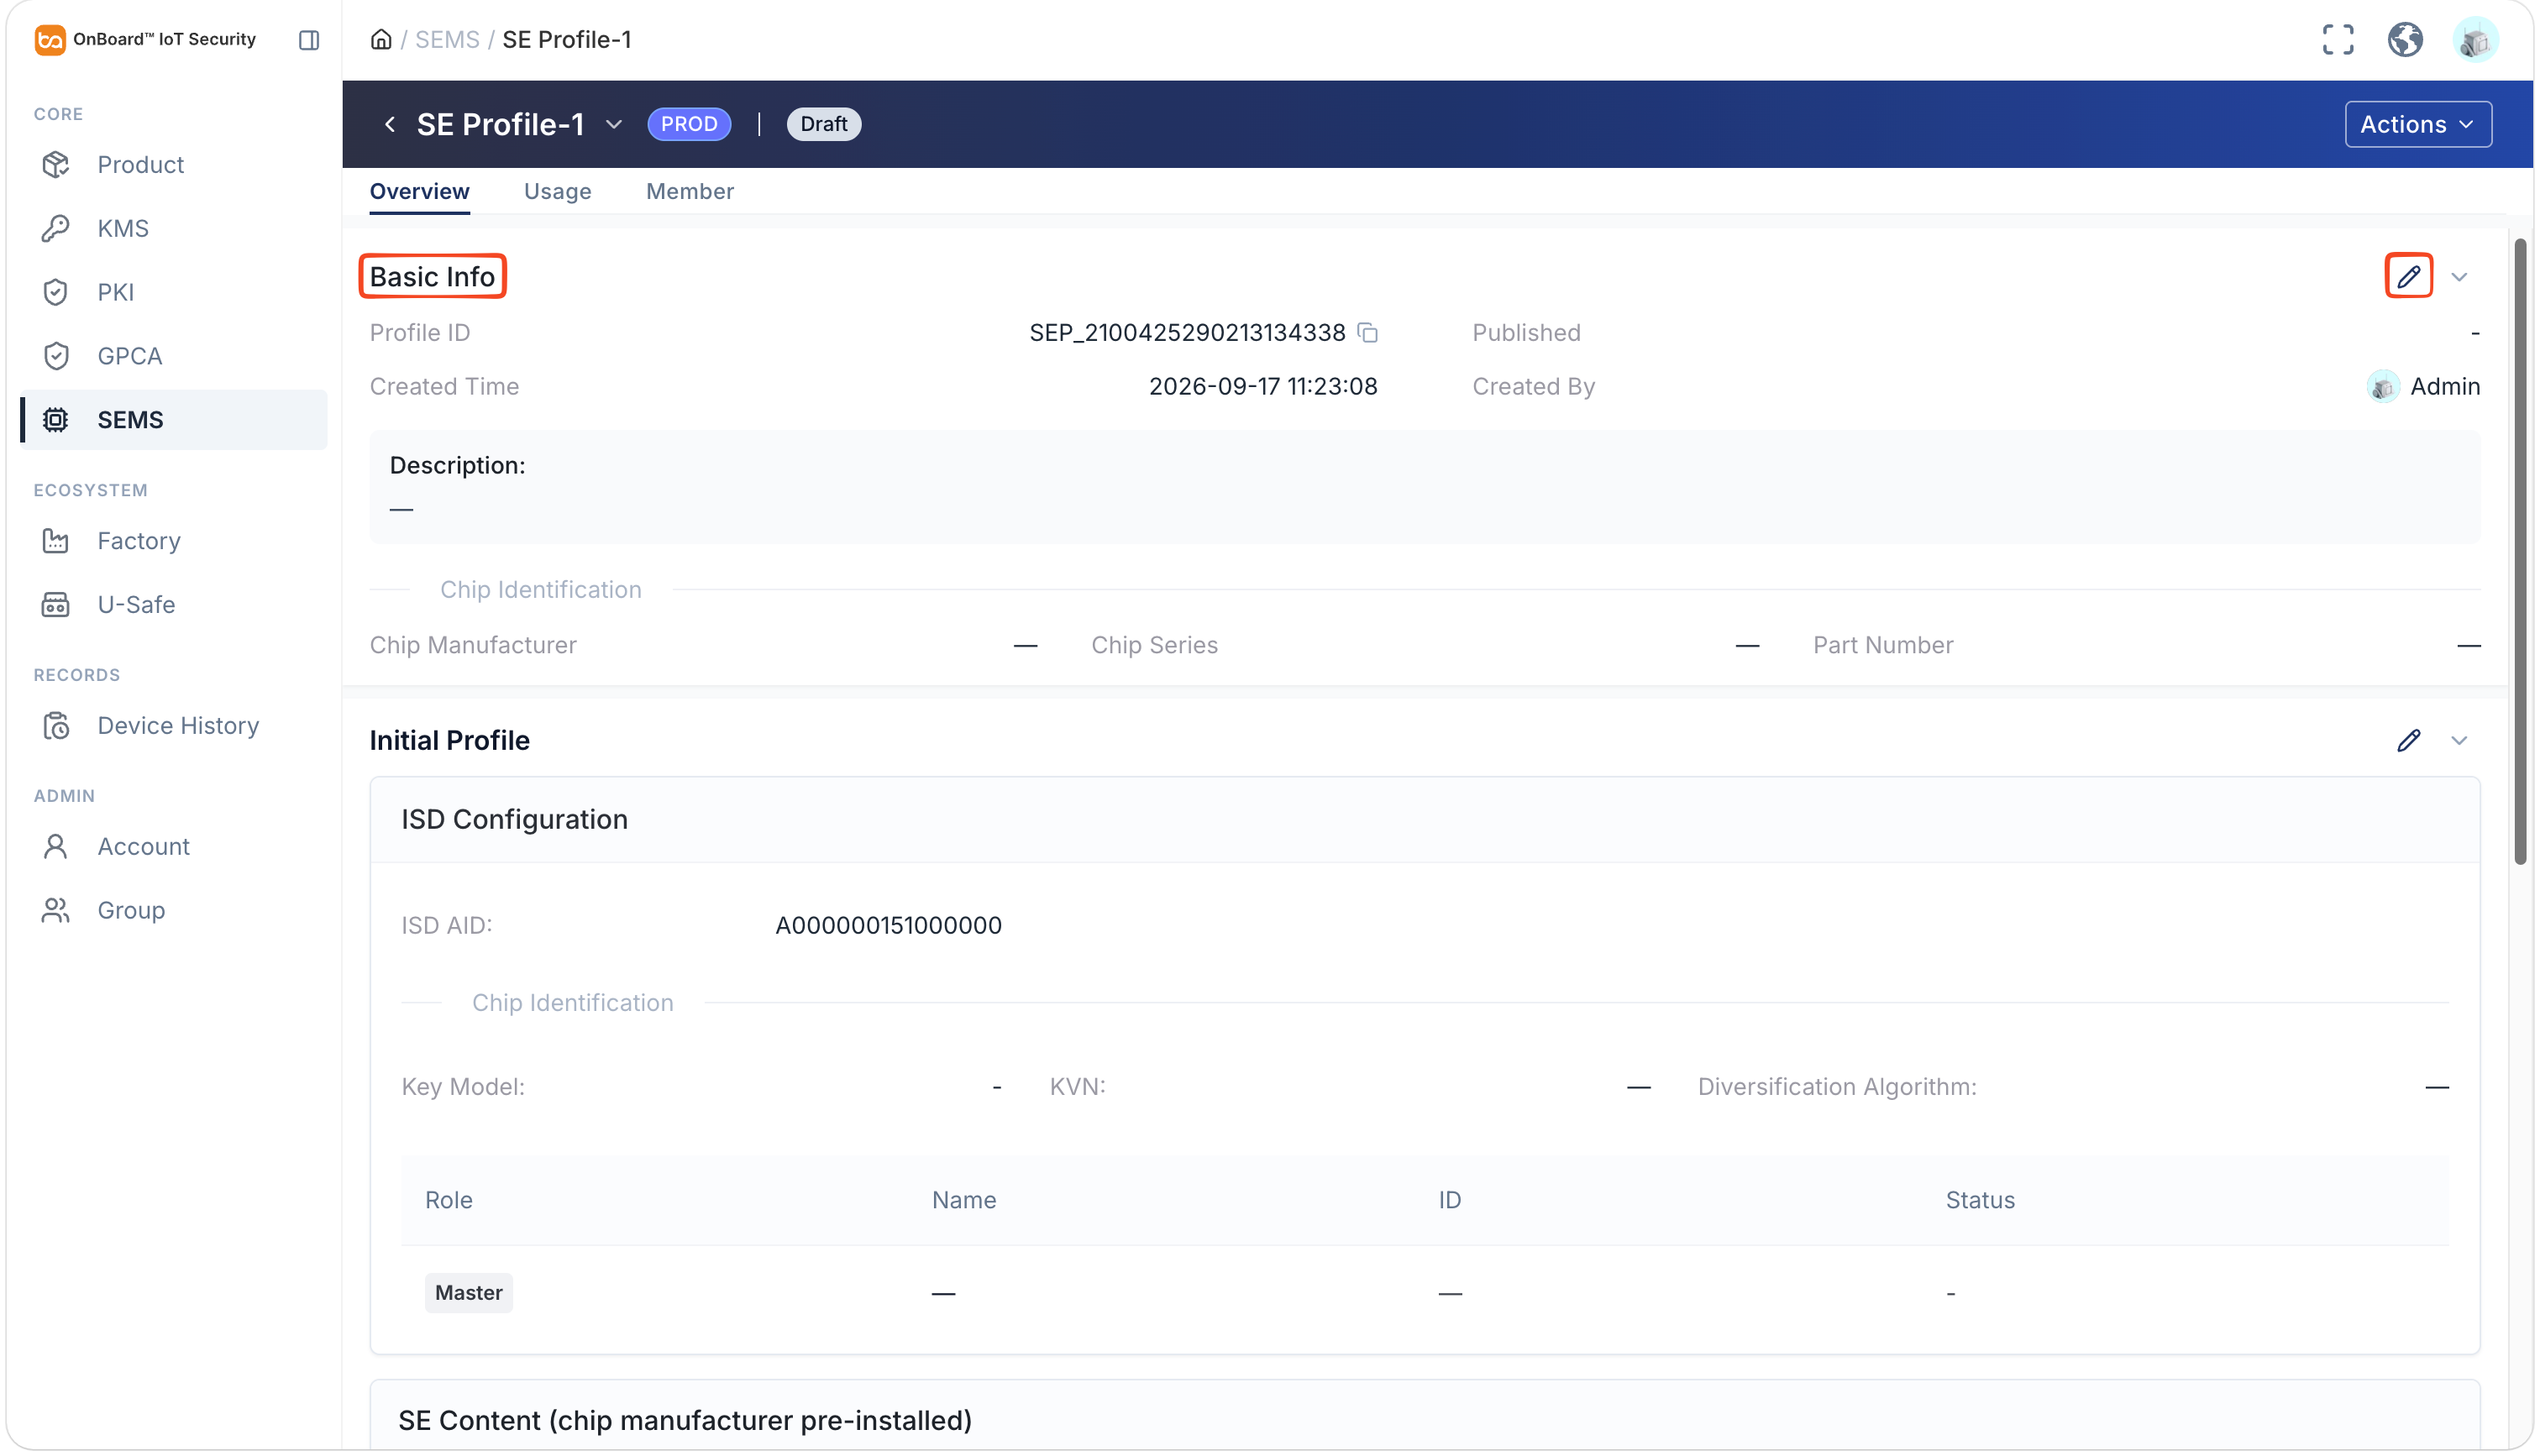
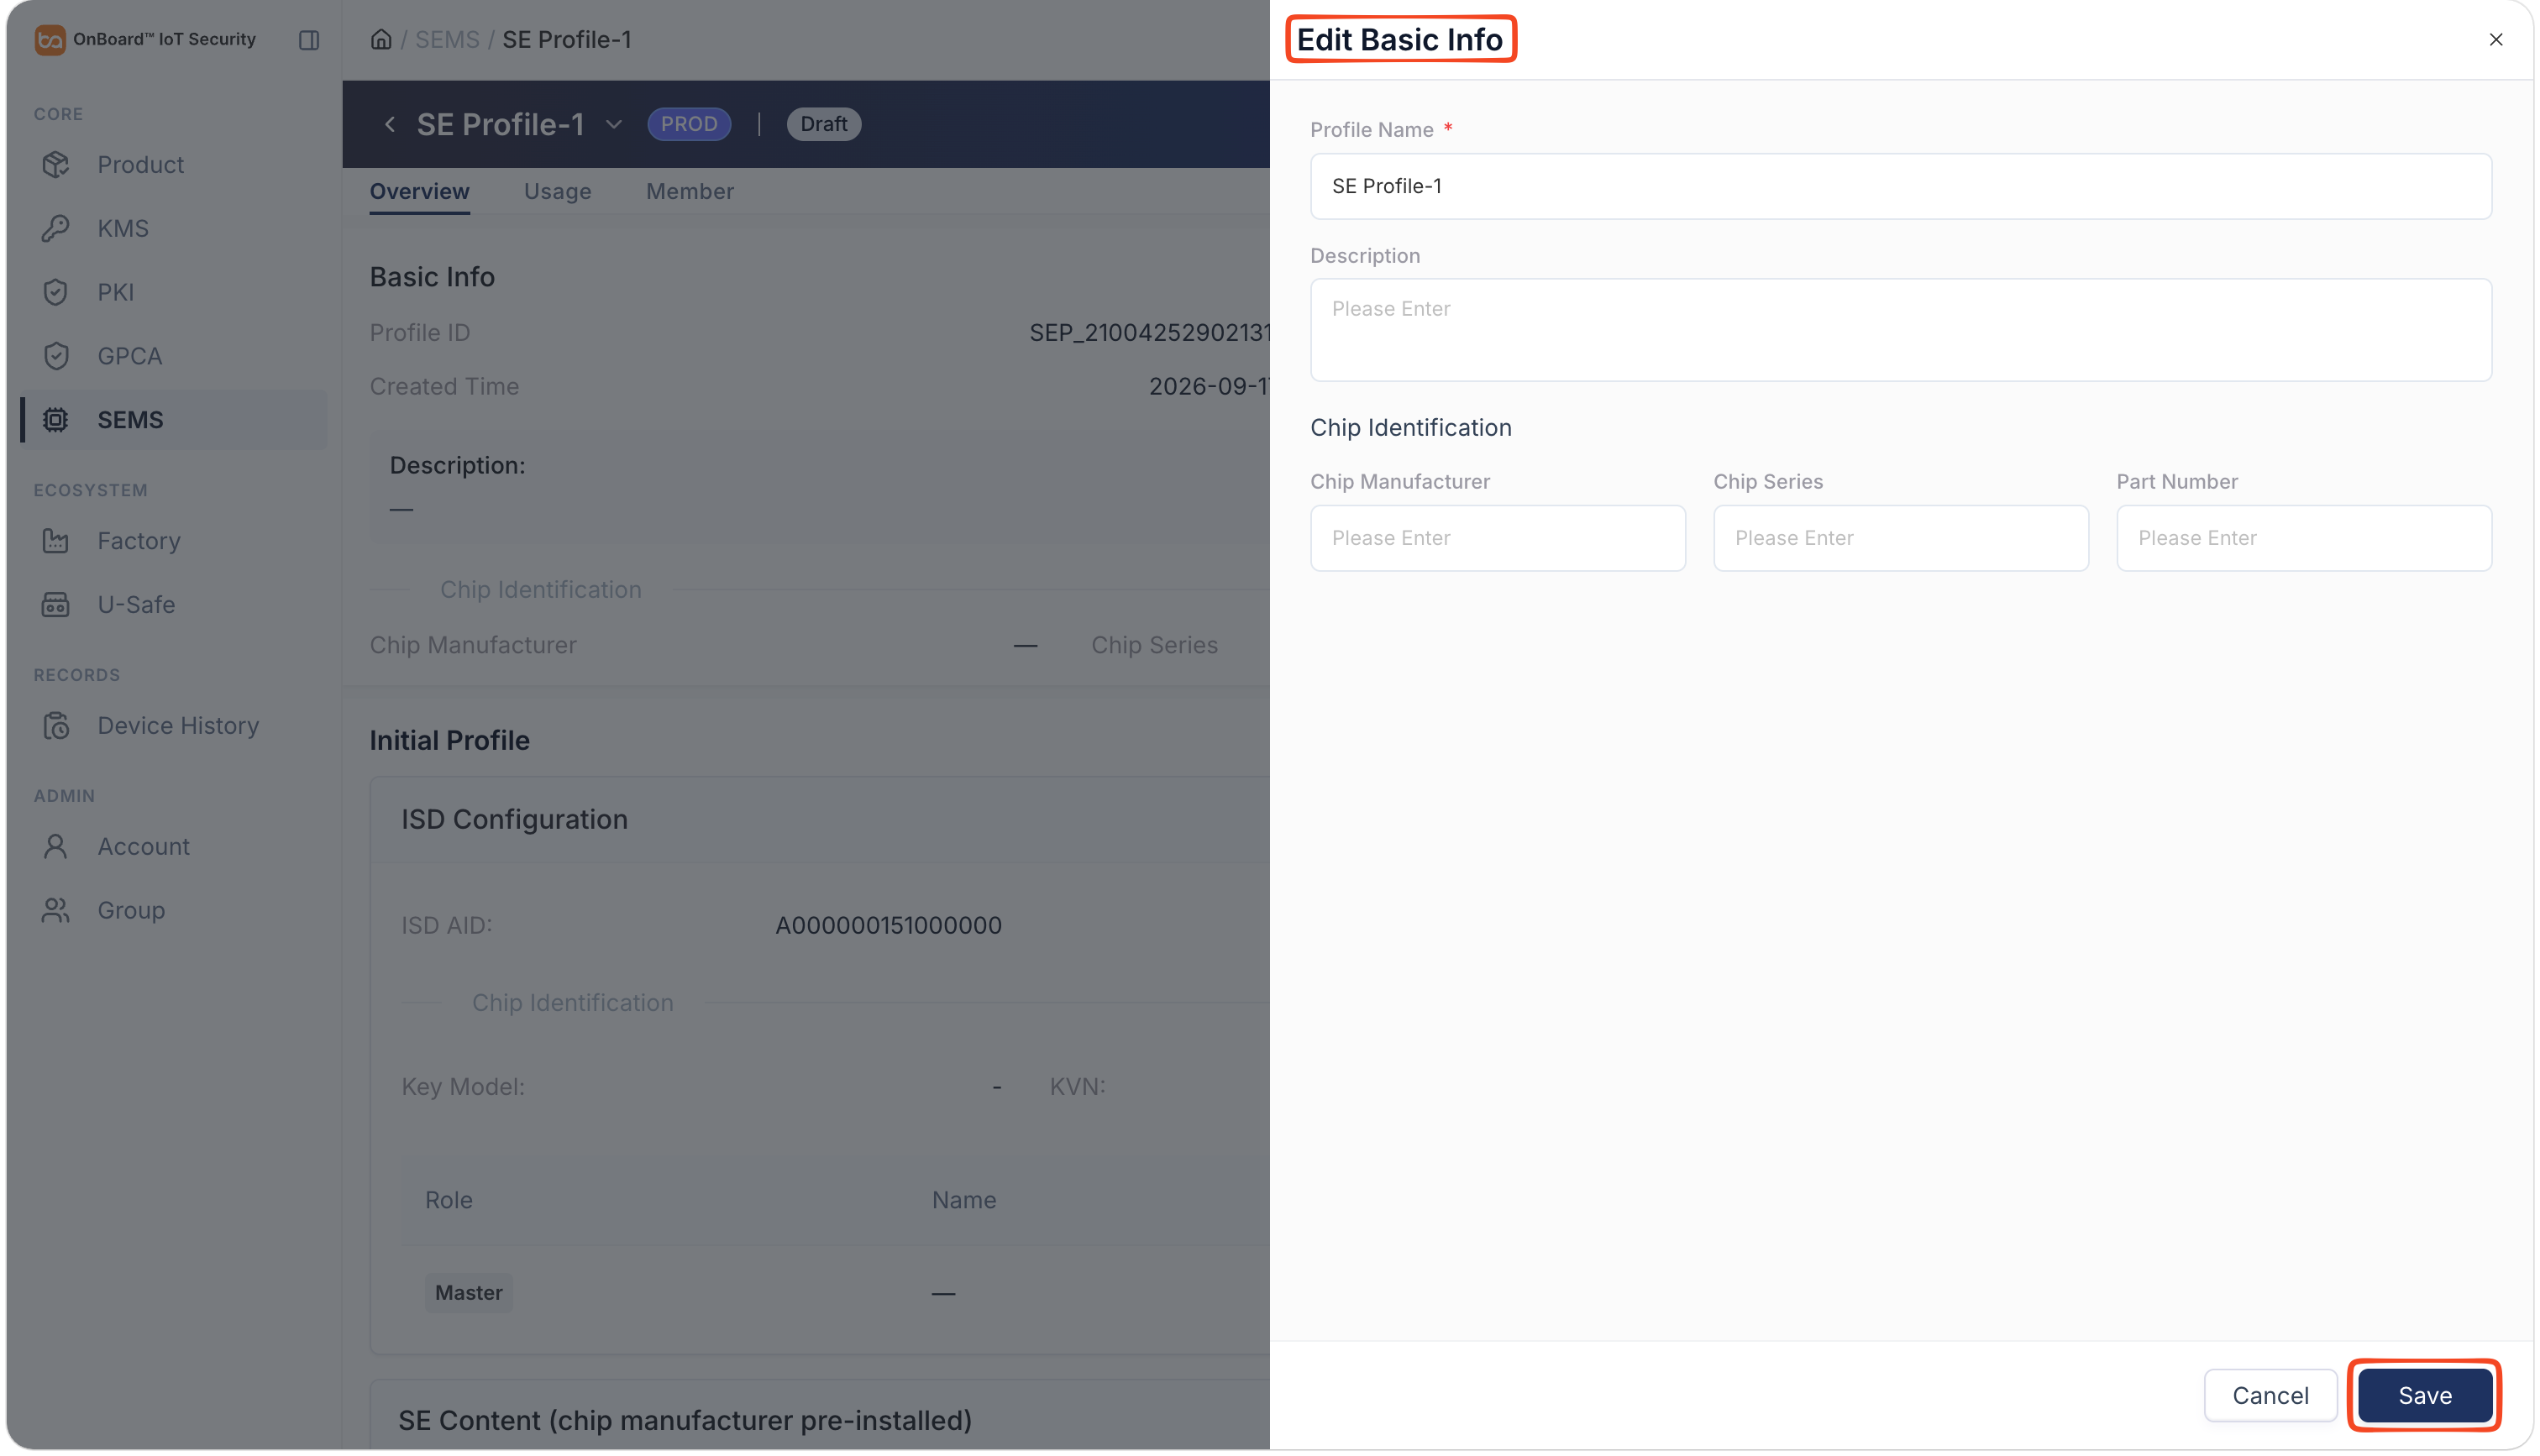
On the SE Profile page, click the Edit
 icon in the Basic Info section.
-
In the Edit Basic Info panel, update the SE Profile name and description, then enter the corresponding chip Identification (chip manufacturer, series, and part number).
-
After verifying that the information is correct, click Save.
Edit SE Profile content
You can configure the SE Profile content only when it is in the Draft state.
-
Sign in to OBIS.
-
In the Core section of the left menu, click SEMS, and then select the corresponding SE Profile.
-
On the SE Profile page, click the Options
icon for the corresponding node (ISD, AMSD, SSD, CAP, or Instance) and select Edit.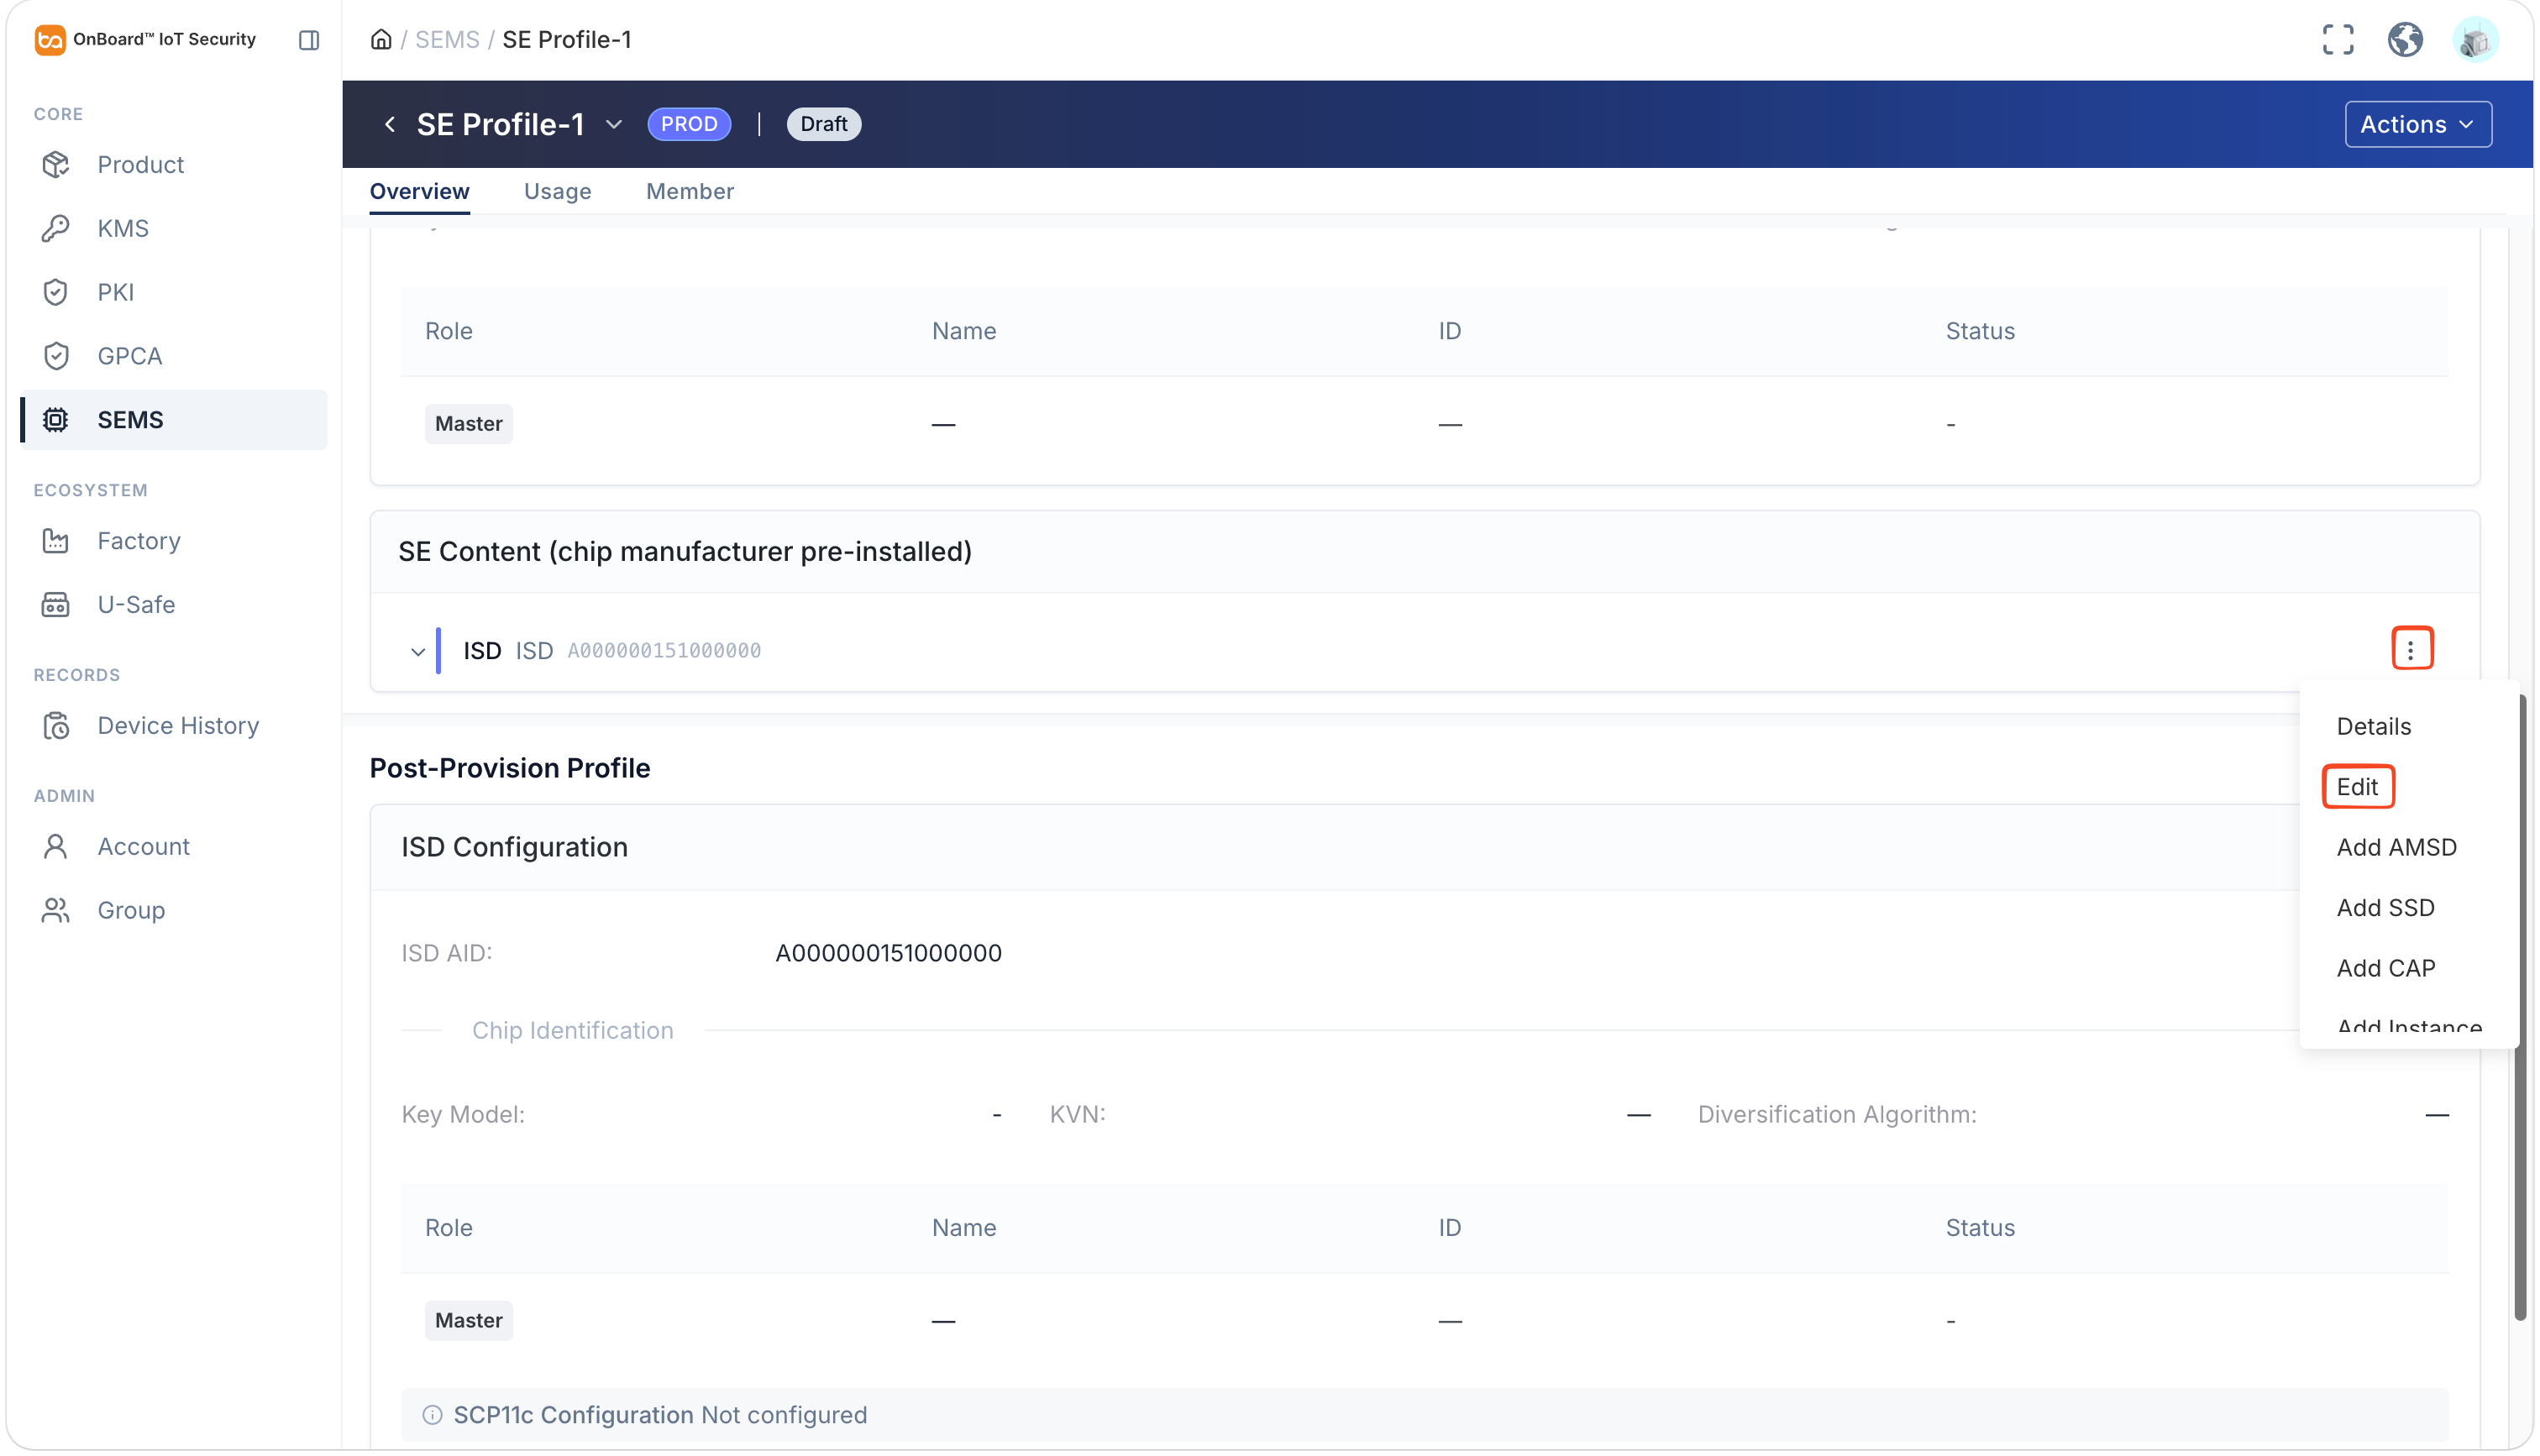
-
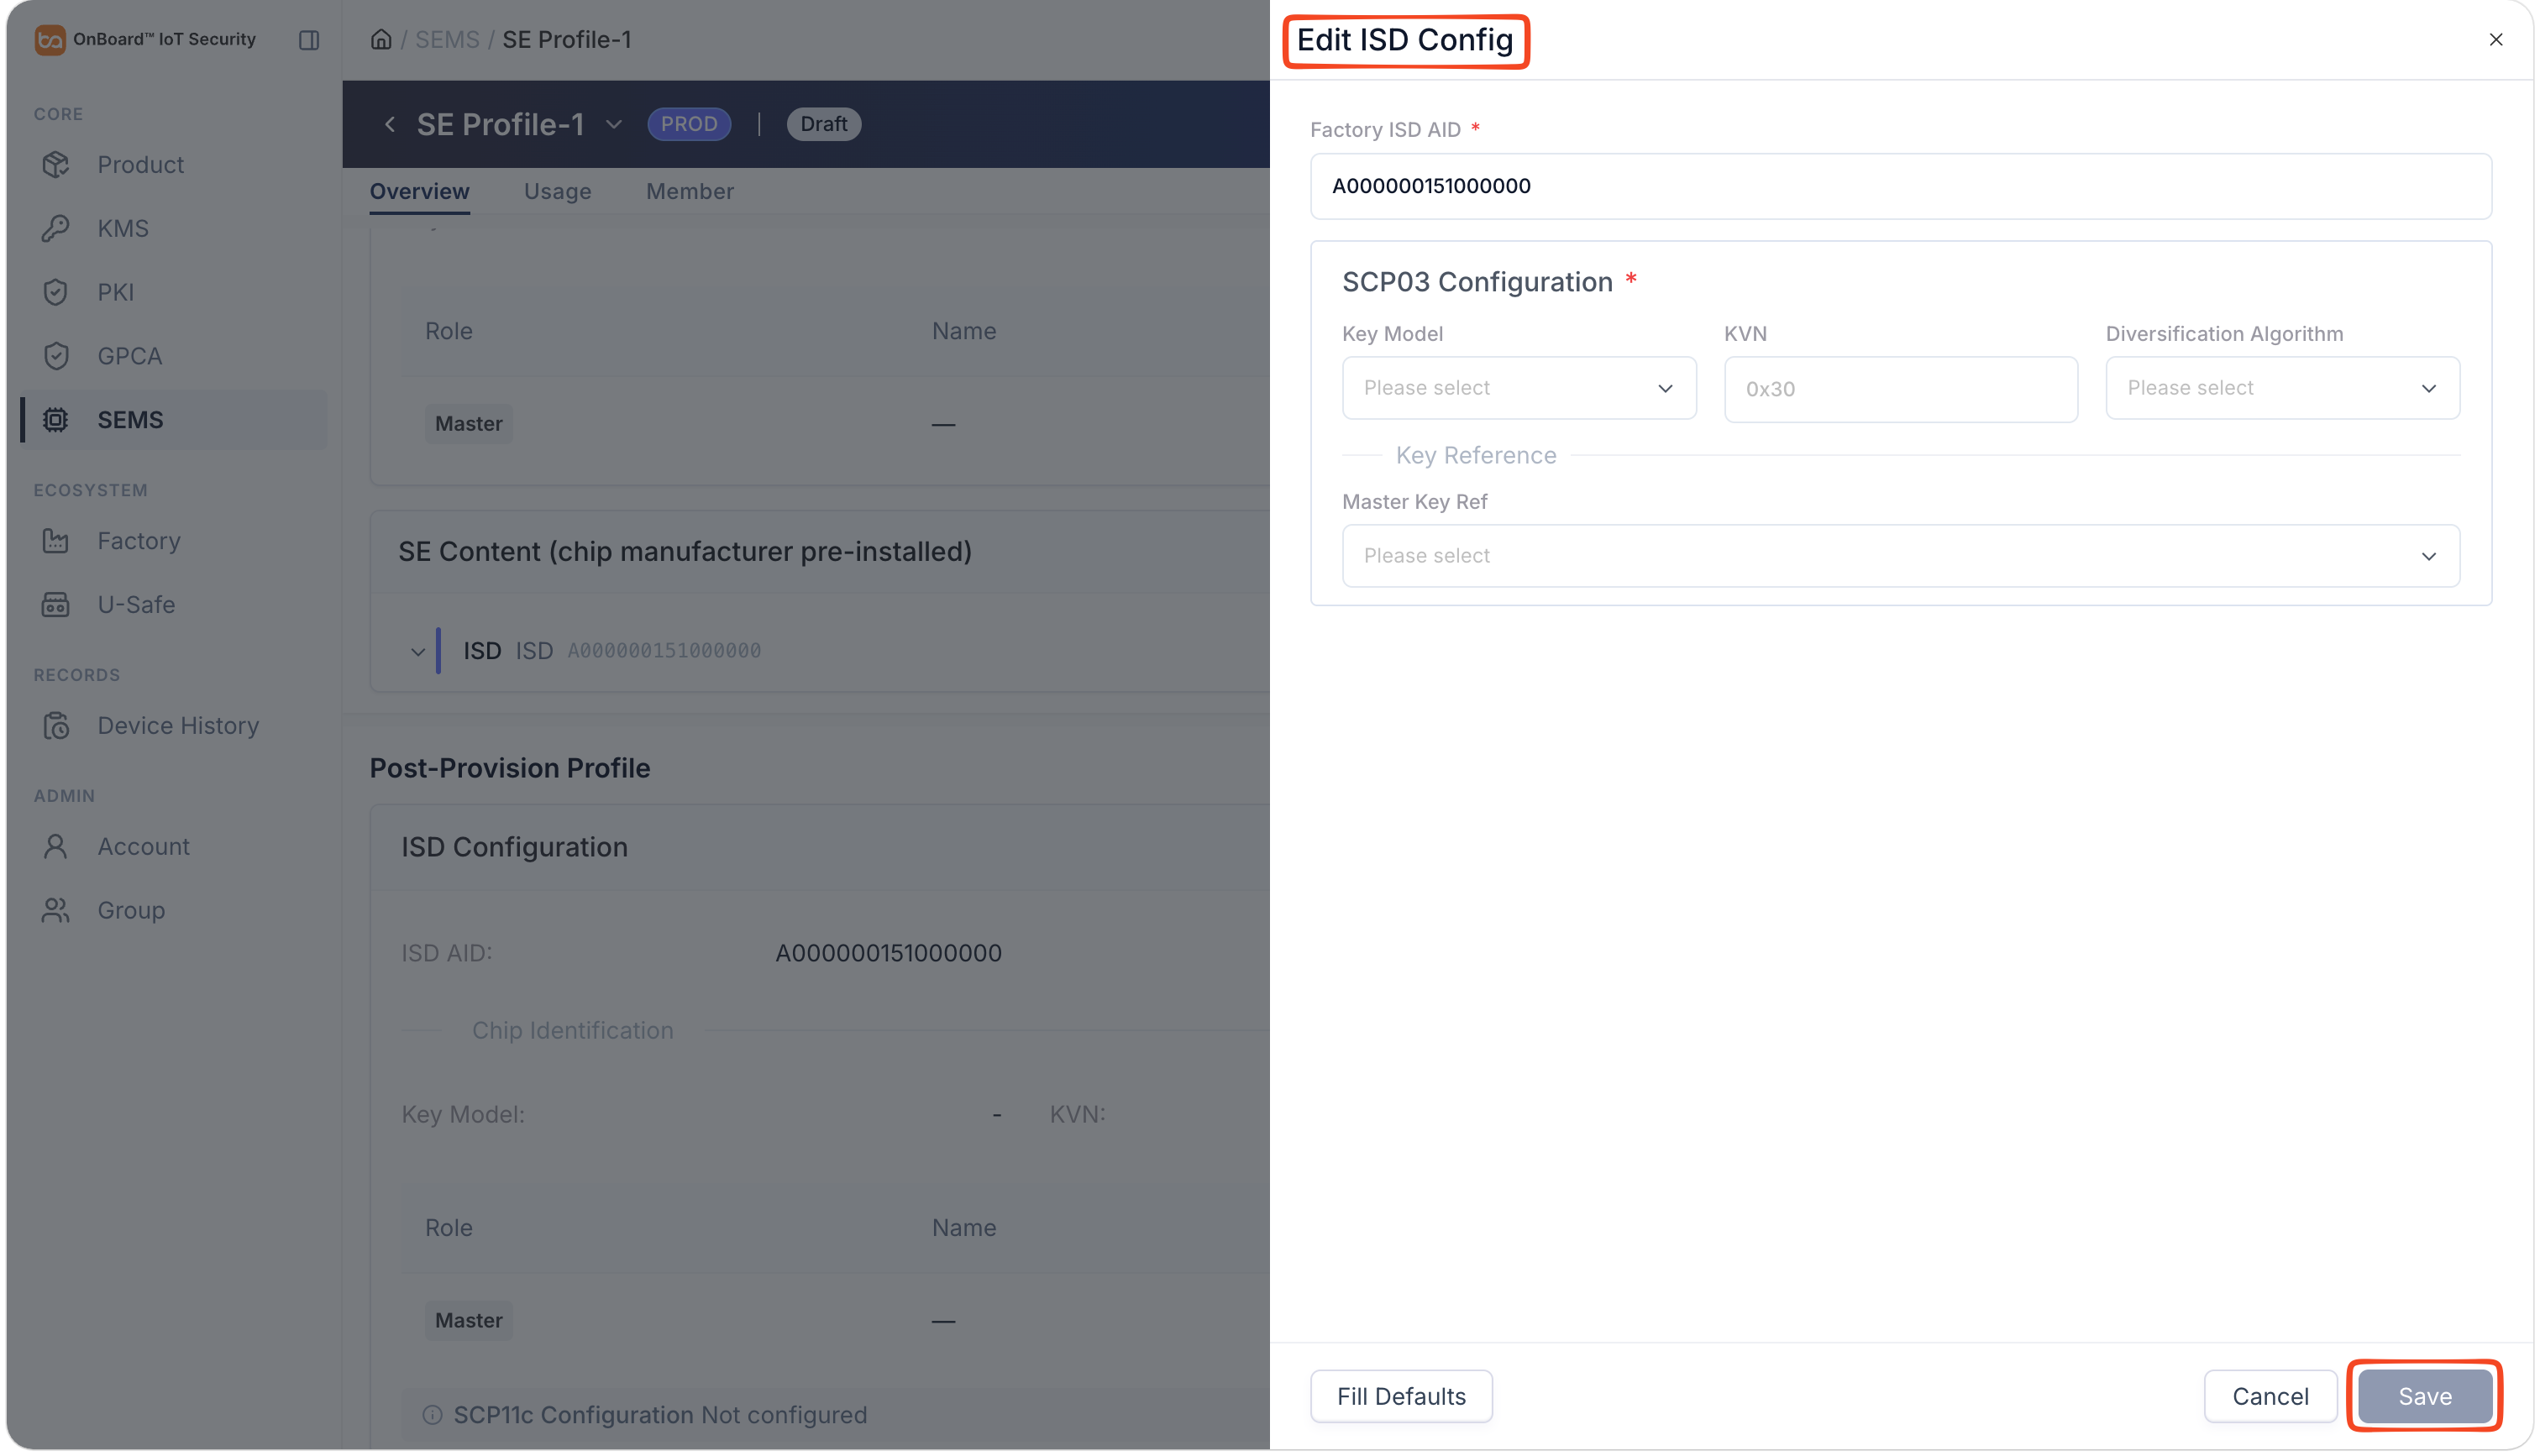
In the editing panel, enter and select the relevant information.
-
After verifying that the information is correct, click Save.
Delete SE Profile content
You can delete SE Profile content only when the SE Profile is in the Draft state.
-
Sign in to OBIS.
-
In the Core section of the left menu, click SEMS, and then select the corresponding SE Profile.
-
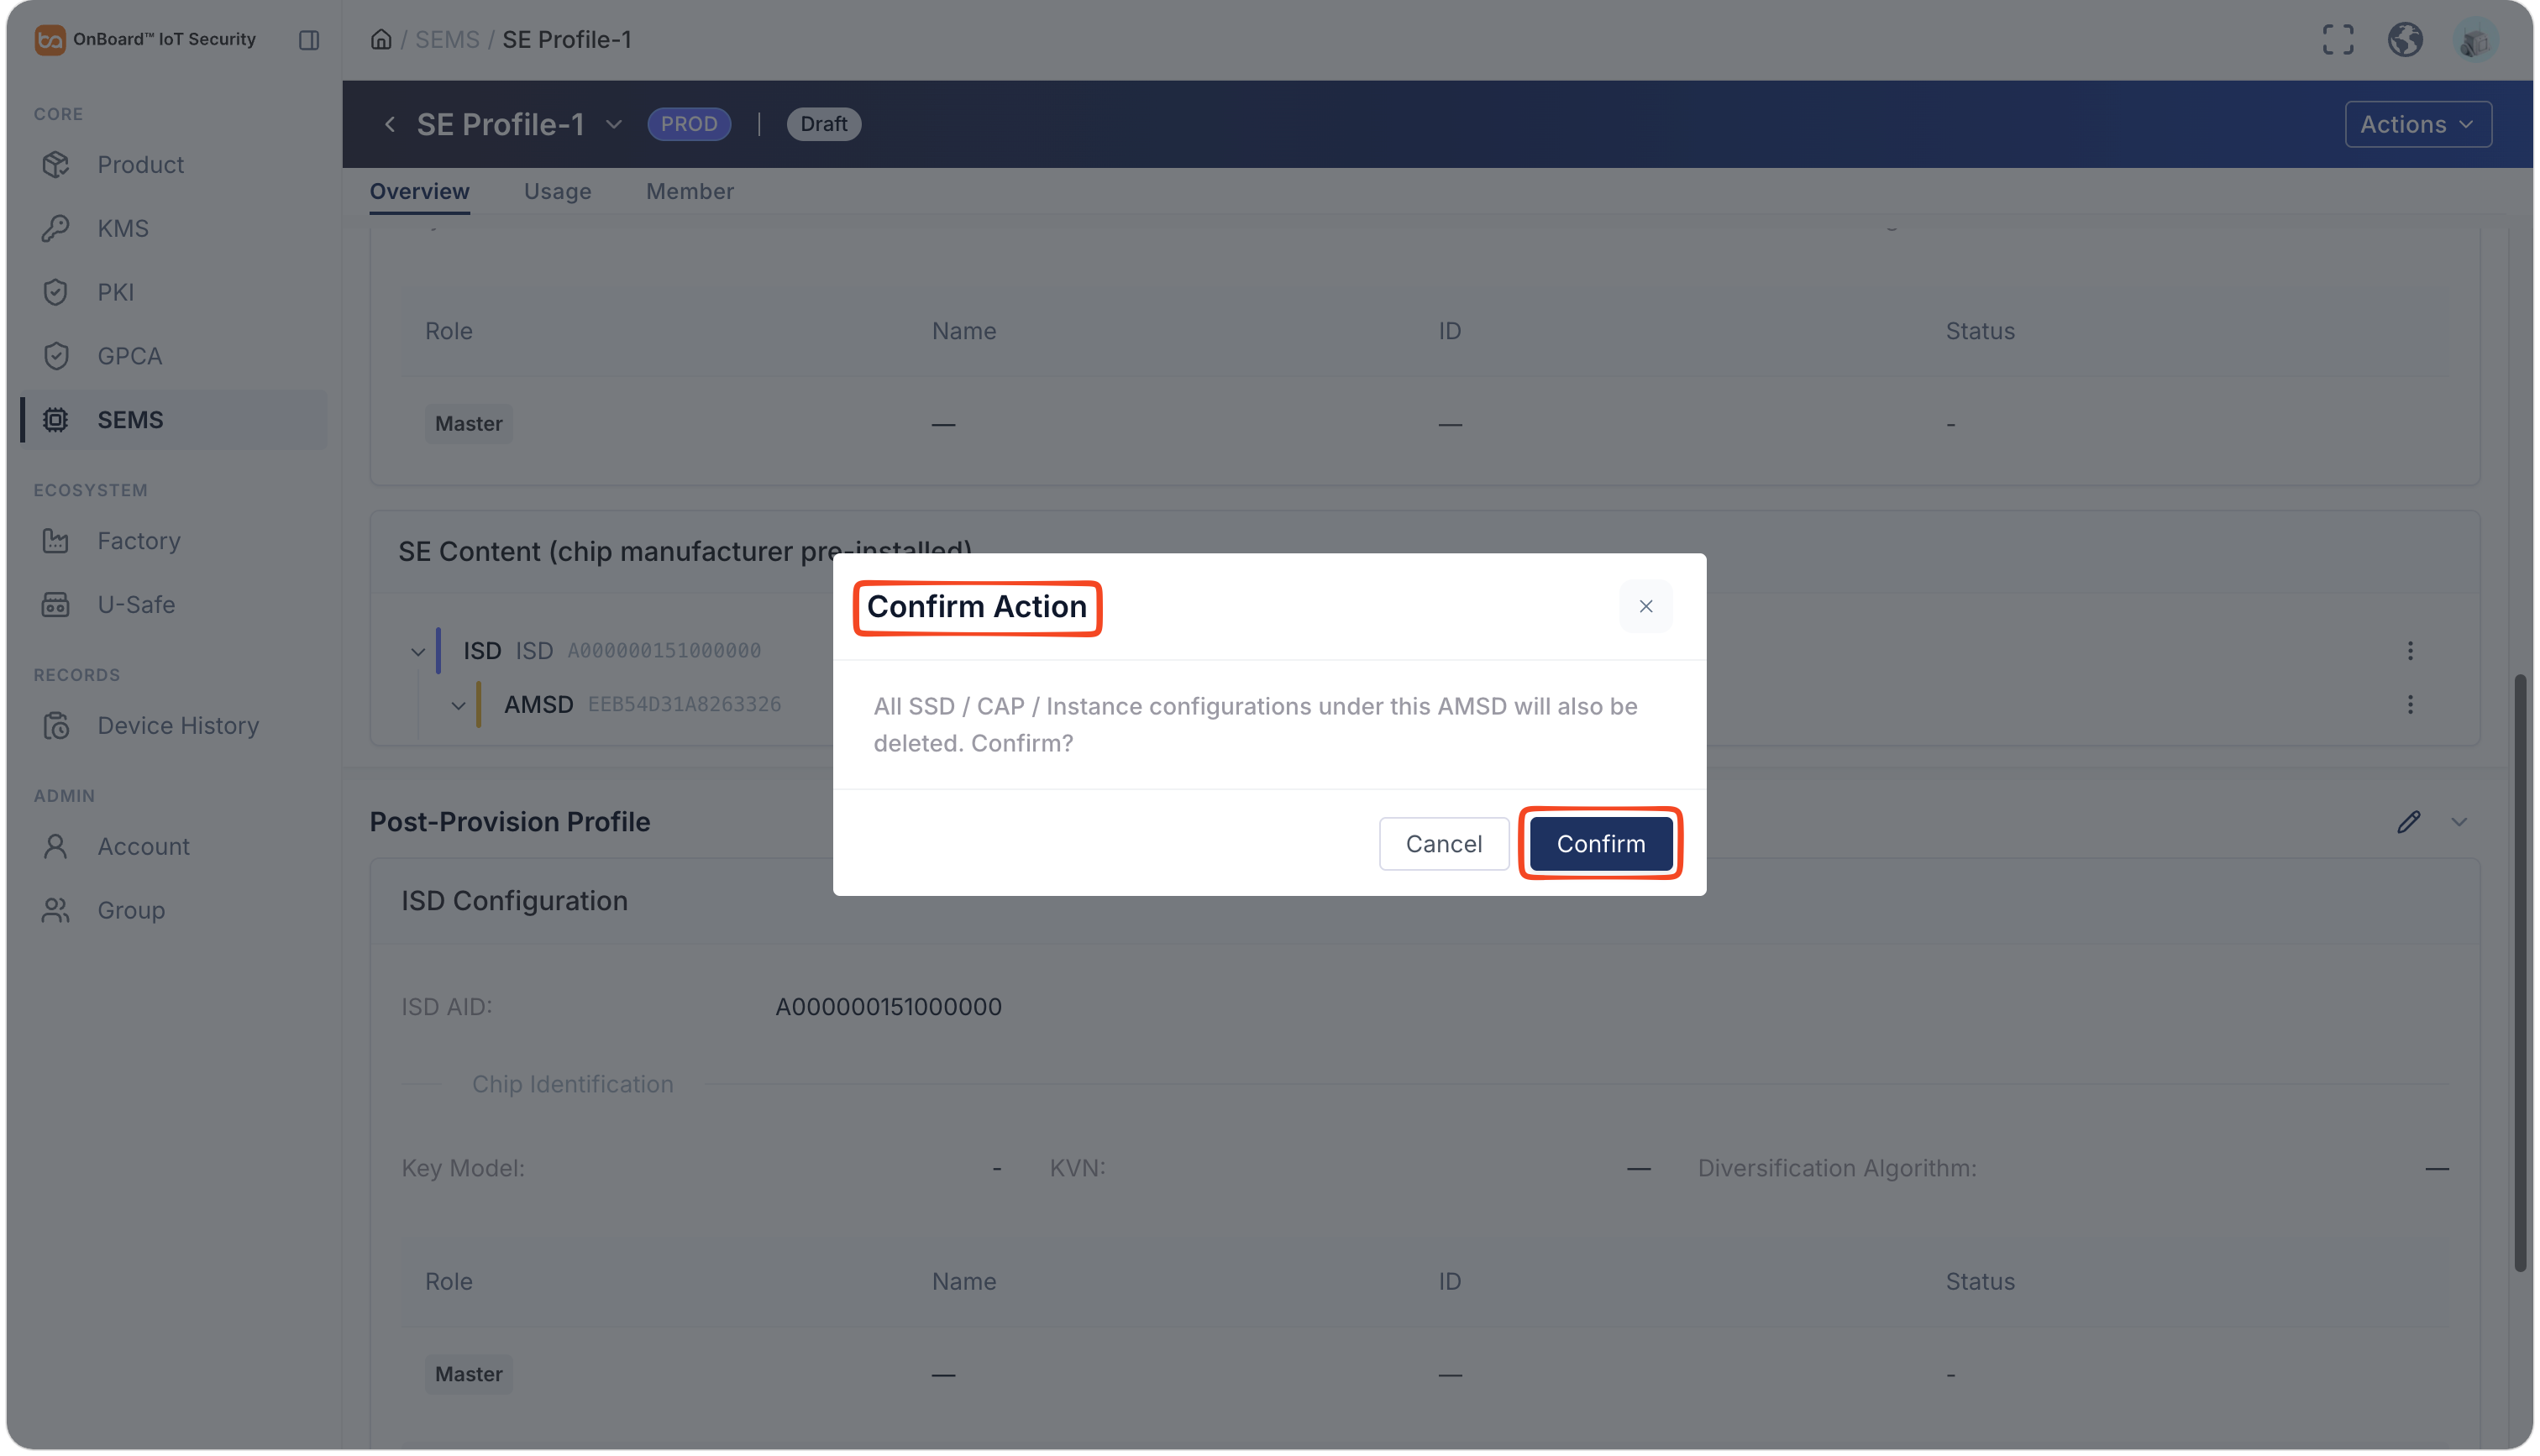
On the SE Profile page, click the Options
icon for the corresponding node (ISD, AMSD, SSD, CAP, or Instance) and select Delete.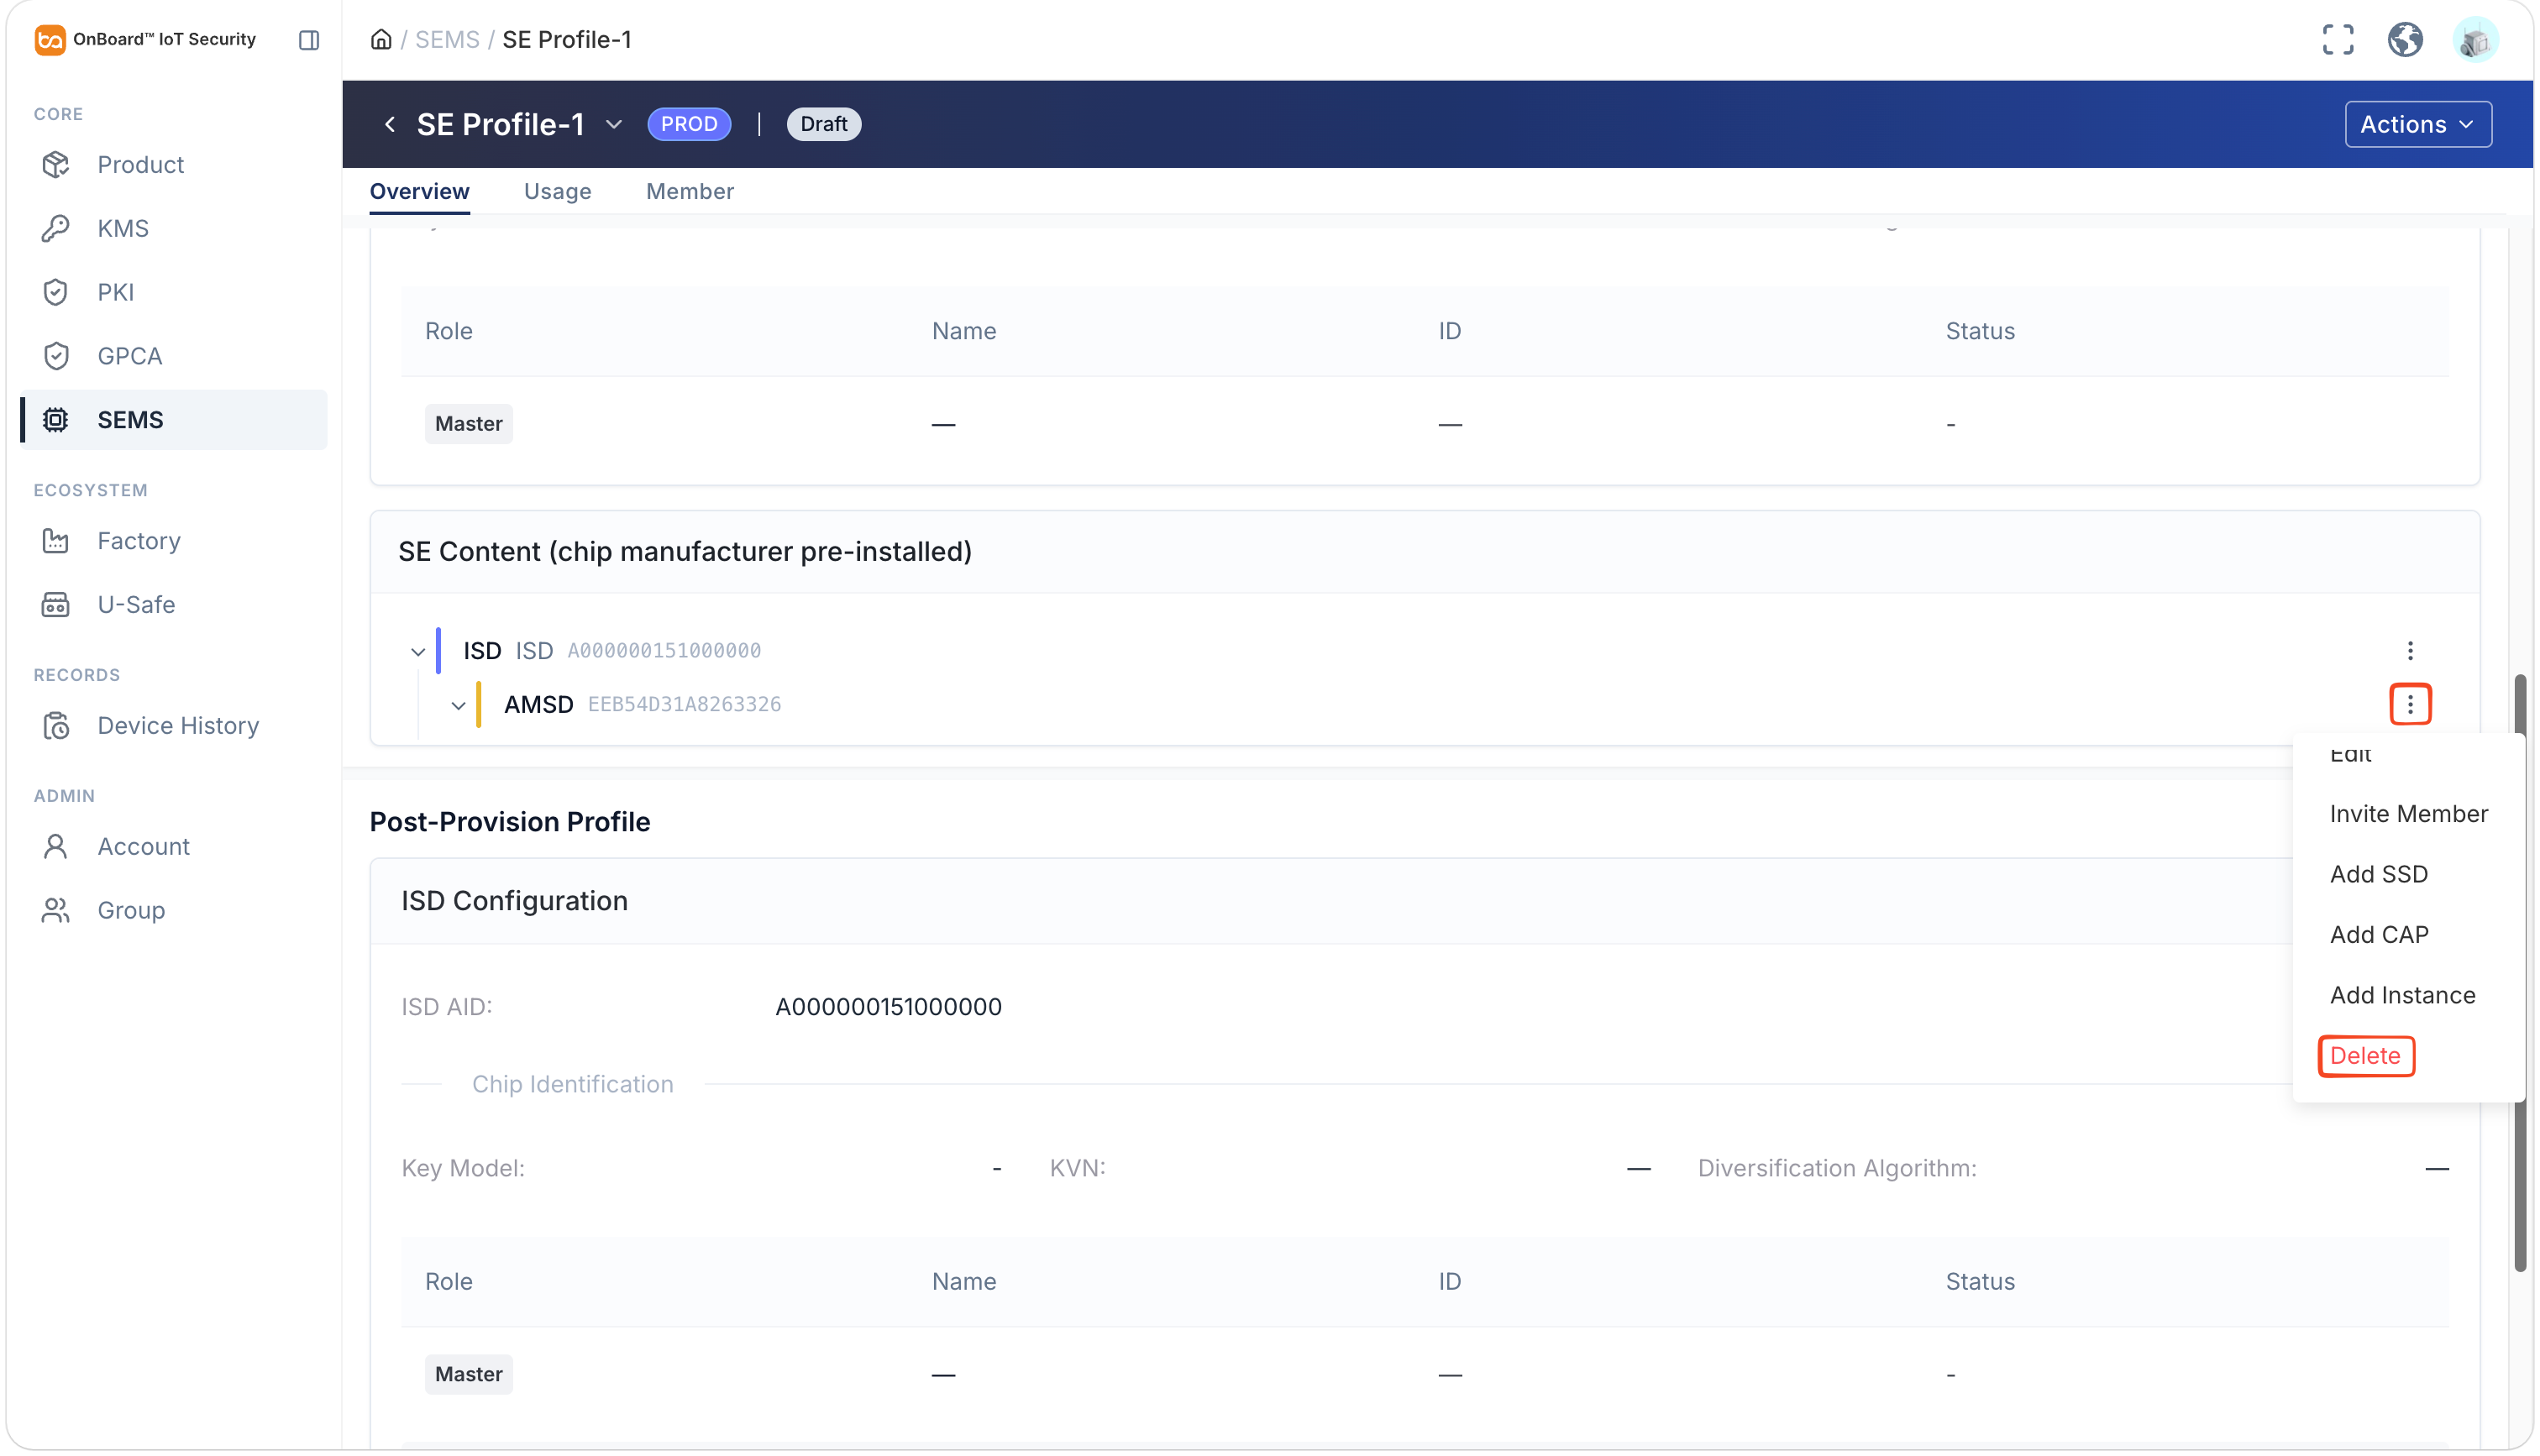
-
In the Confirm Action window, click Confirm to delete the content of this SE Profile.
Invite AMSD members
You can invite AMSD members only when an SE Profile is in the Draft state. AMSD members are permitted to edit only the AMSD content.
-
Sign in to OBIS.
-
In the Core section of the left menu, click SEMS, and then select the corresponding SE Profile.
-
On the SE Profile page, click the Options
icon for the AMSD and select Invite Member.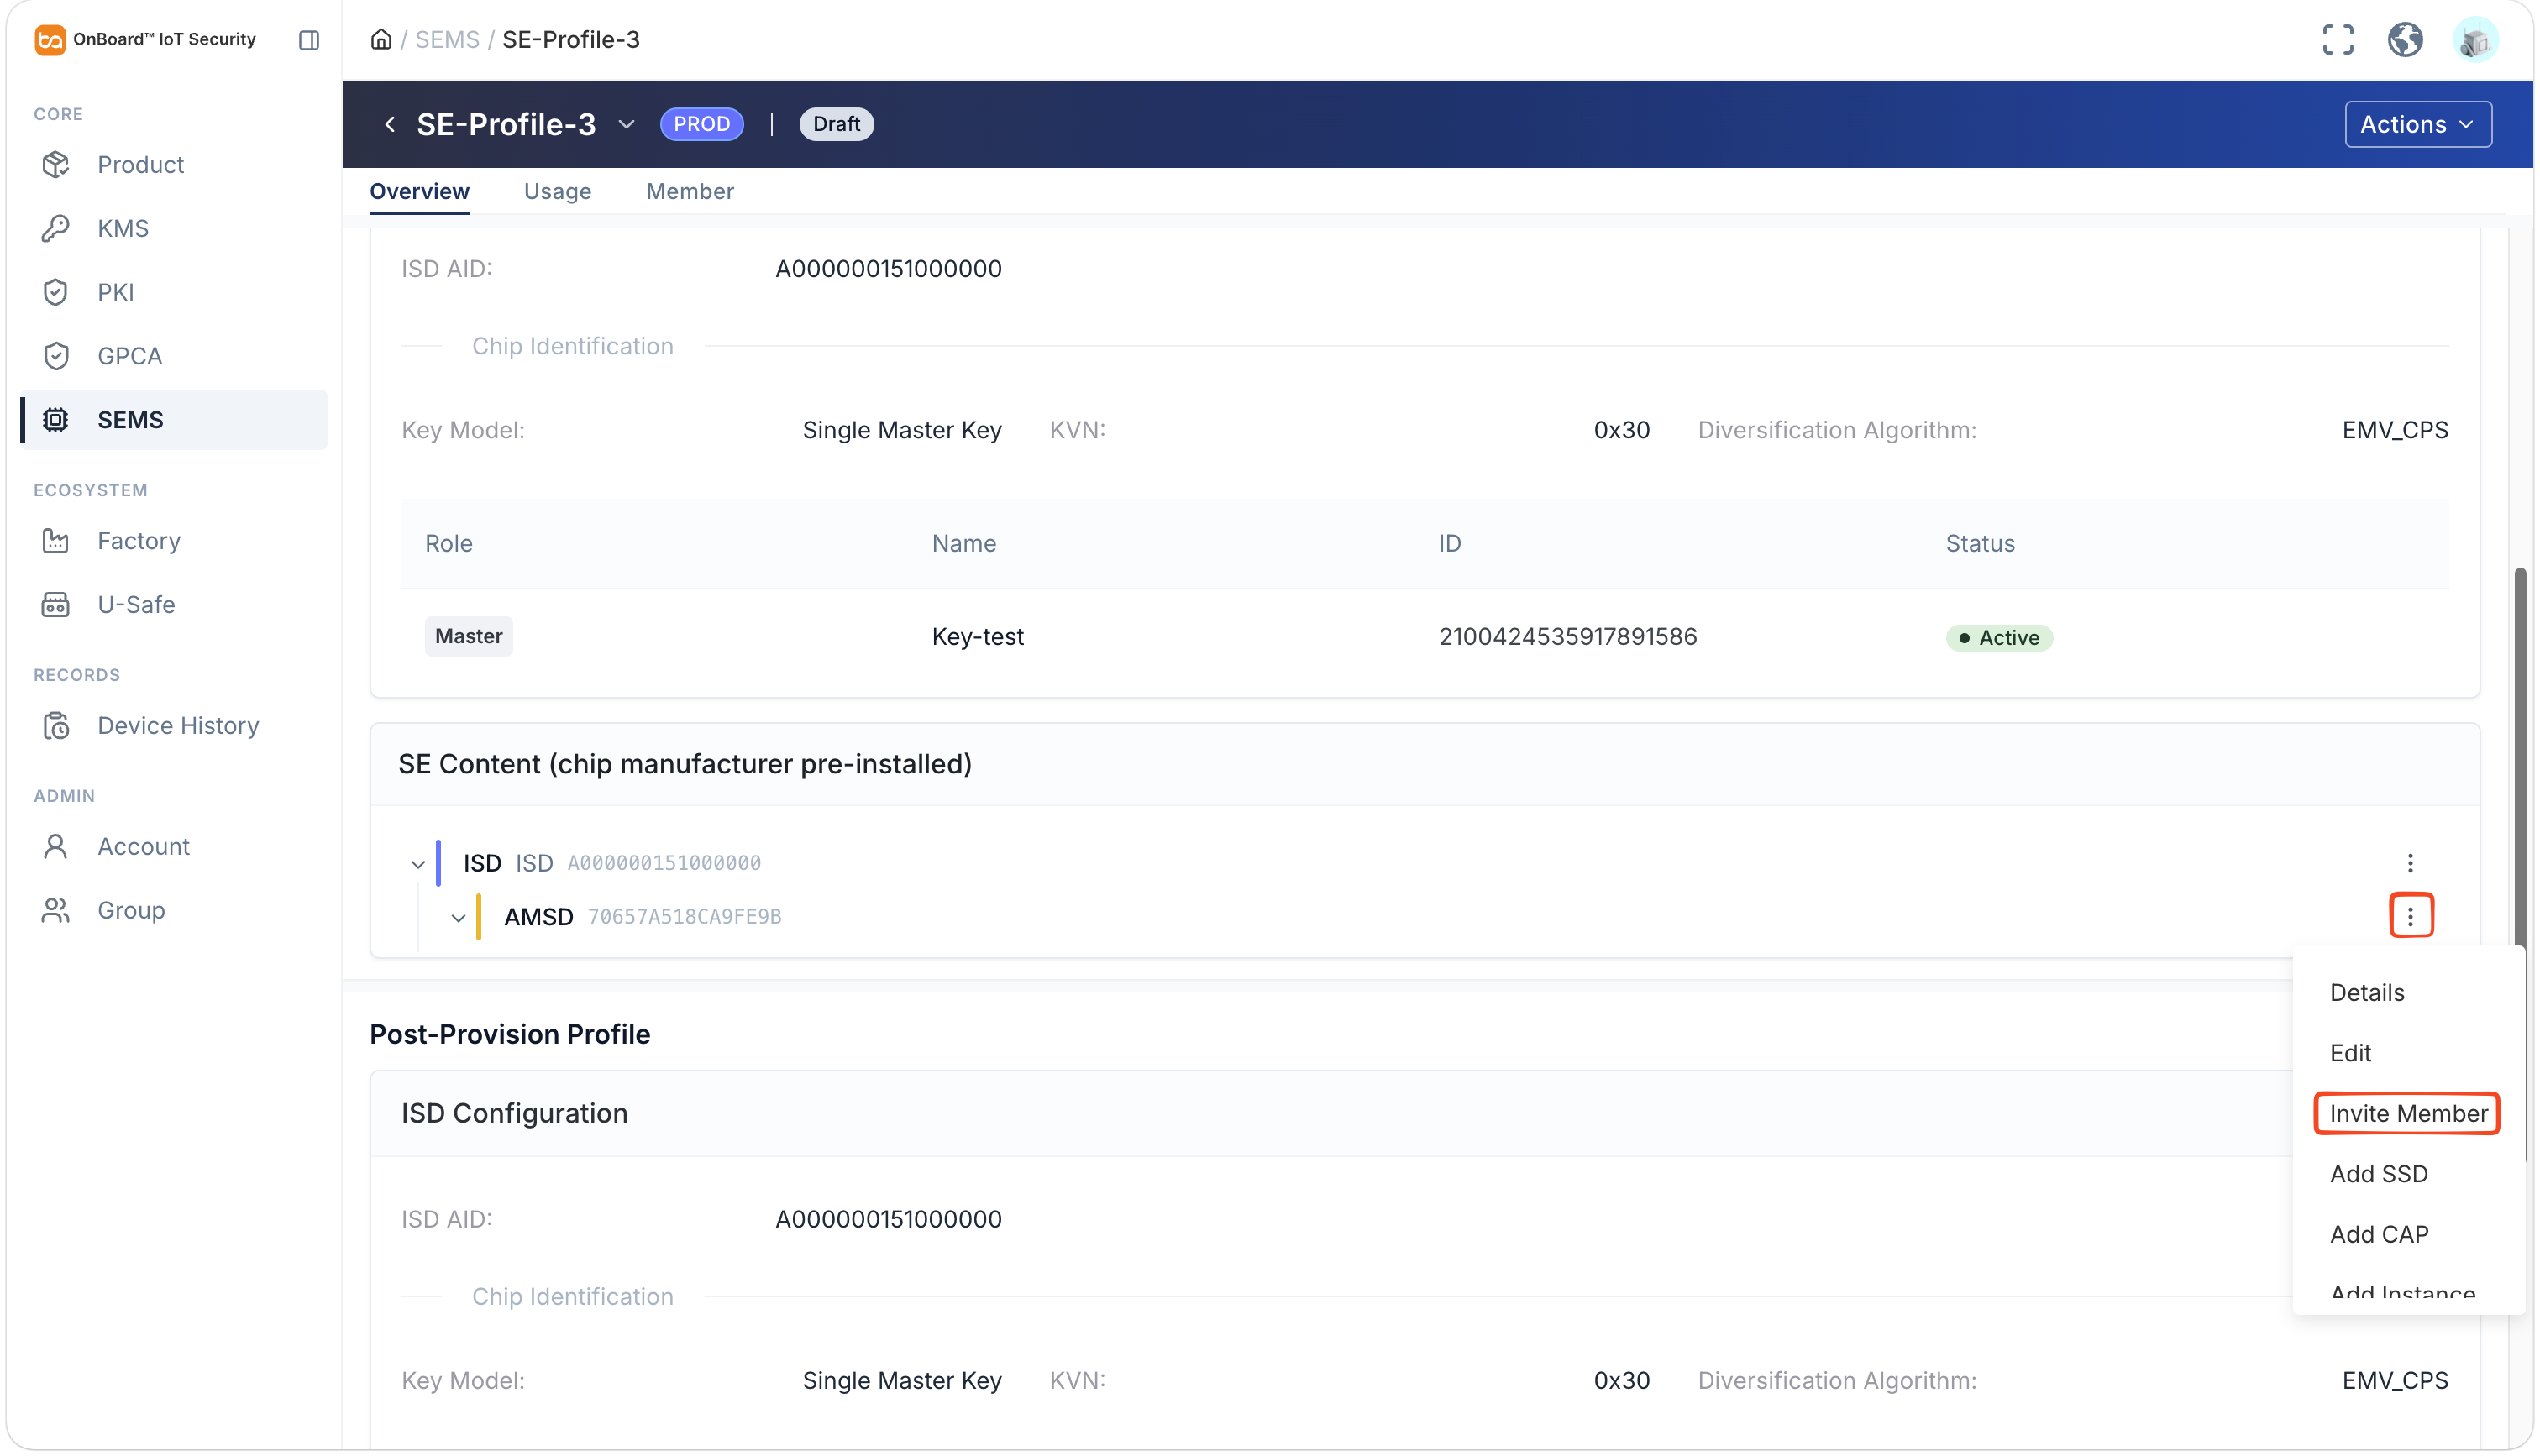
-
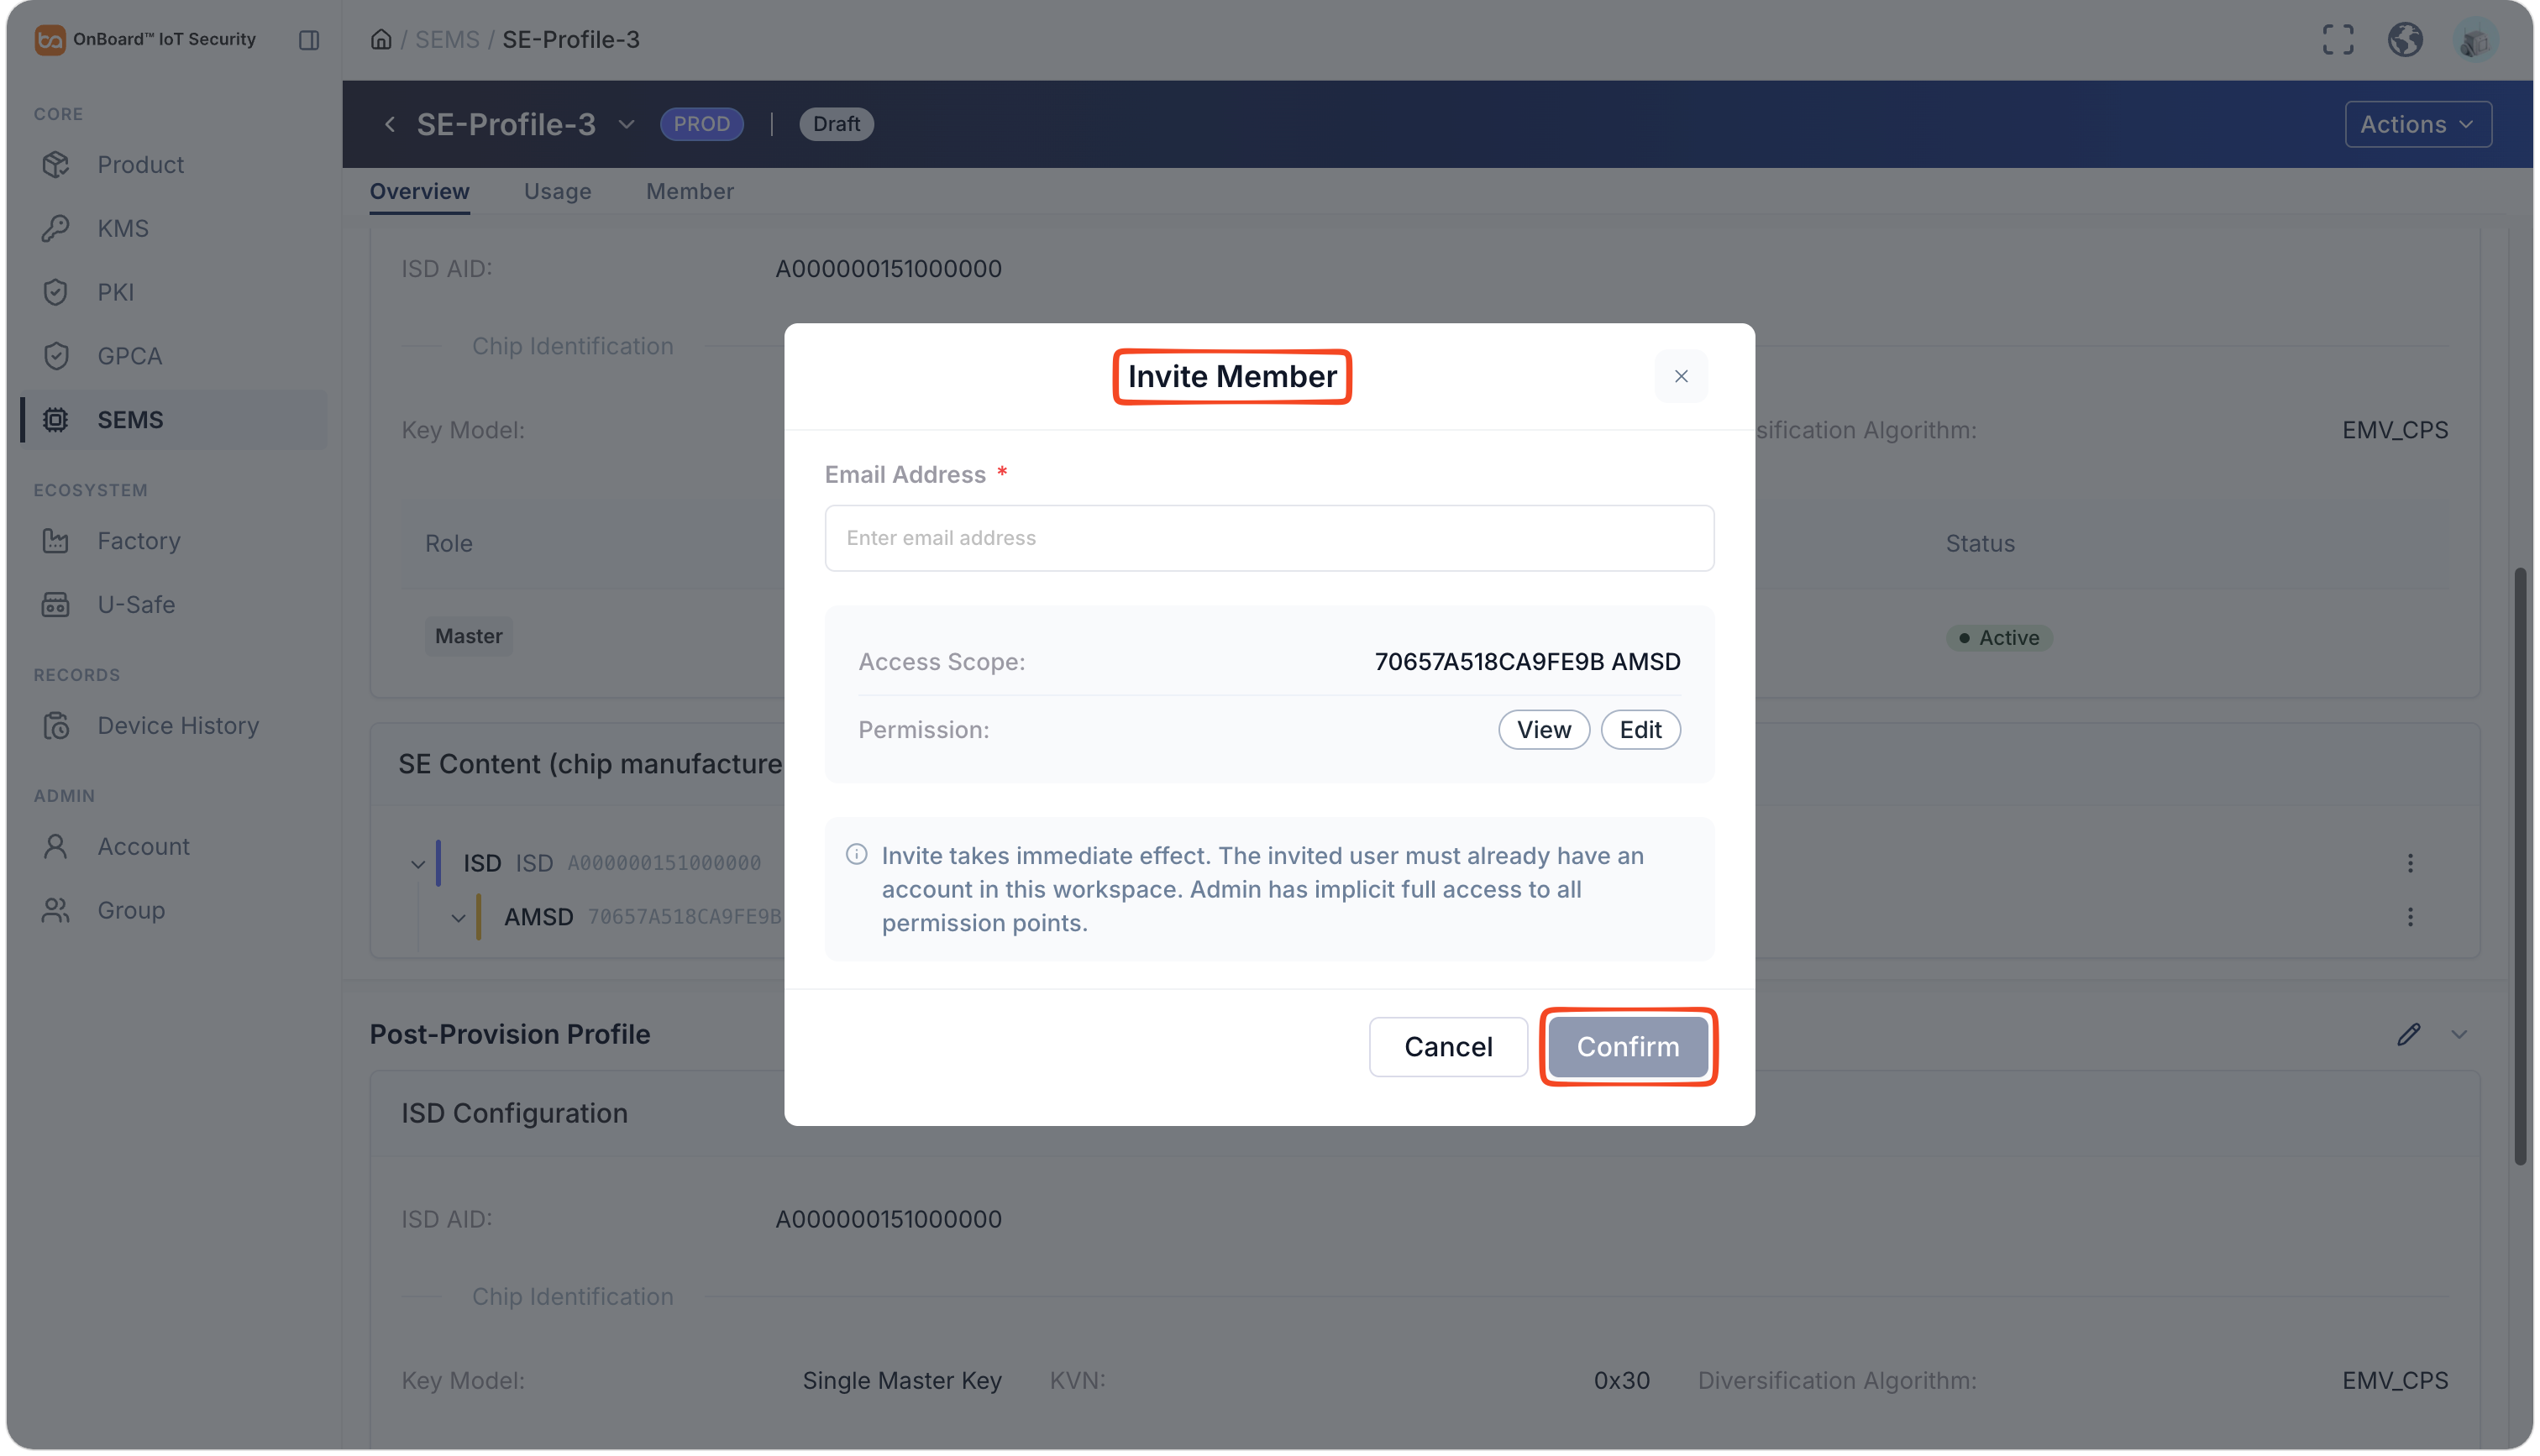
In the Invite Member window, enter the user email address and confirm the access scope and permissions. The added user must be in the Active state.
-
Click Confirm to invite AMSD members.
Lock or unlock an SE Profile
Only SE Profiles with the status of Active can be locked or unlocked. Lock the SE Profile to prevent its use. Once locked, its status will change to Locked.
-
Sign in to OBIS.
-
In the Core section of the left menu, click SEMS, and then click the Options
icon for the SE Profile and select Lock or Unlock. Click Confirm to lock or unlock the SE Profile. When locking an SE Profile, you can optionally provide a reason.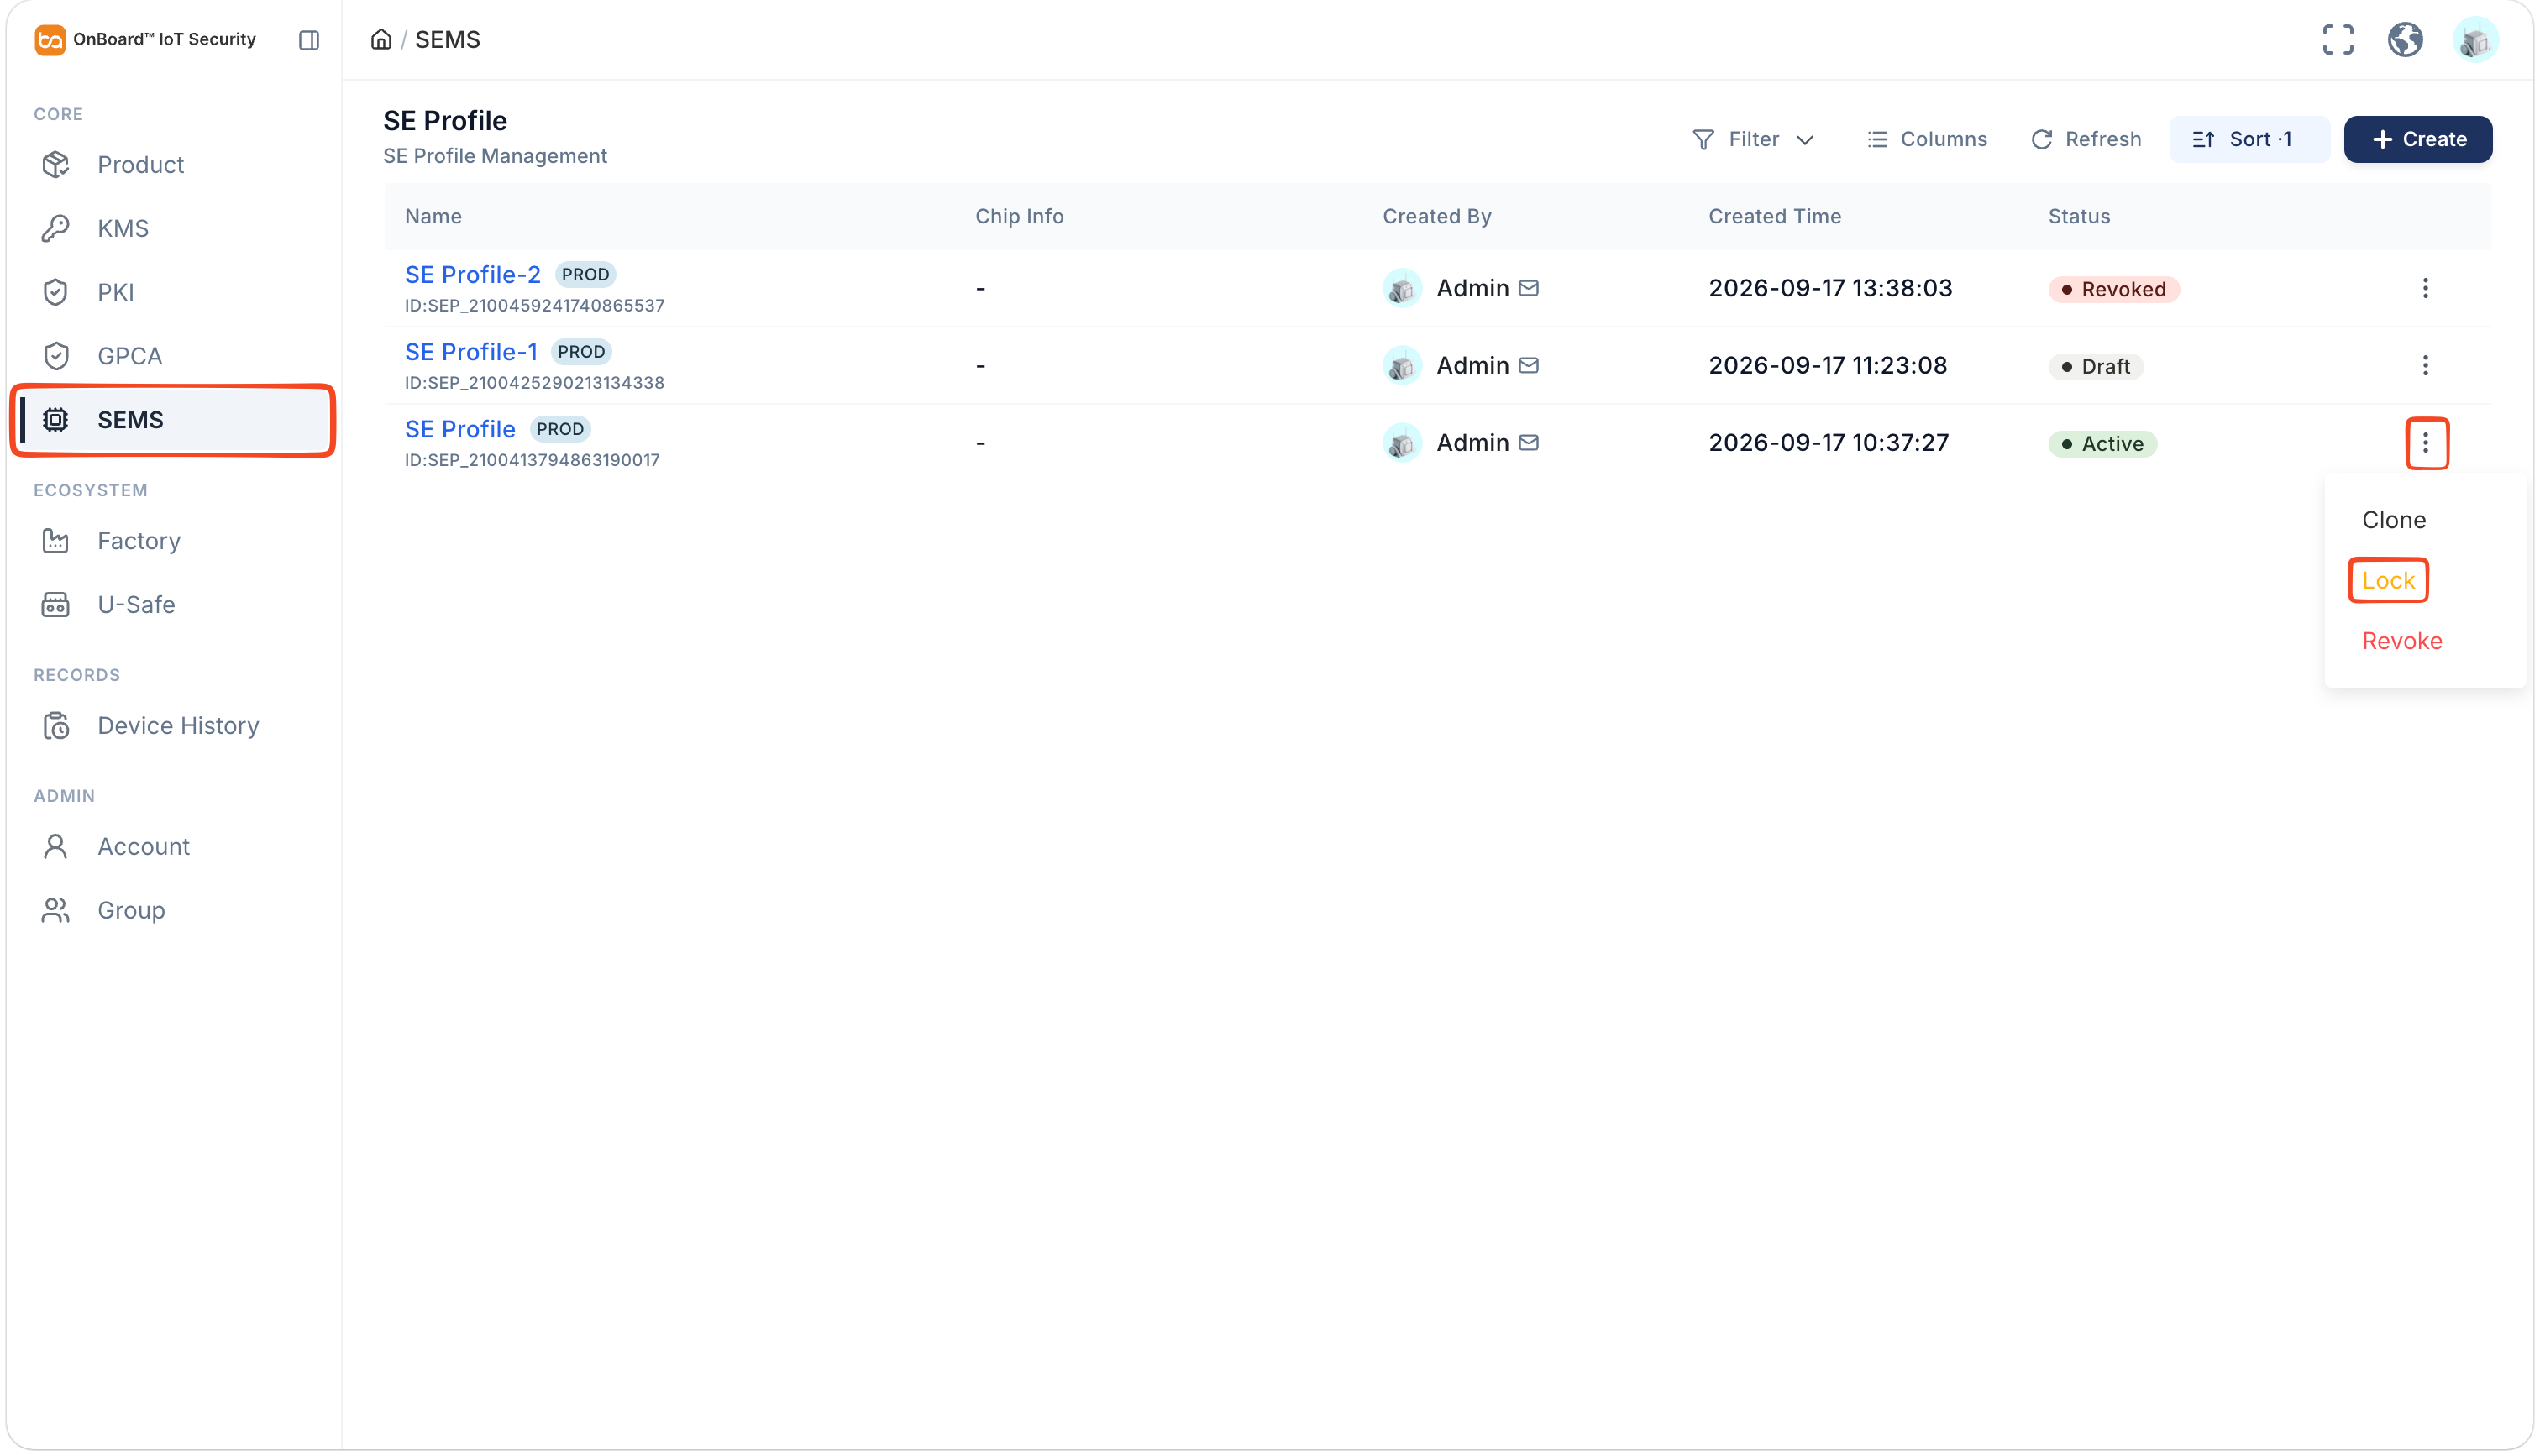
Archive an SE Profile
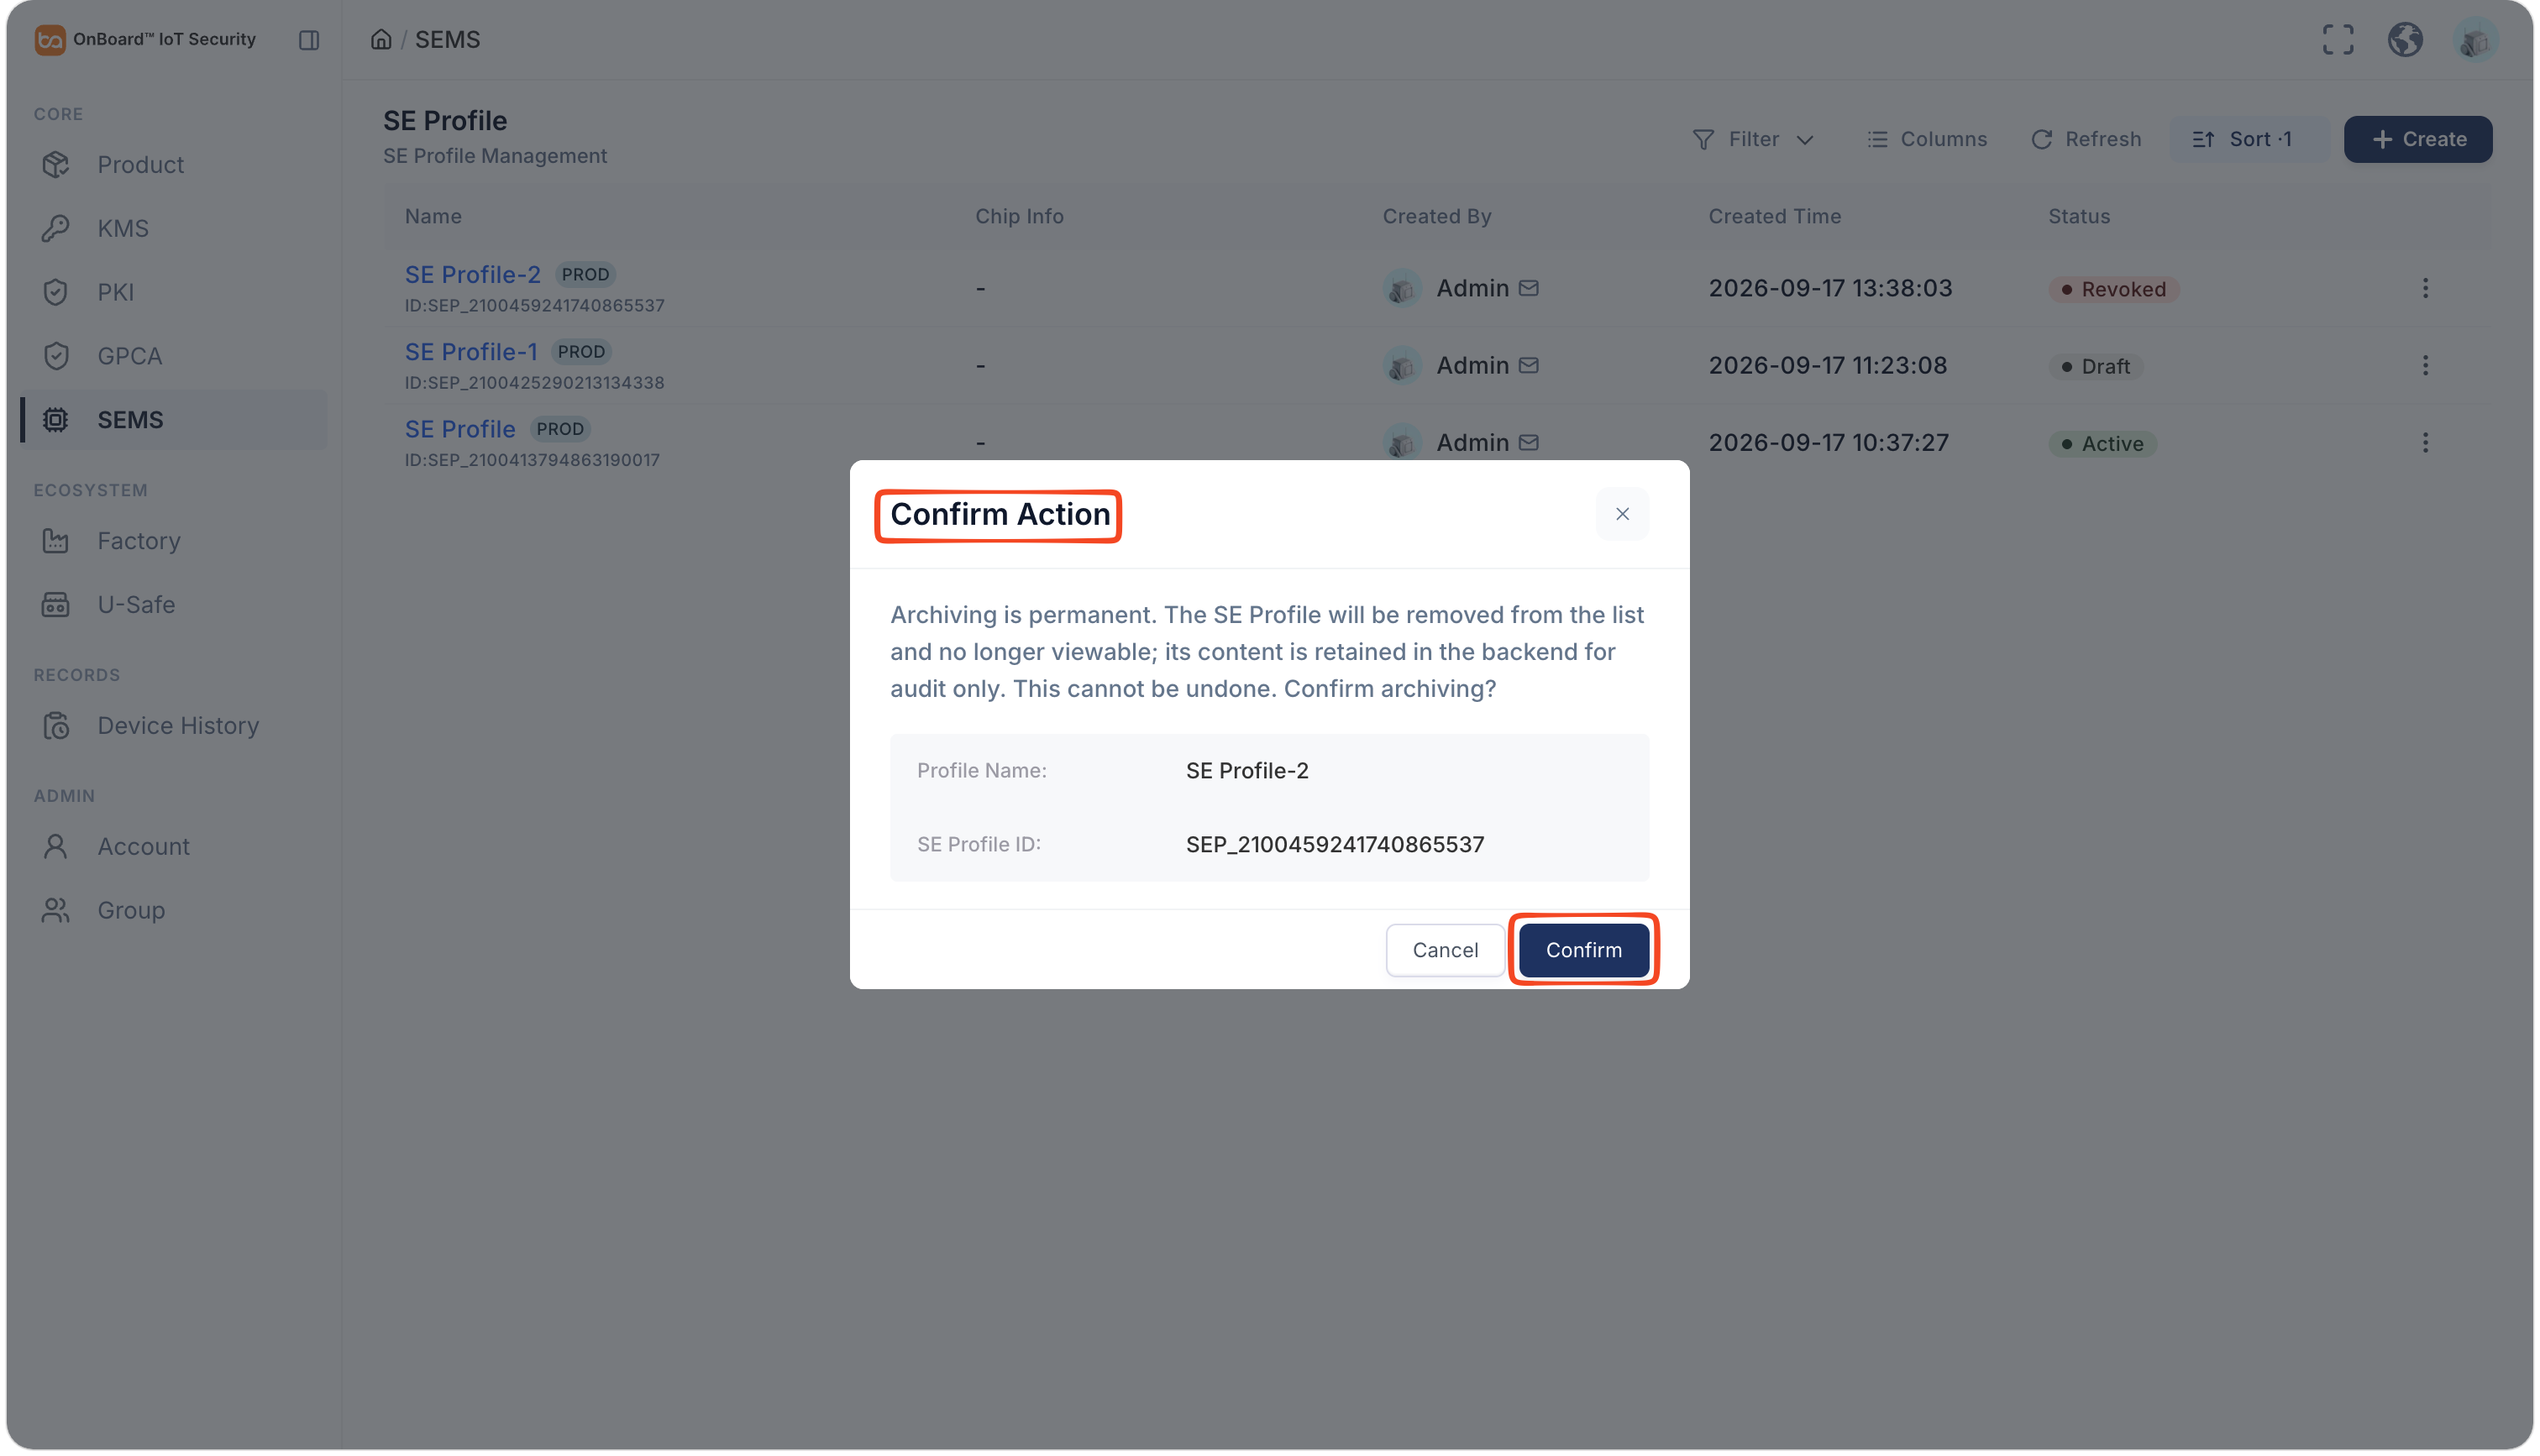
Only SE Profiles with the status of Revoked can be archived. Once archived, the SE Profile can't be edited, and its content will be retained solely in the backend for audit purposes and can't be restored.
-
Sign in to OBIS.
-
In the Core section of the left menu, click SEMS, and then click the Options
icon for the SE Profile and select Archive.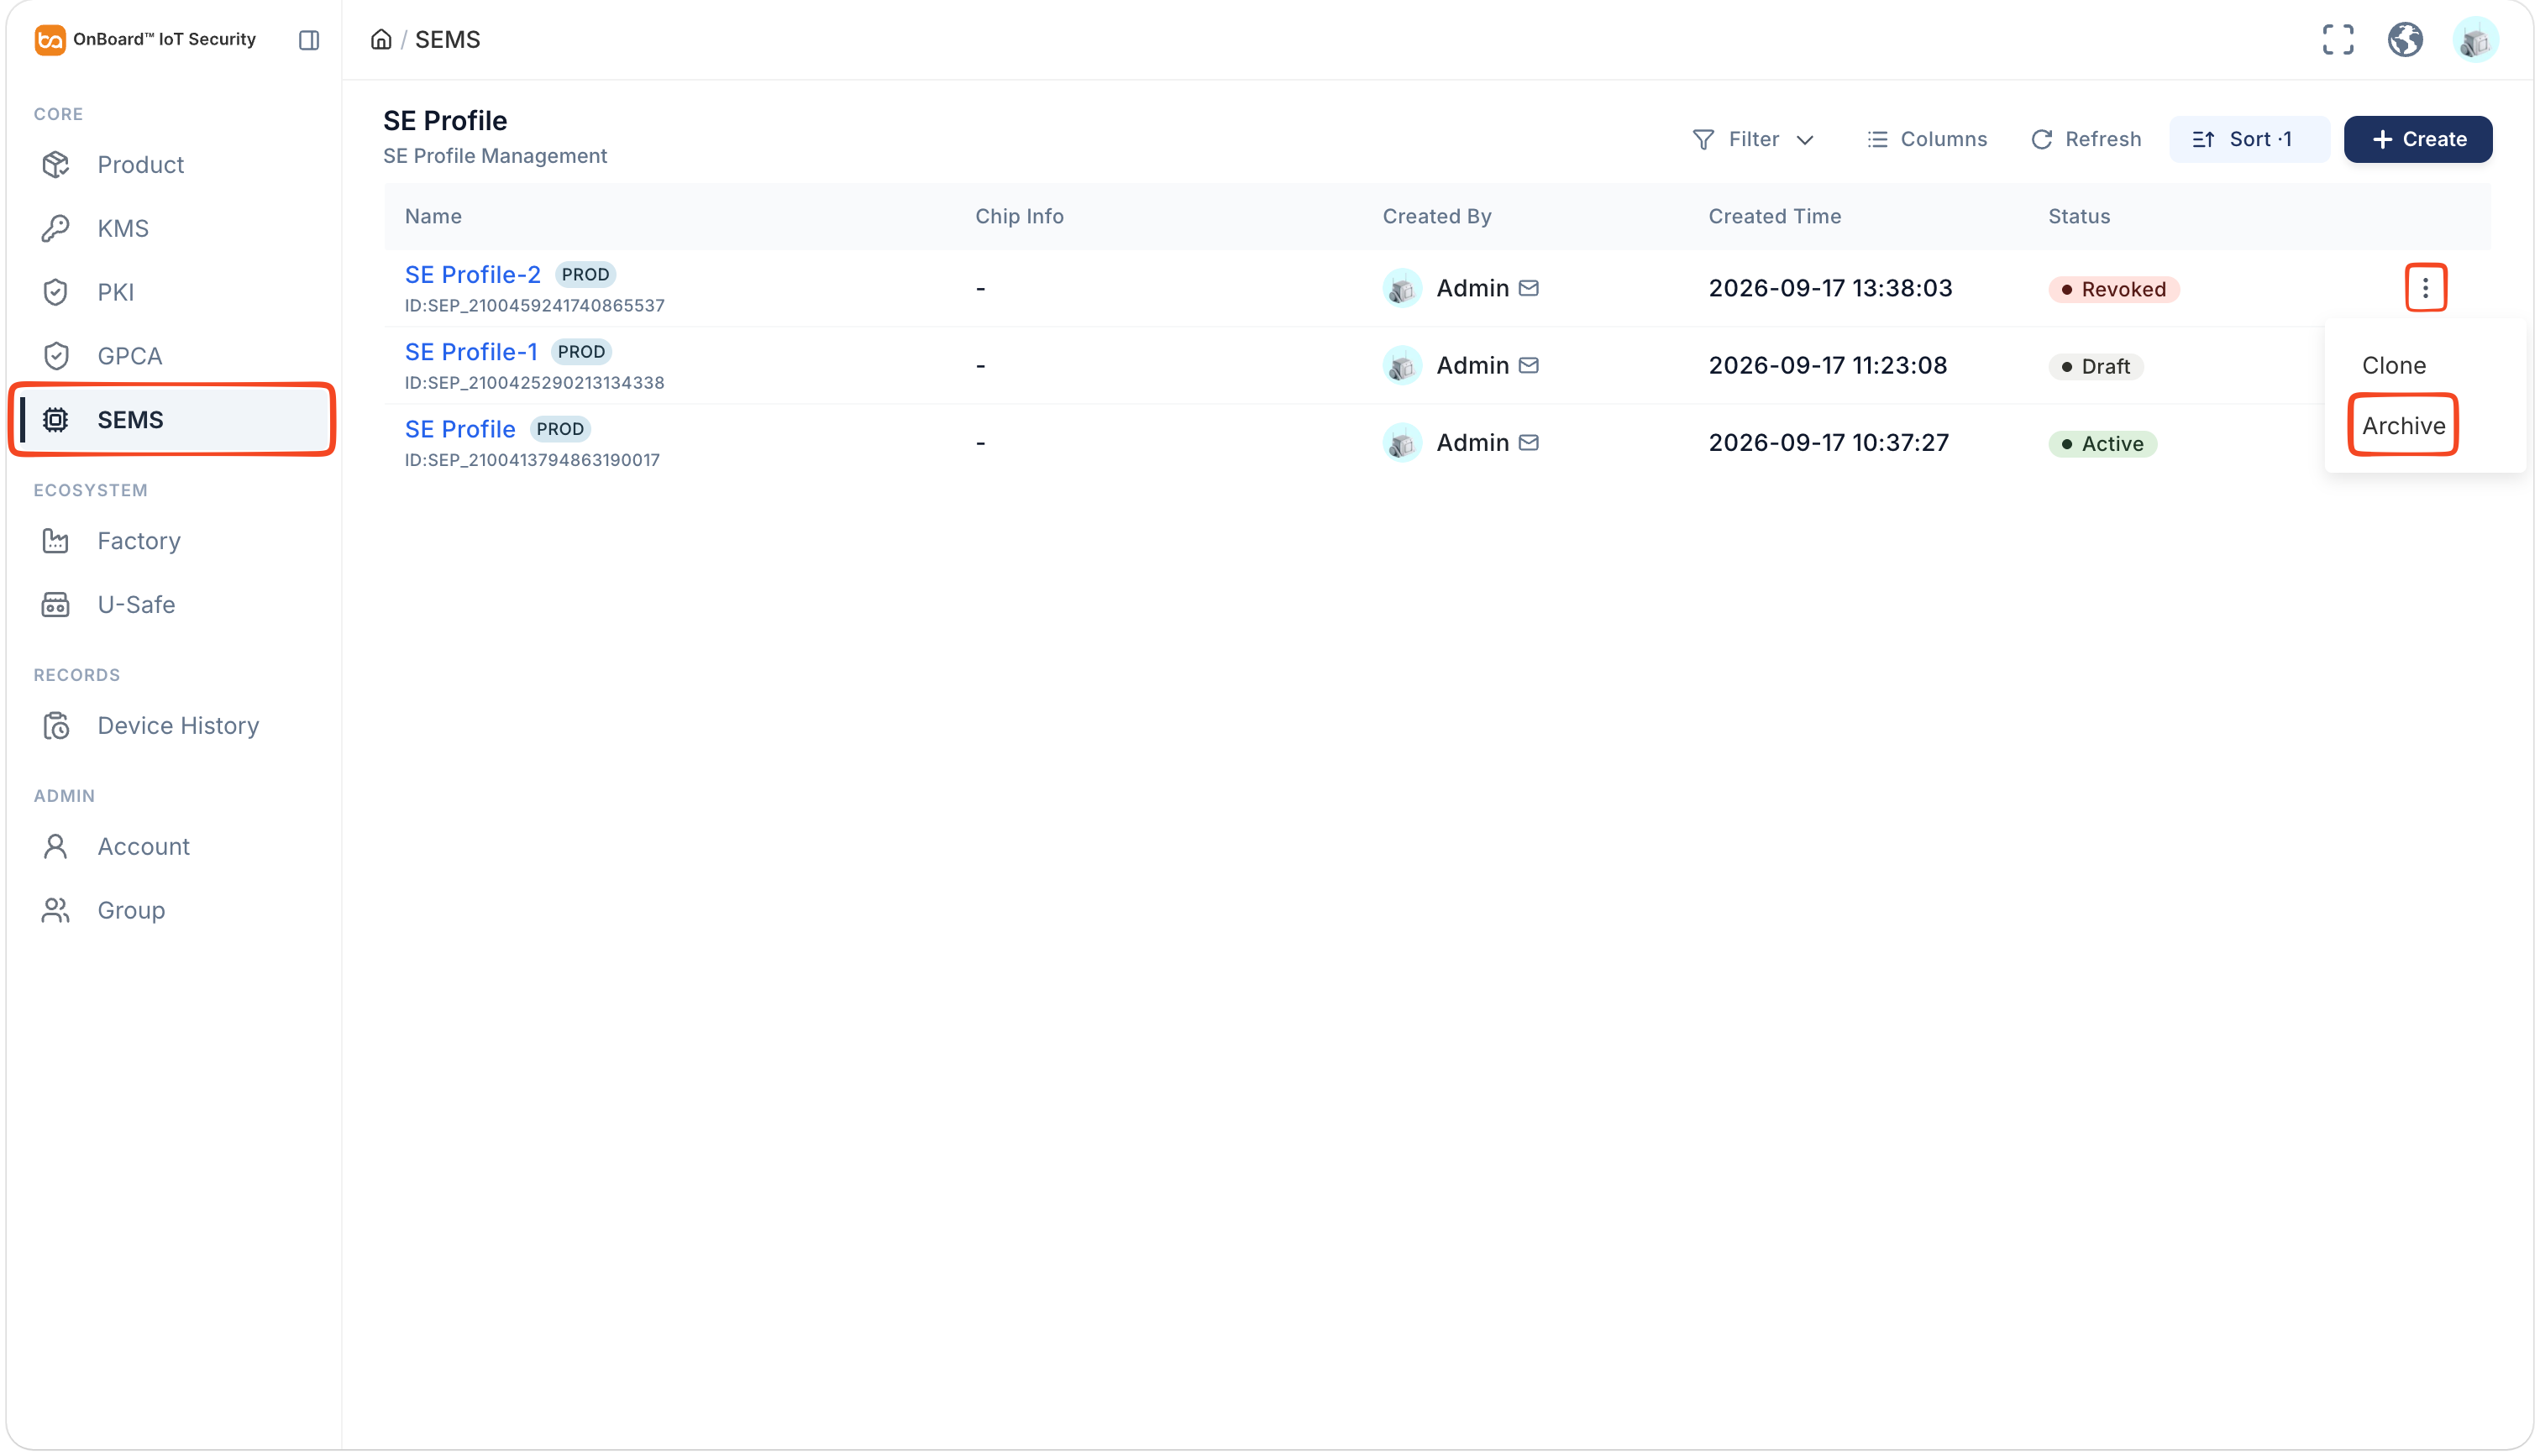
-
In the Confirm Action window, click Confirm to revoke the SE Profile.
Revoke an SE Profile
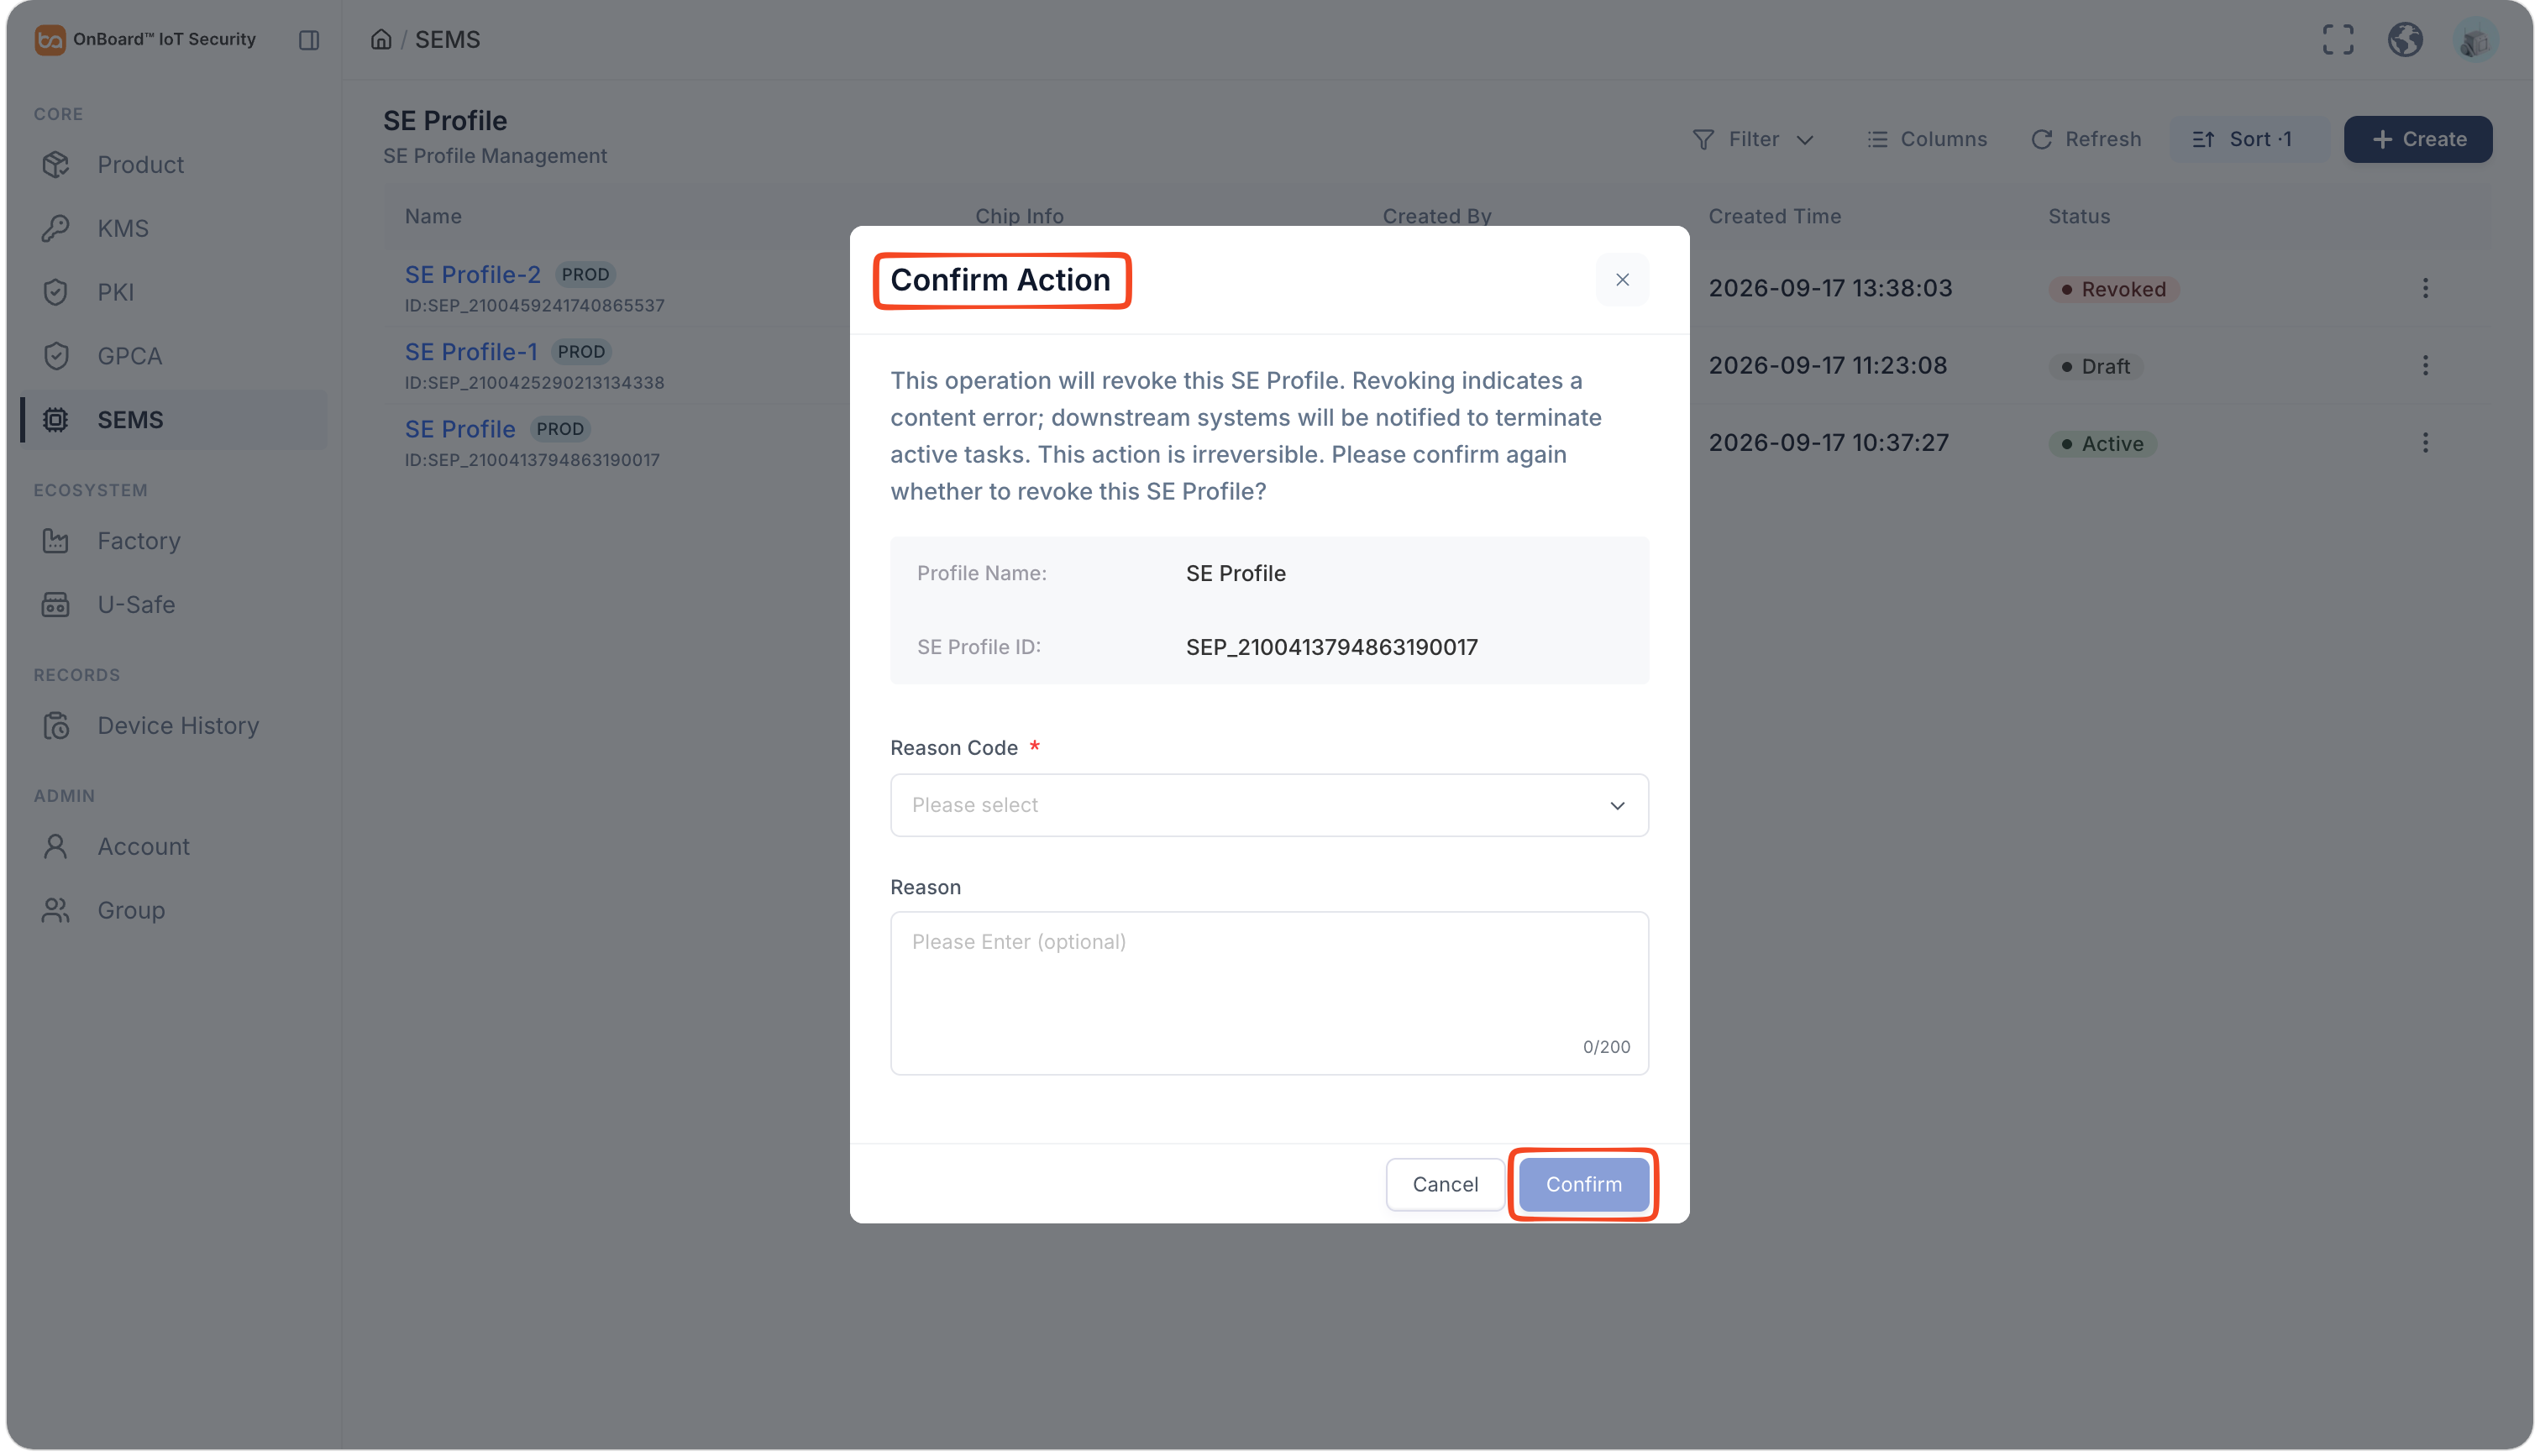
Only SE Profiles with the status of Active can be revoked. Once revoked, downstream systems will be notified to terminate any ongoing tasks associated with that SE Profile.
-
Sign in to OBIS.
-
In the Core section of the left menu, click SEMS, and then click the Options
icon for the SE Profile and select Revoke.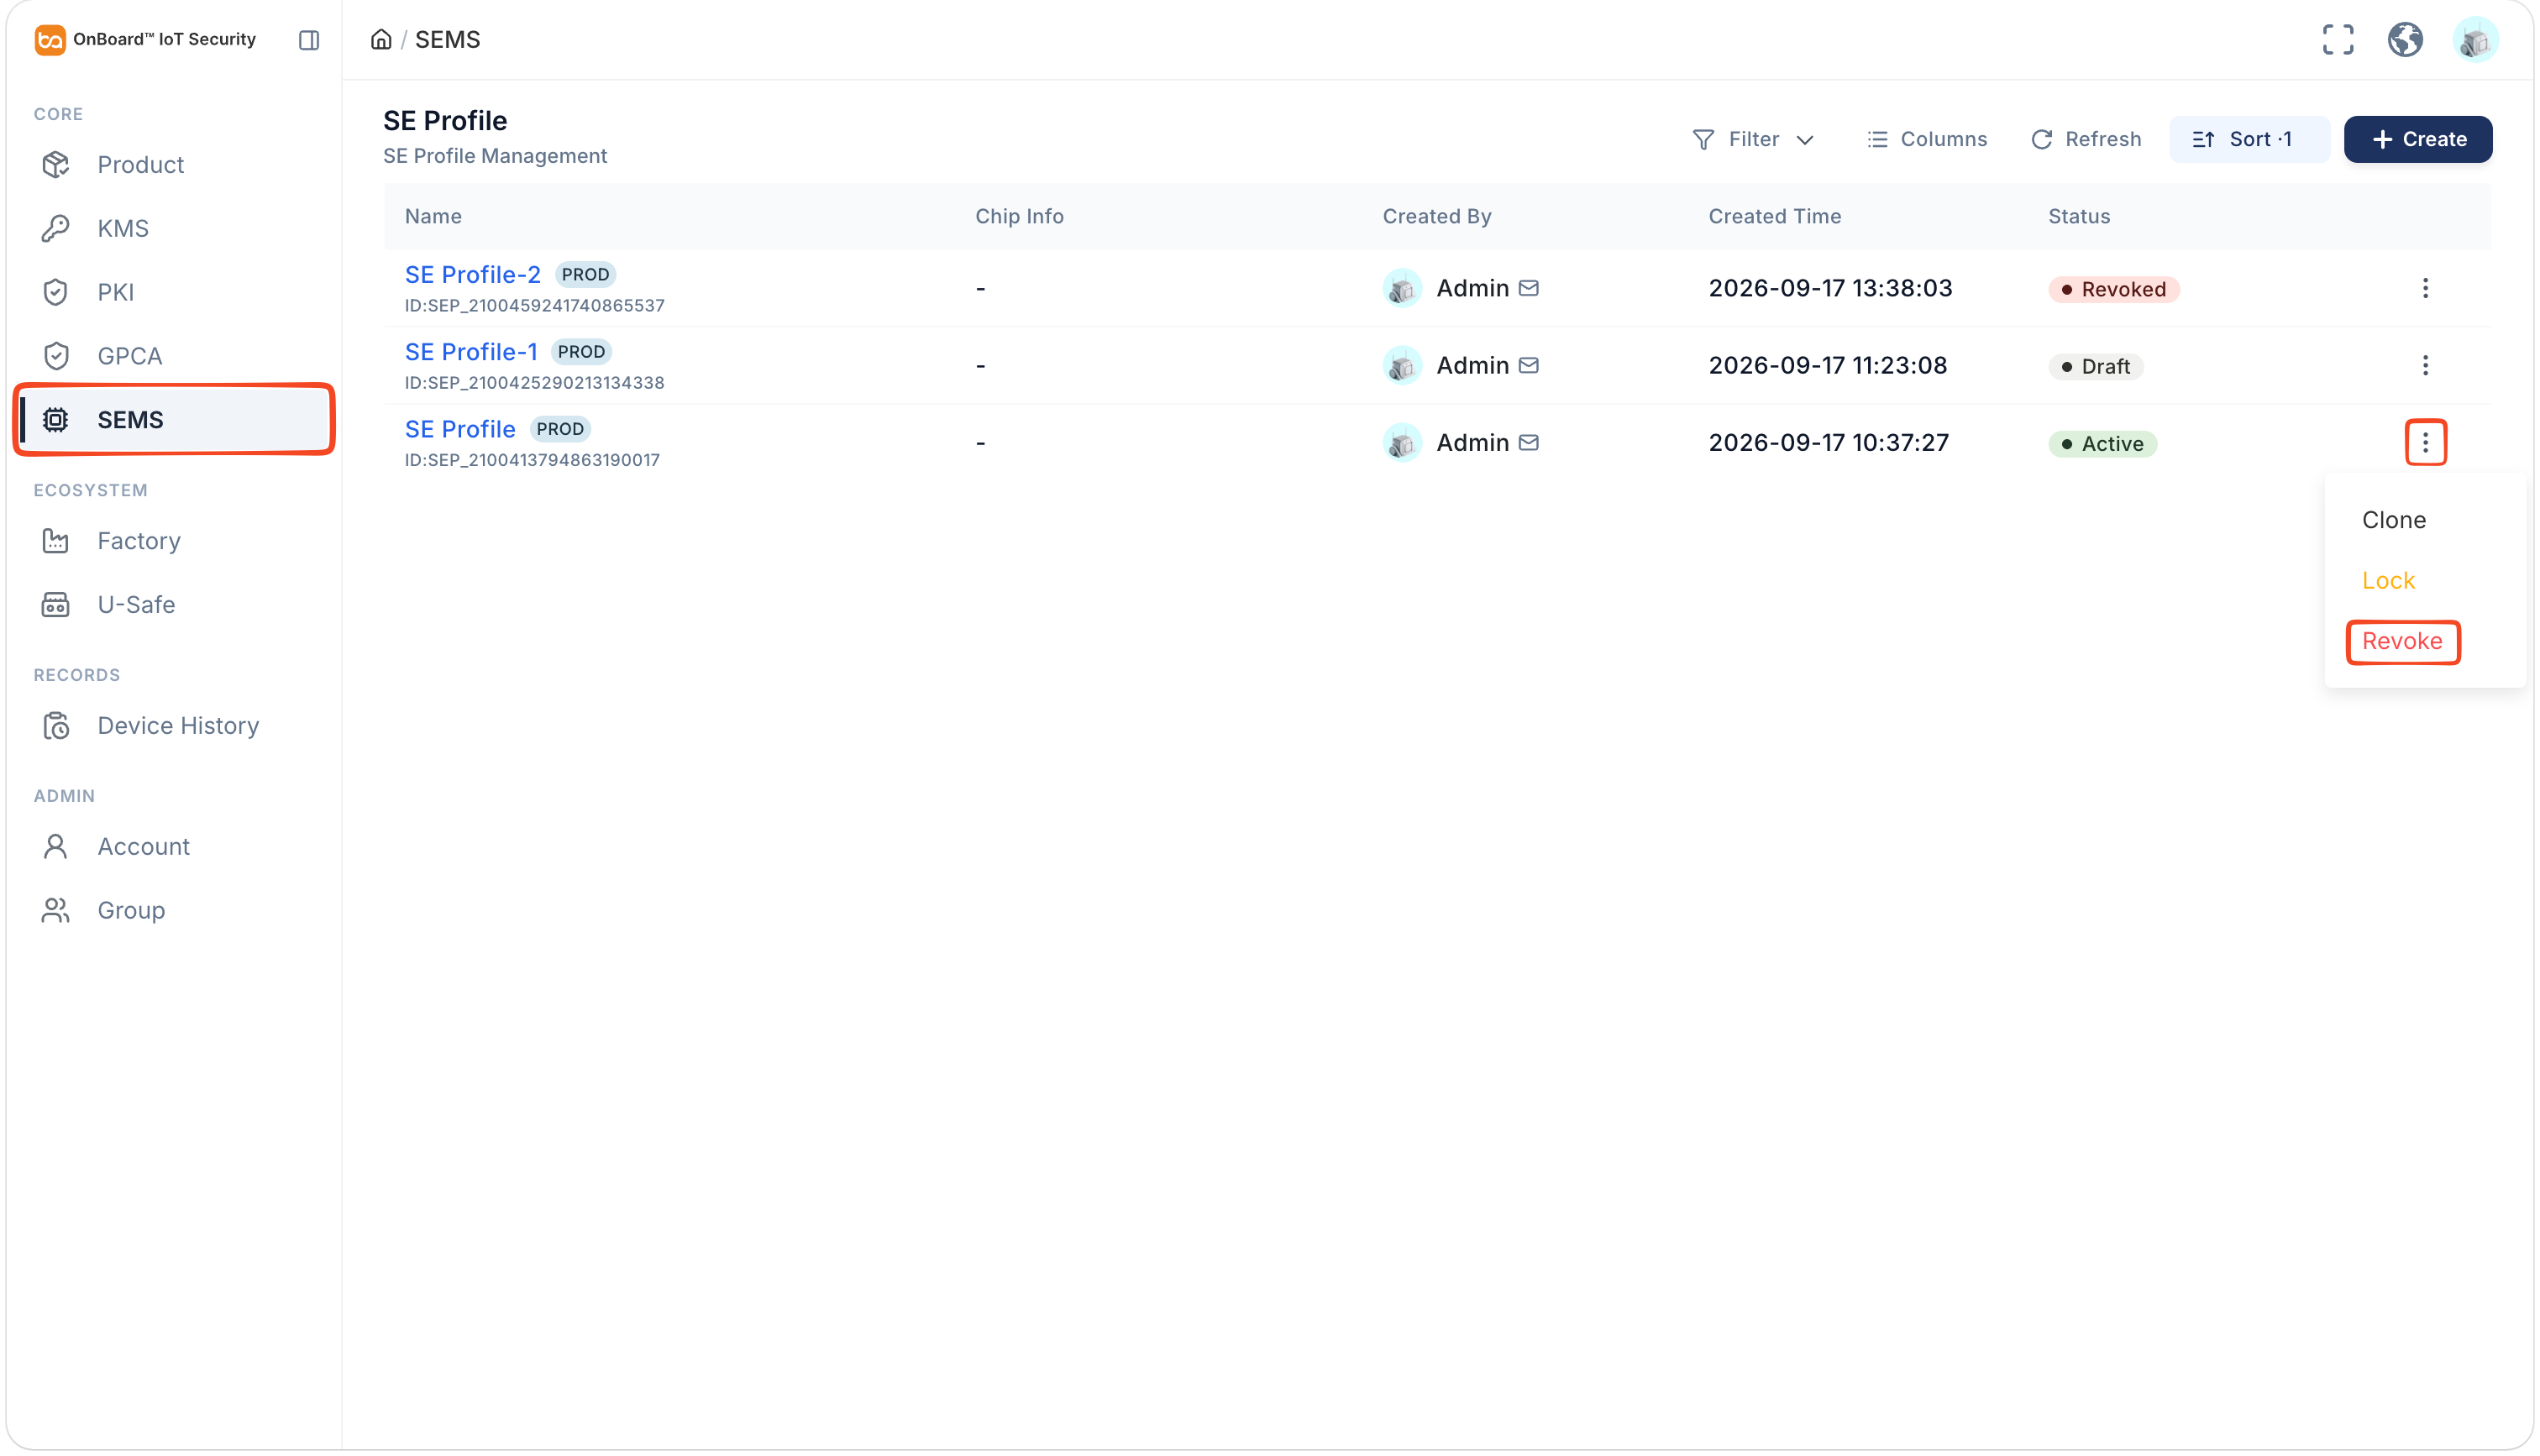
-
In the Confirm Action window, select the Reason Code and enter the Reason, then click Confirm to revoke the SE Profile.
Destroy an SE Profile
Destroyed SE Profiles cannot be recovered. Please proceed with caution.
Only SE Profiles with the status of Draft can be destroyed.
-
Sign in to OBIS.
-
In the Core section of the left menu, click SEMS, and then click the Options
icon for the SE Profile and select Destroy.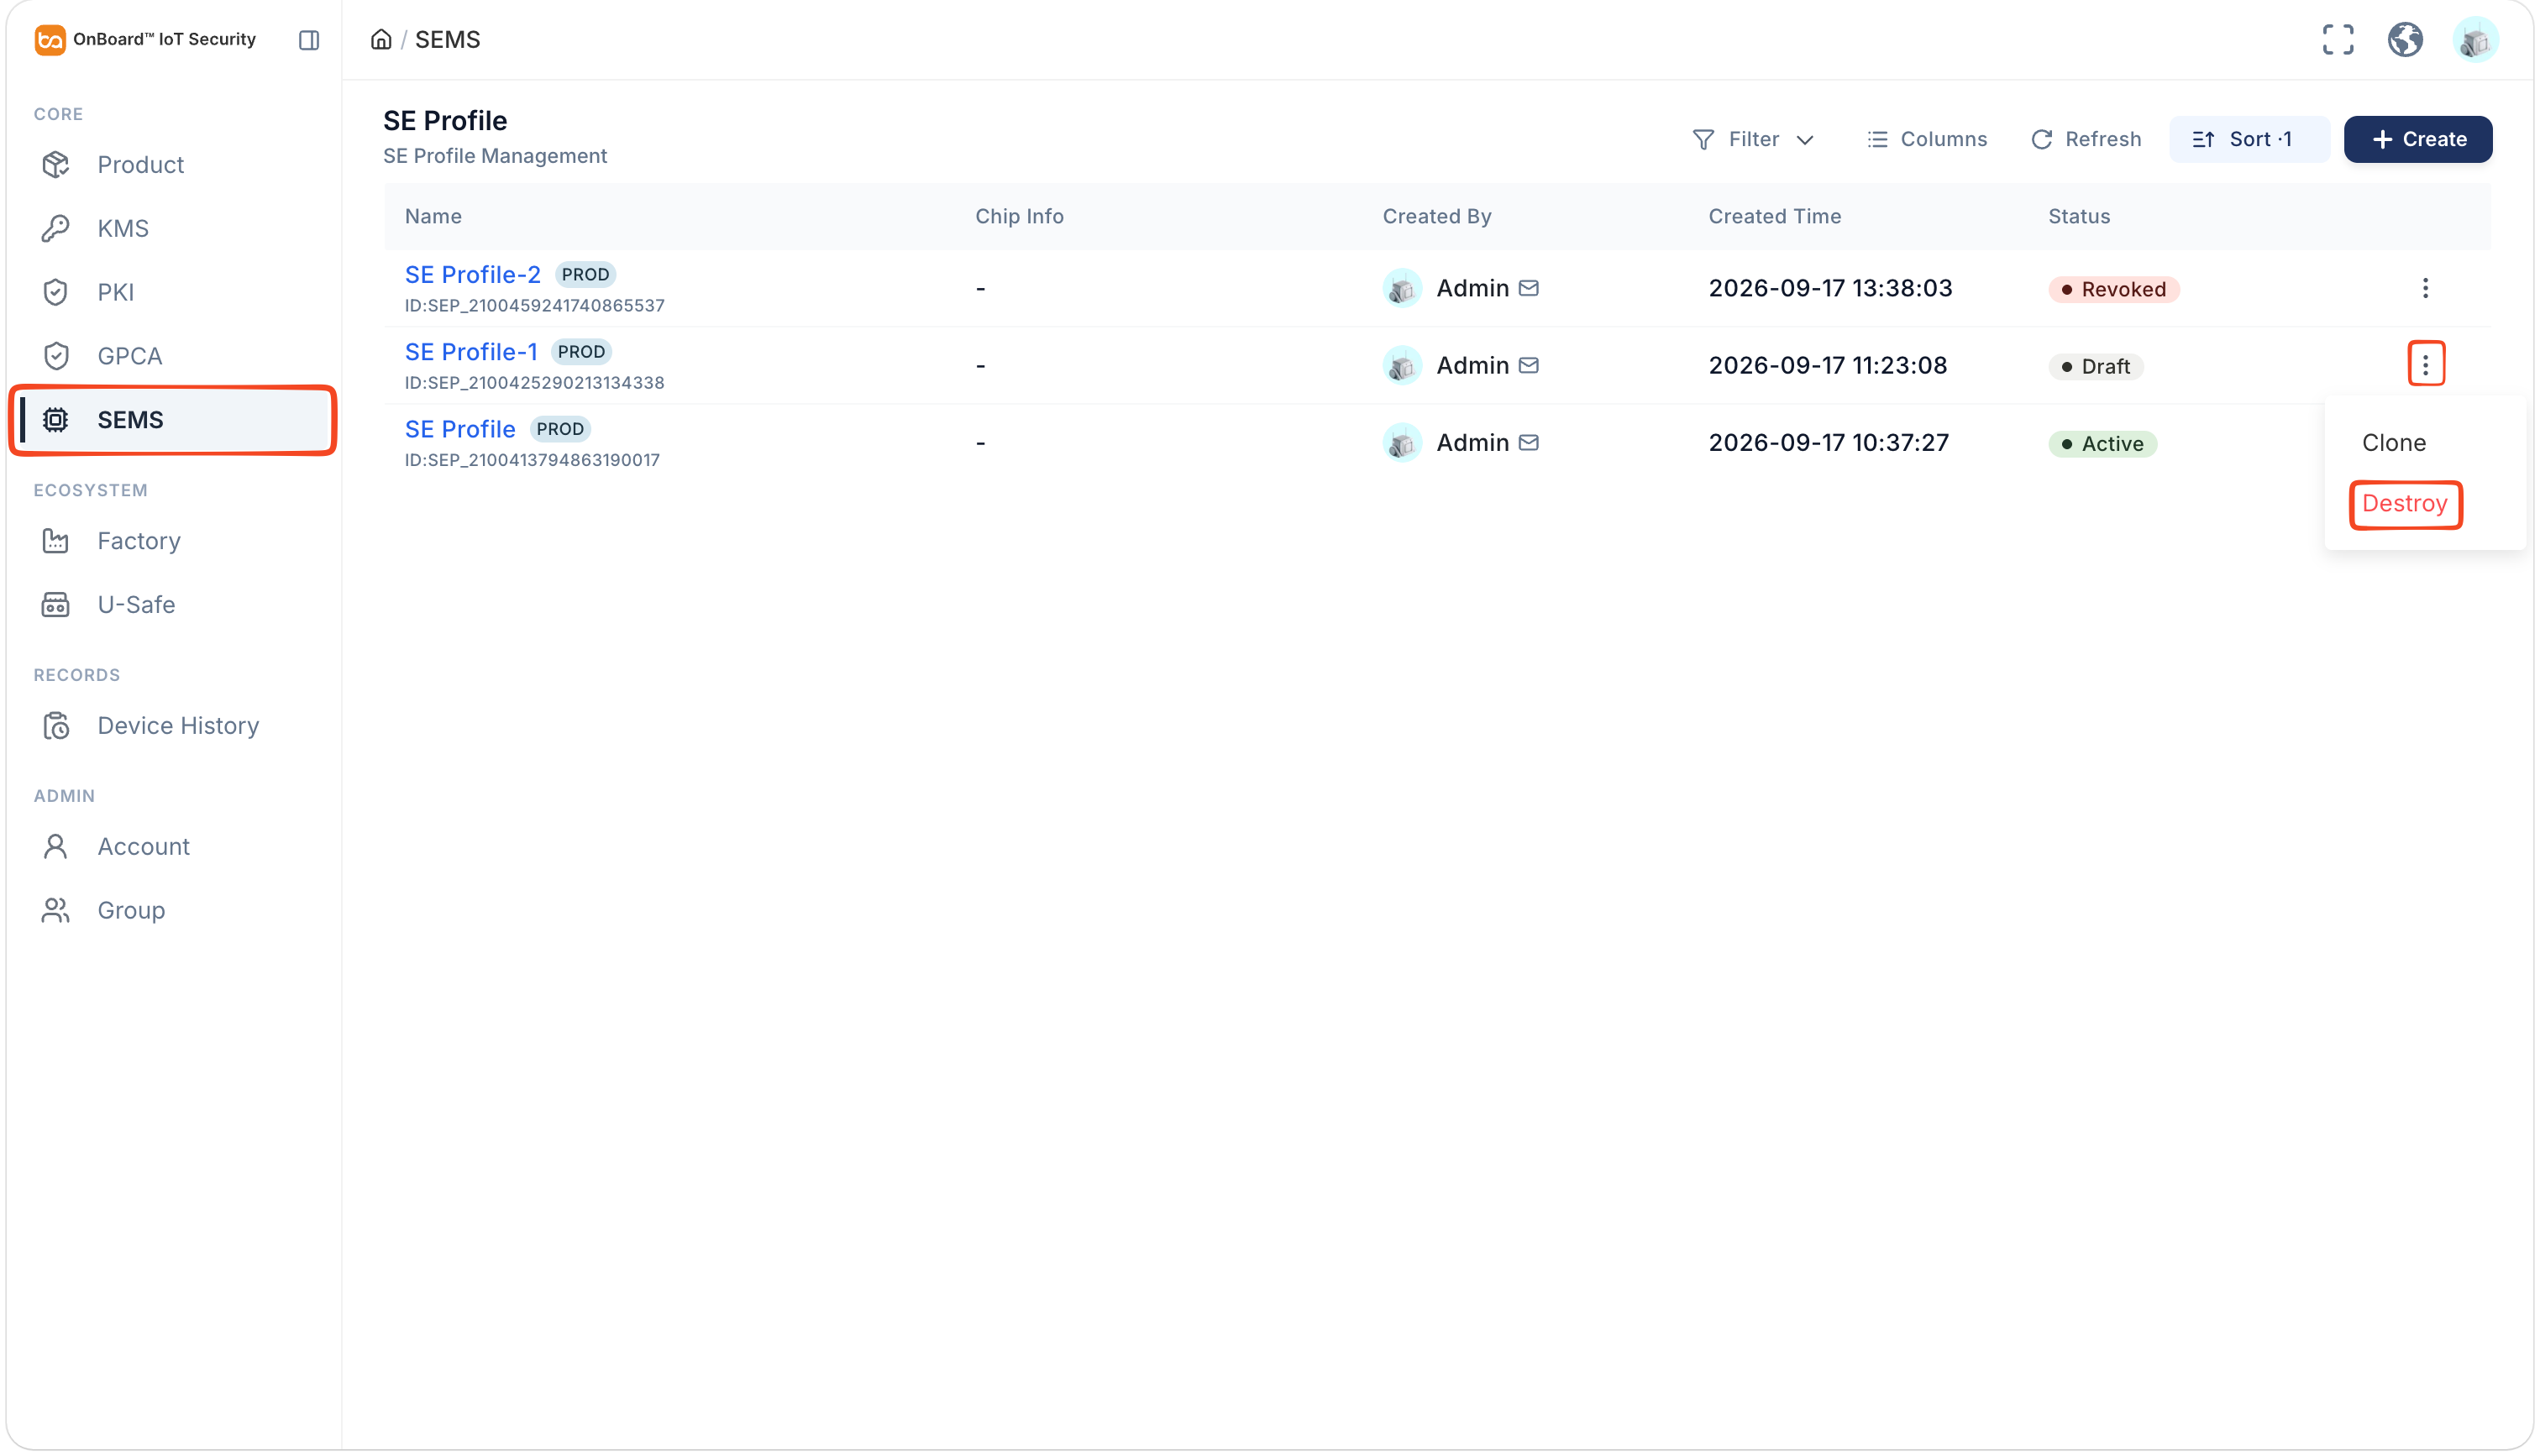
-
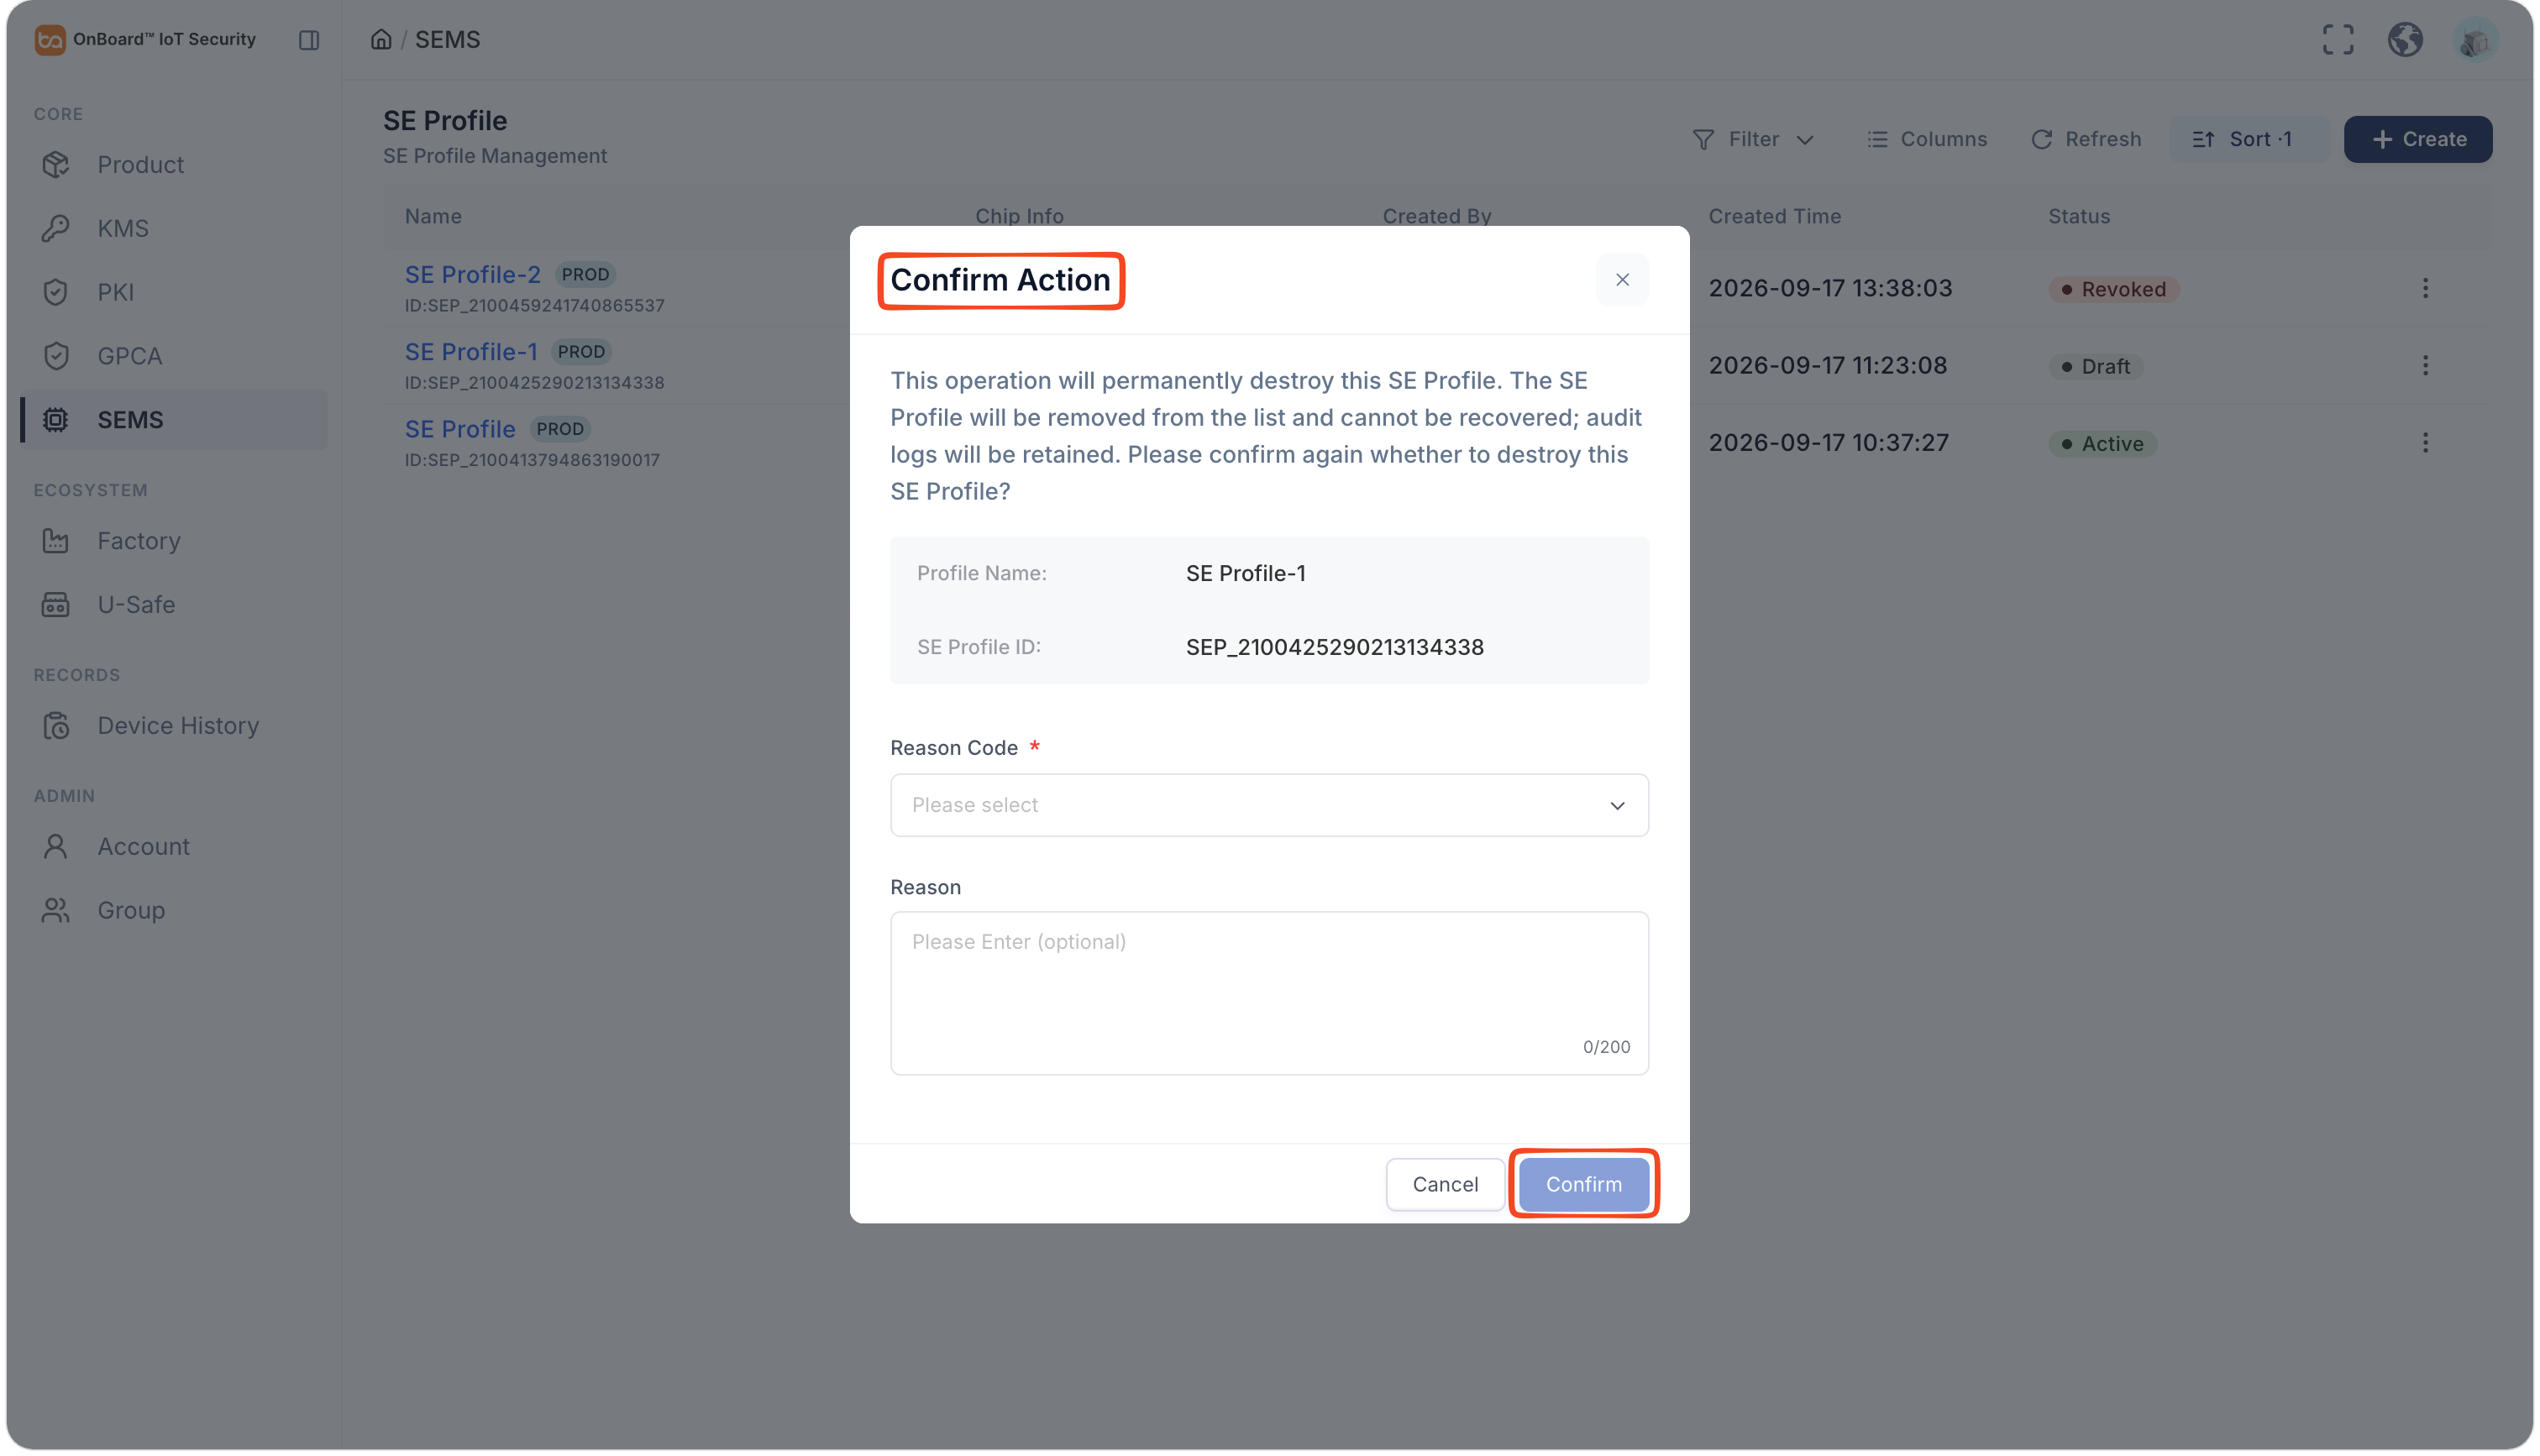
In the Confirm Action window, select the Reason Code and enter the Reason, then click Confirm to destroy the SE Profile.

 Download User Manual