How to manage product members in OnBoard™ IoT Security
You can check members' activity records for the product in the Logs area of the Setting tab.
This article will guide you through the following operations in OnBoard™ IoT Security (OBIS) to manage user access and permissions for a product:
- Add a user
- Update user role
- Remove a user
- Add a user group
- Update user group role
- Remove a user group
Prerequisites
Before getting started, please ensure that:
- The users and user groups have already been created.
- You have product role permissions for the corresponding product: Product Owner or Product Manager.
Add a user
-
Sign in to OBIS.
-
In the left menu, click Product, and then select the corresponding product to navigate to the product page.
-
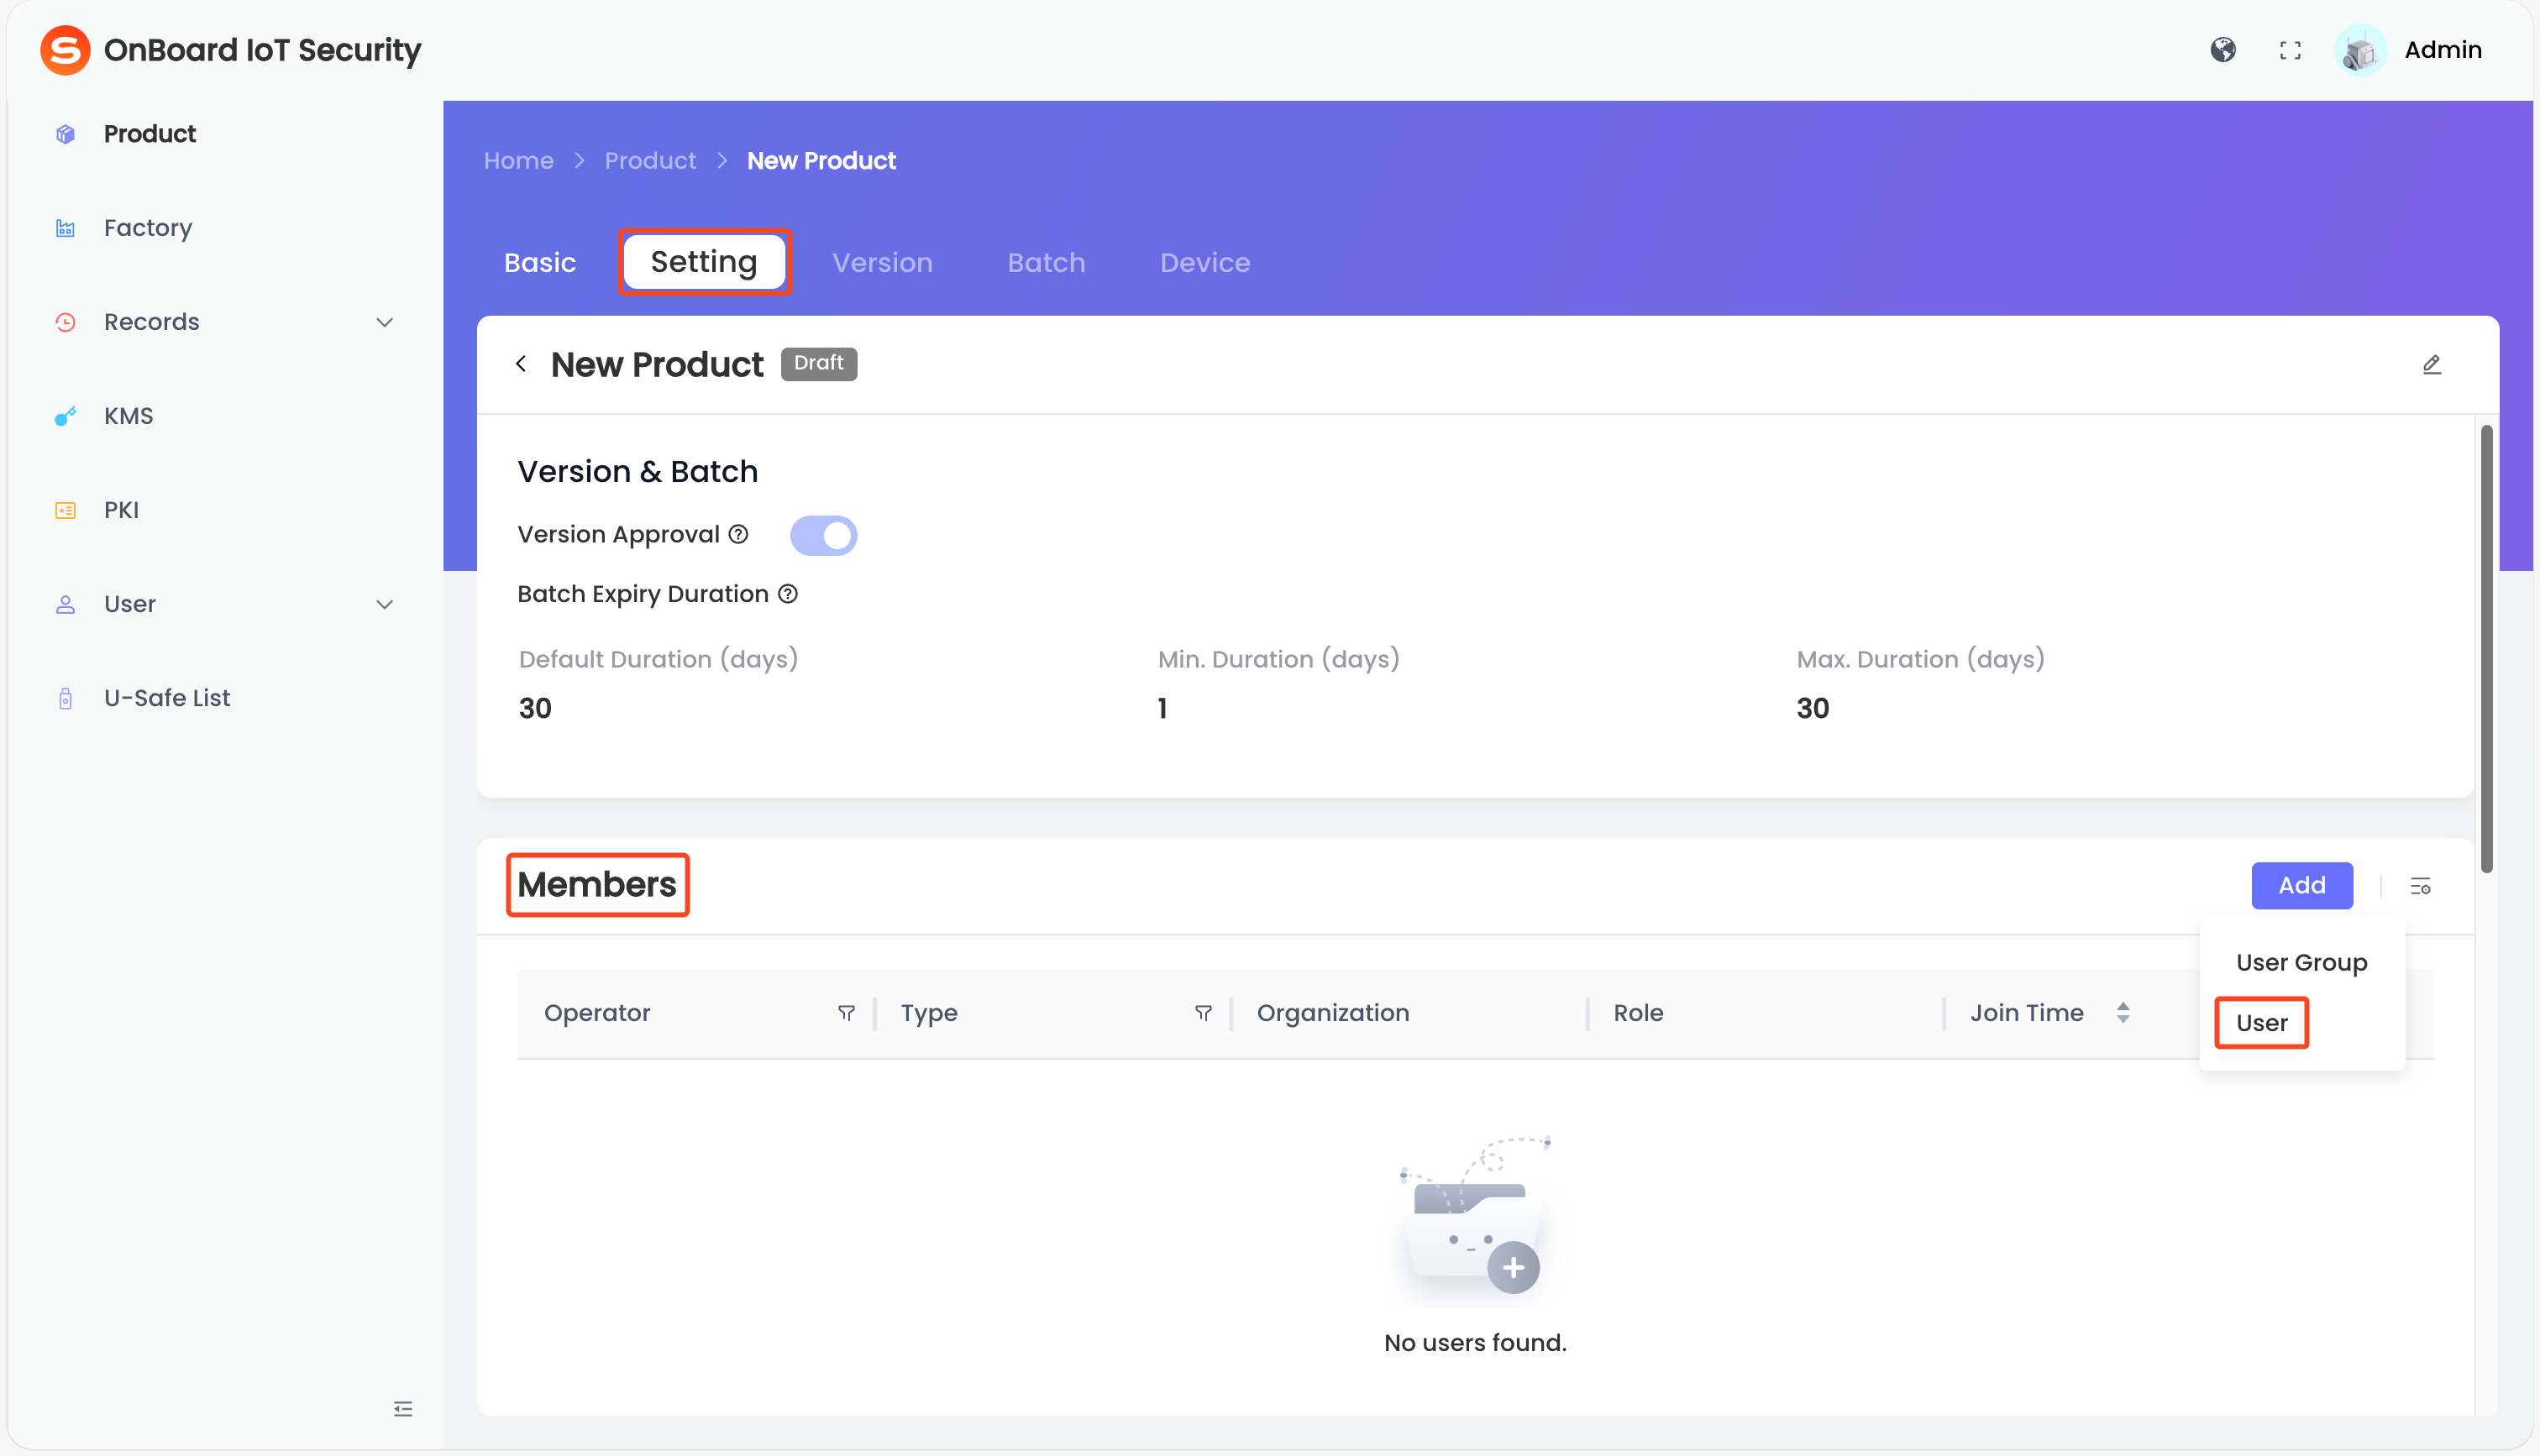
On the product page, select the Setting tab, click Add in the Members area and then select User.
-
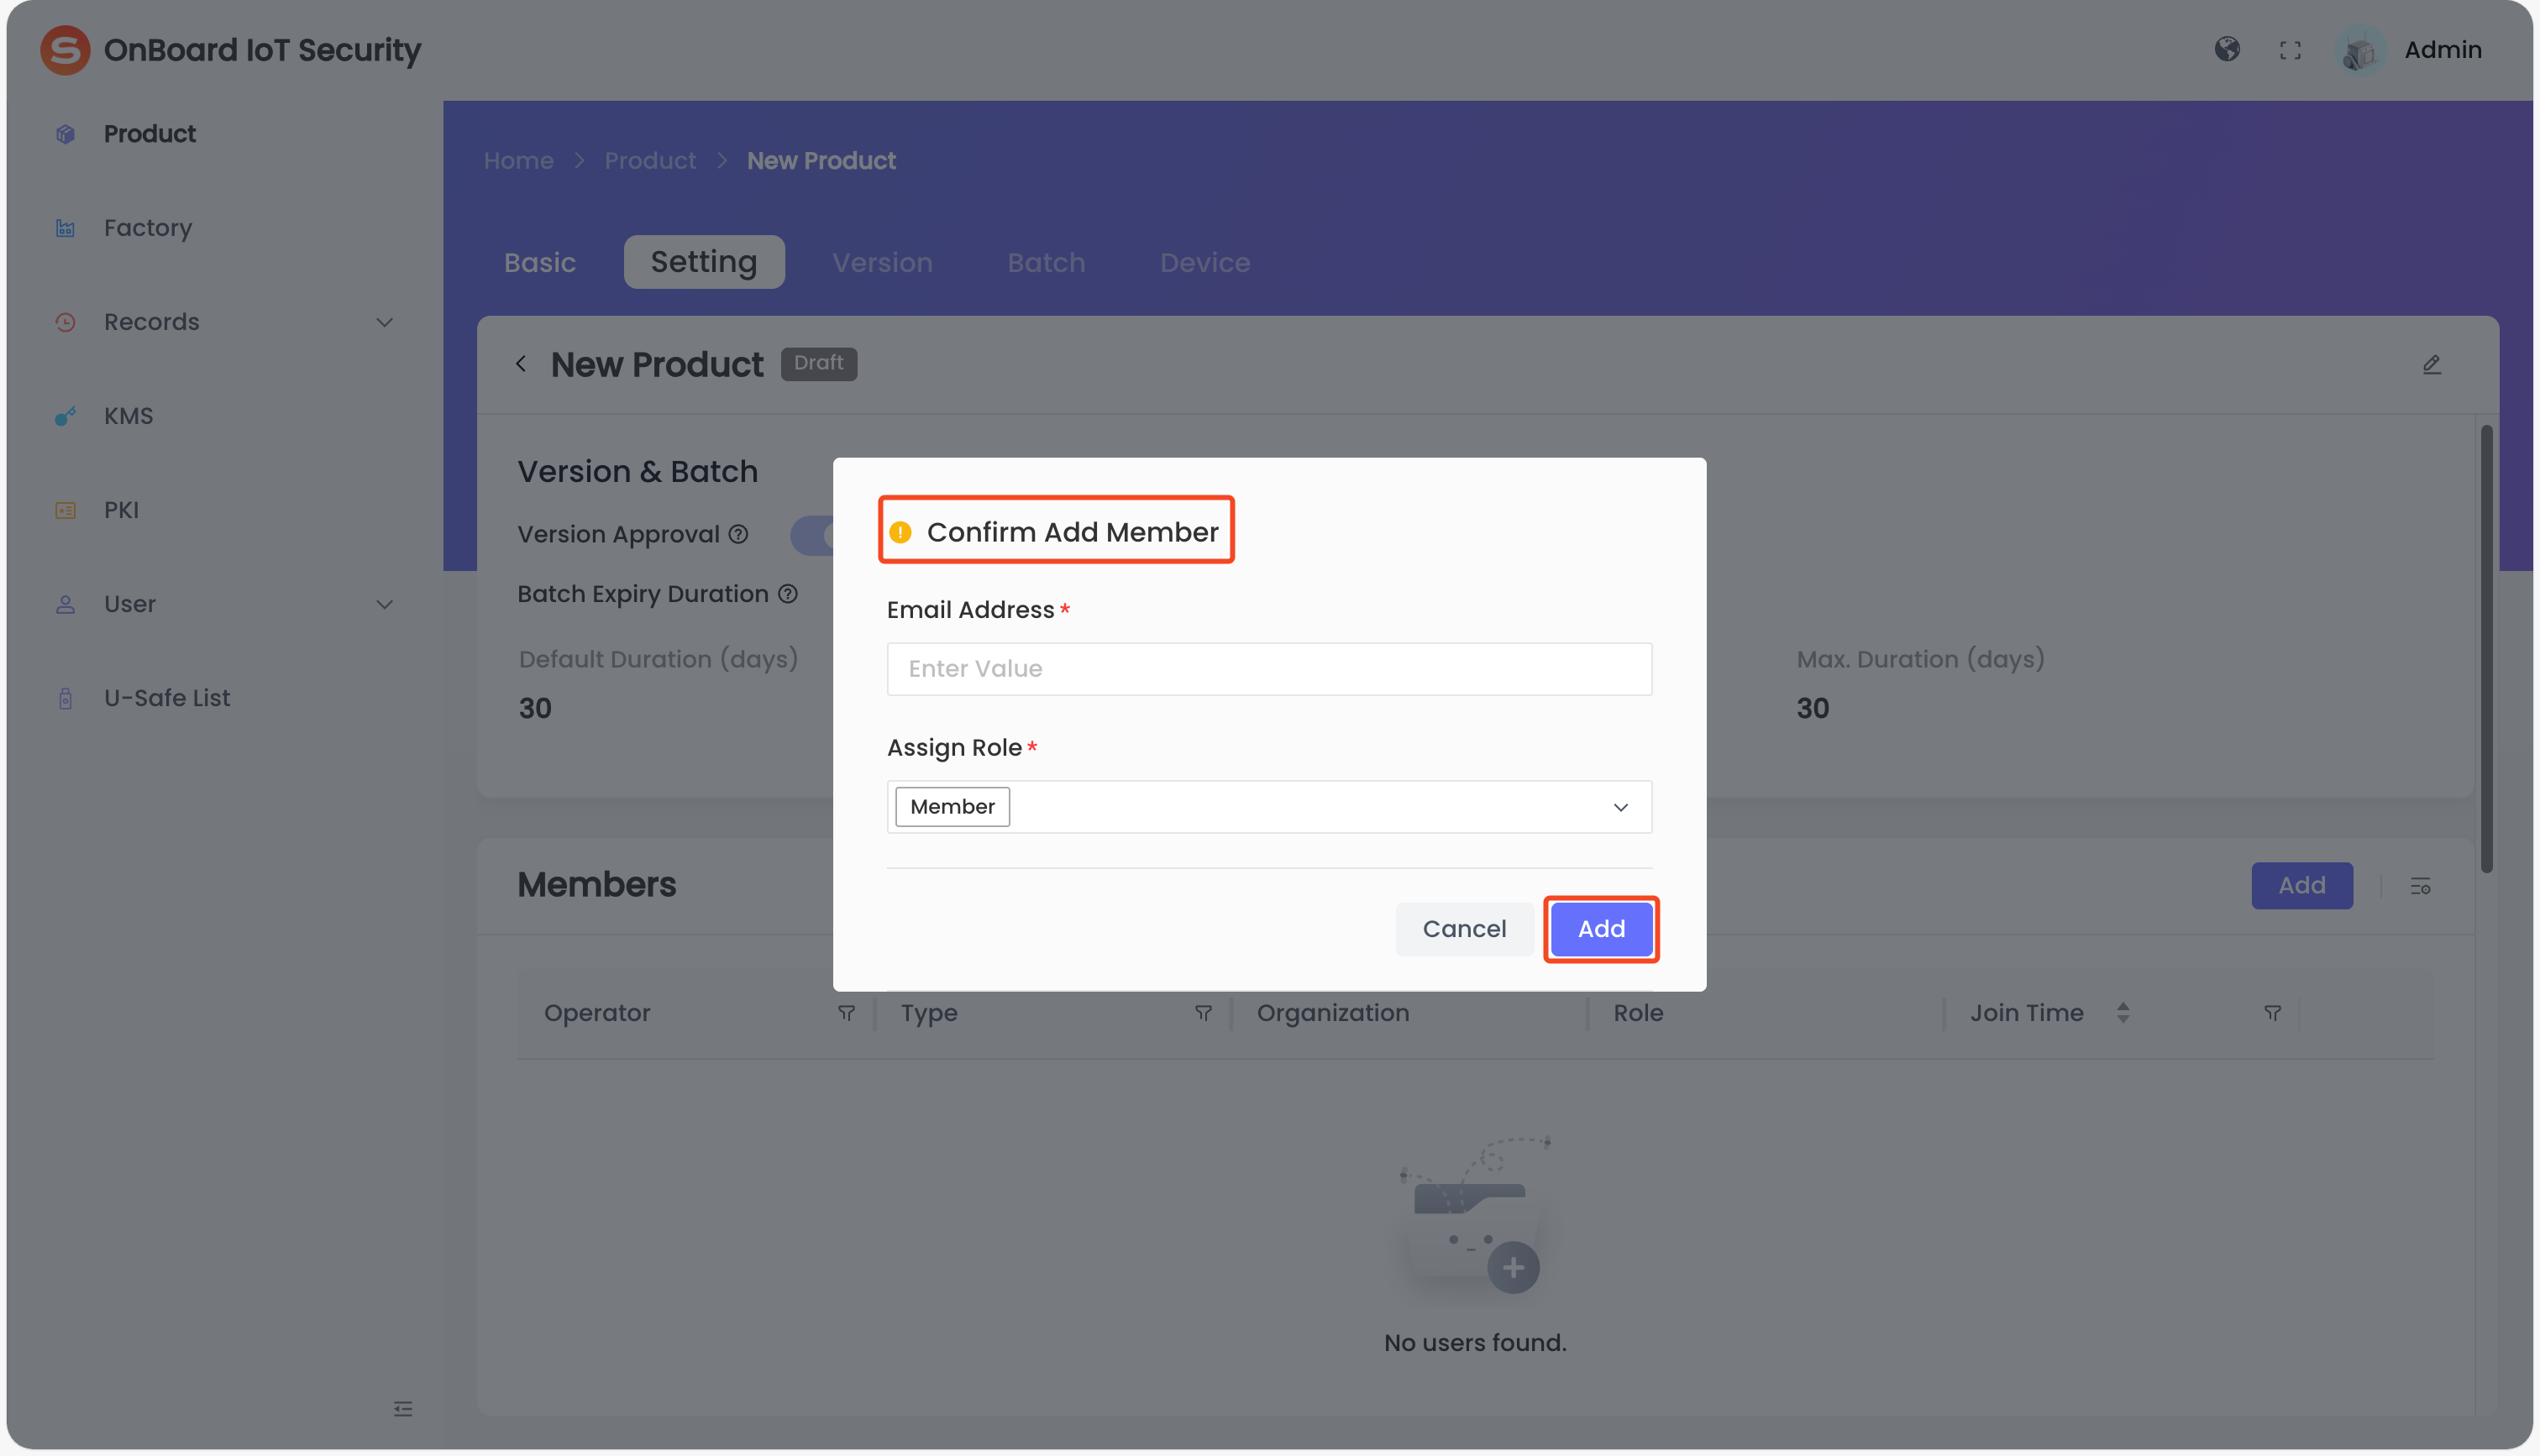
In the Confirm Add Member window, enter the user's email address and then select the roles.
tip- A user can be assigned multiple roles. For more information, refer to the description of product role permissions.
- The added users will receive an email containing a link, through which they can use to access the product details.
- Only users with the Active status can be added. Users from other tenants can be added. For example, a Product Manager from Tenant A can add a user from Tenant B to their product team.
-
Click Add to complete adding a member.
Update user role
-
Sign in to OBIS.
-
In the left menu, click Product, and then select the corresponding product to navigate to the product page.
-
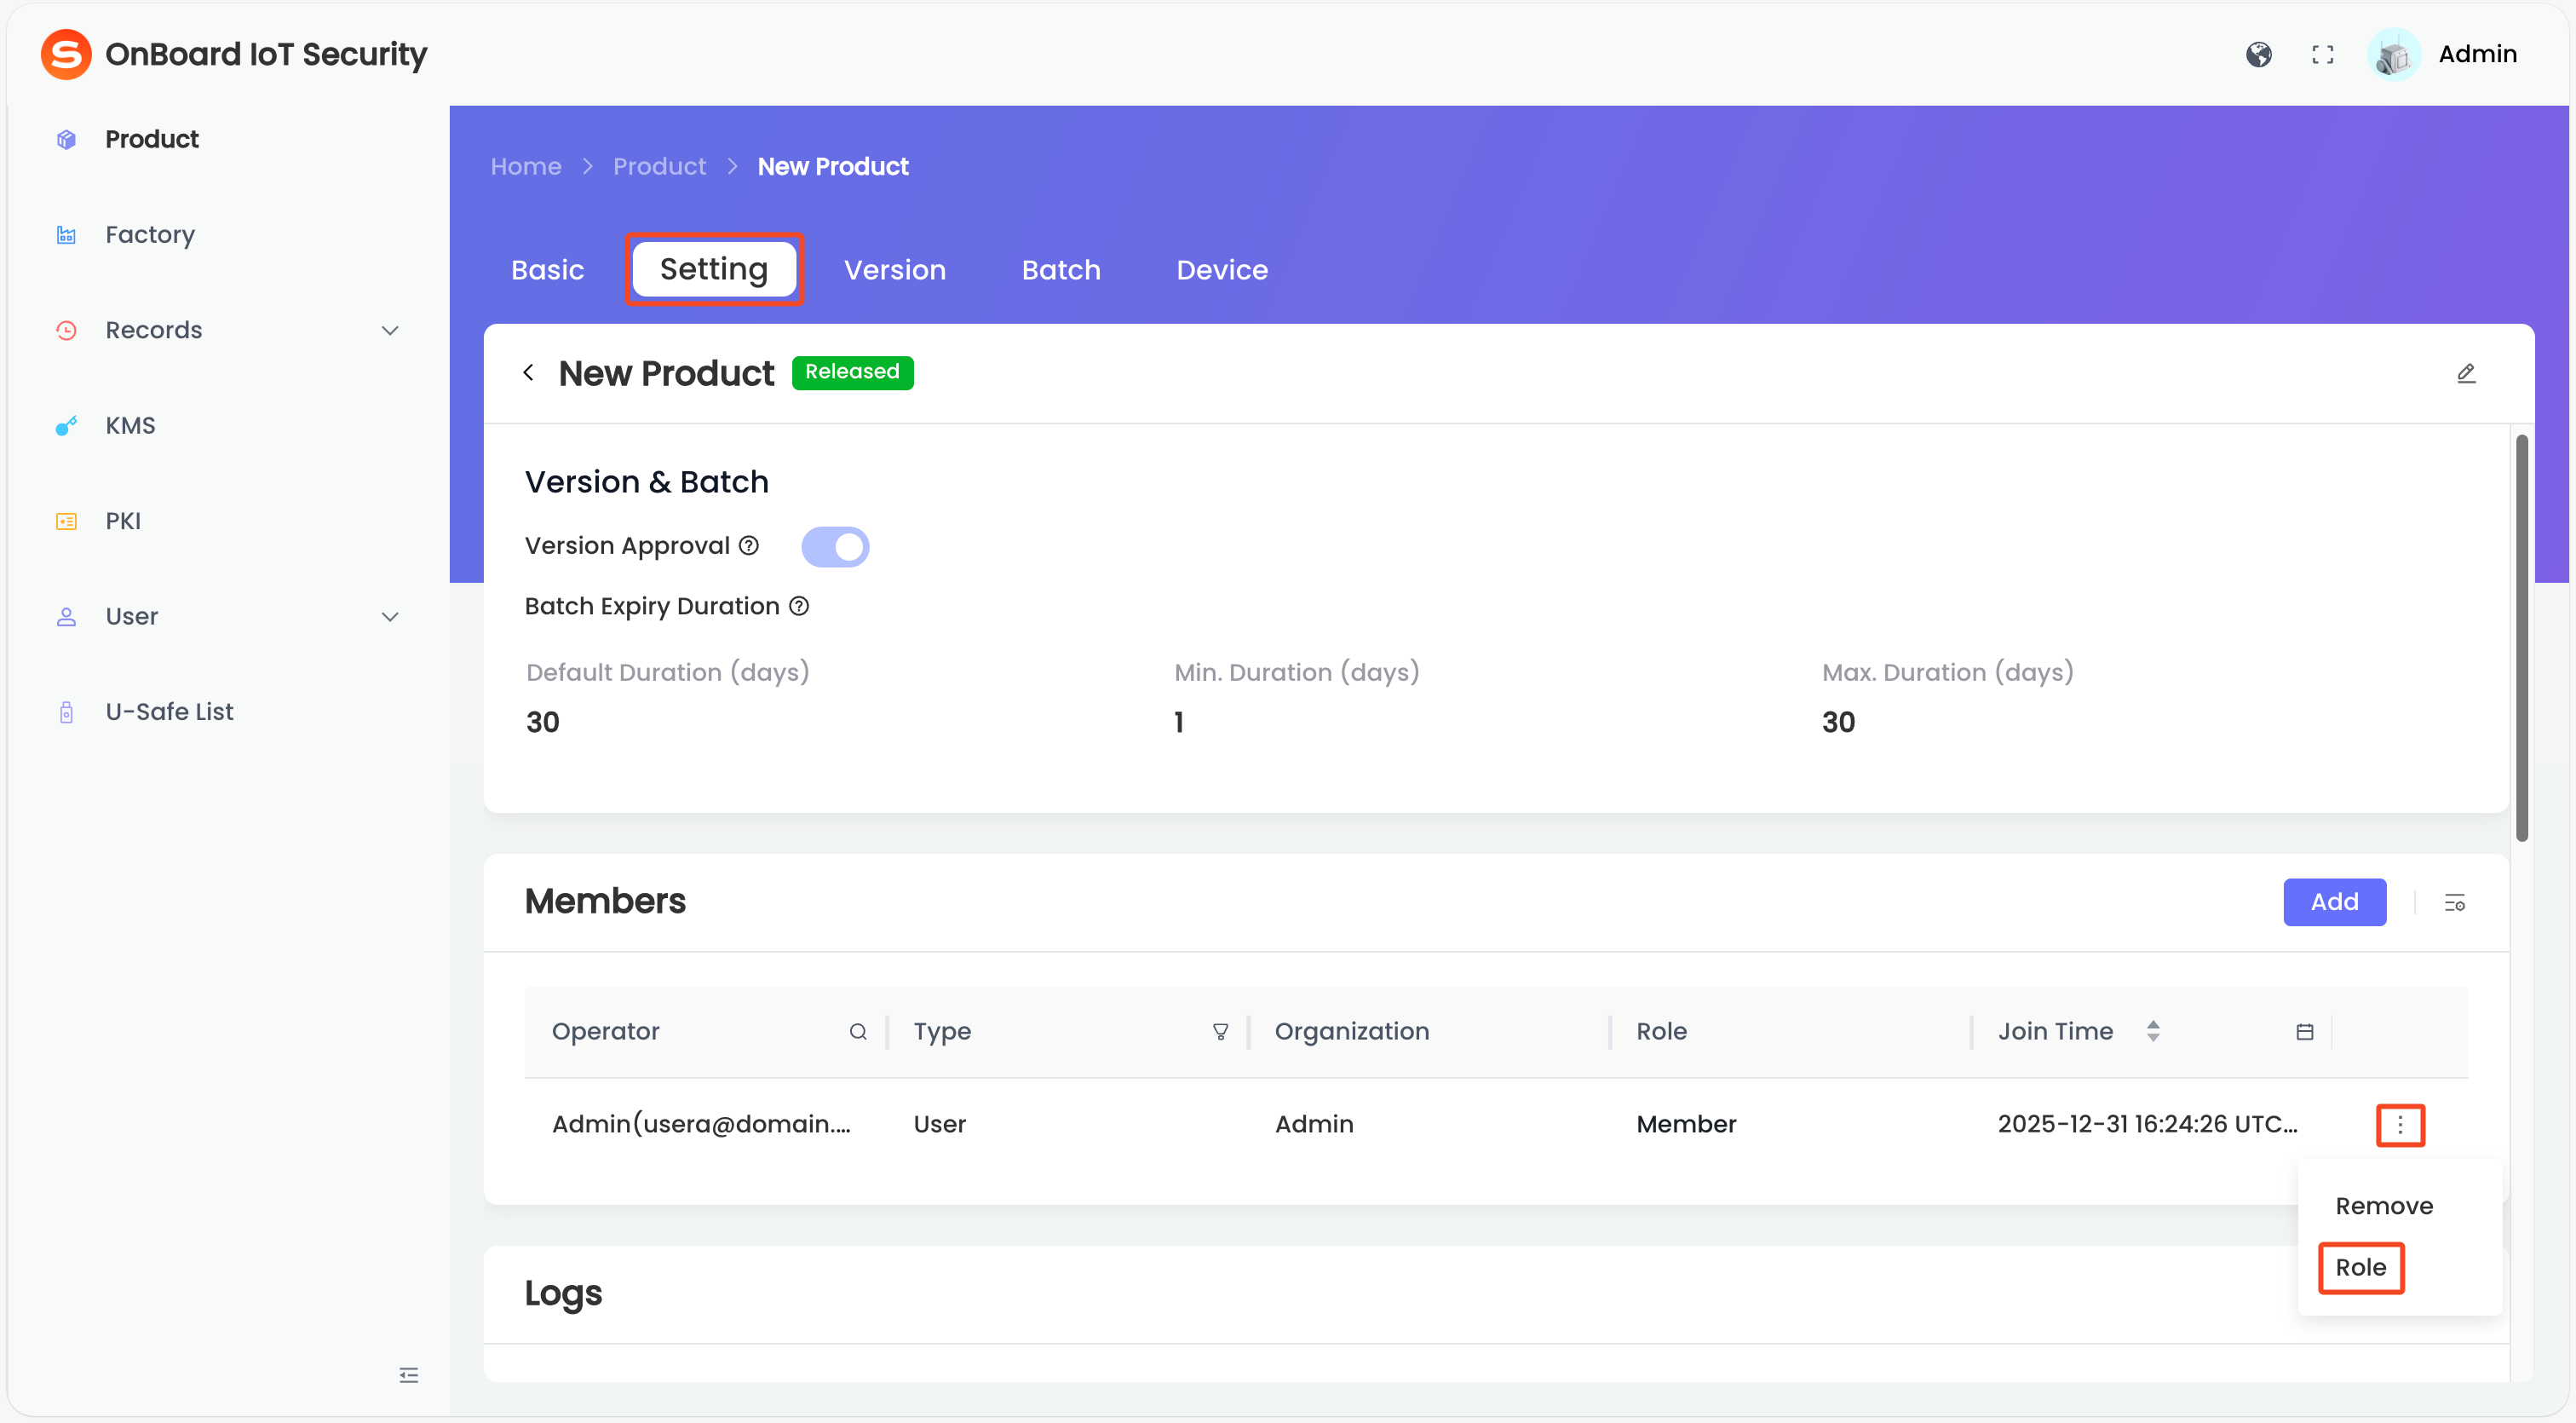
On the product page, select the Setting tab. In the Members area, click the Options
 icon for the corresponding user and then select Role.
-
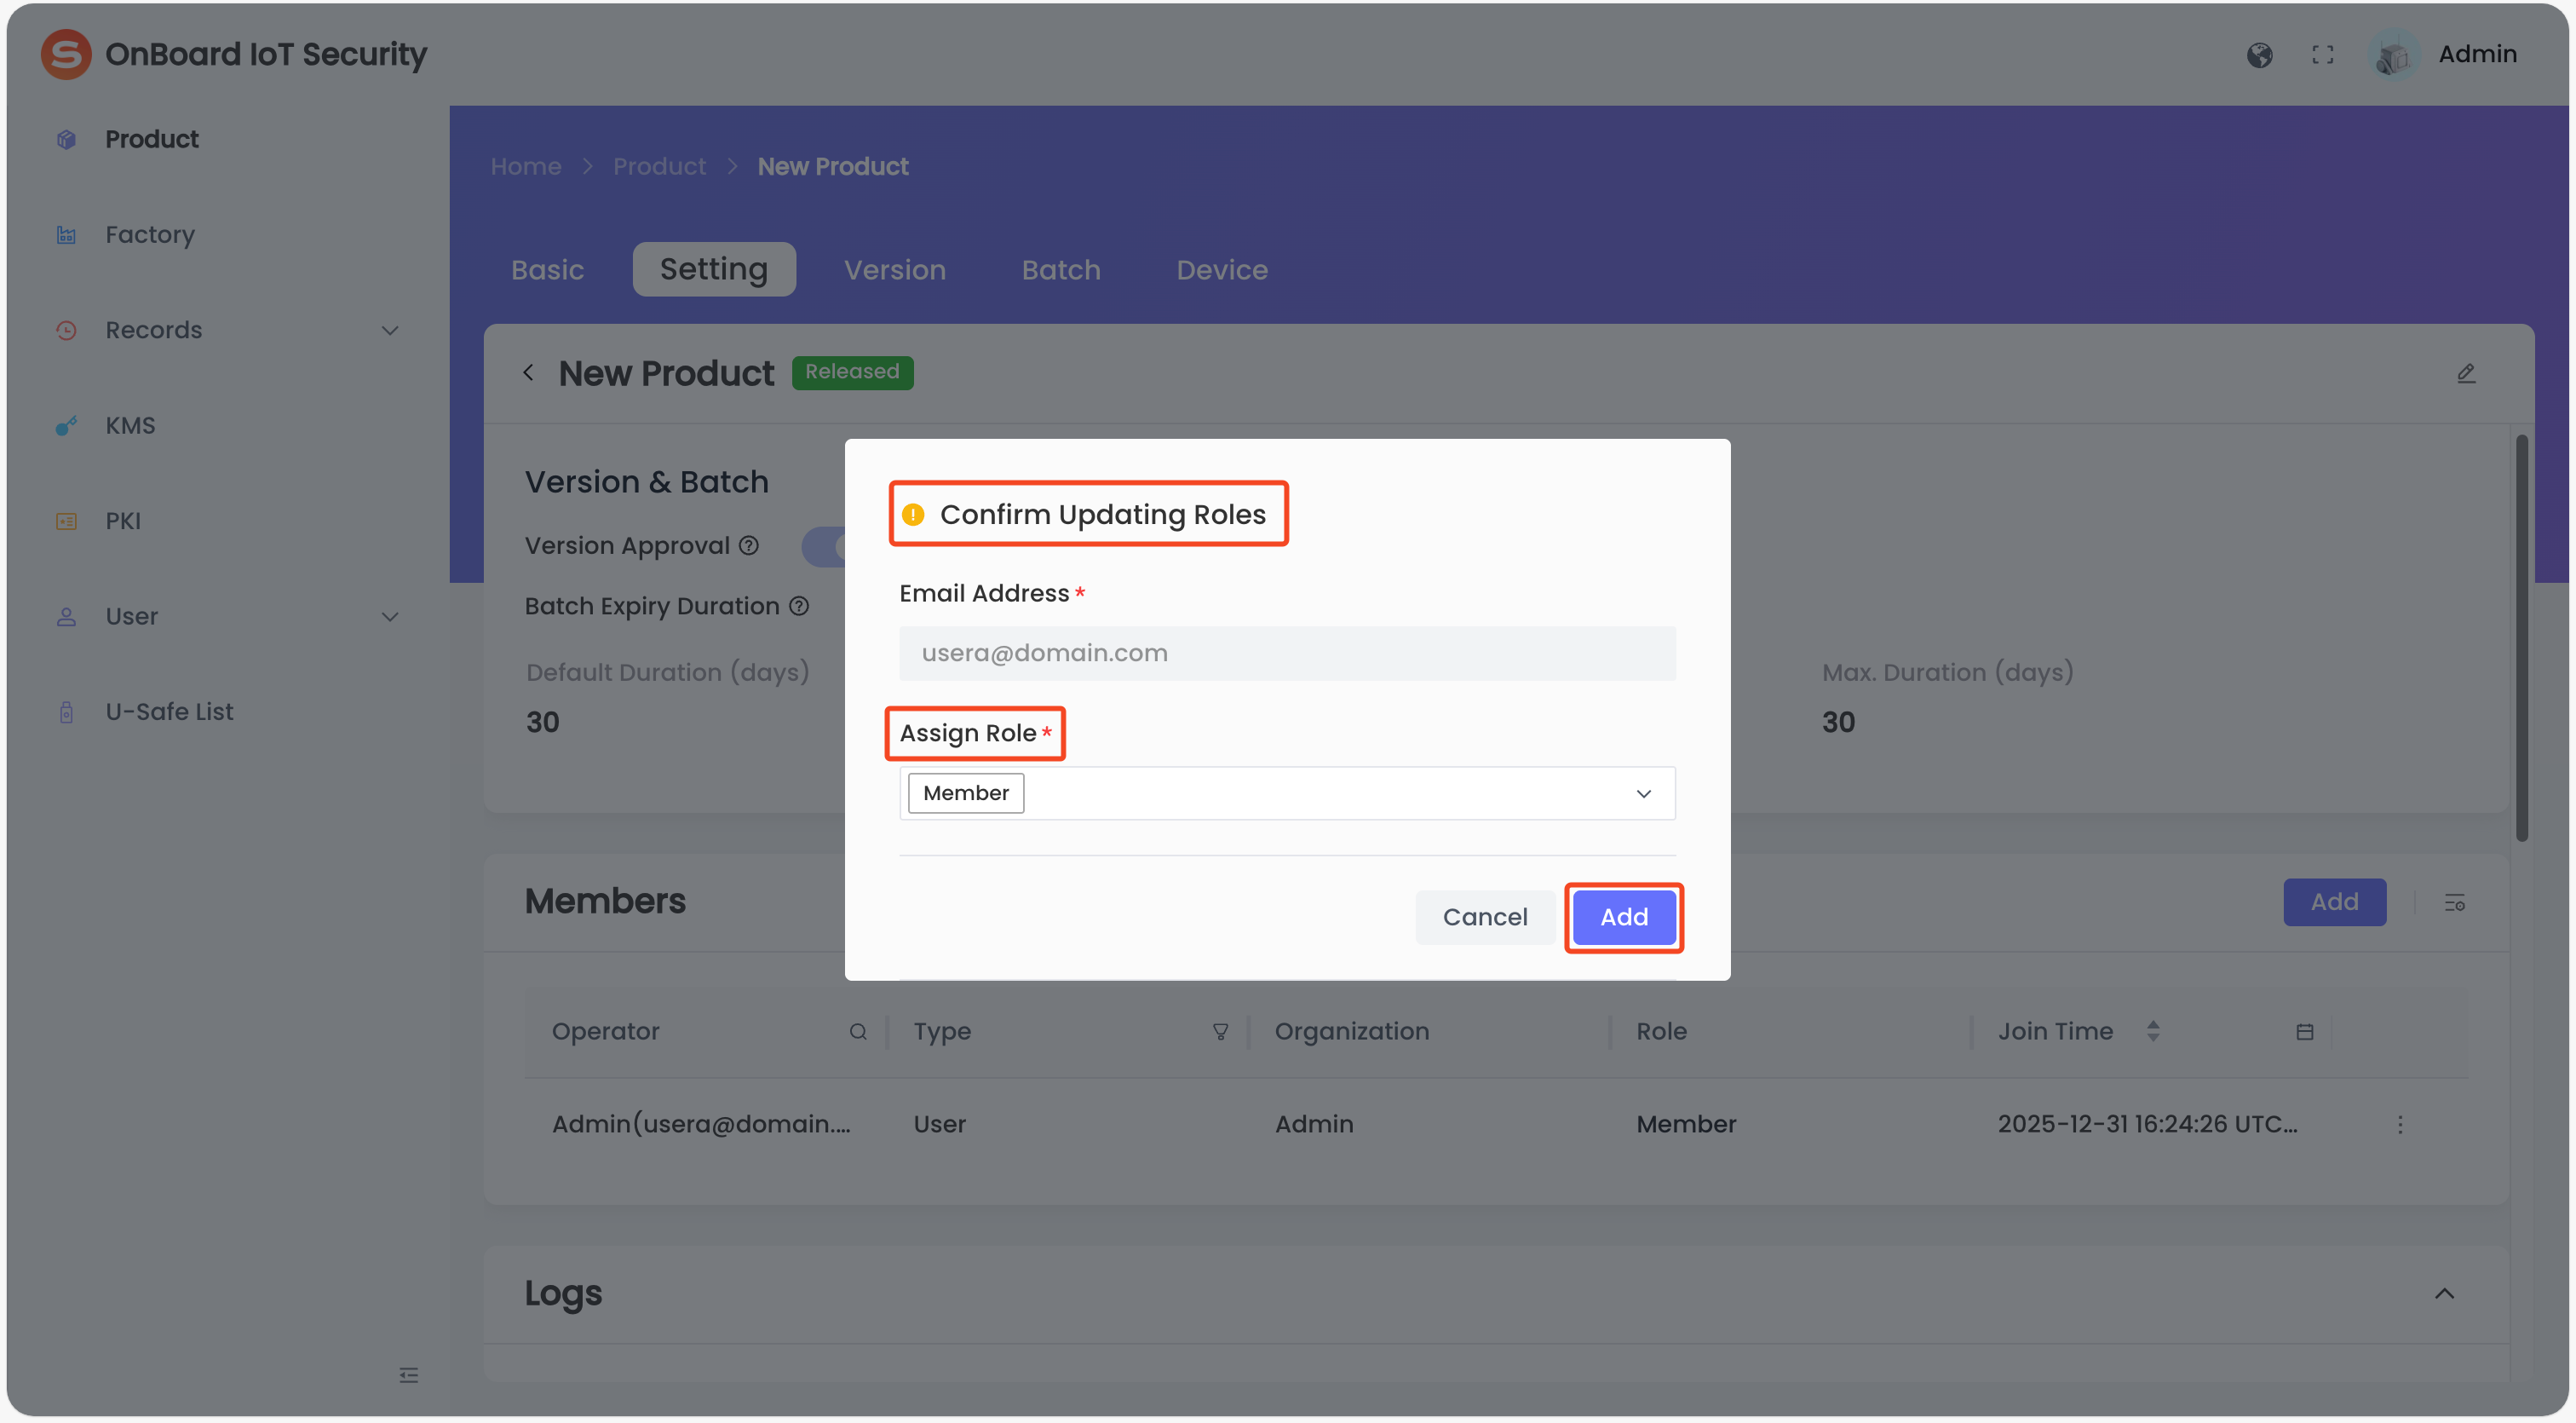
In the Confirm Updating Roles window, select the corresponding roles and then click Add to complete the update.
Remove a user
-
Sign in to OBIS.
-
In the left menu, click Product, and then select the corresponding product to navigate to the product page.
-
On the product page, select the Setting tab. In the Members area, click the Options
icon for the corresponding user and then select Remove.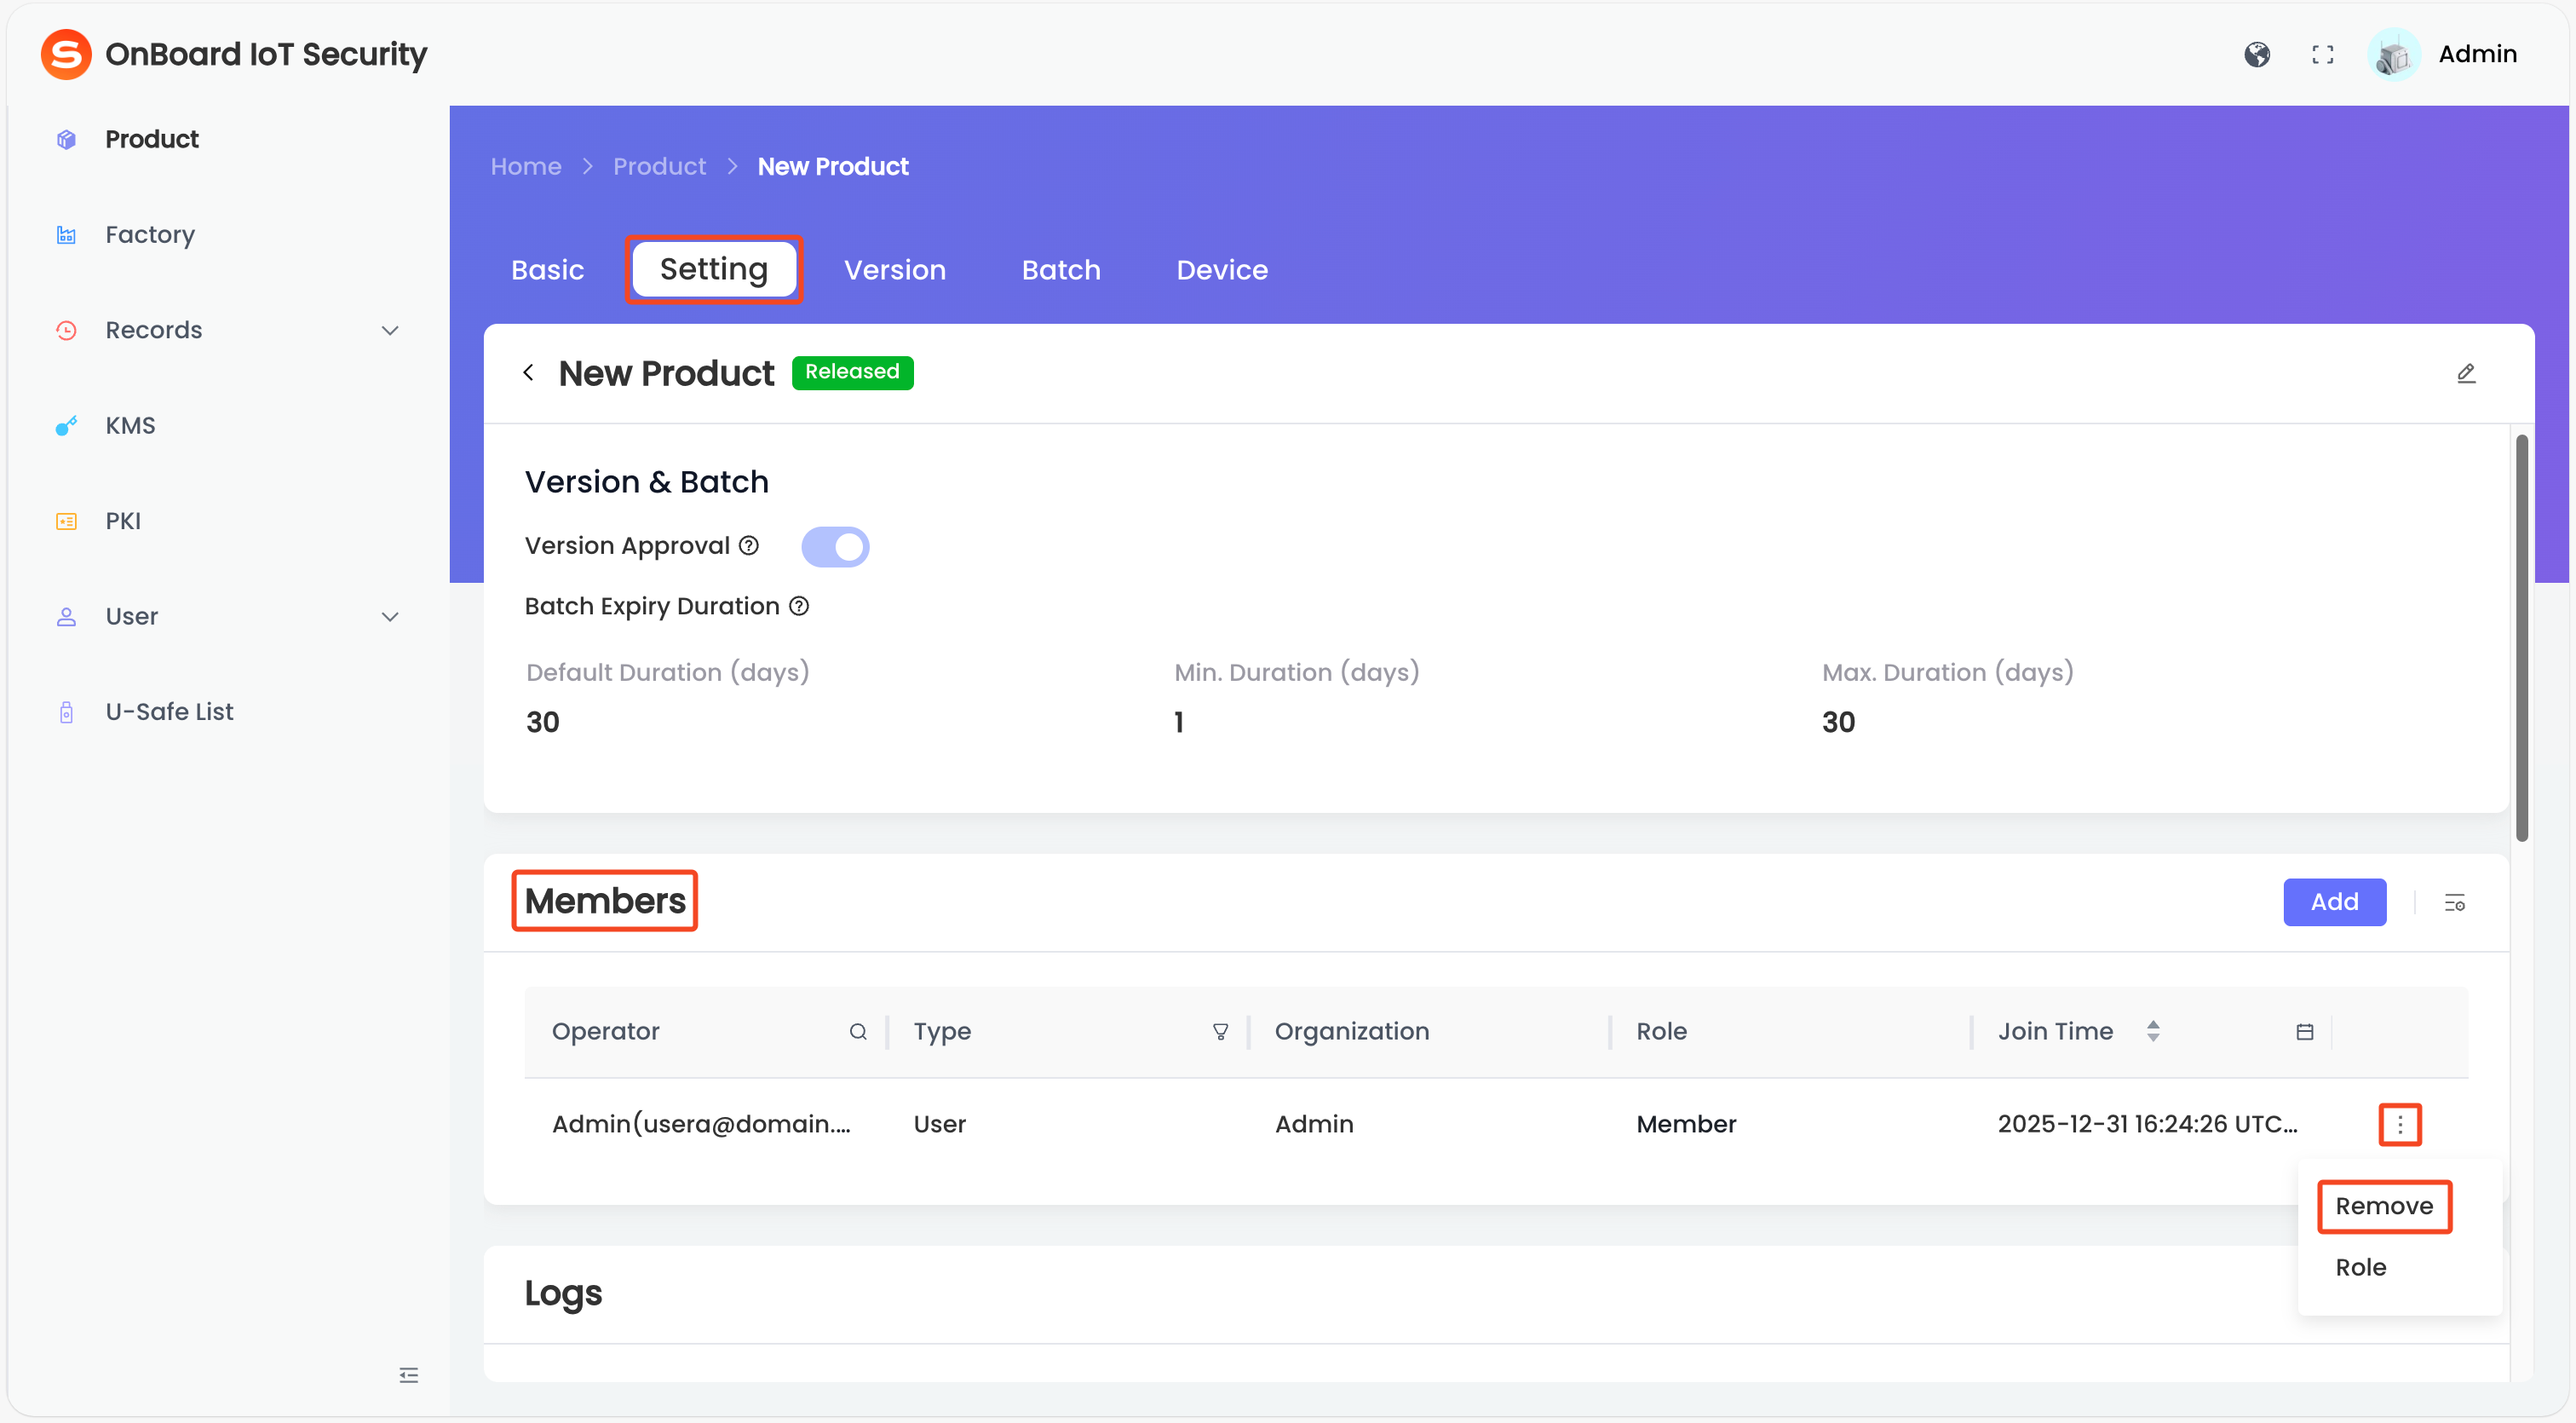
-
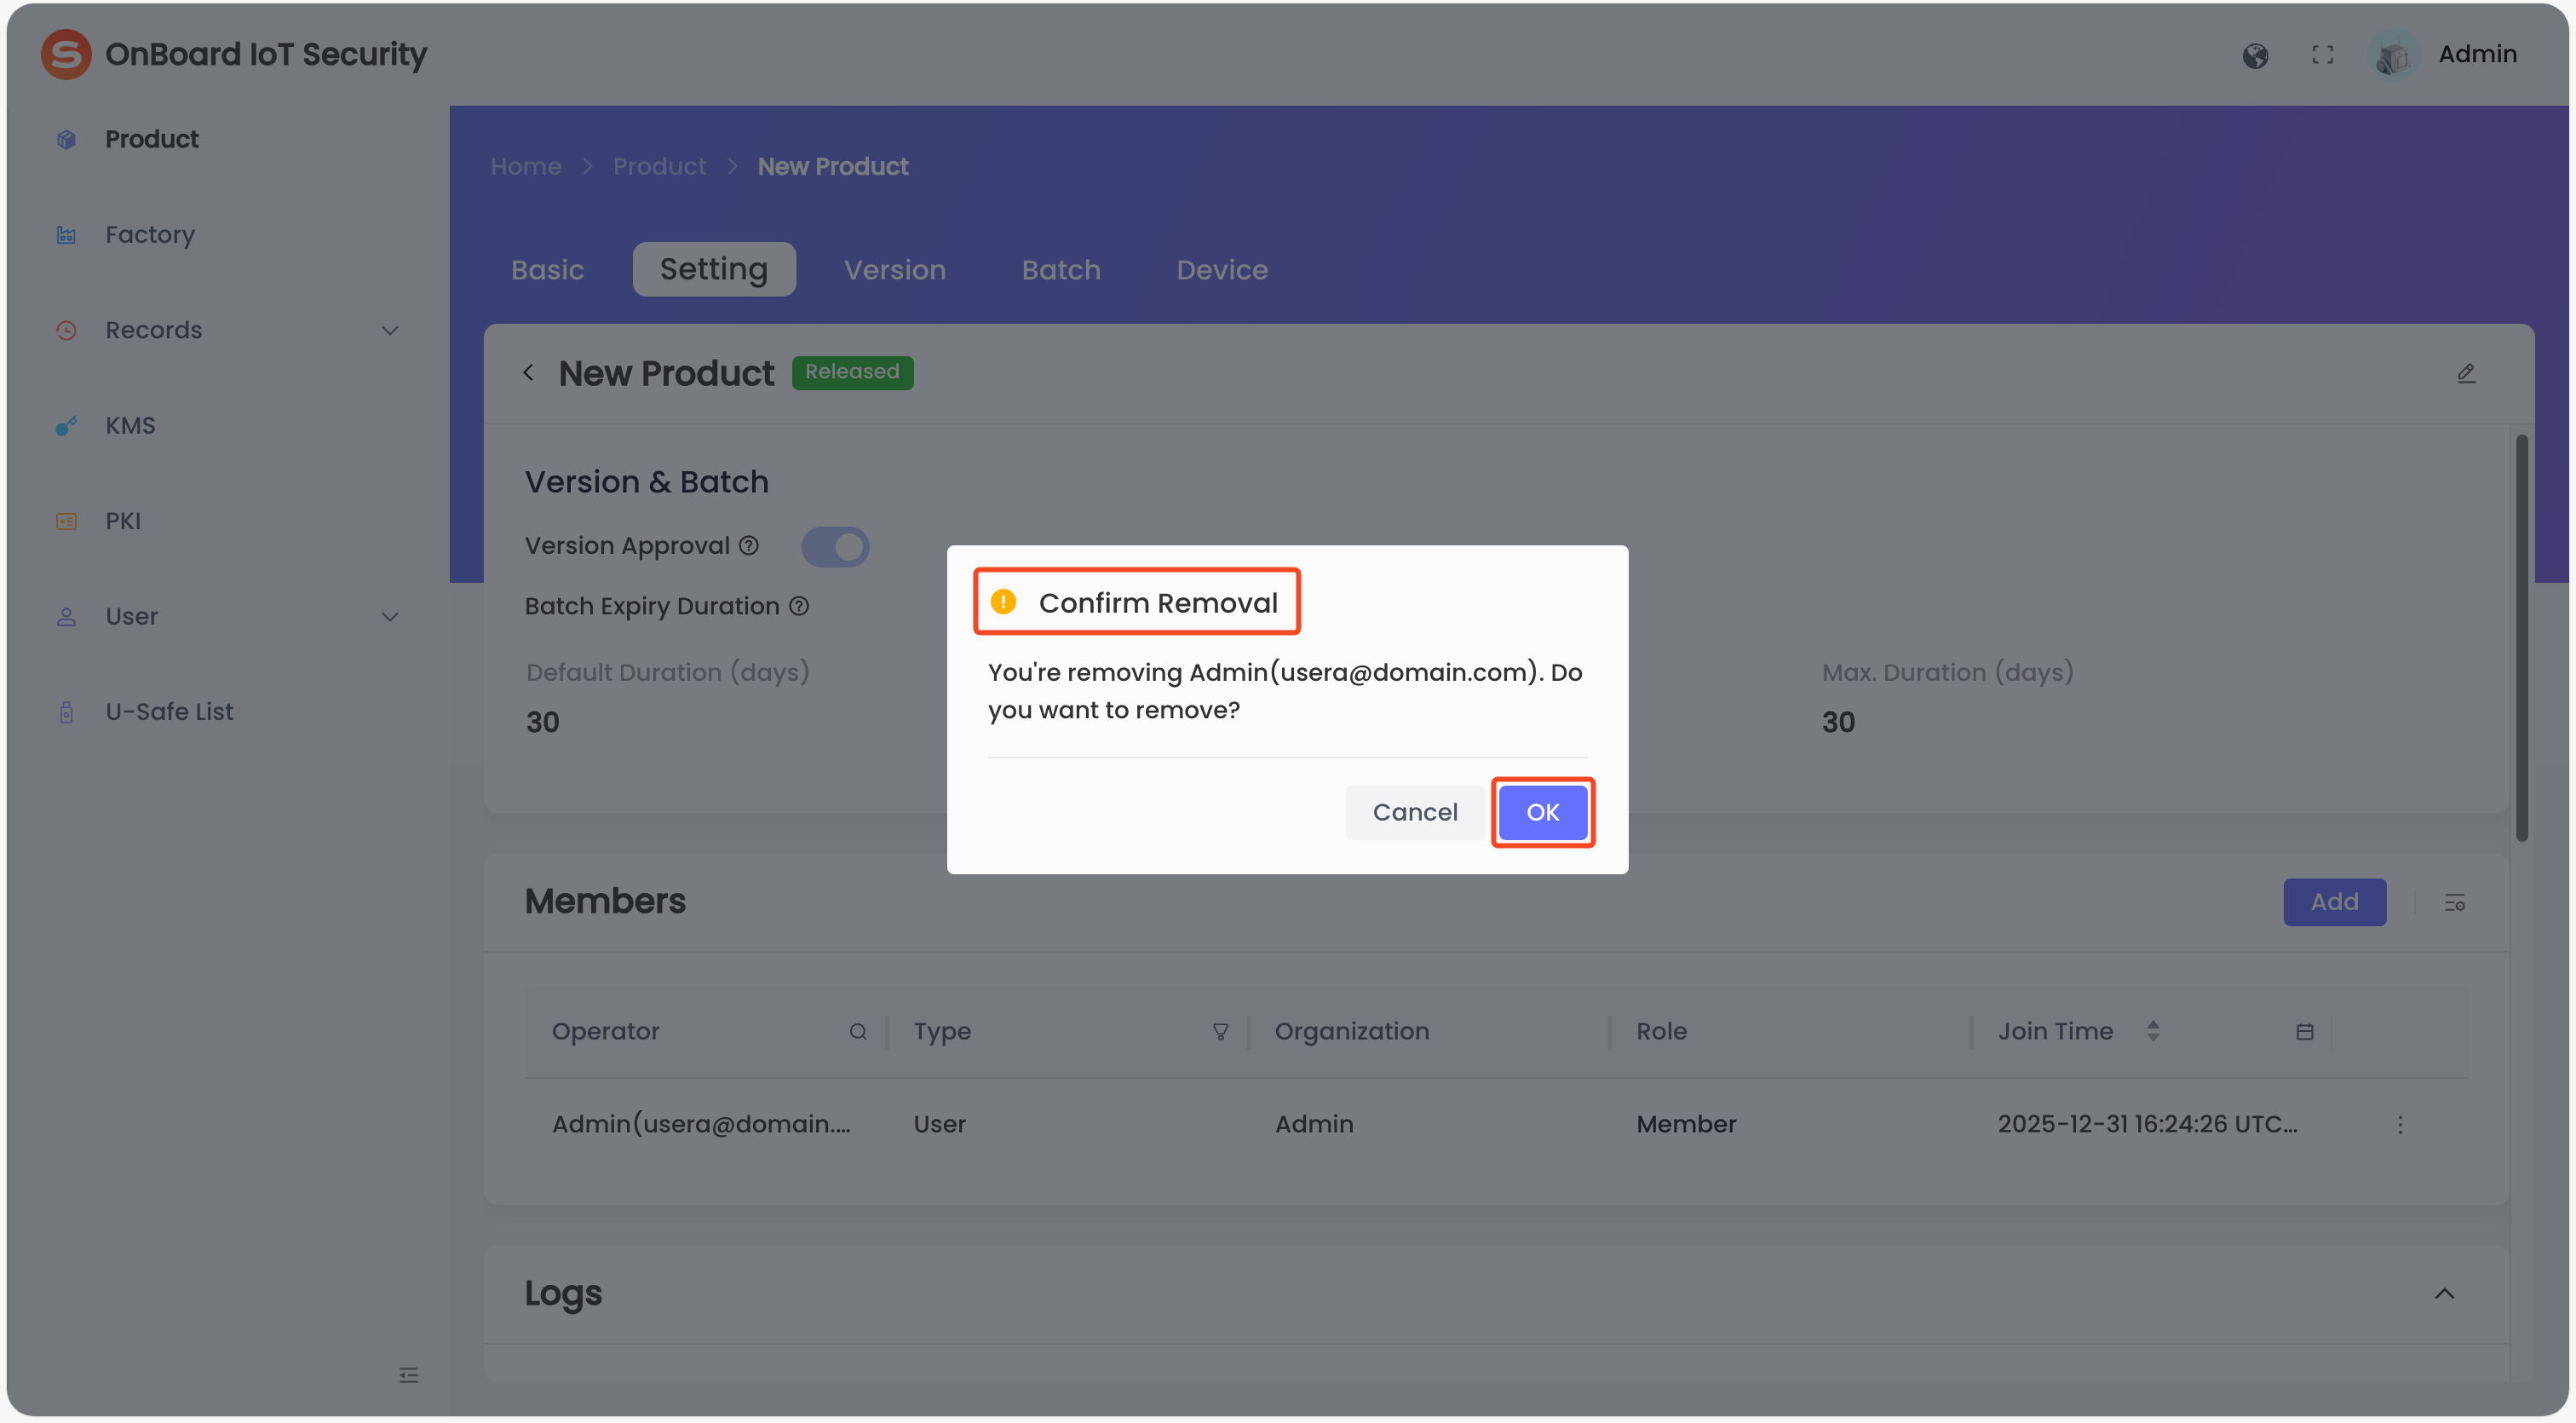
In the Confirm Removal window, verify the information and then click OK to remove the user.
Add a user group
-
Sign in to OBIS.
-
In the left menu, click Product, and then select the corresponding product to navigate to the product page.
-
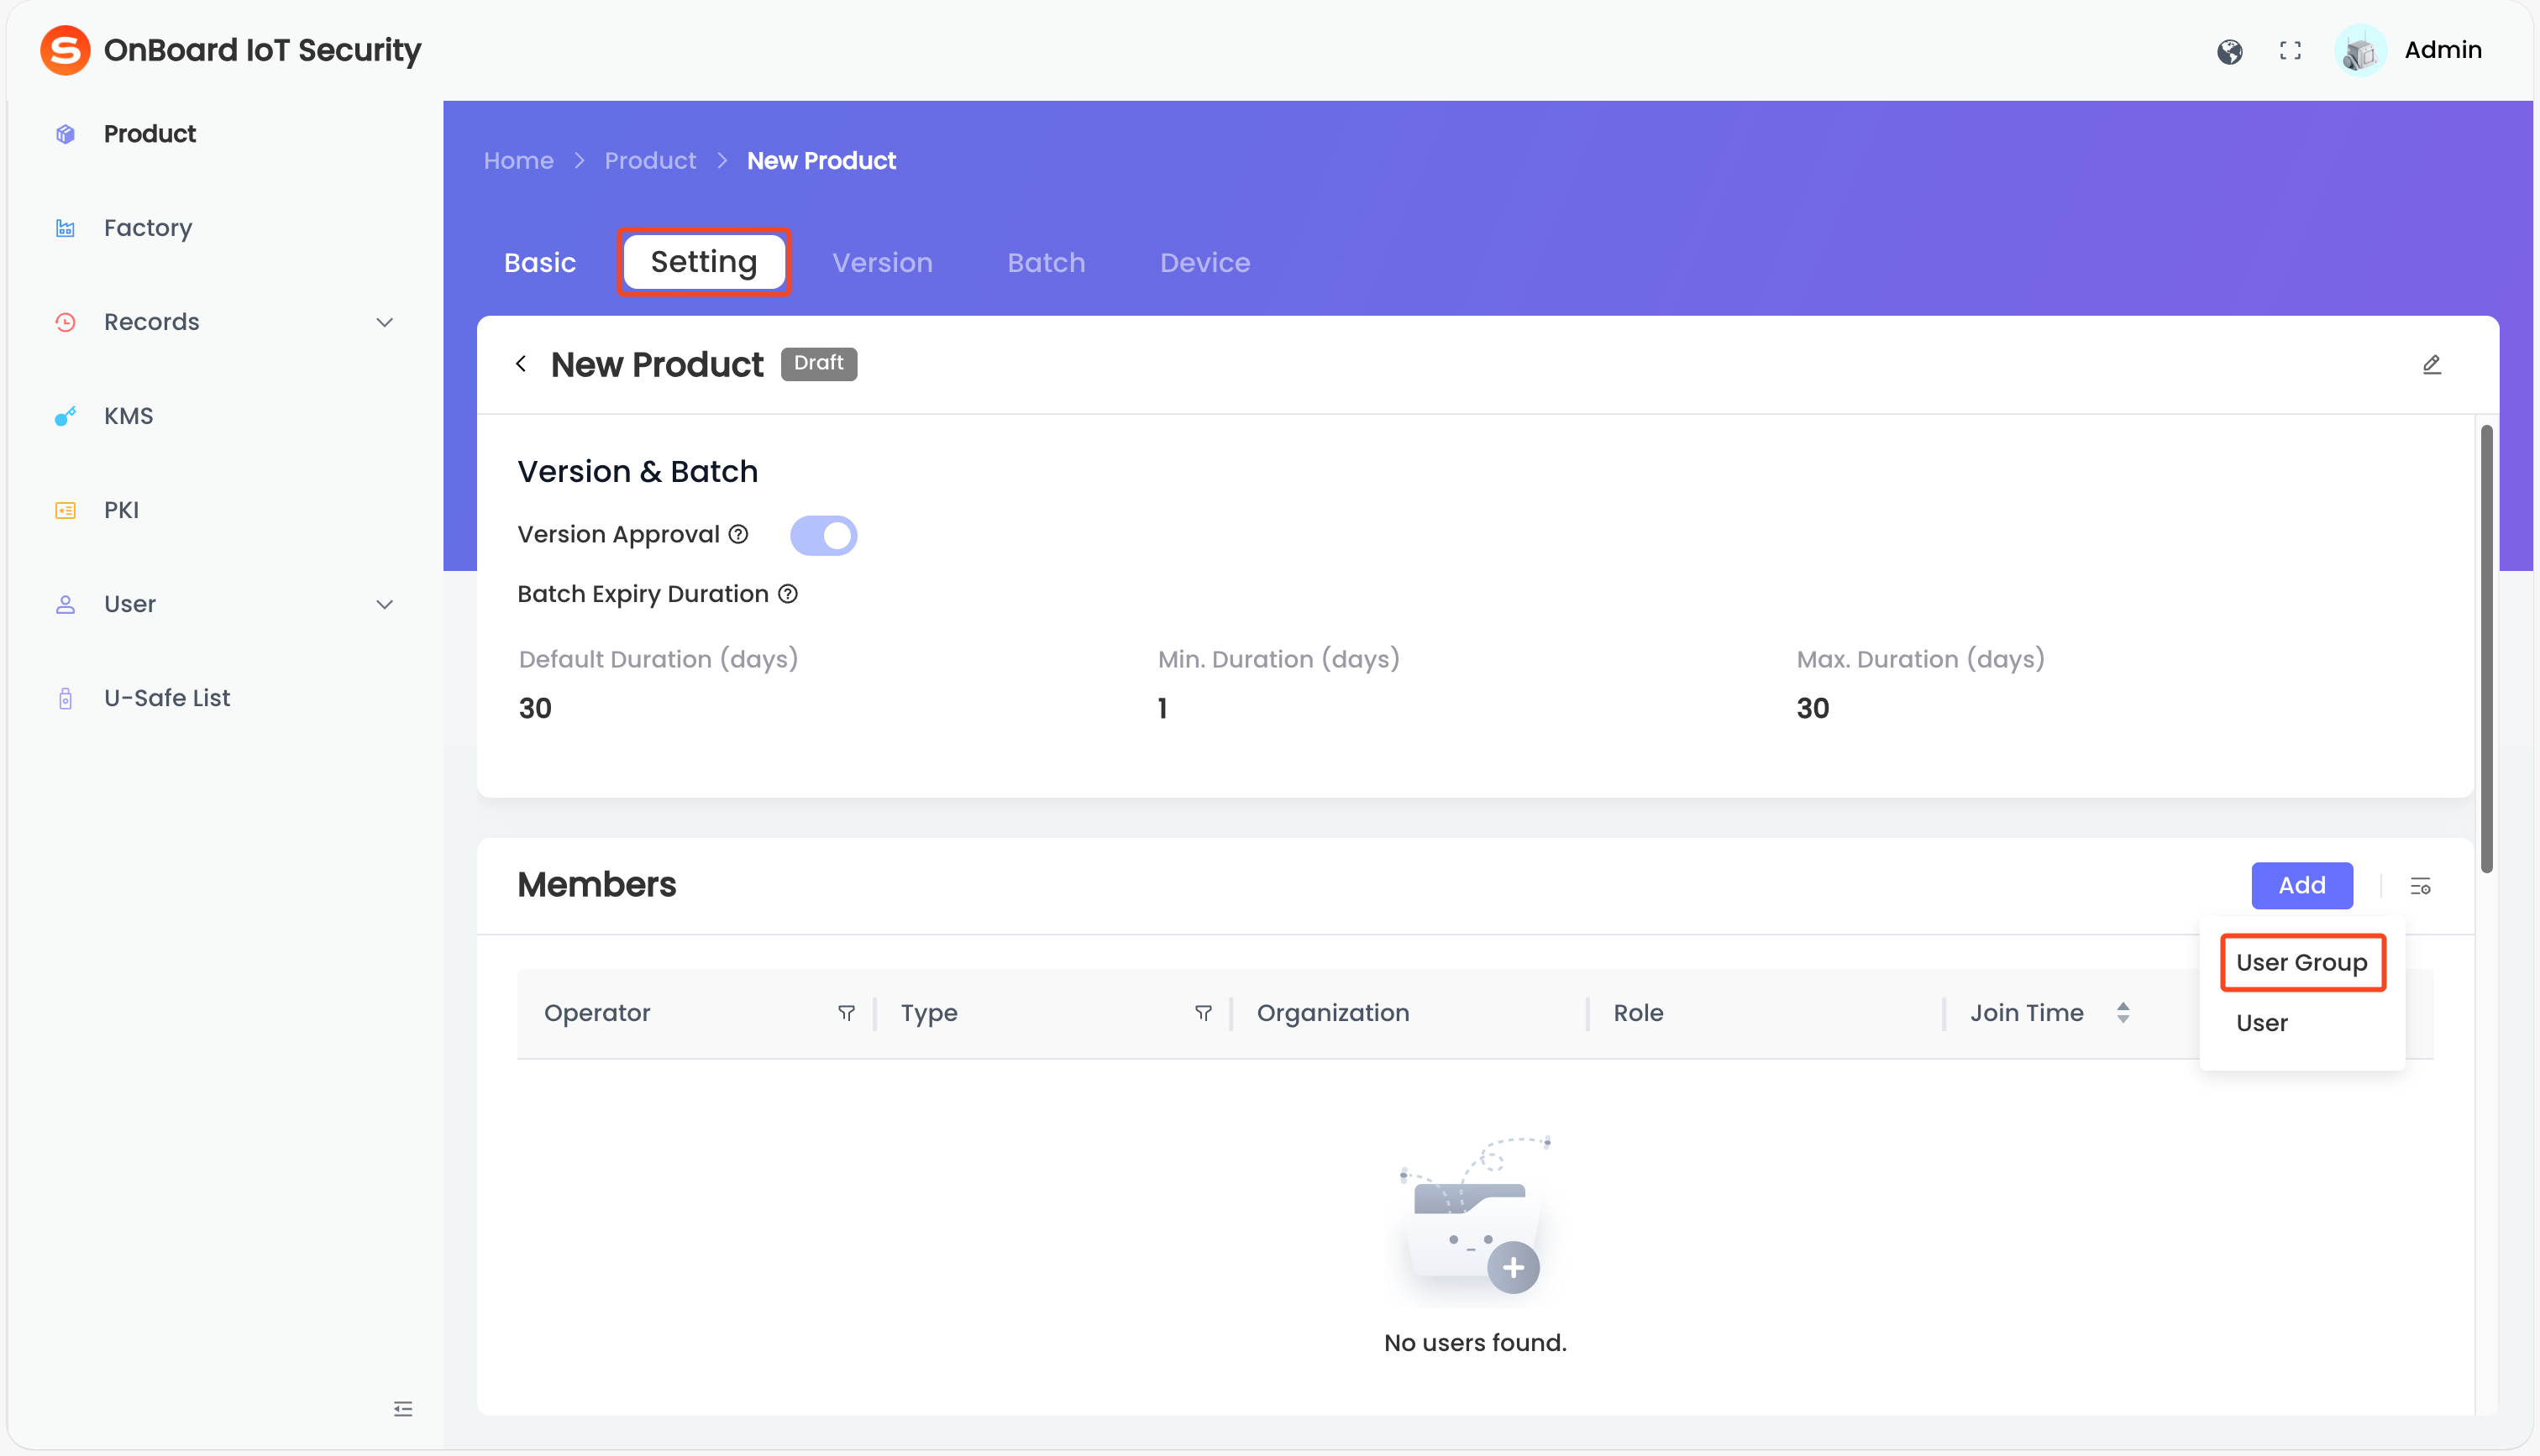
On the product page, select the Setting tab, click Add in the Members area and then select User Group.
-
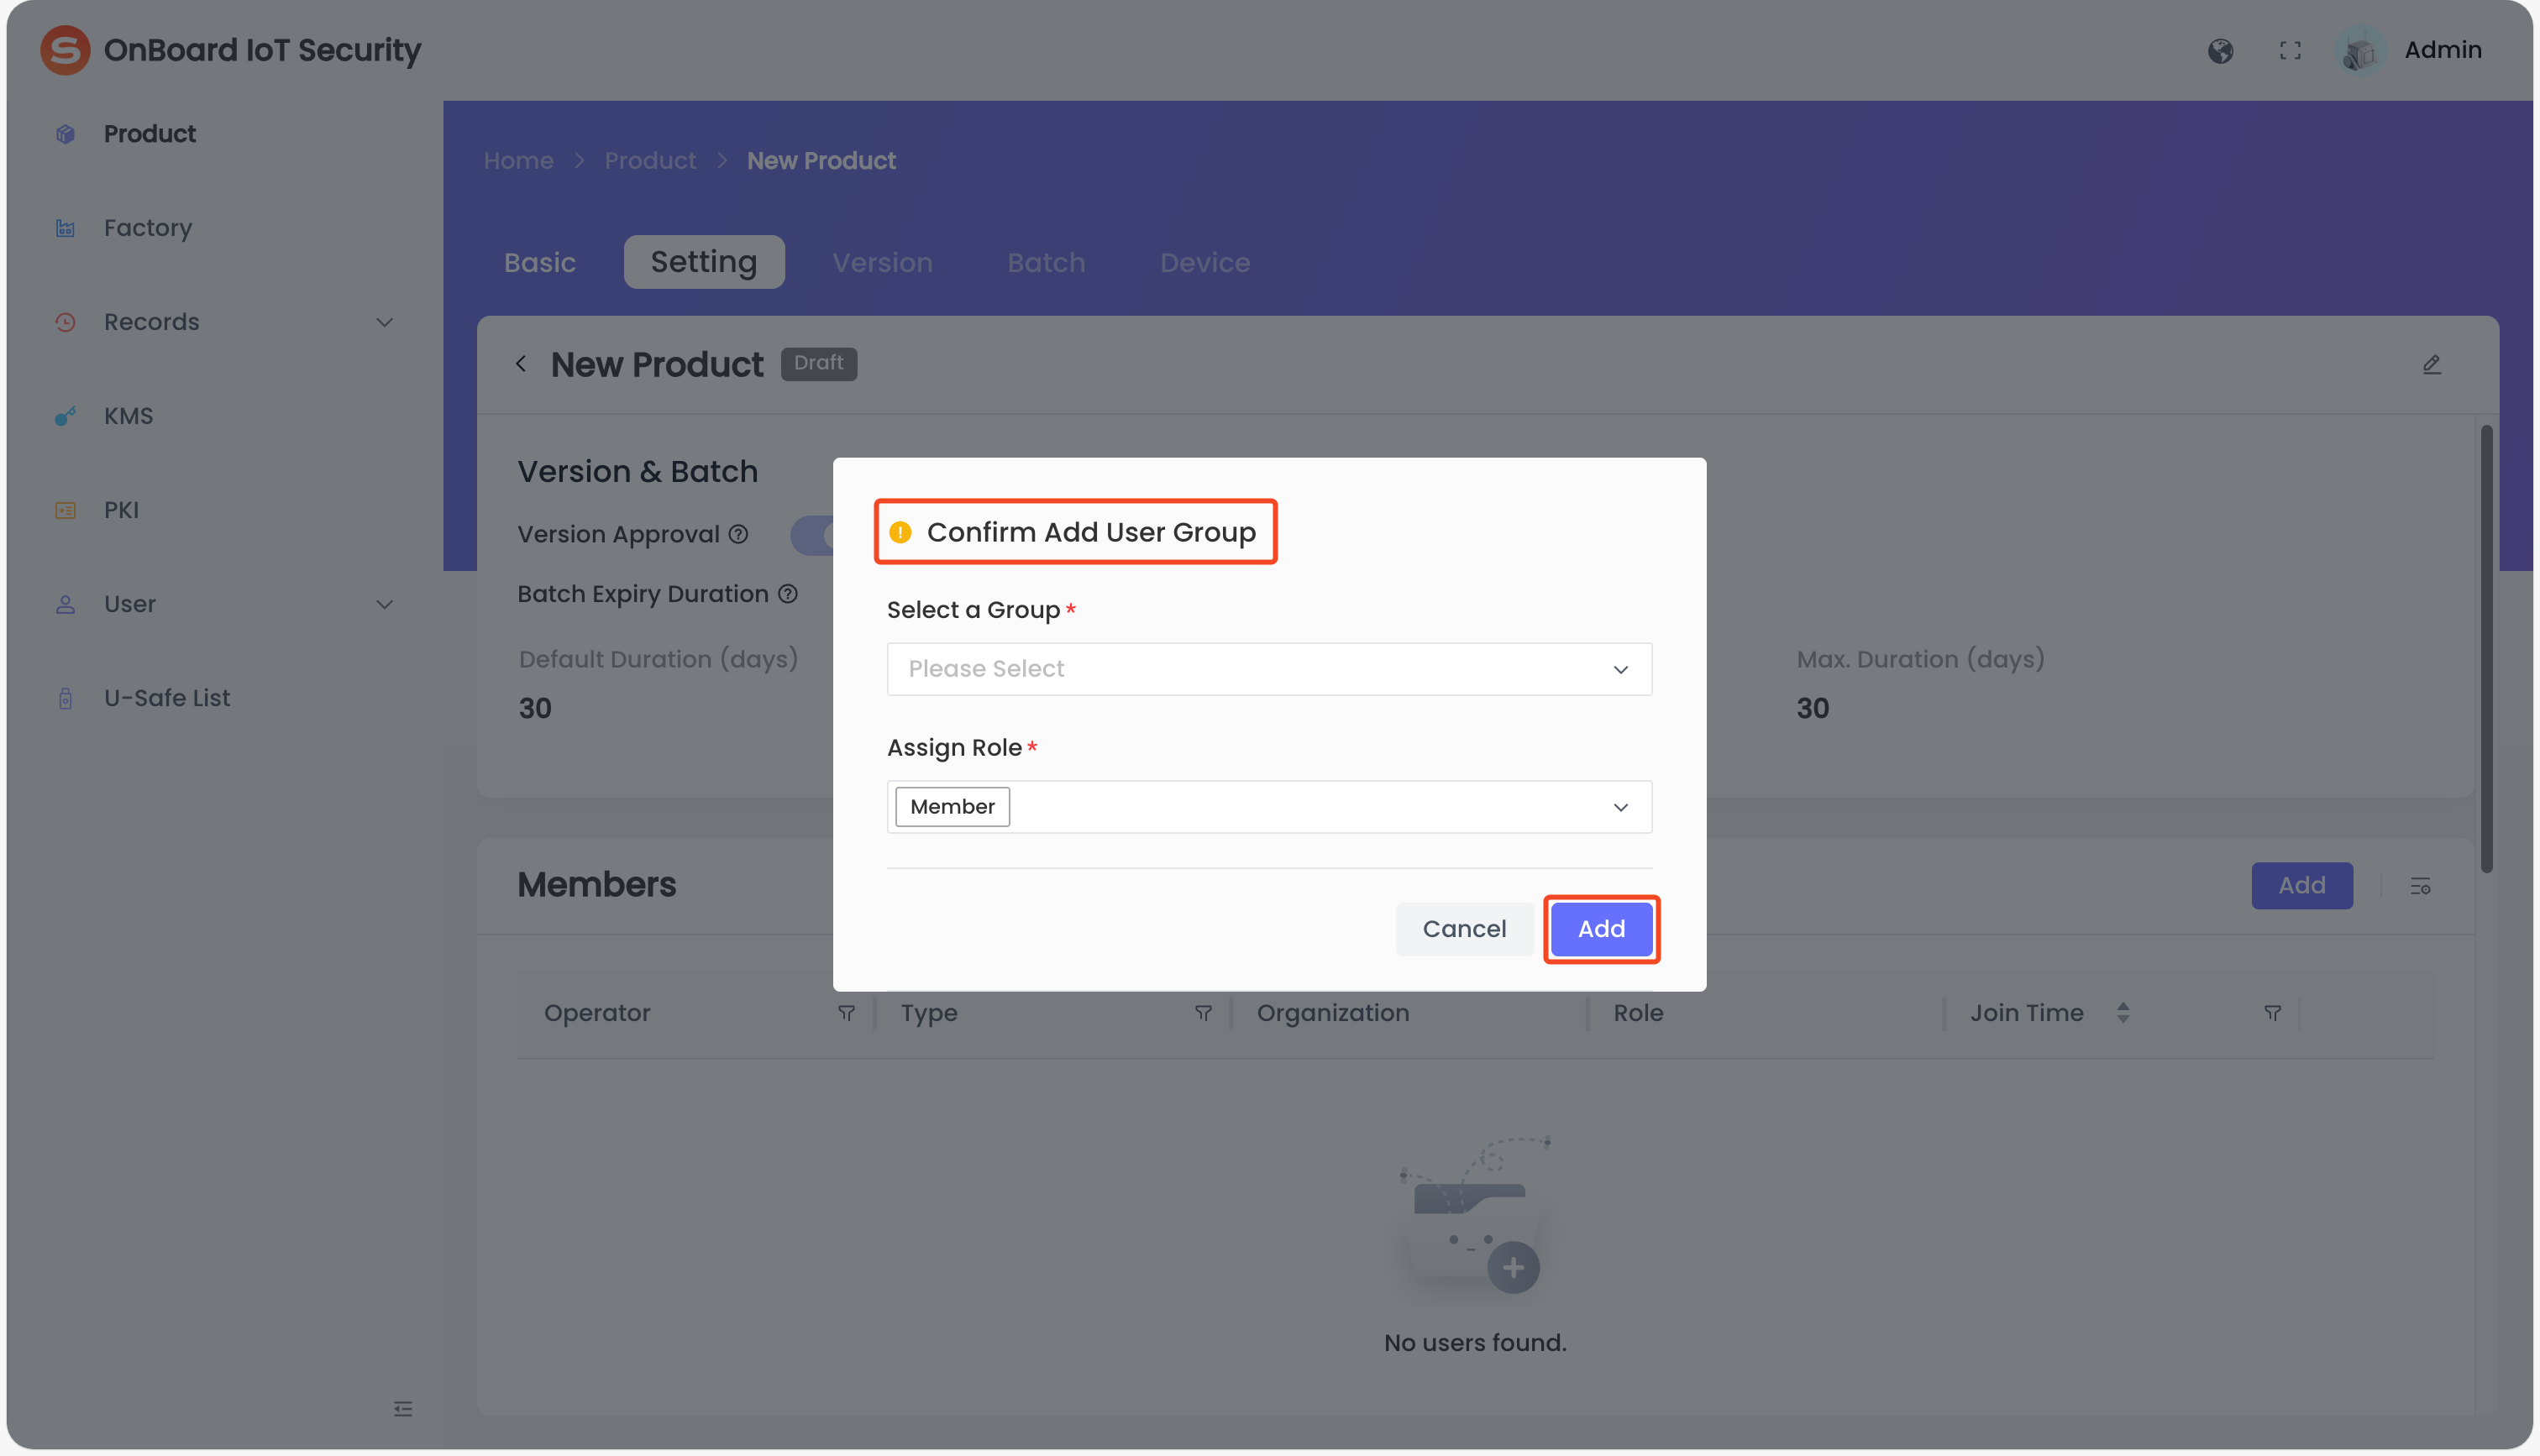
In the Confirm Add User Group window, select the user group and roles.
tip- A user group can be assigned multiple roles. For more information, refer to the description of product role permissions.
- Users within the user group will receive an email containing a link, through which they can use to access the product details.
- Only user groups under the same tenant can be added.
-
Click Add to complete adding a user group.
Update a user group role
-
Sign in to OBIS.
-
In the left menu, click Product, and then select the corresponding product to navigate to the product page.
-
On the product page, select the Setting tab. In the Members area, click the Options
icon for the corresponding user group and then select Role.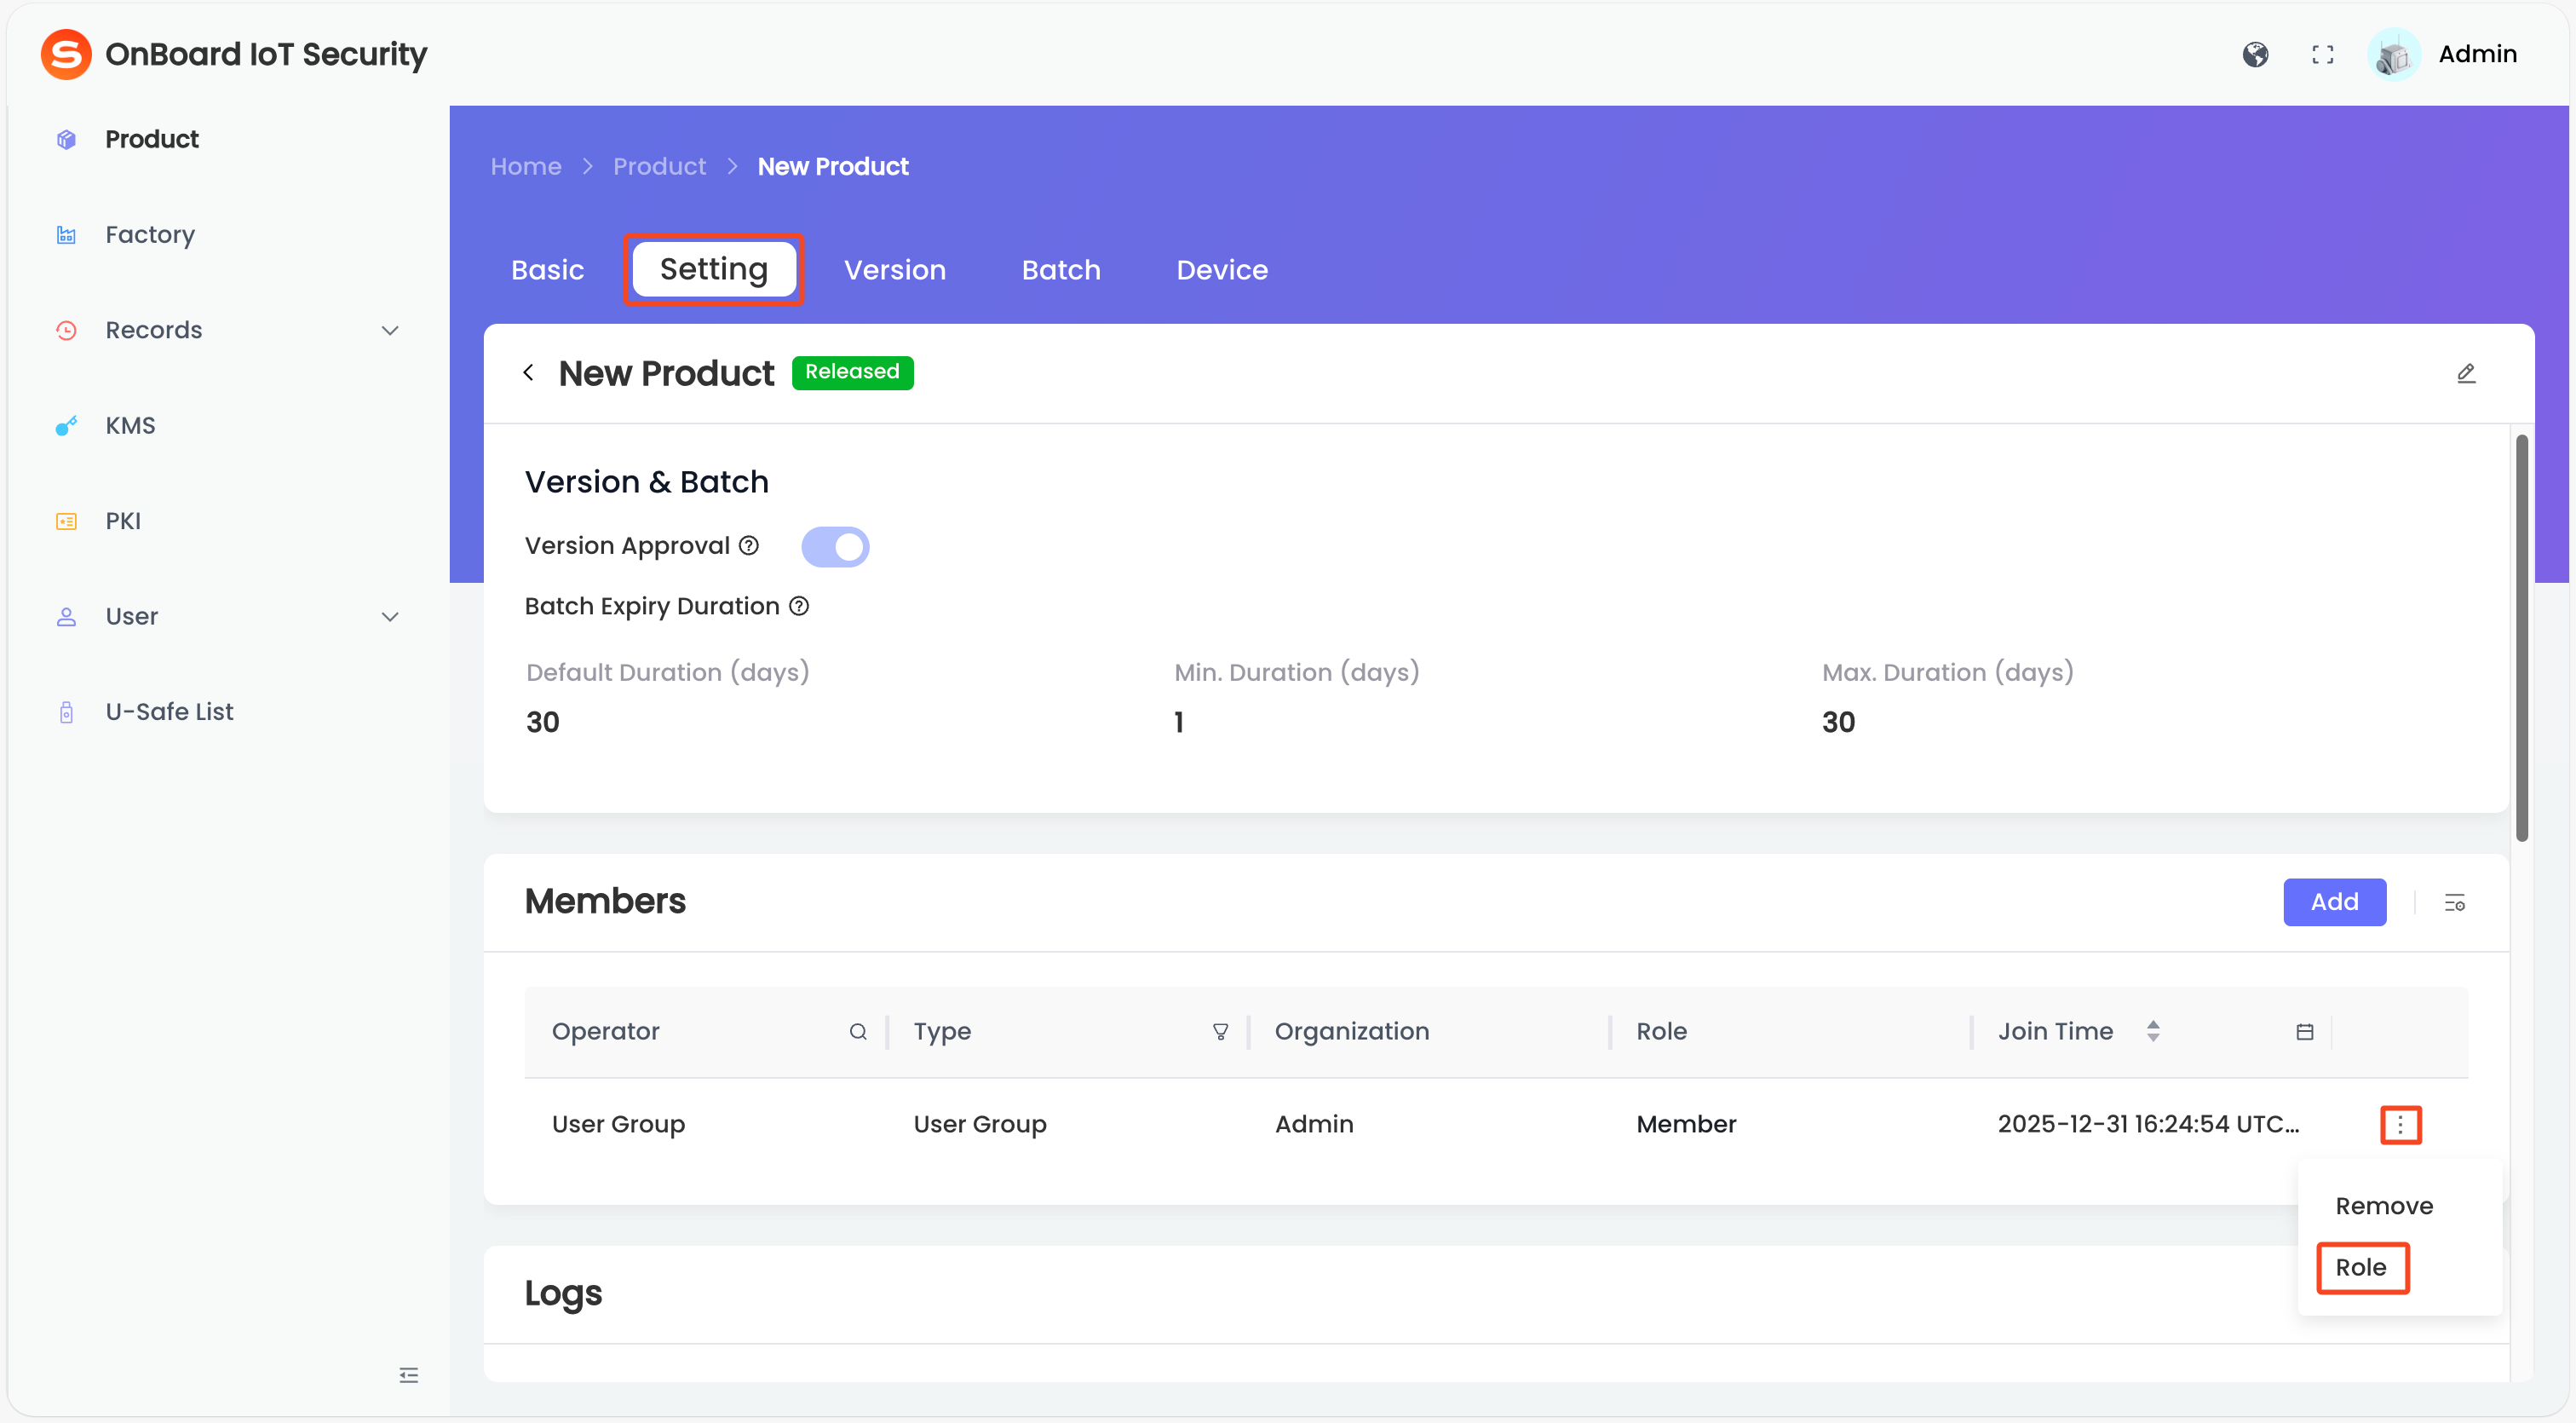
-
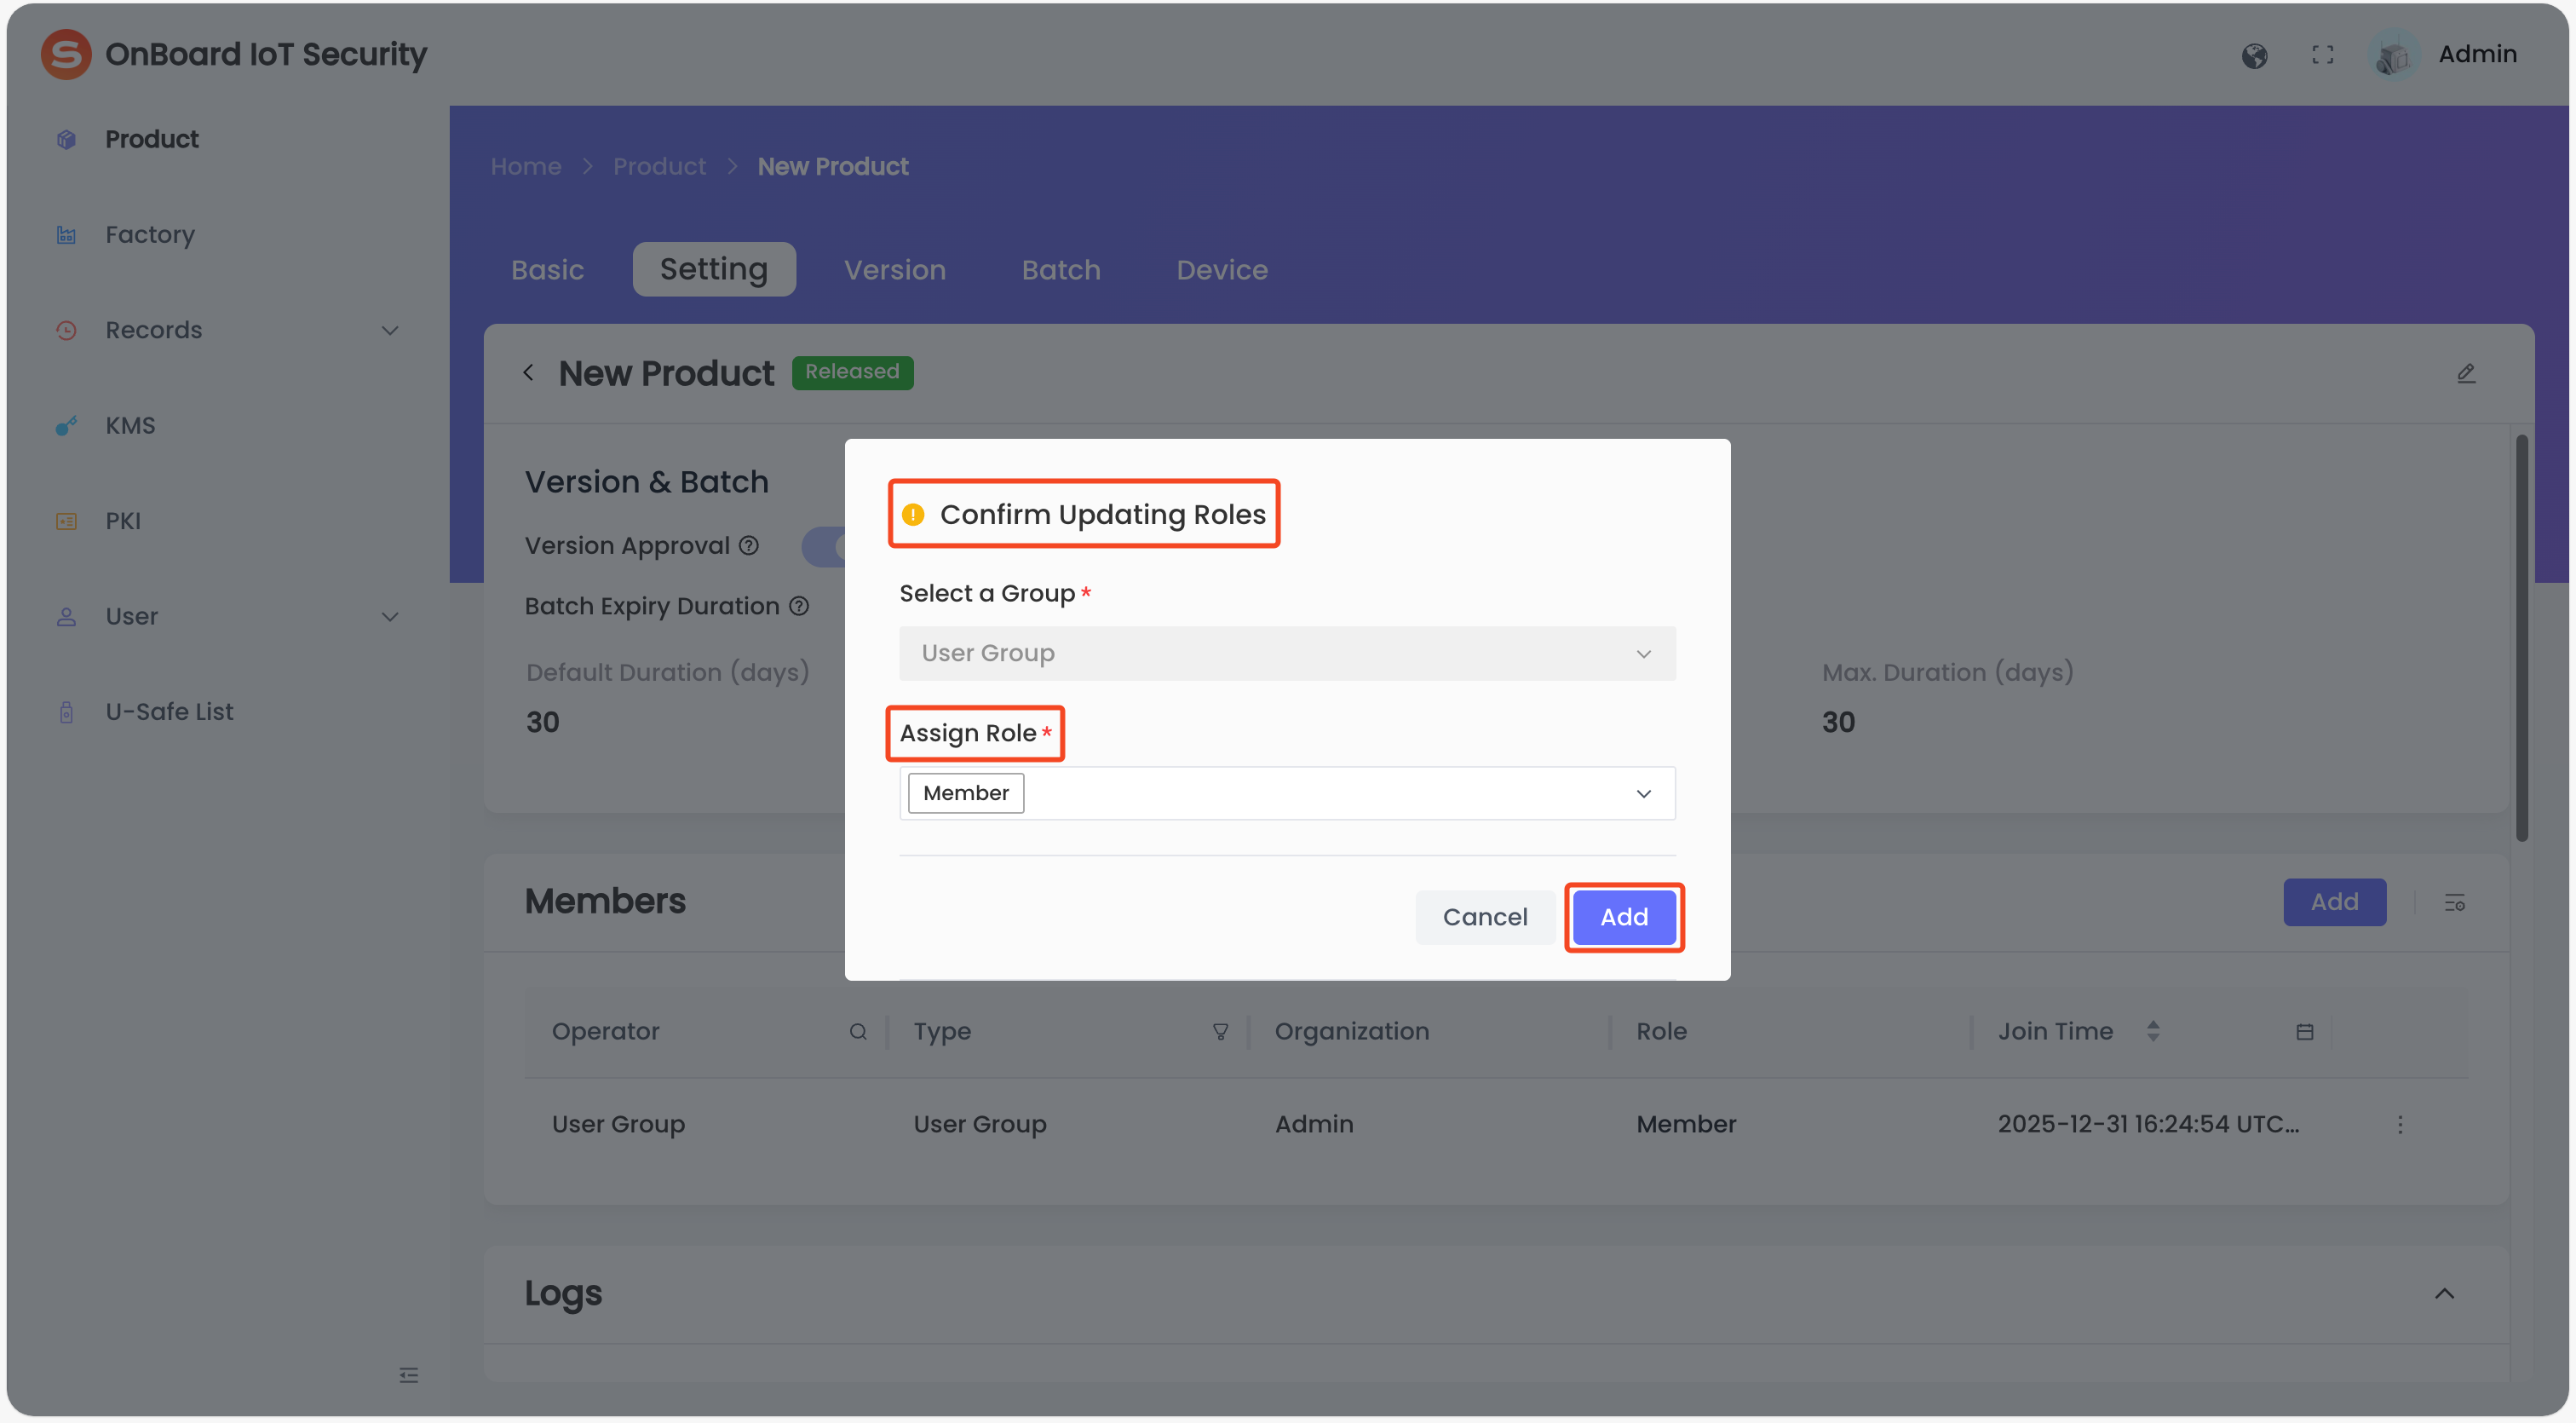
In the Confirm Updating Roles window, select the corresponding roles and then click Add to complete the update.
Remove a user group
-
Sign in to OBIS.
-
In the left menu, click Product, and then select the corresponding product to navigate to the product page.
-
On the product page, select the Setting tab. In the Members area, click the Options
icon for the corresponding user group and then select Remove.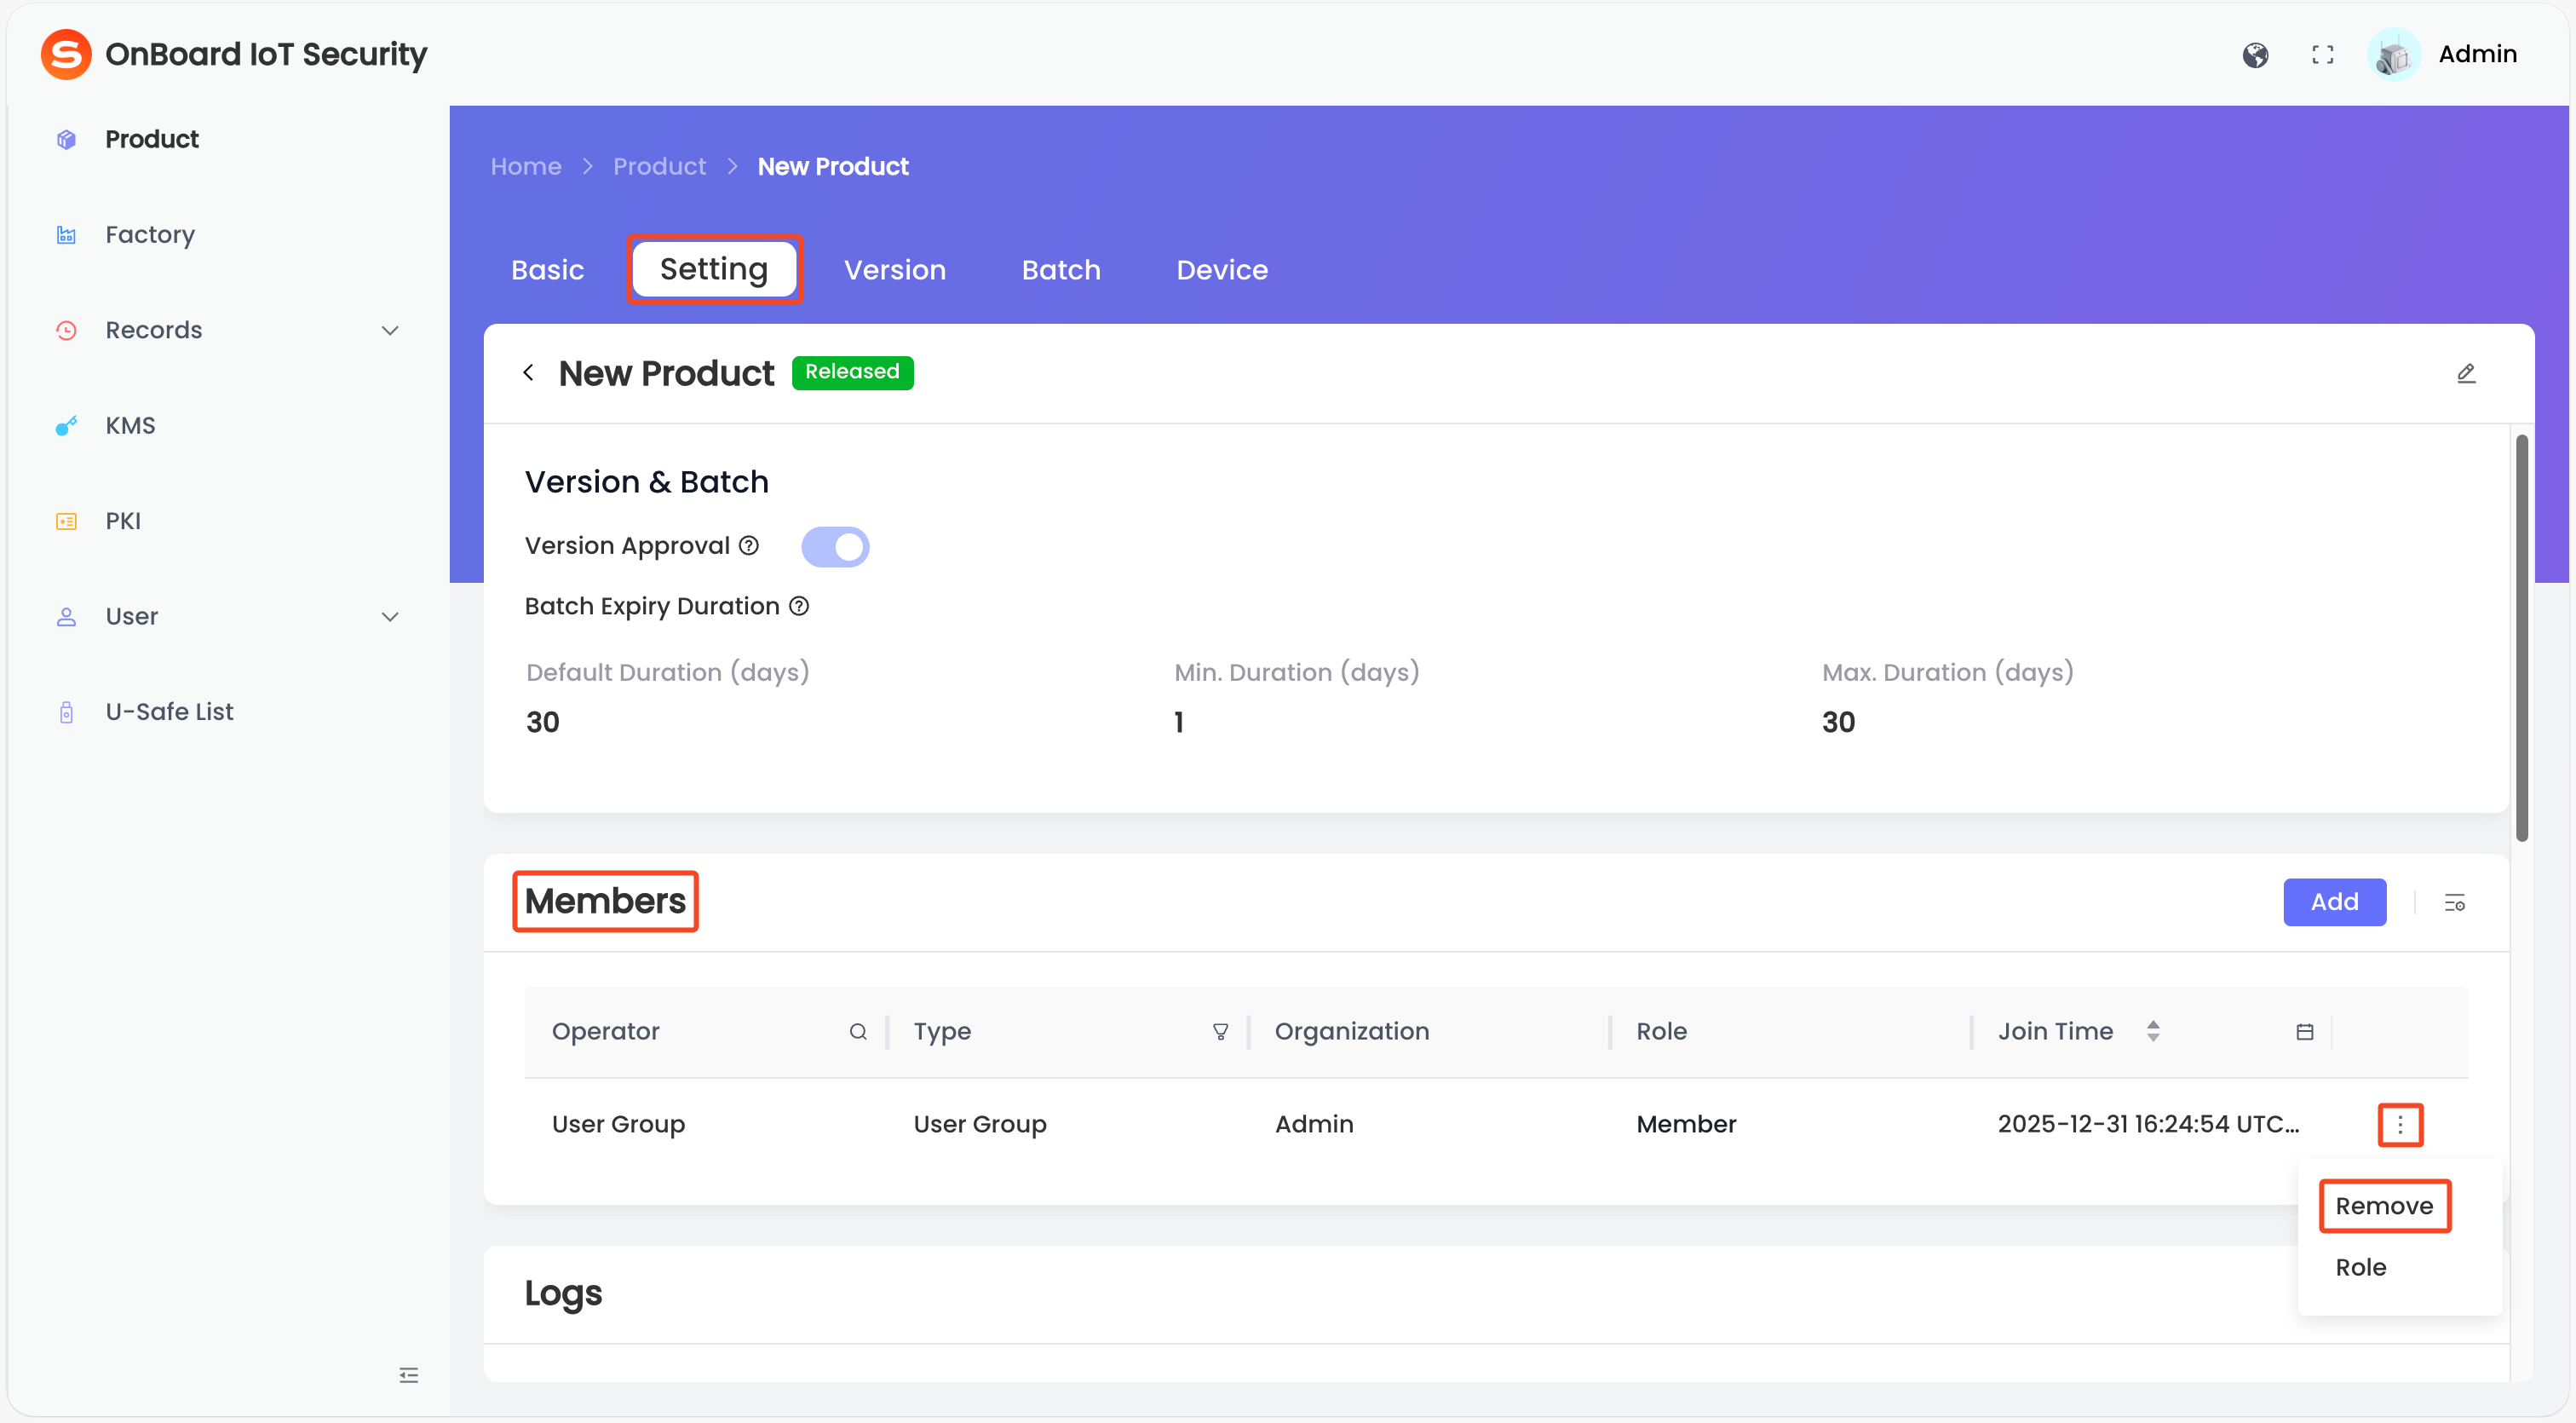
-
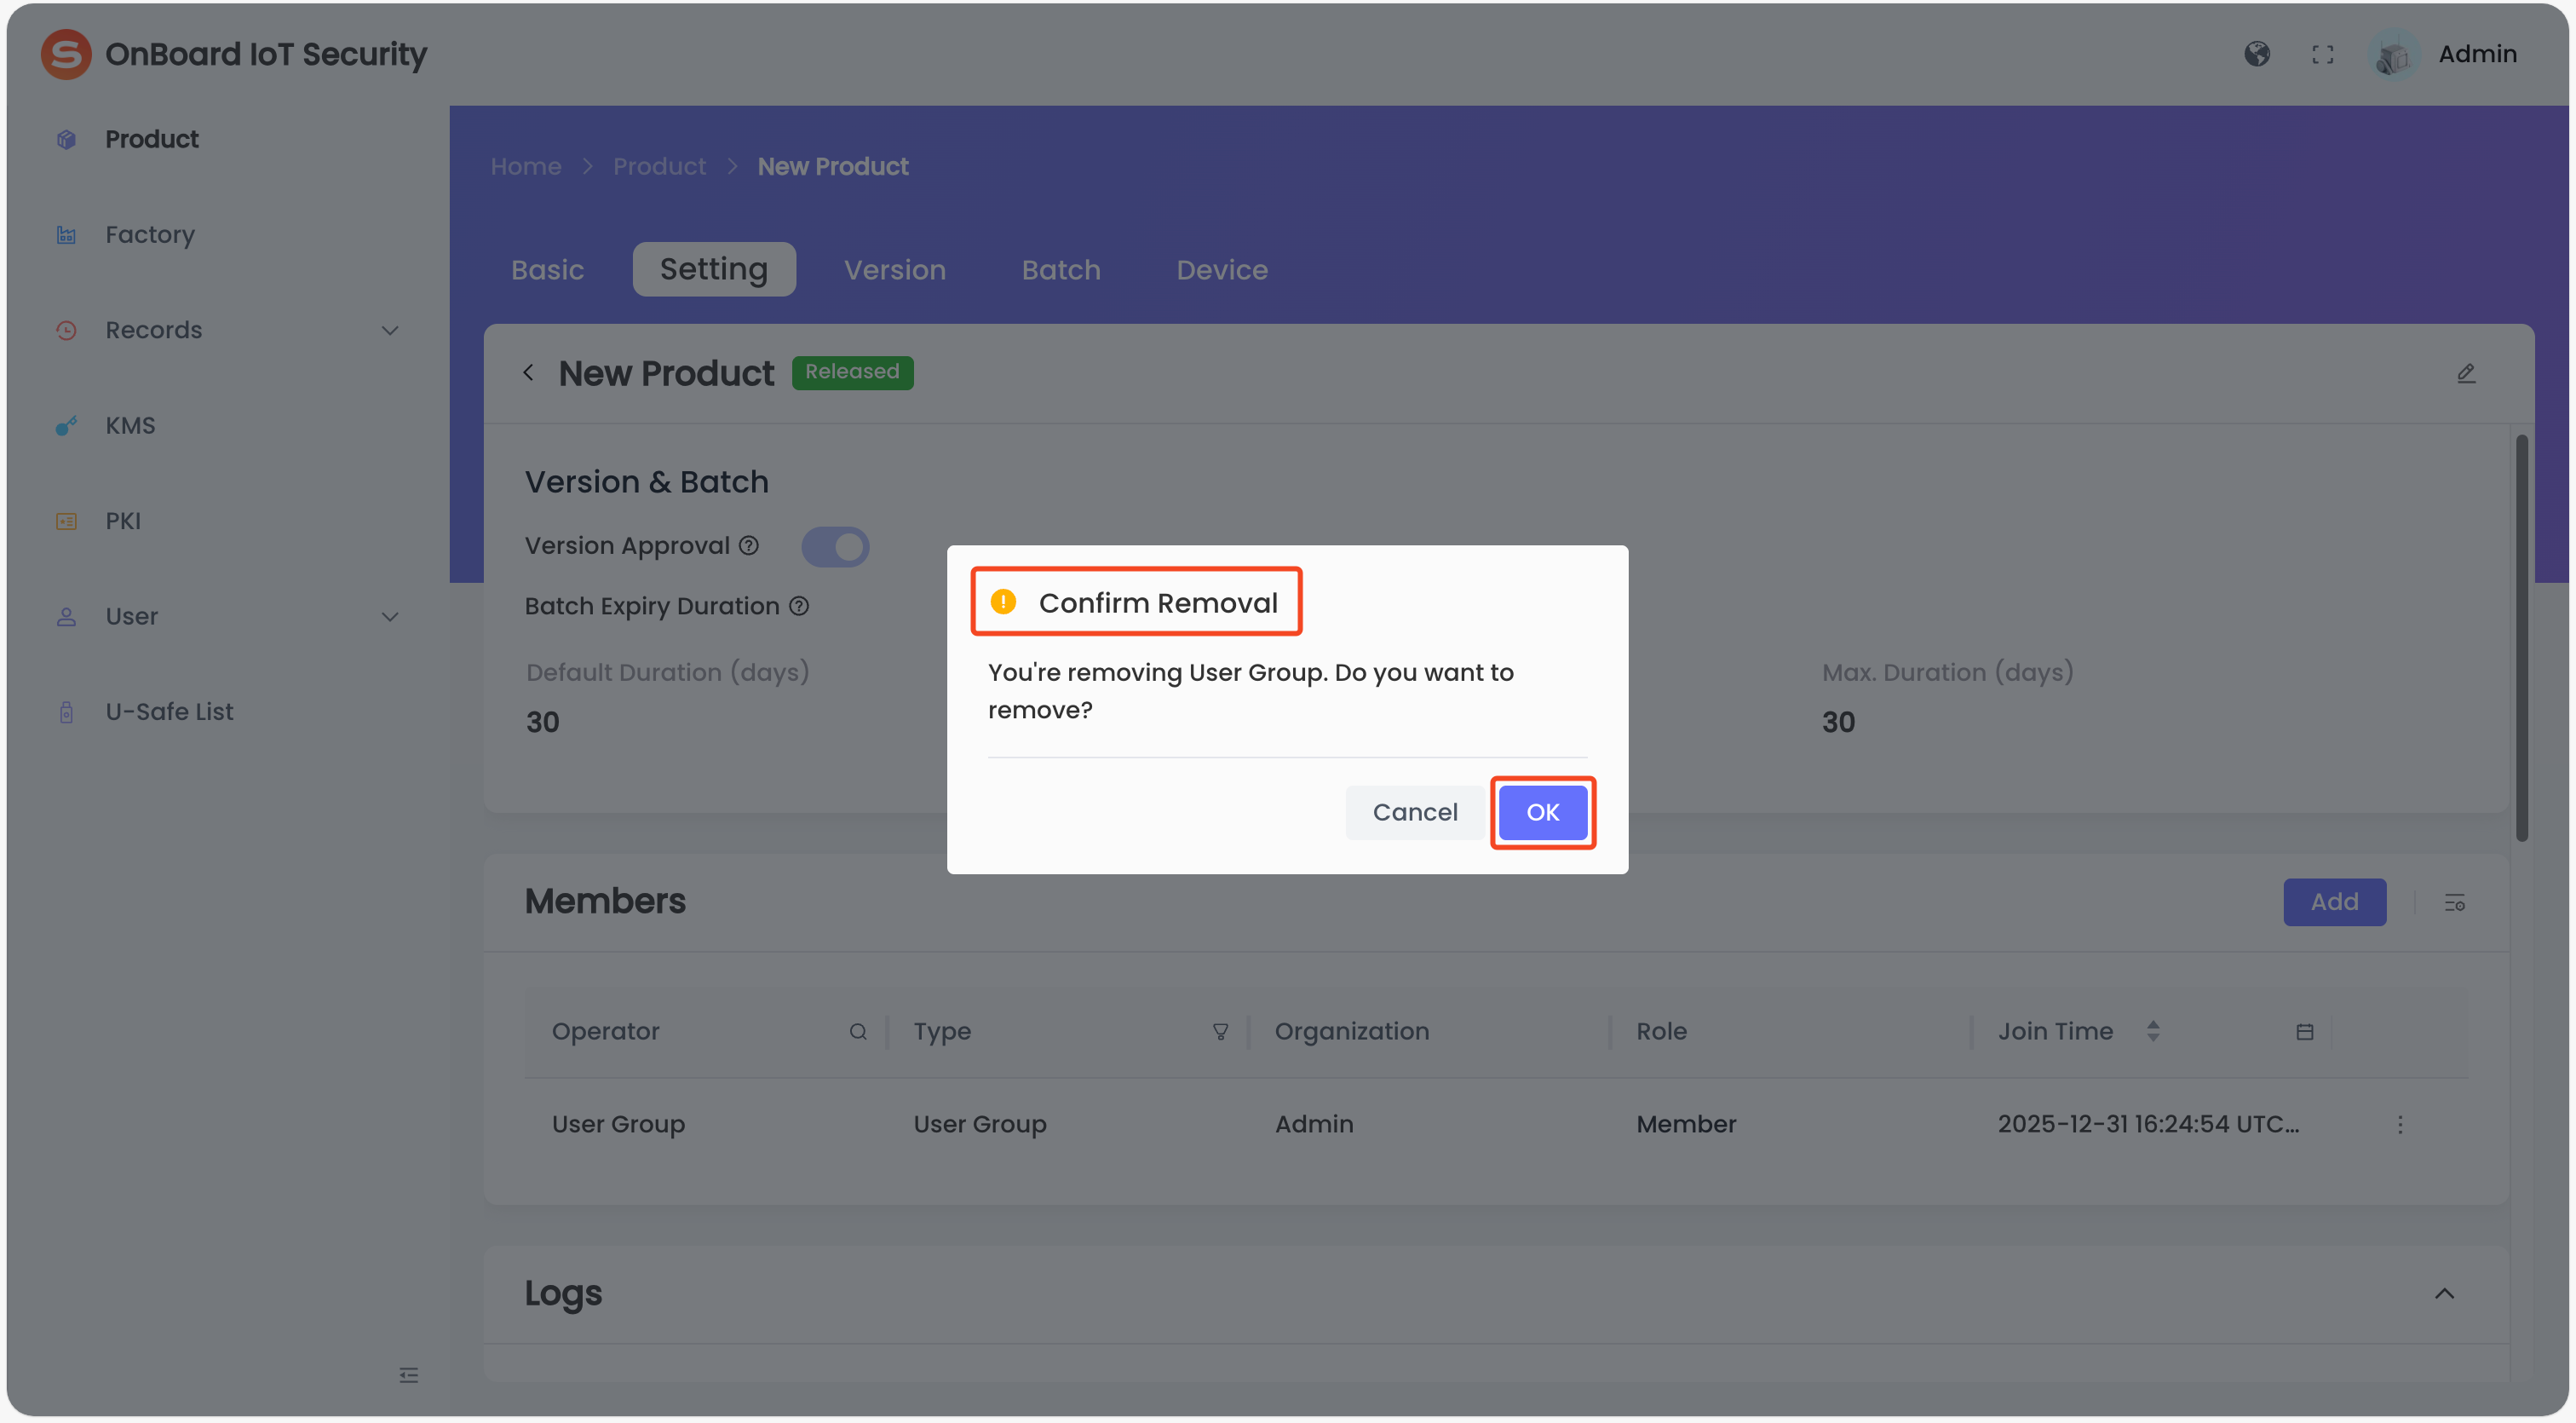
In the Confirm Removal window, verify the information and then click OK to remove the user group.

 Download User Manual