How to manage product members in OnBoard™ IoT Security
This article will guide you through the following operations in OnBoard™ IoT Security (OBIS) to manage user access and permissions for a product:
- Add a user
- Update user role
- Remove a user
- Add a user group
- Update user group role
- Remove a user group
Prerequisites
Before getting started, please ensure that:
- The users and user groups have already been created.
- You have product role permissions for the corresponding product: Product Owner or Product Manager.
Add a user
-
Sign in to OBIS.
-
In the Core section of the left menu, click Product, and then select the corresponding product to navigate to the product page.
-
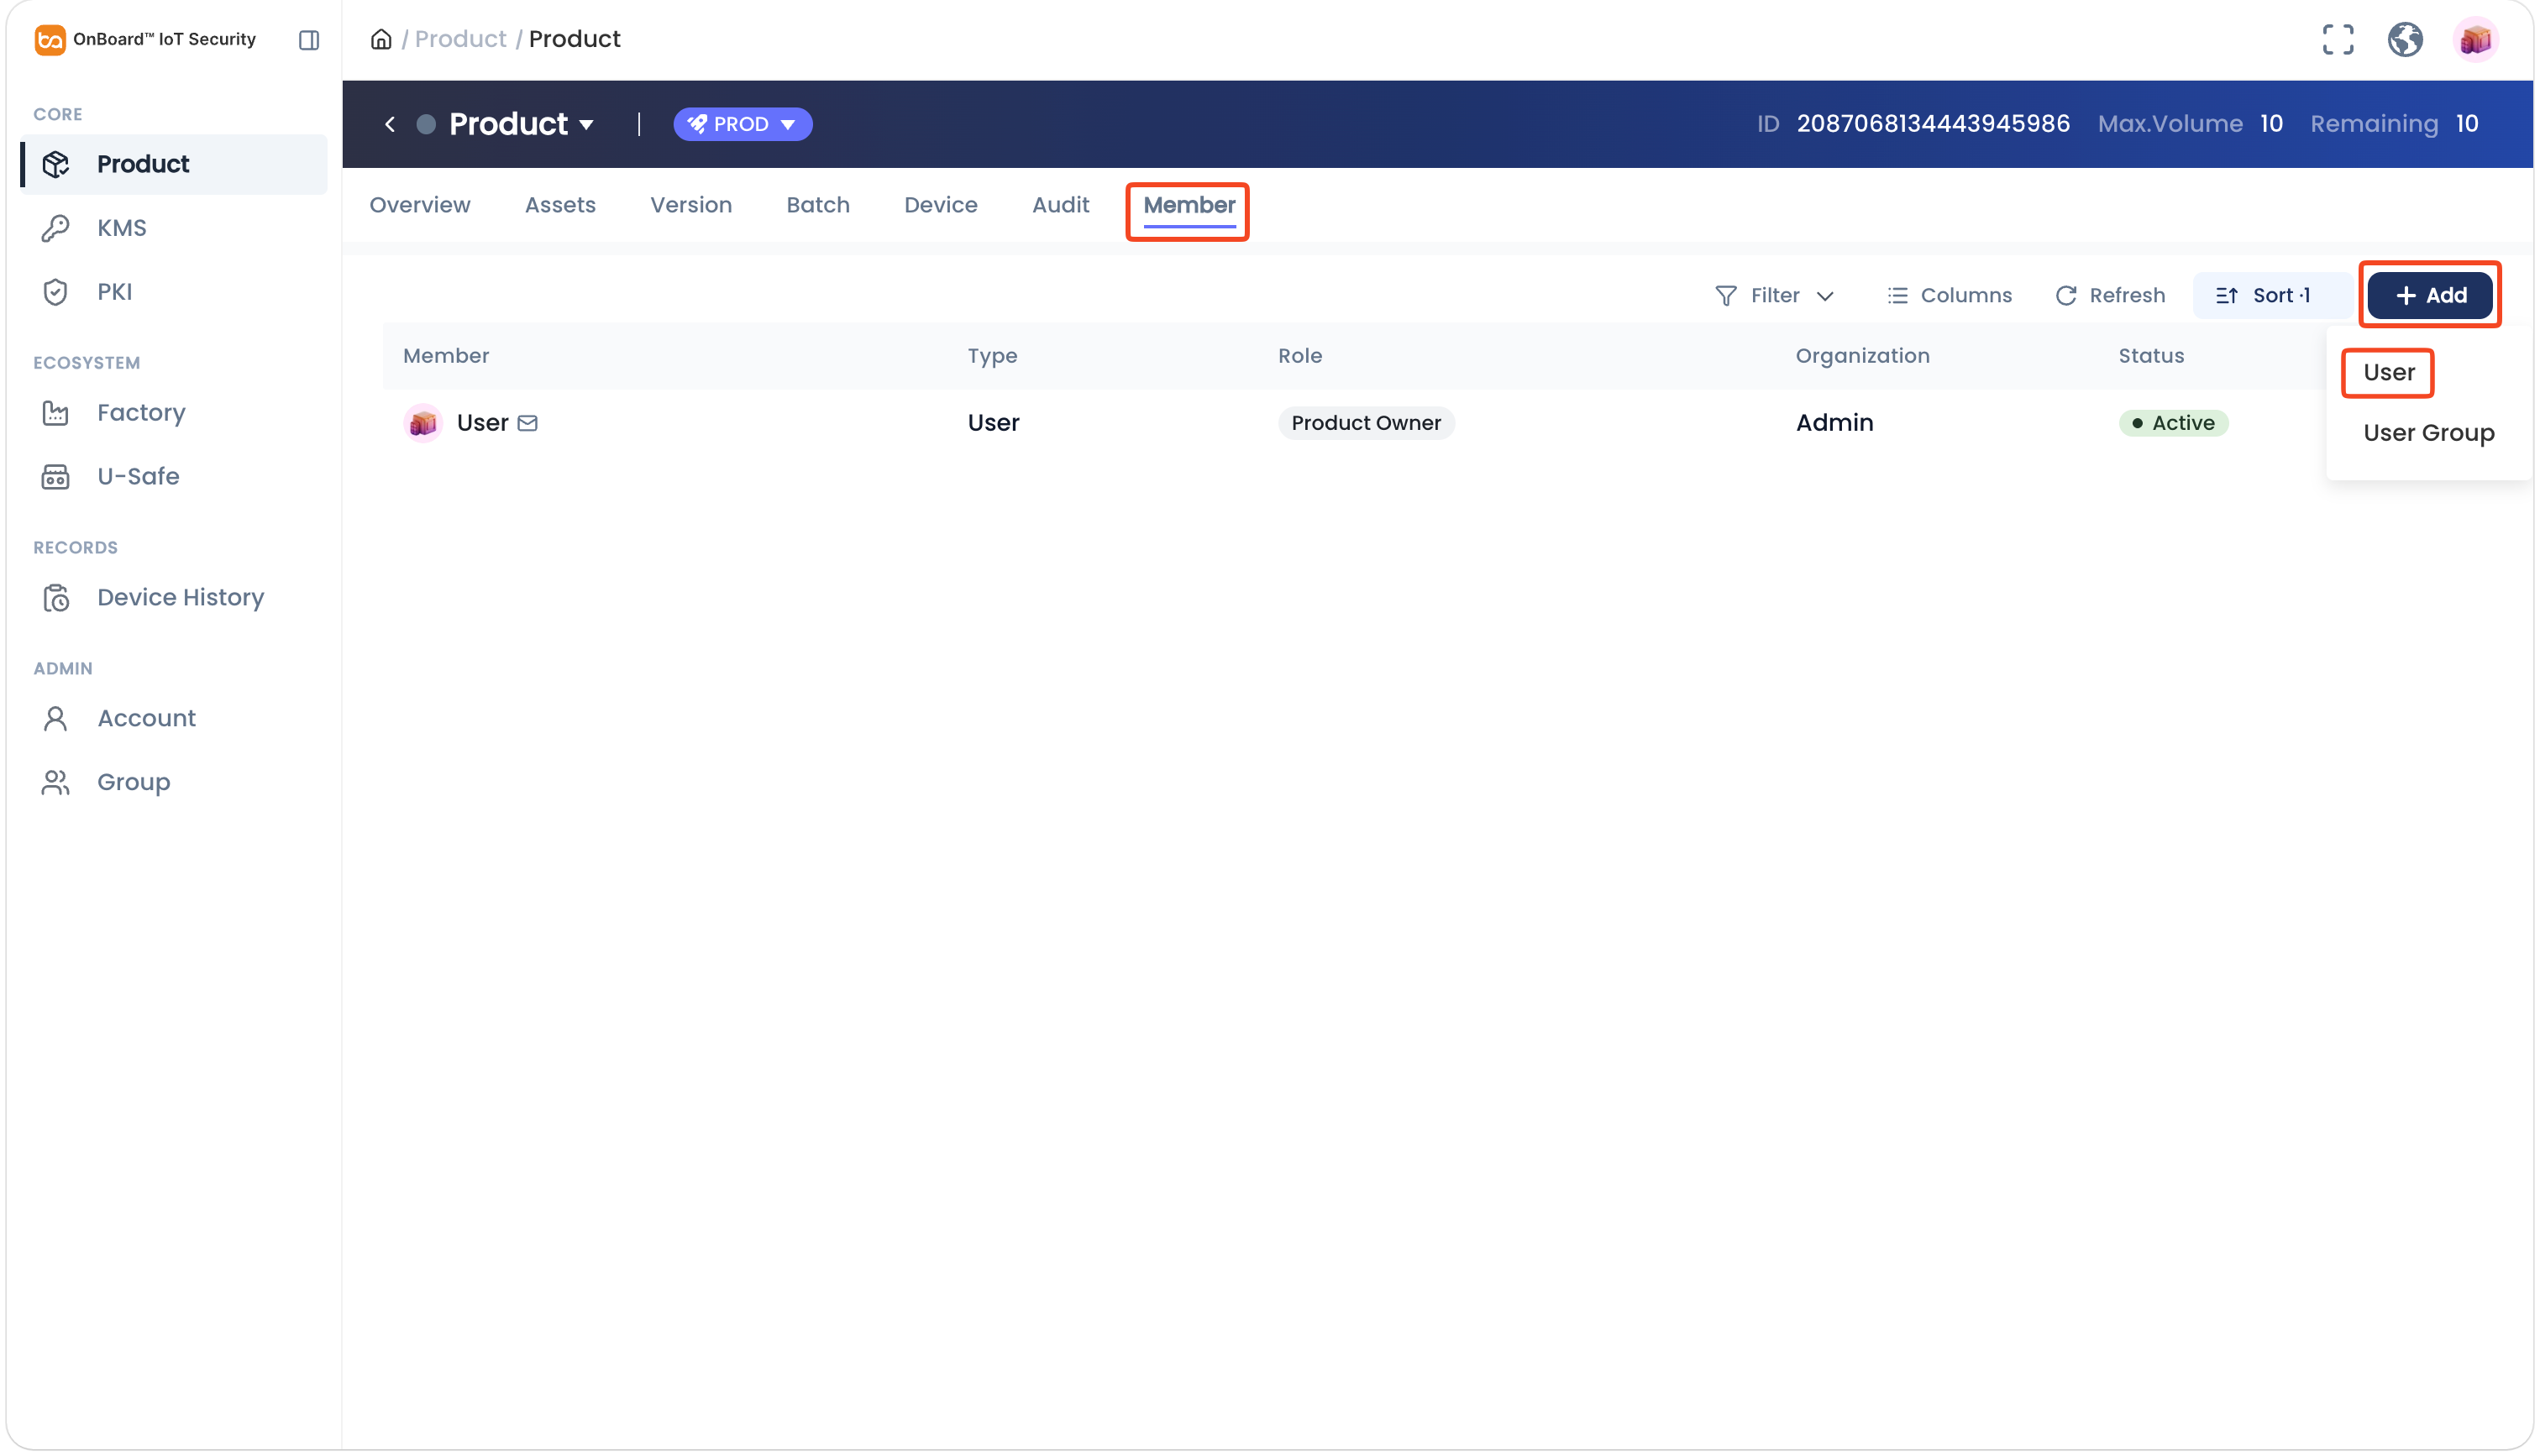
On the product page, select the Member tab, click Add and then select User.
-
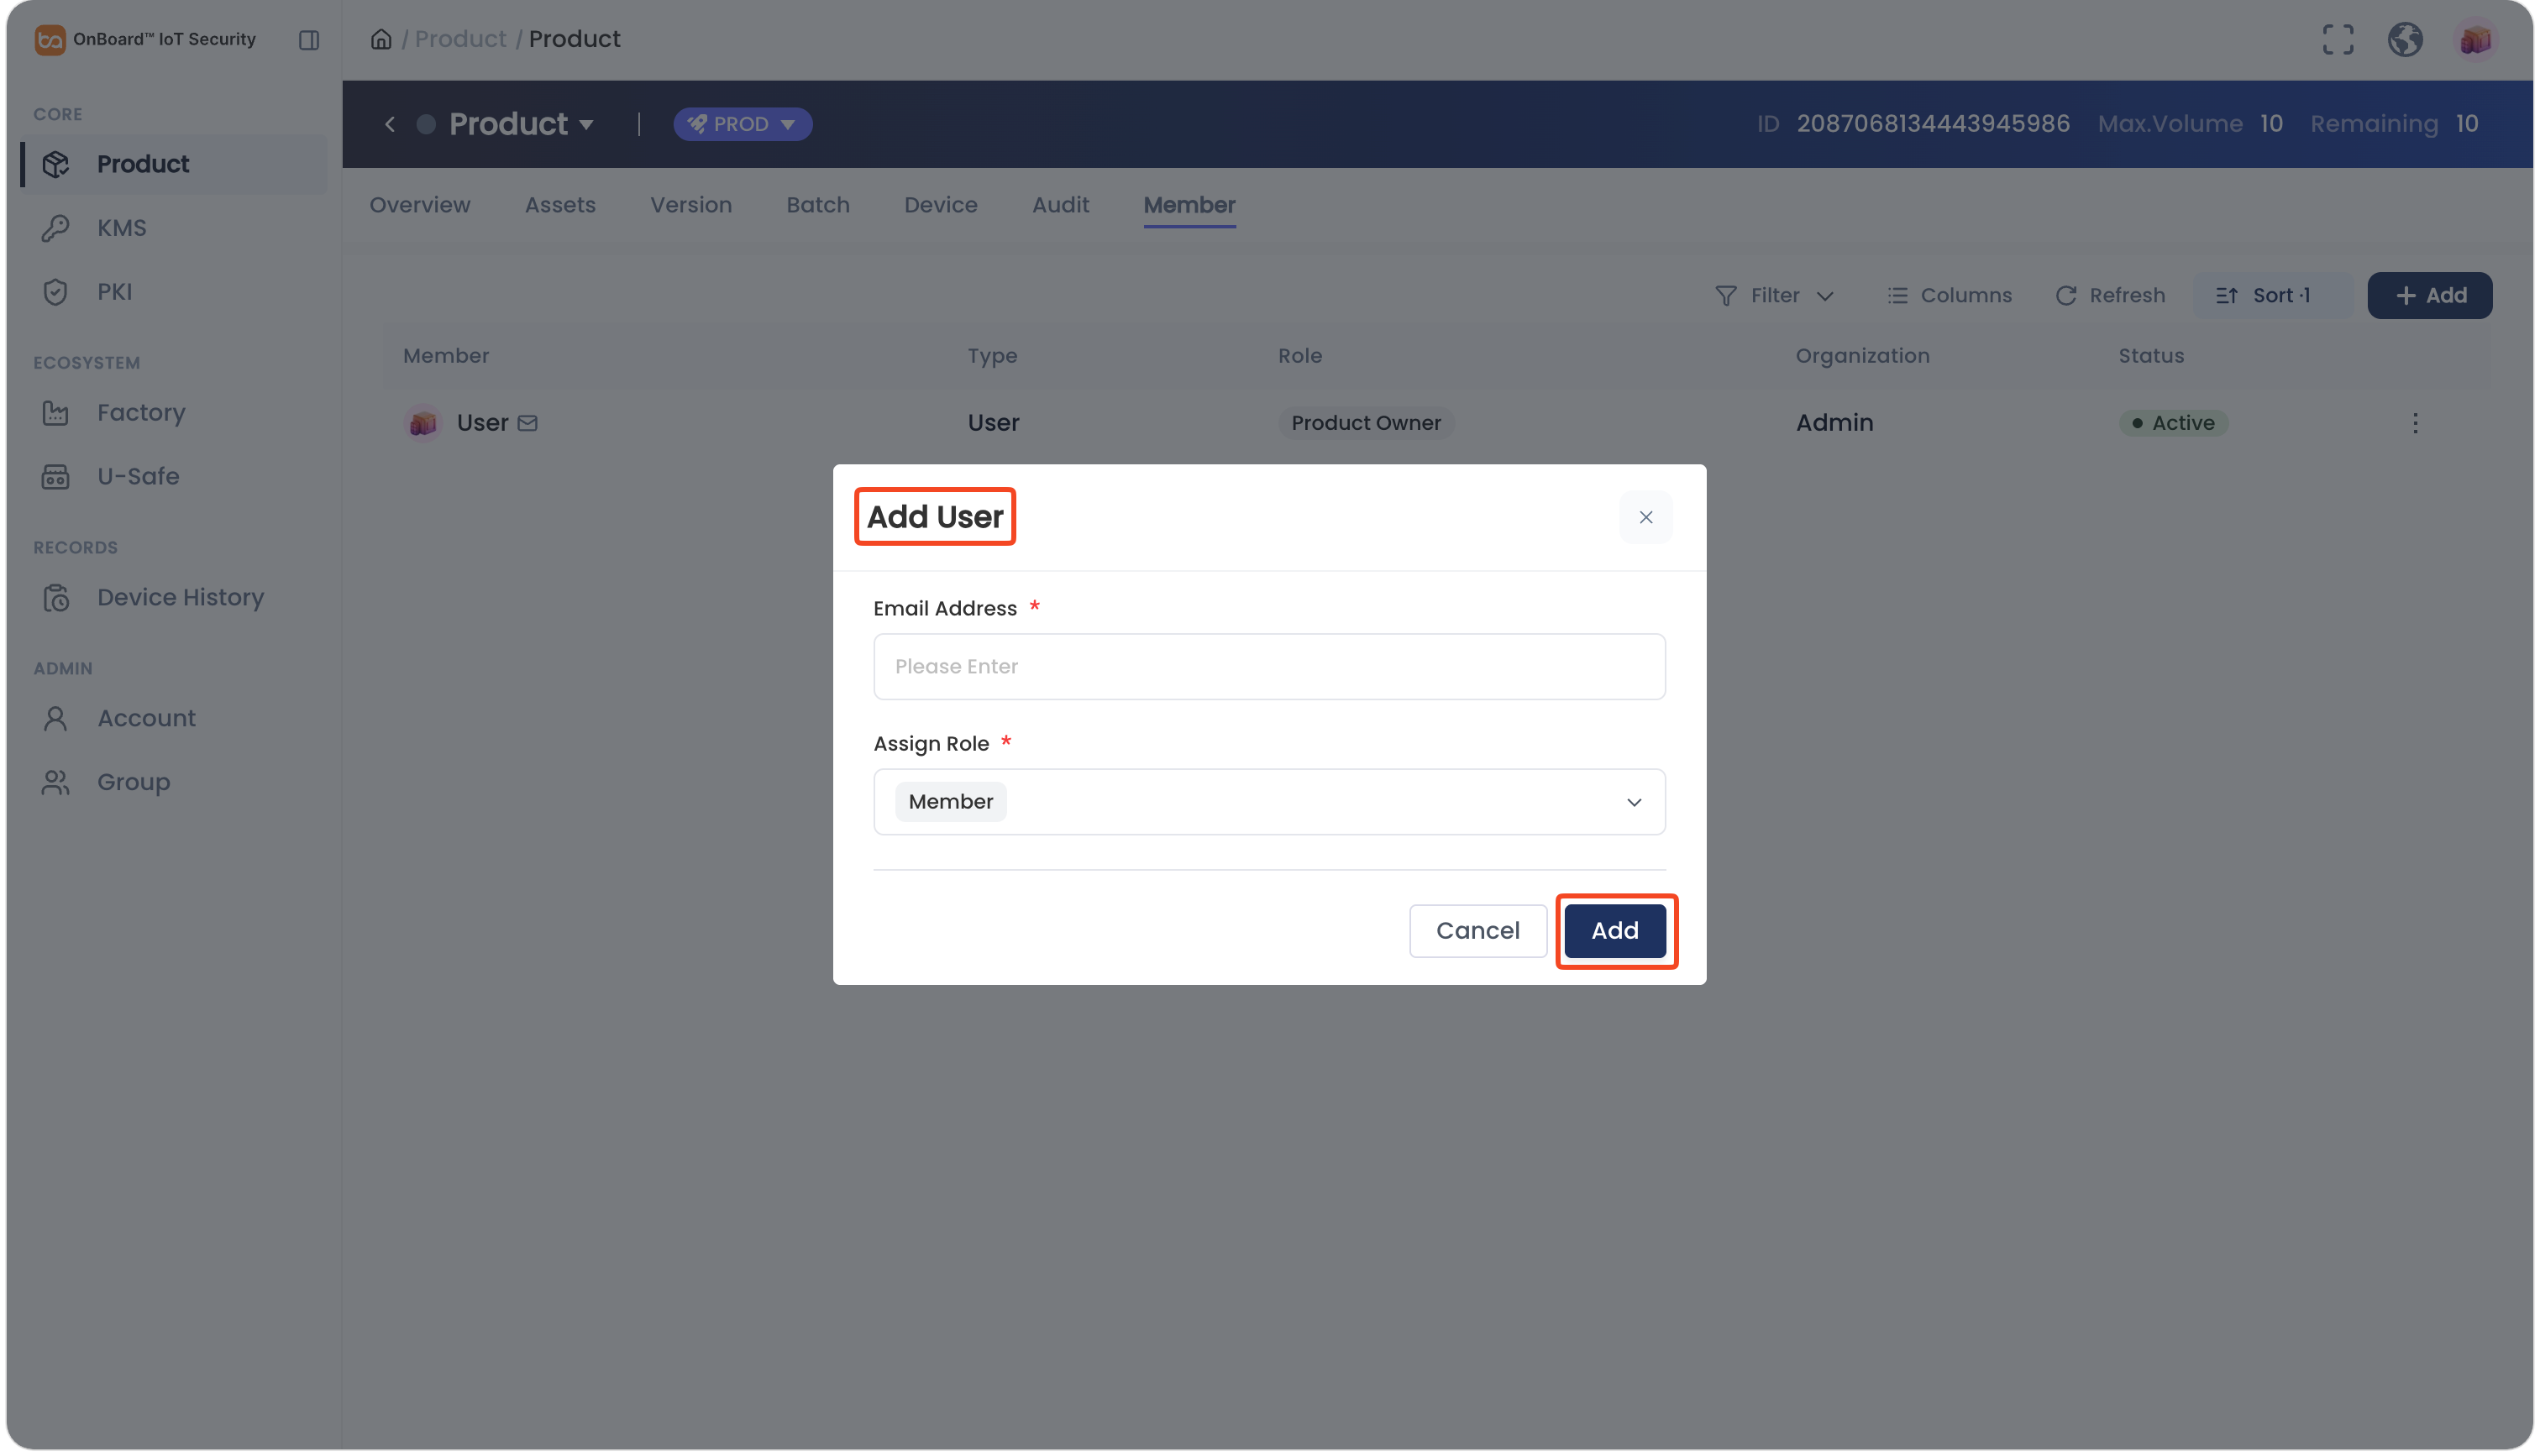
In the Add User window, enter the user's email address and then select the roles.
tip- A user can be assigned multiple roles. For more information, refer to the description of product role permissions.
- The added users will receive an email containing a link, through which they can use to access the product details.
- Only users with the Active status can be added. Users from other tenants can be added. For example, a Product Manager from Tenant A can add a user from Tenant B to their product team.
-
Click Add to complete adding a member.
Update user role
By default, the product creator is set as the Product Owner. To change the Product Owner, click the Options  icon for the Product Owner and select Transfer Owner on the Member tab, then choose the new Product Owner and click Confirm.
-
Sign in to OBIS.
-
In the Core section of the left menu, click Product, and then select the corresponding product to navigate to the product page.
-
On the product page, select the Member tab. Click the Options
icon for the corresponding user and then select Edit Role.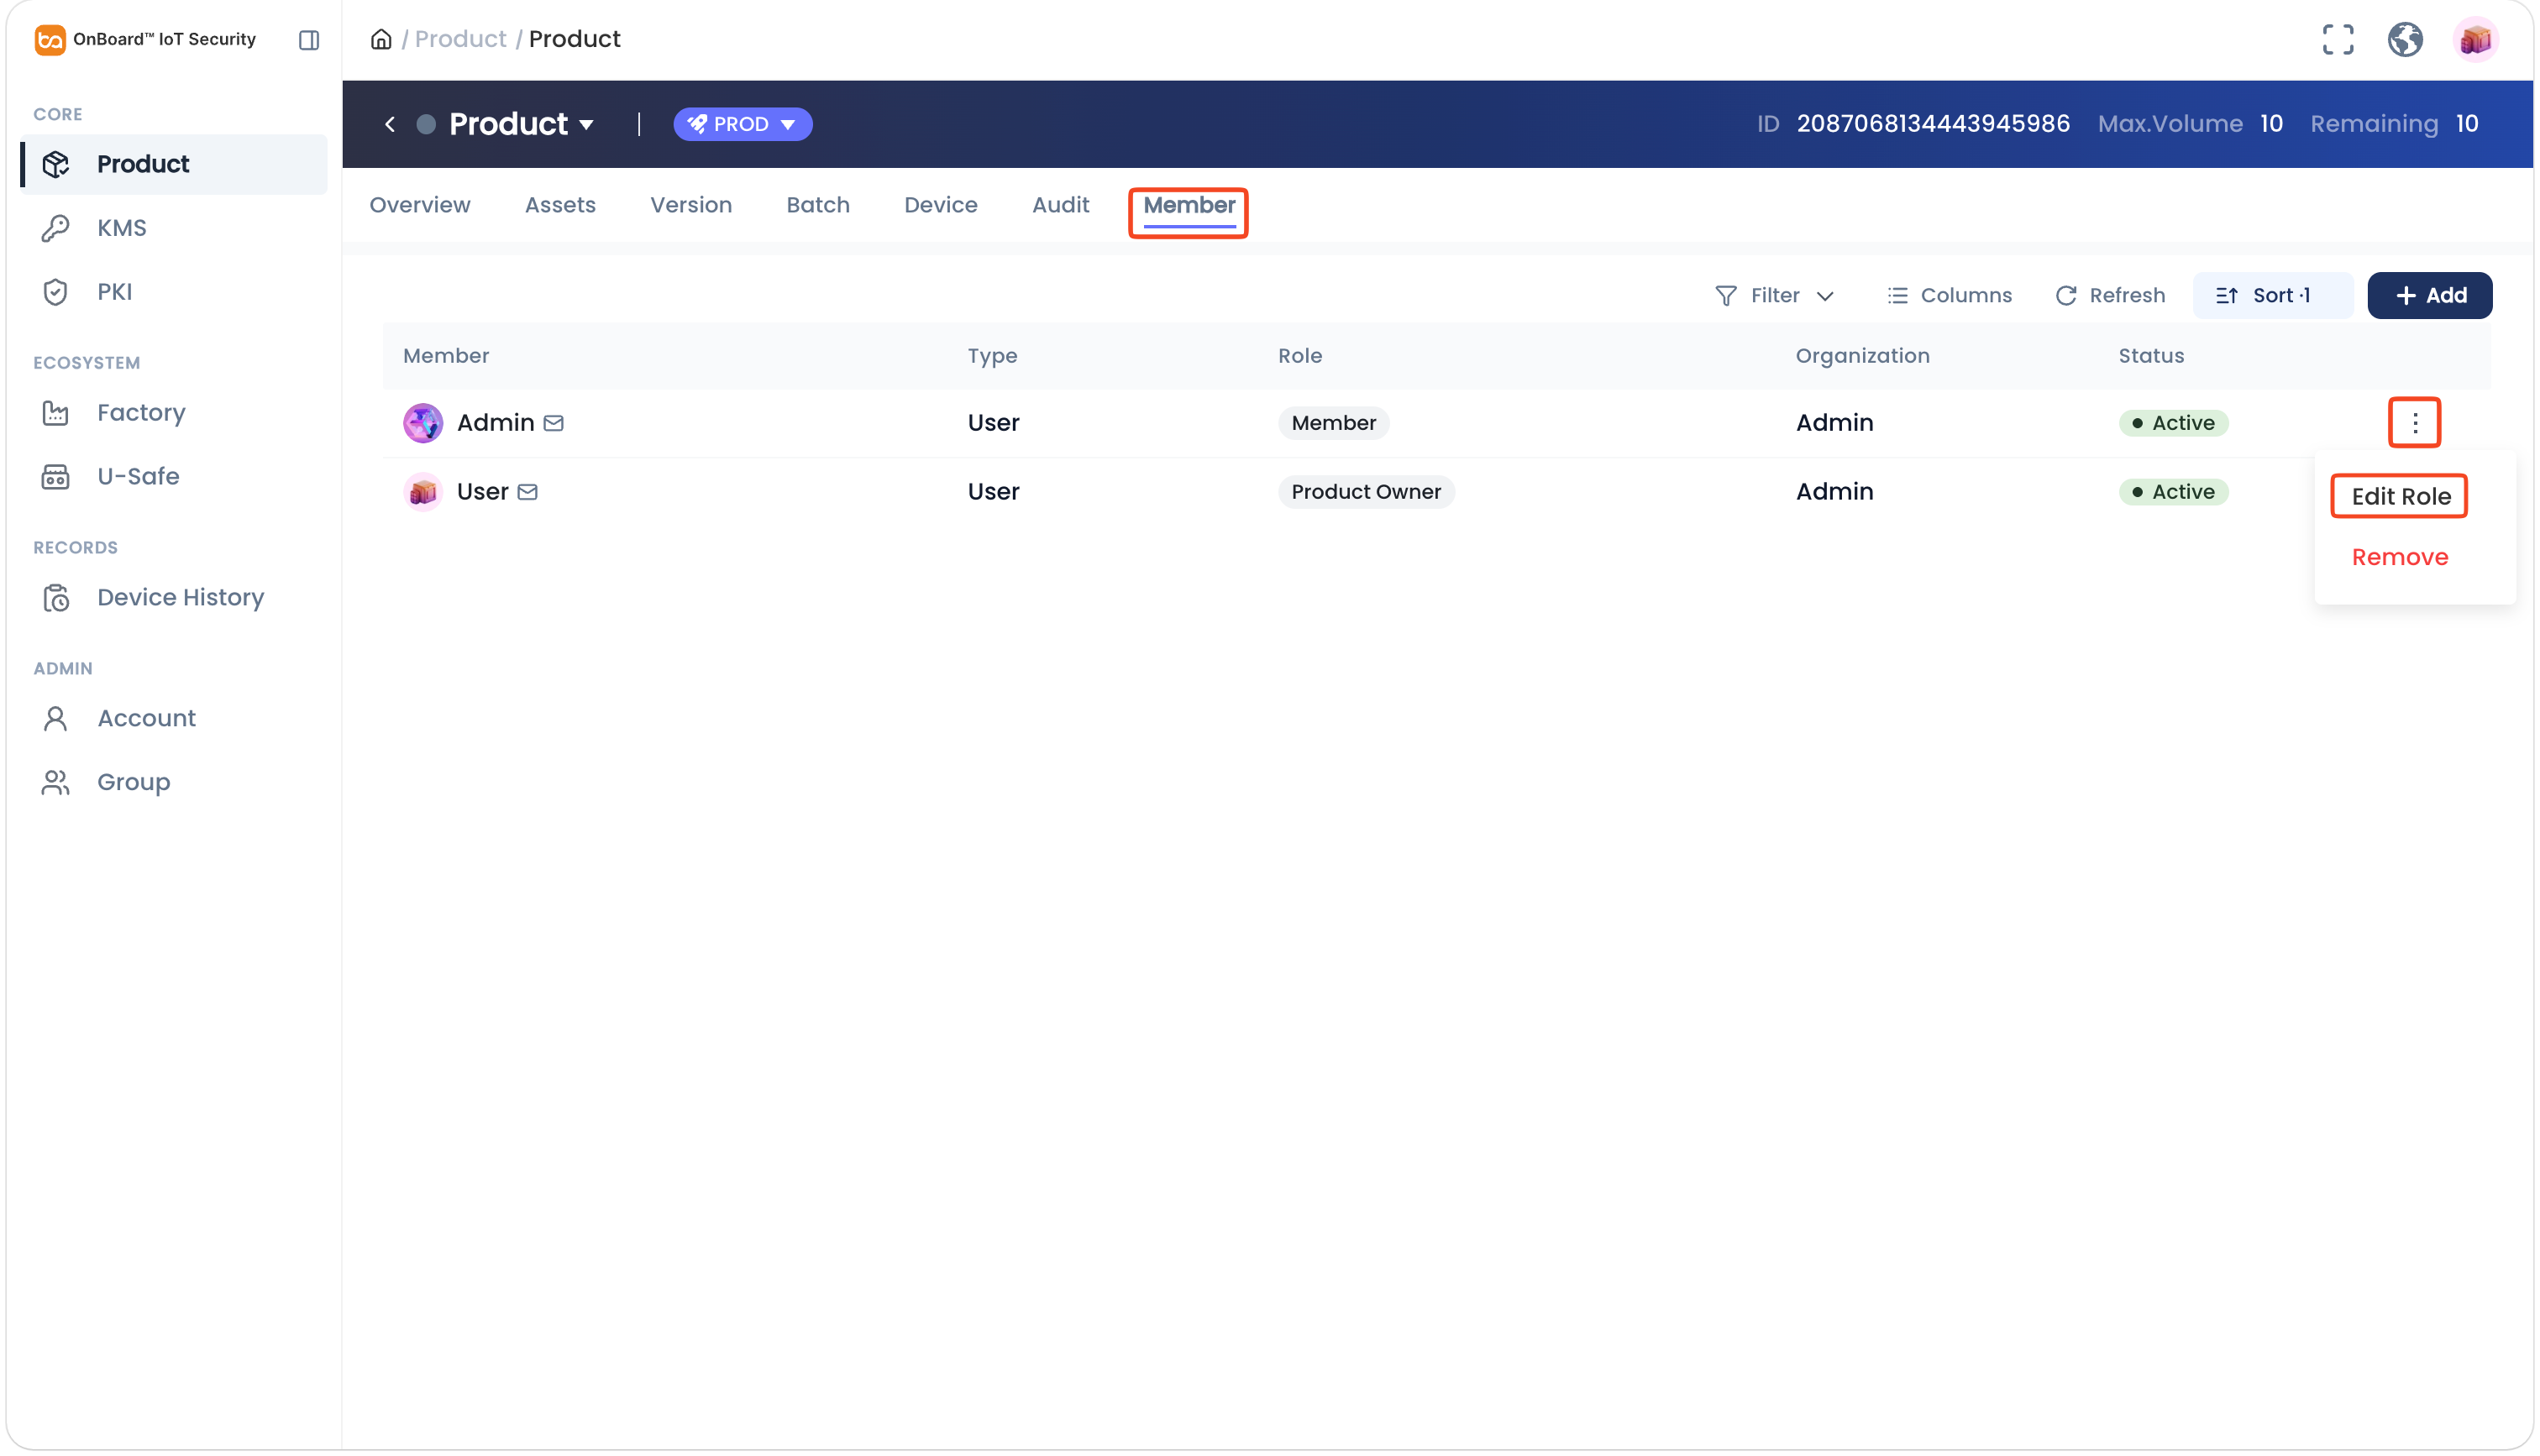
-
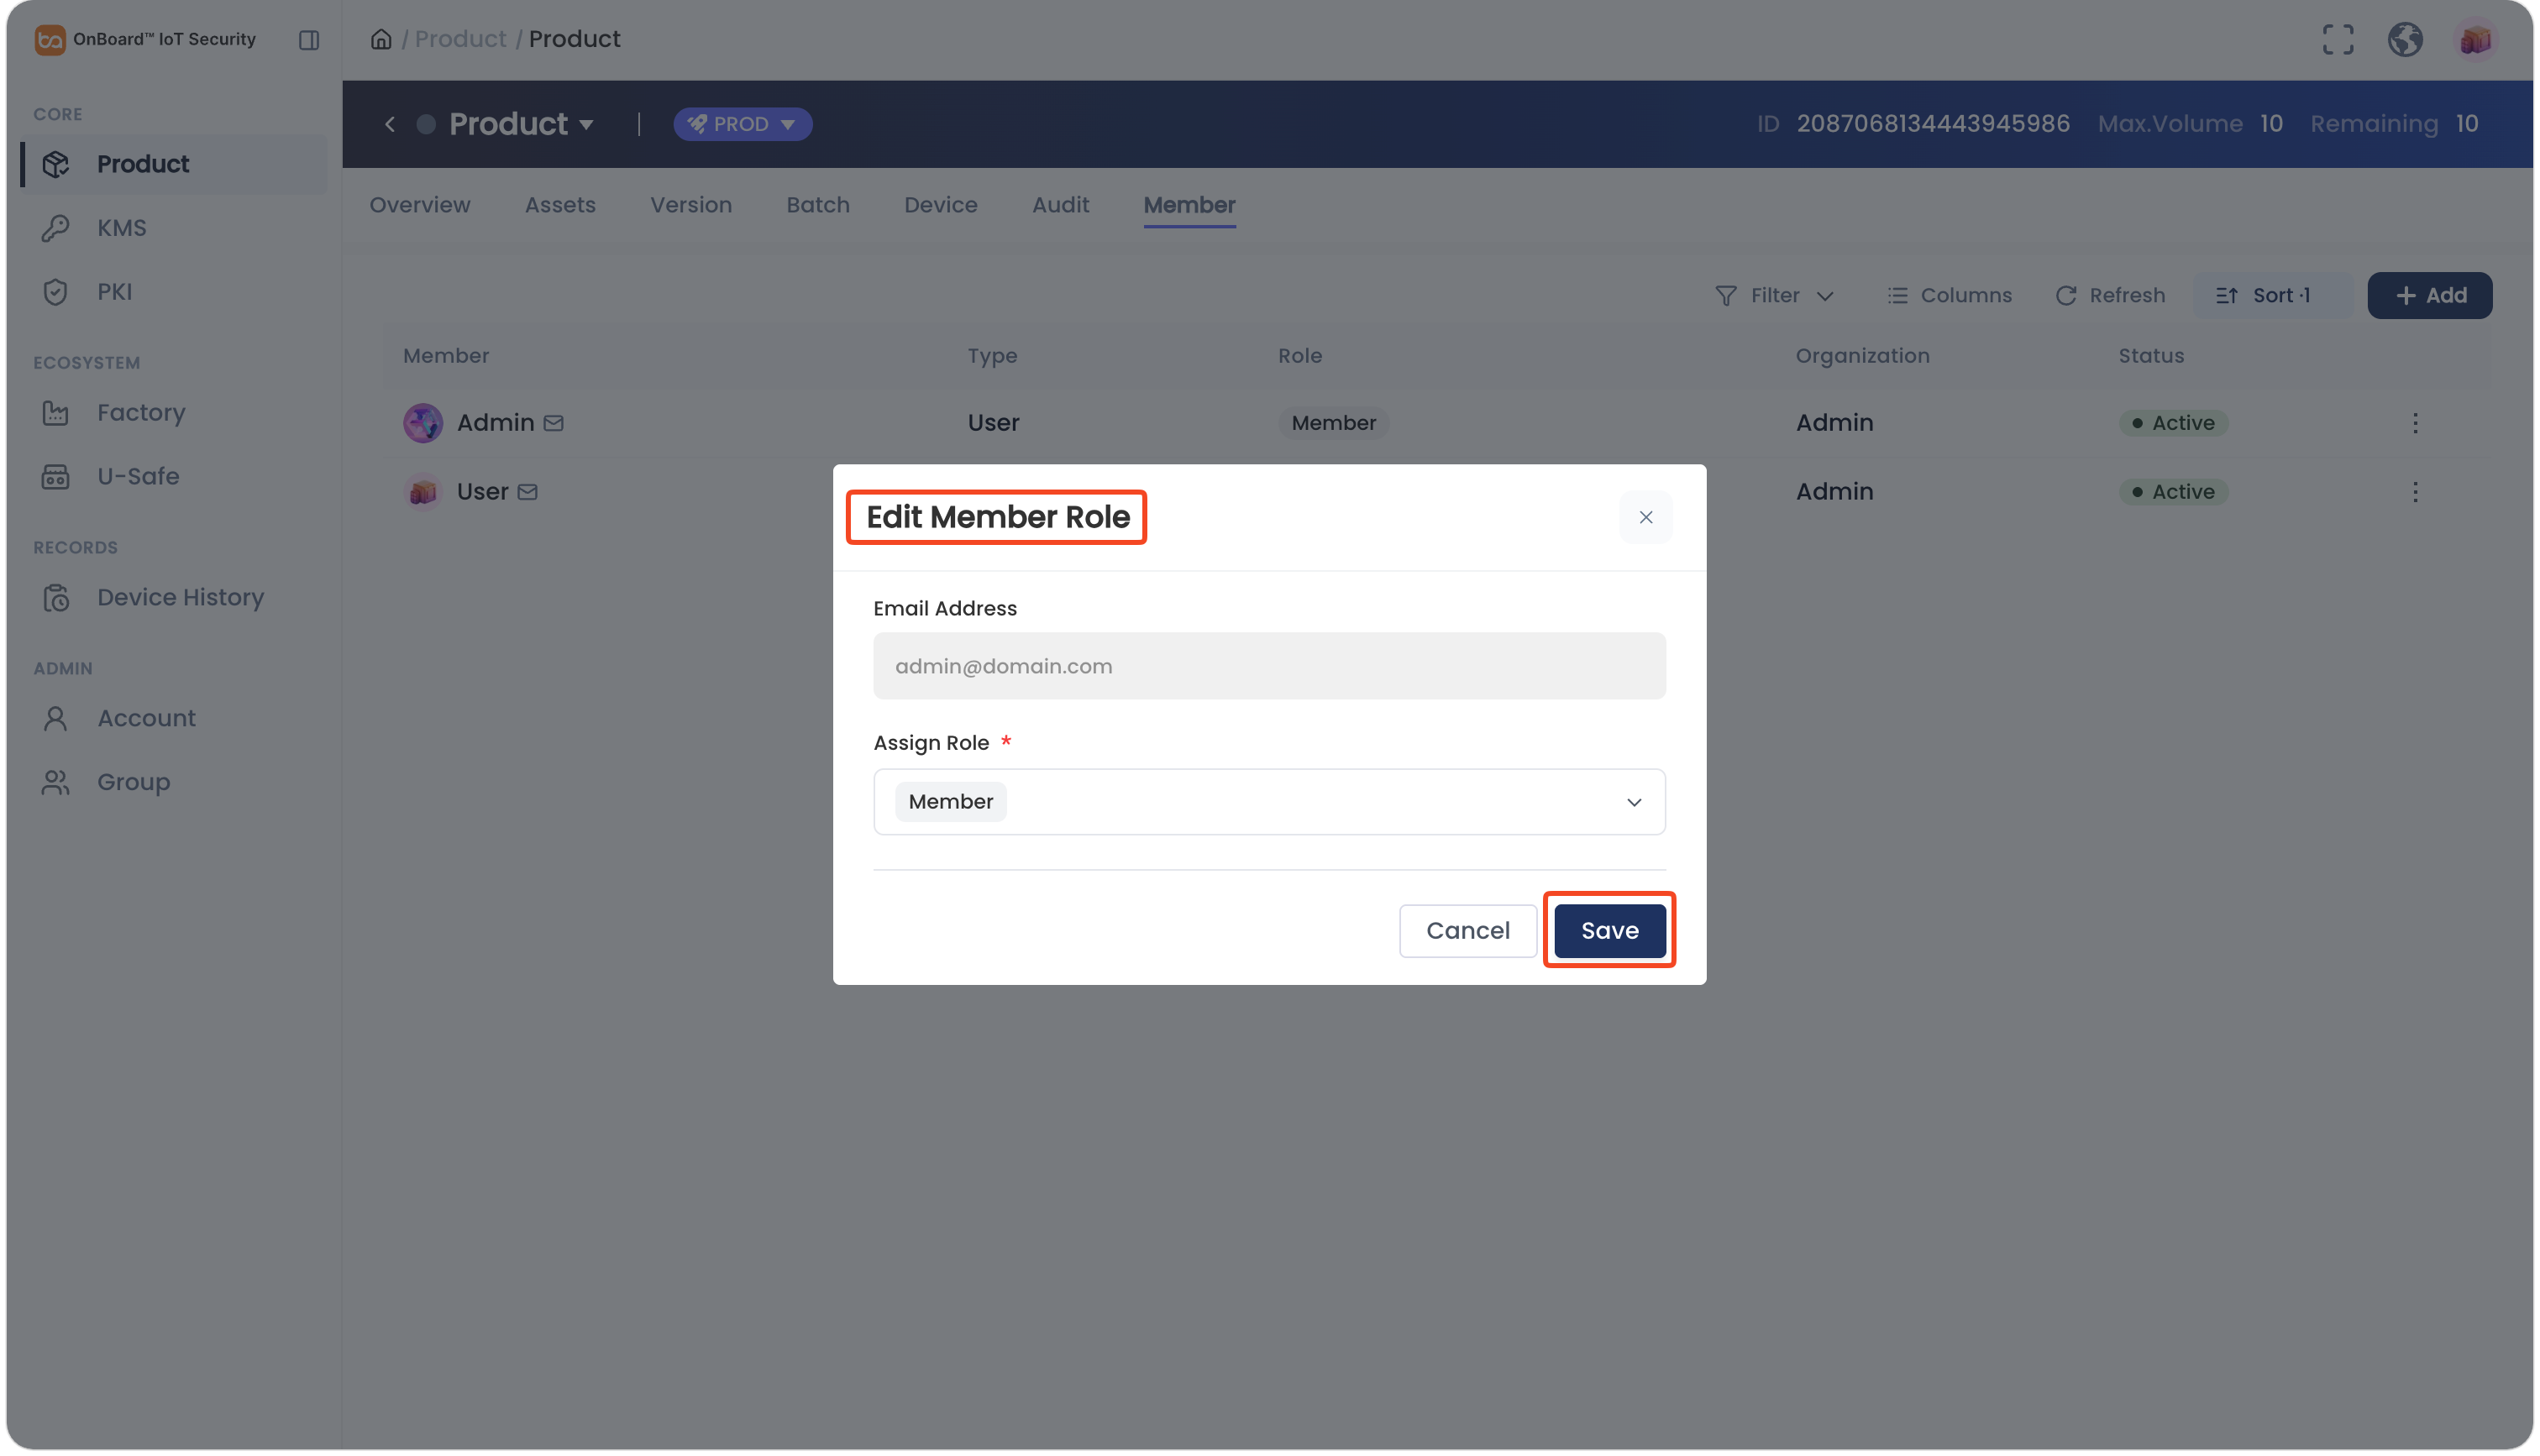
In the Edit Member Role window, select the corresponding roles and then click Save to complete the update.
Remove a user
-
Sign in to OBIS.
-
In the Core section of the left menu, click Product, and then select the corresponding product to navigate to the product page.
-
On the product page, select the Member tab. Click the Options
icon for the corresponding user and then select Remove.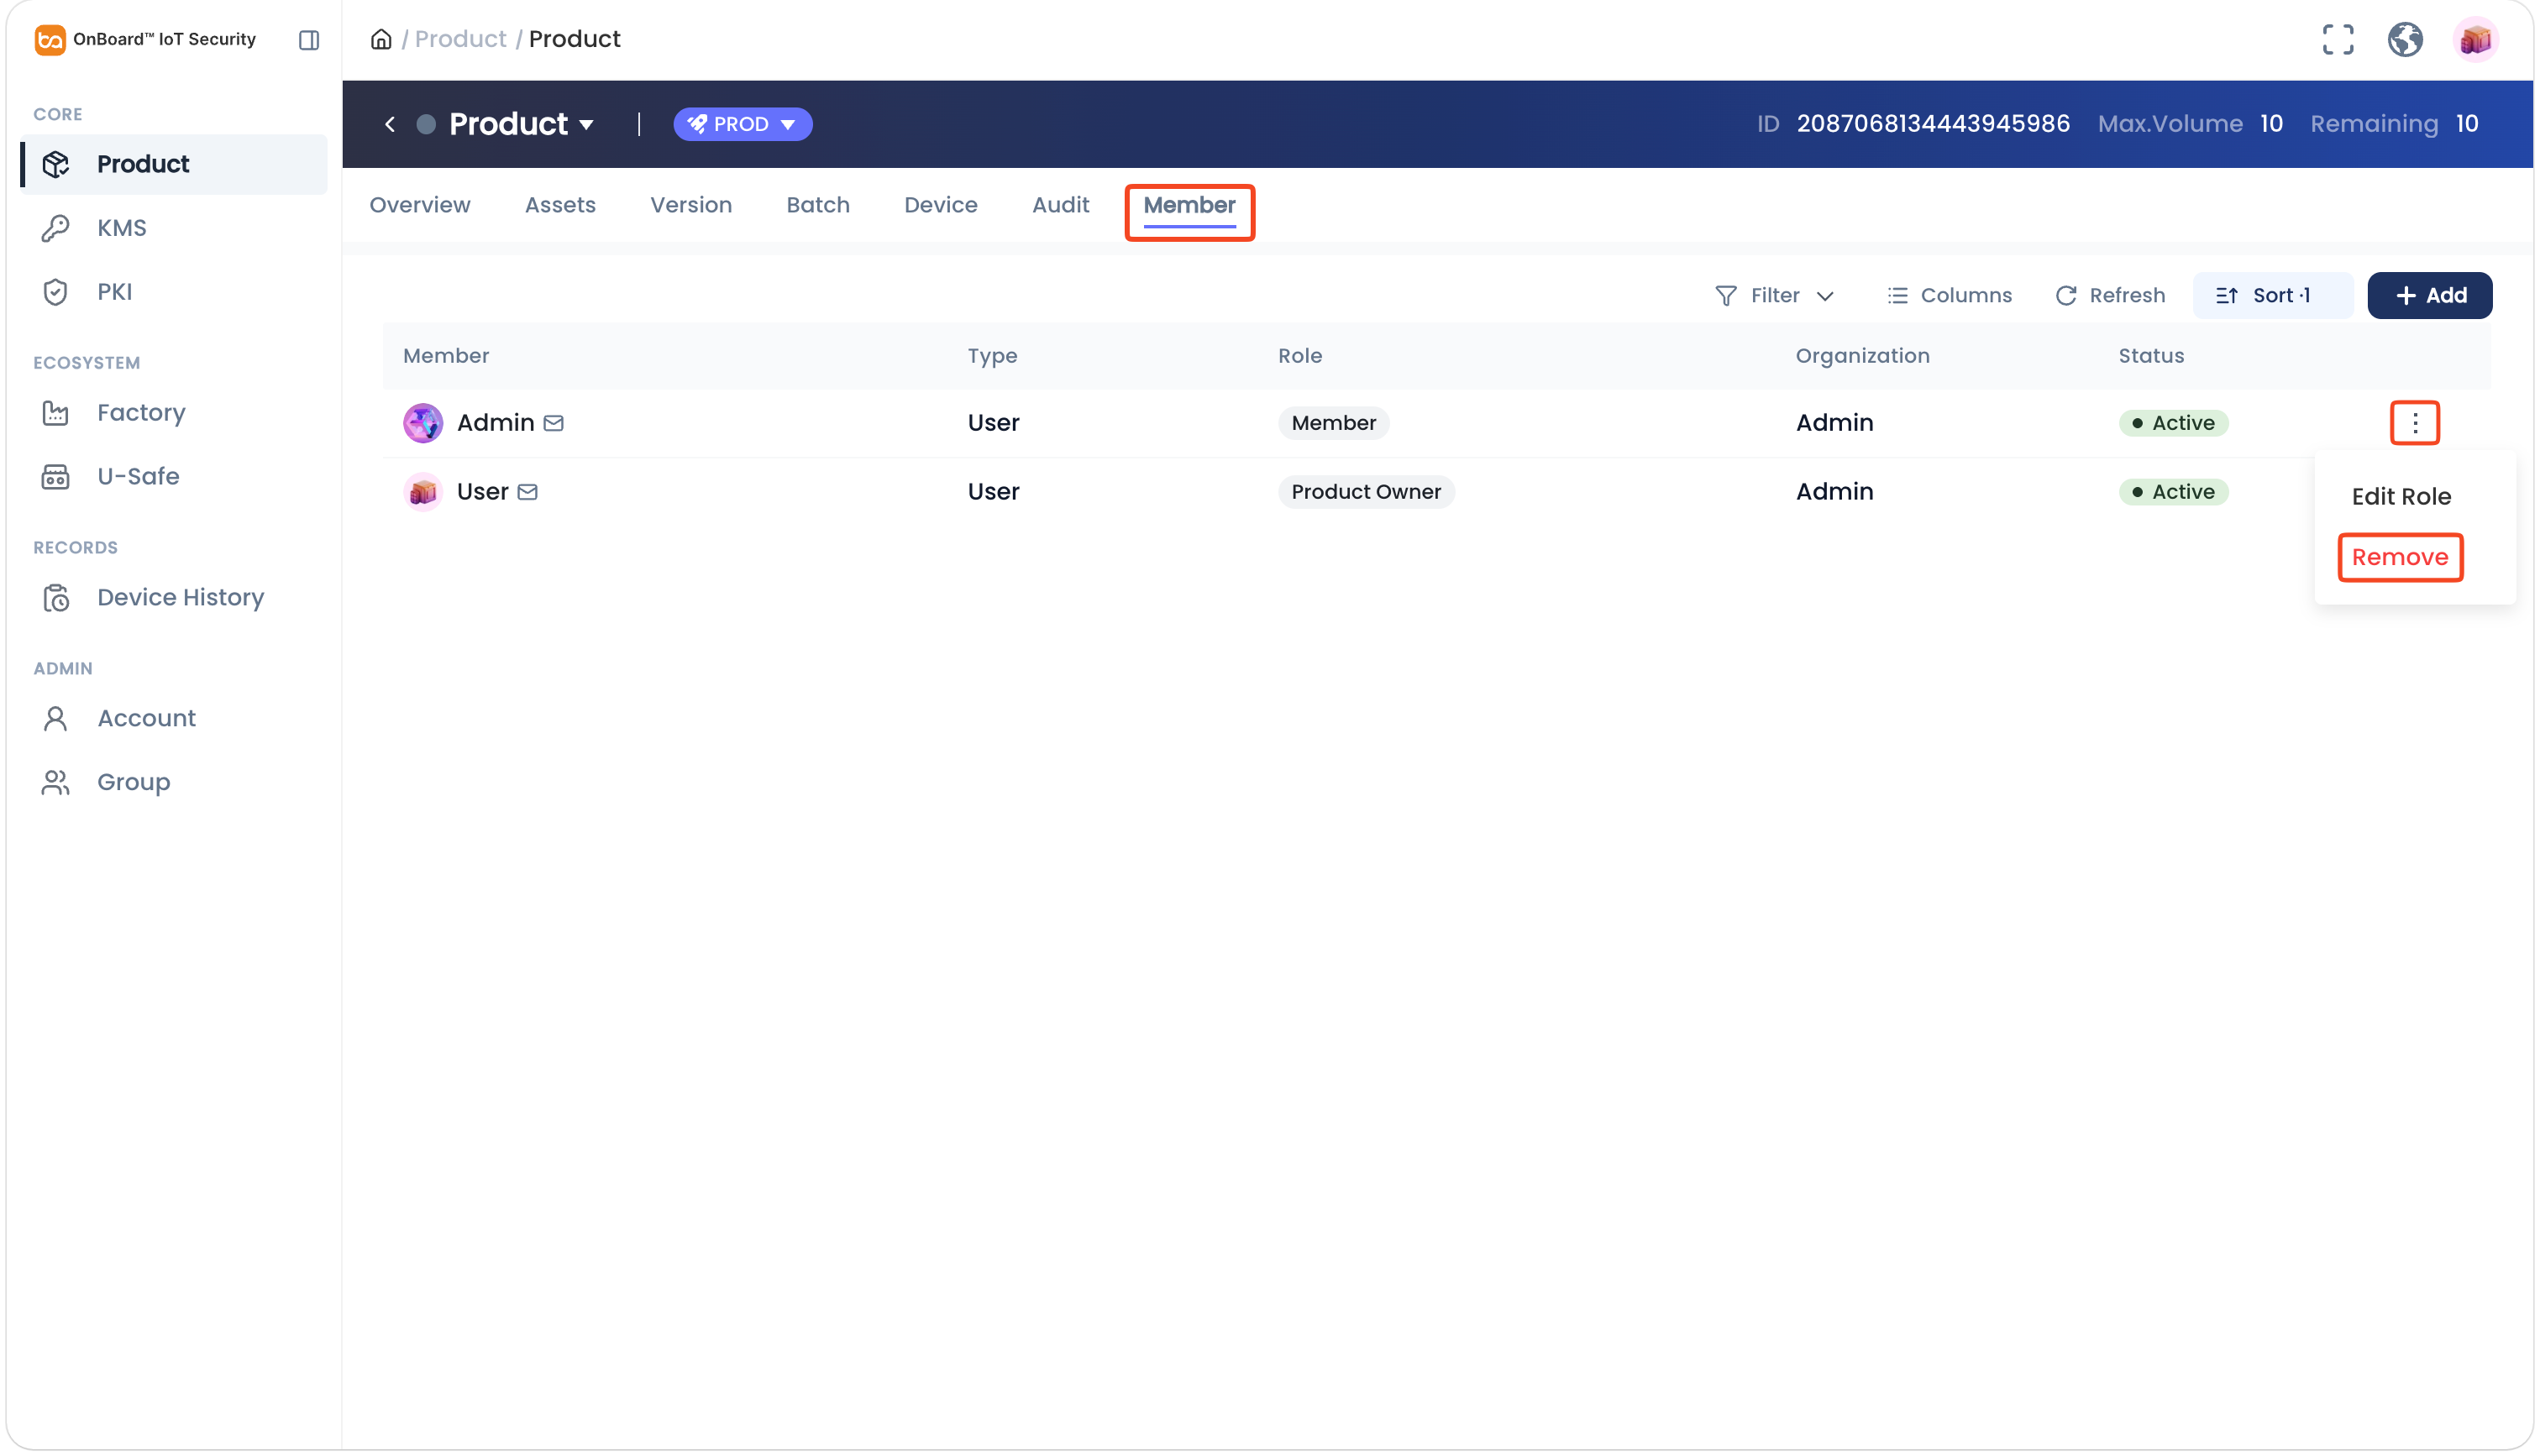
-
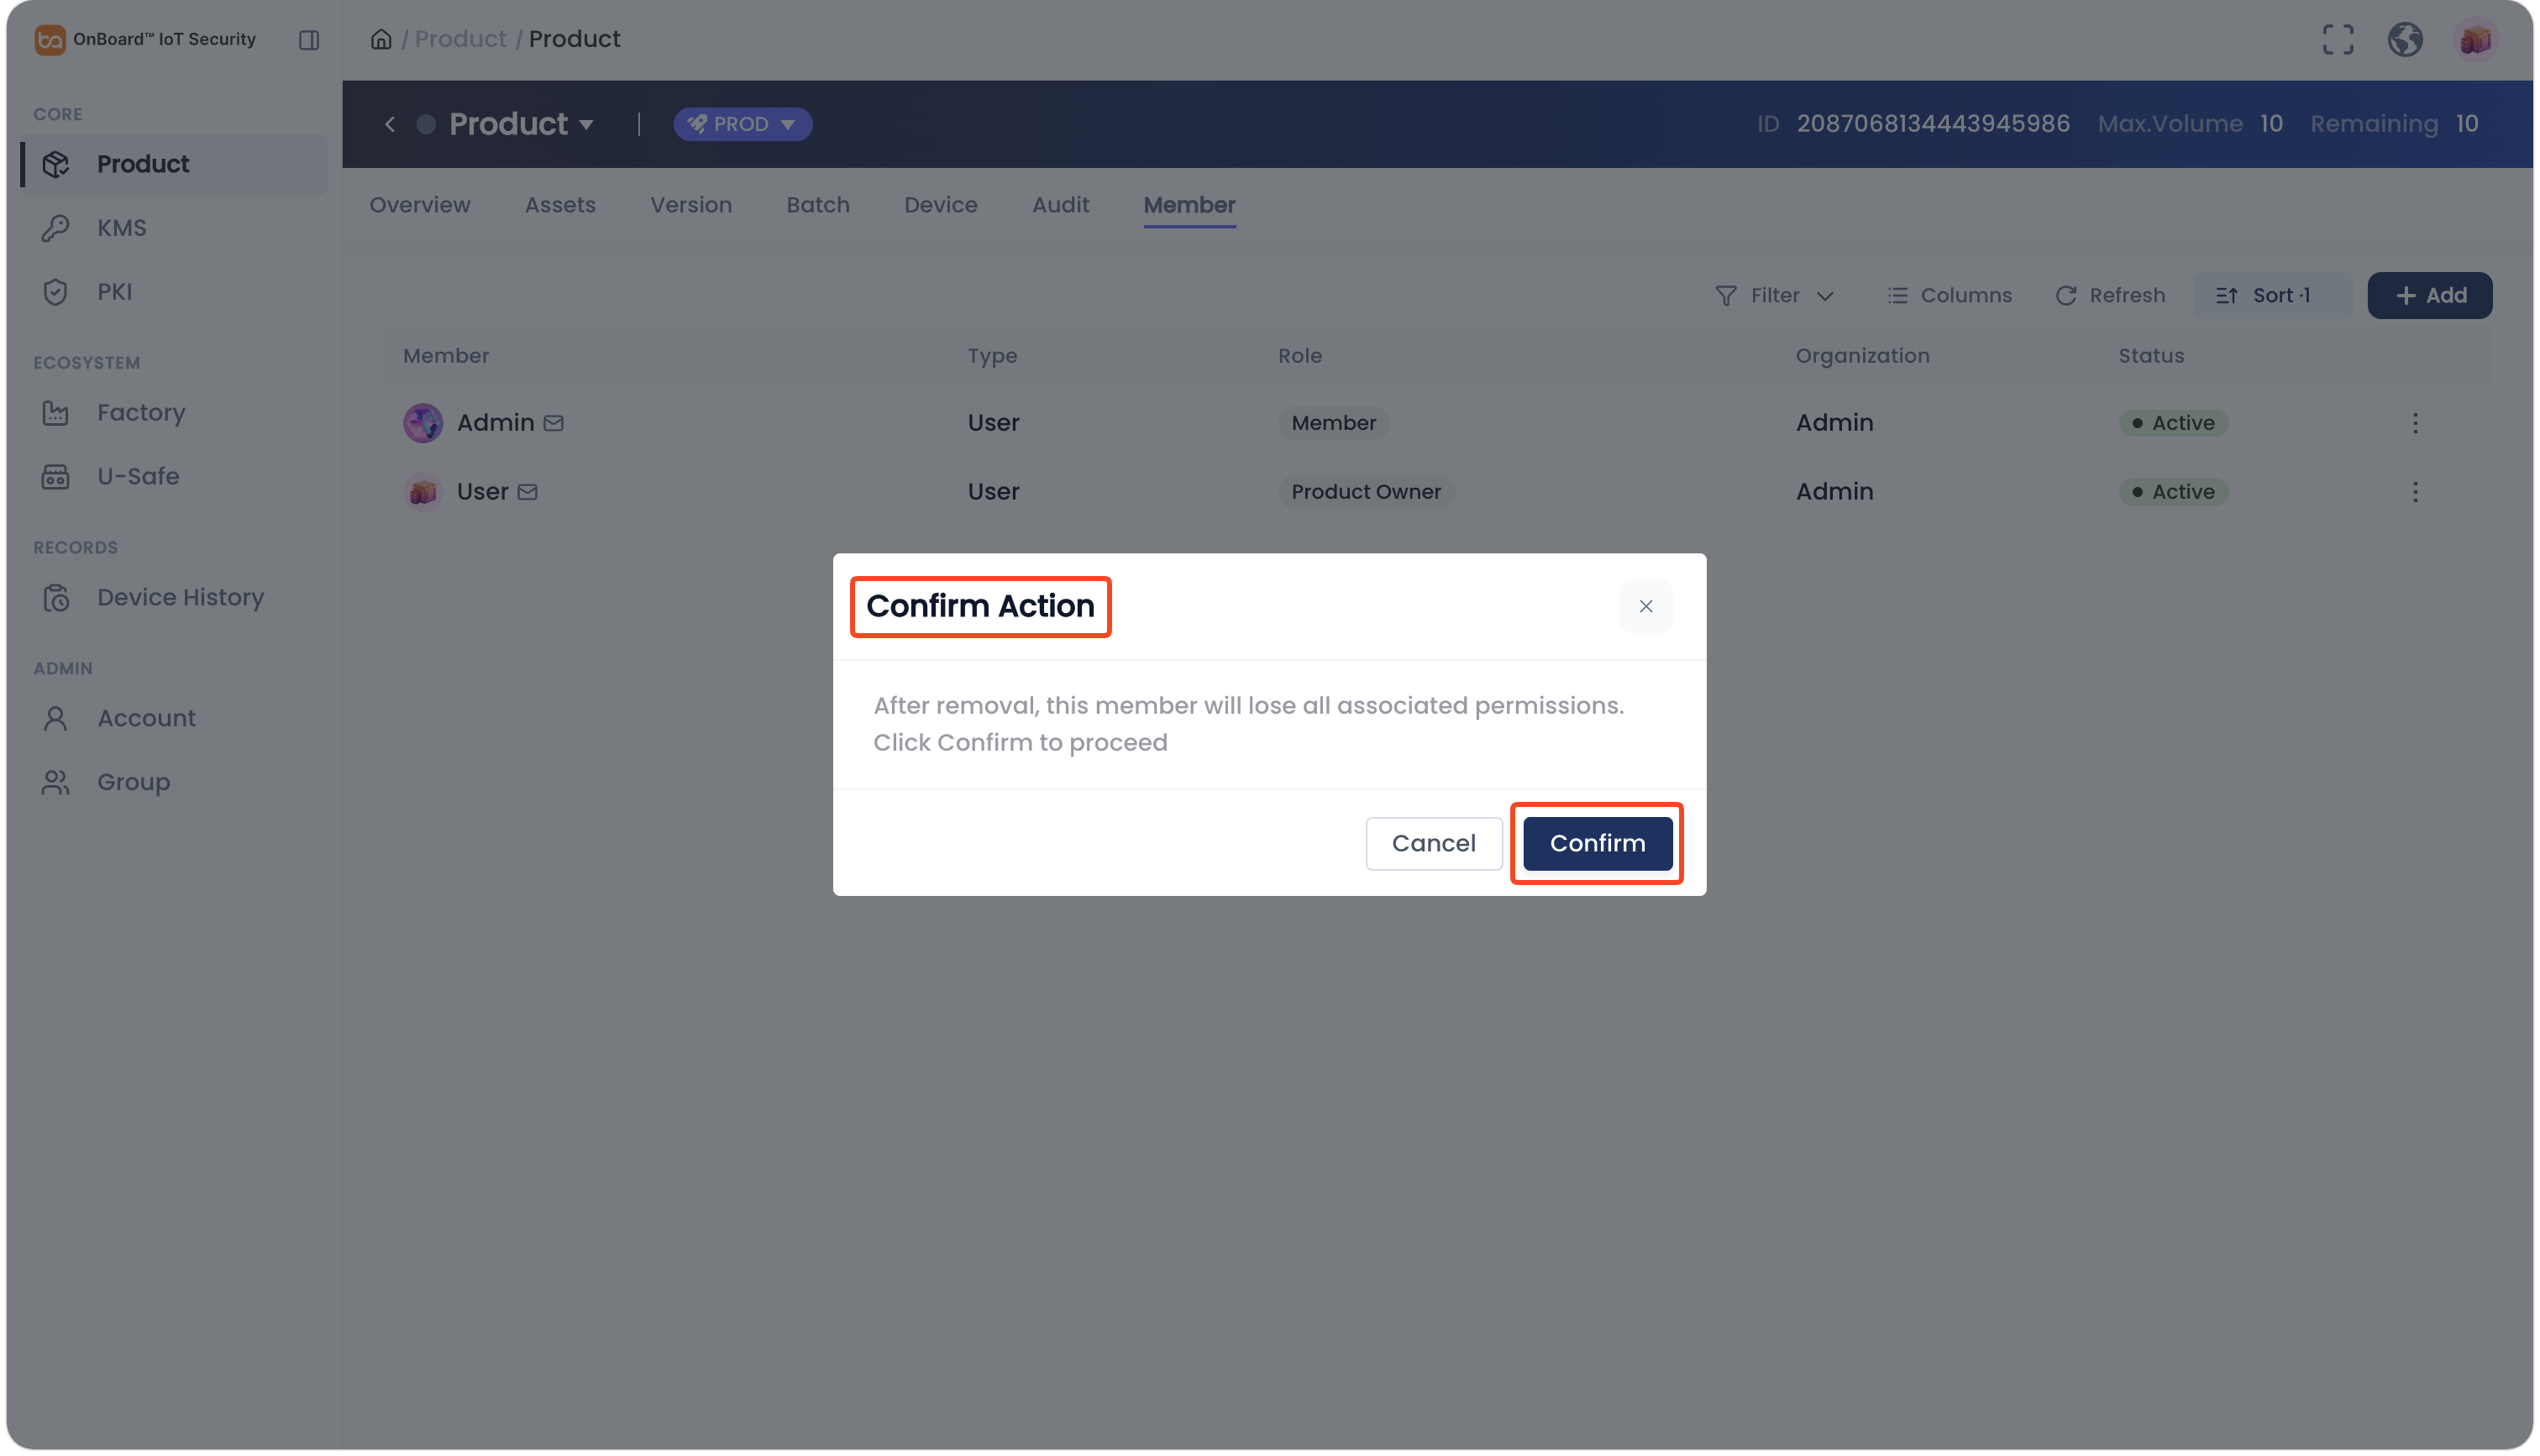
In the Confirm Action window, verify the information and then click Confirm to remove the user.
Add a user group
-
Sign in to OBIS.
-
In the Core section of the left menu, click Product, and then select the corresponding product to navigate to the product page.
-
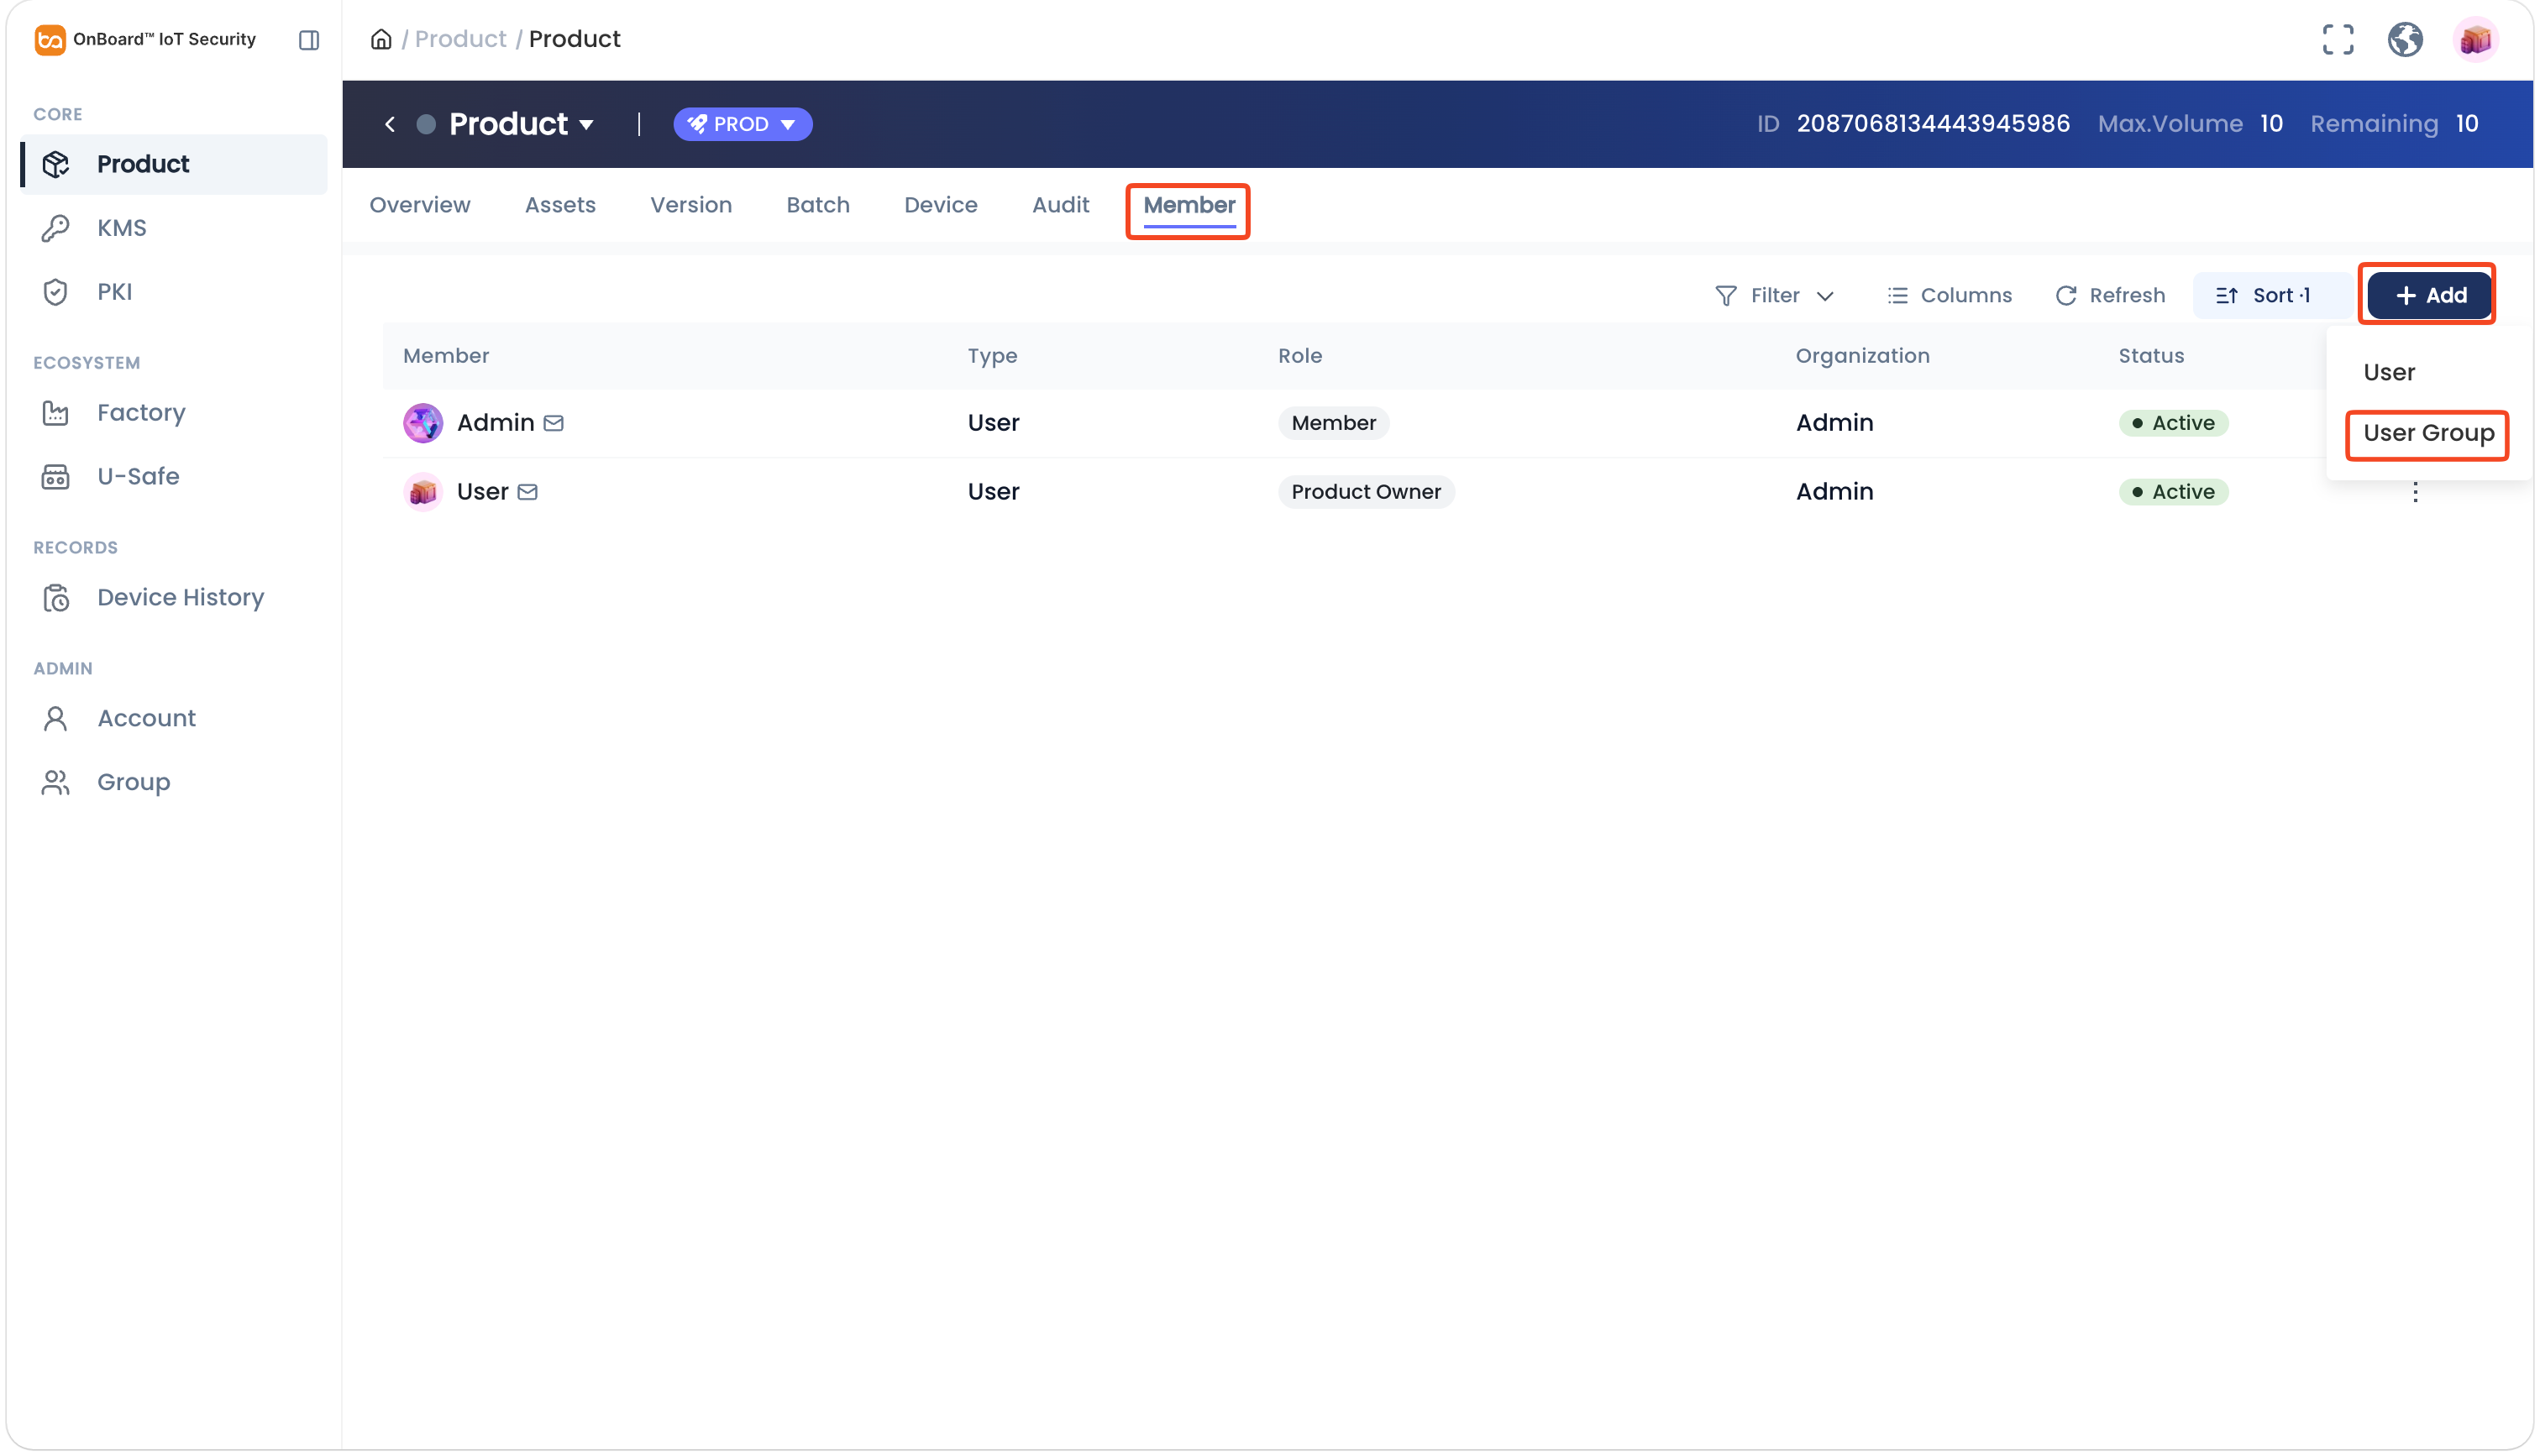
On the product page, select the Member tab, click Add and then select User Group.
-
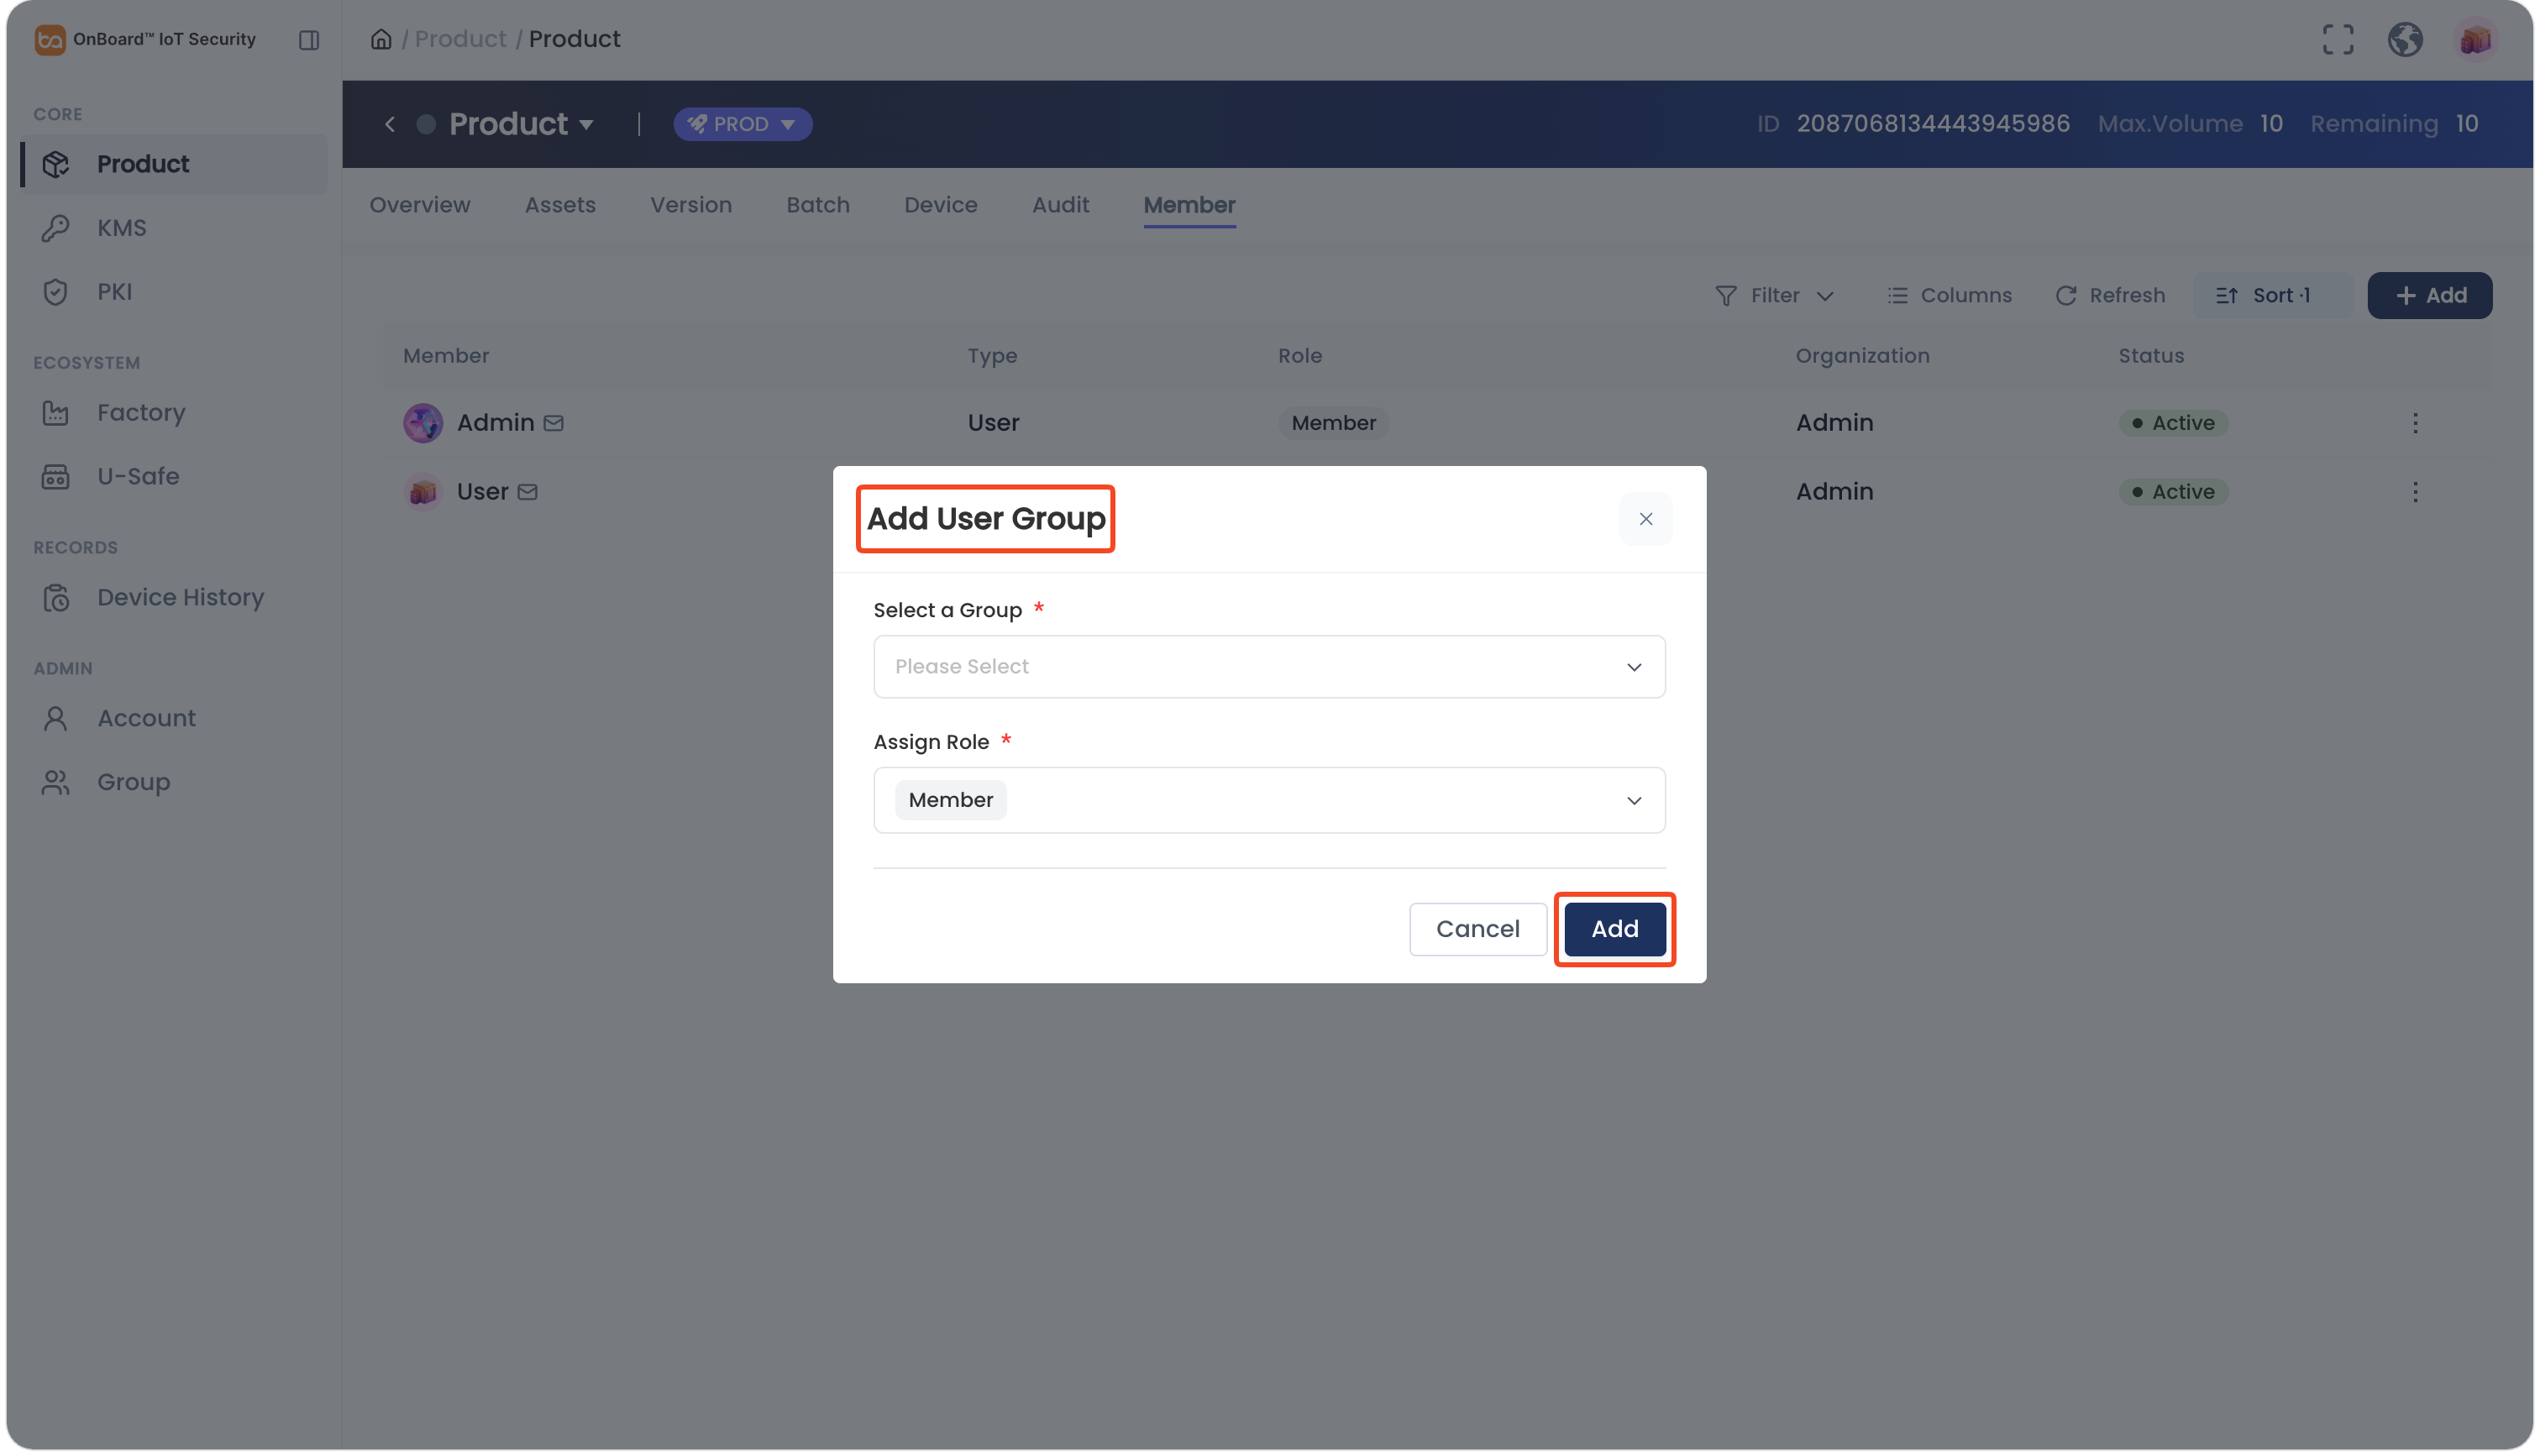
In the Add User Group window, select the user group and roles.
tip- A user group can be assigned multiple roles. For more information, refer to the description of product role permissions.
- Users within the user group will receive an email containing a link, through which they can use to access the product details.
- Only user groups under the same tenant can be added.
-
Click Add to complete adding a user group.
Update a user group role
-
Sign in to OBIS.
-
In the Core section of the left menu, click Product, and then select the corresponding product to navigate to the product page.
-
On the product page, select the Member tab. Click the Options
icon for the corresponding user group and then select Edit Role.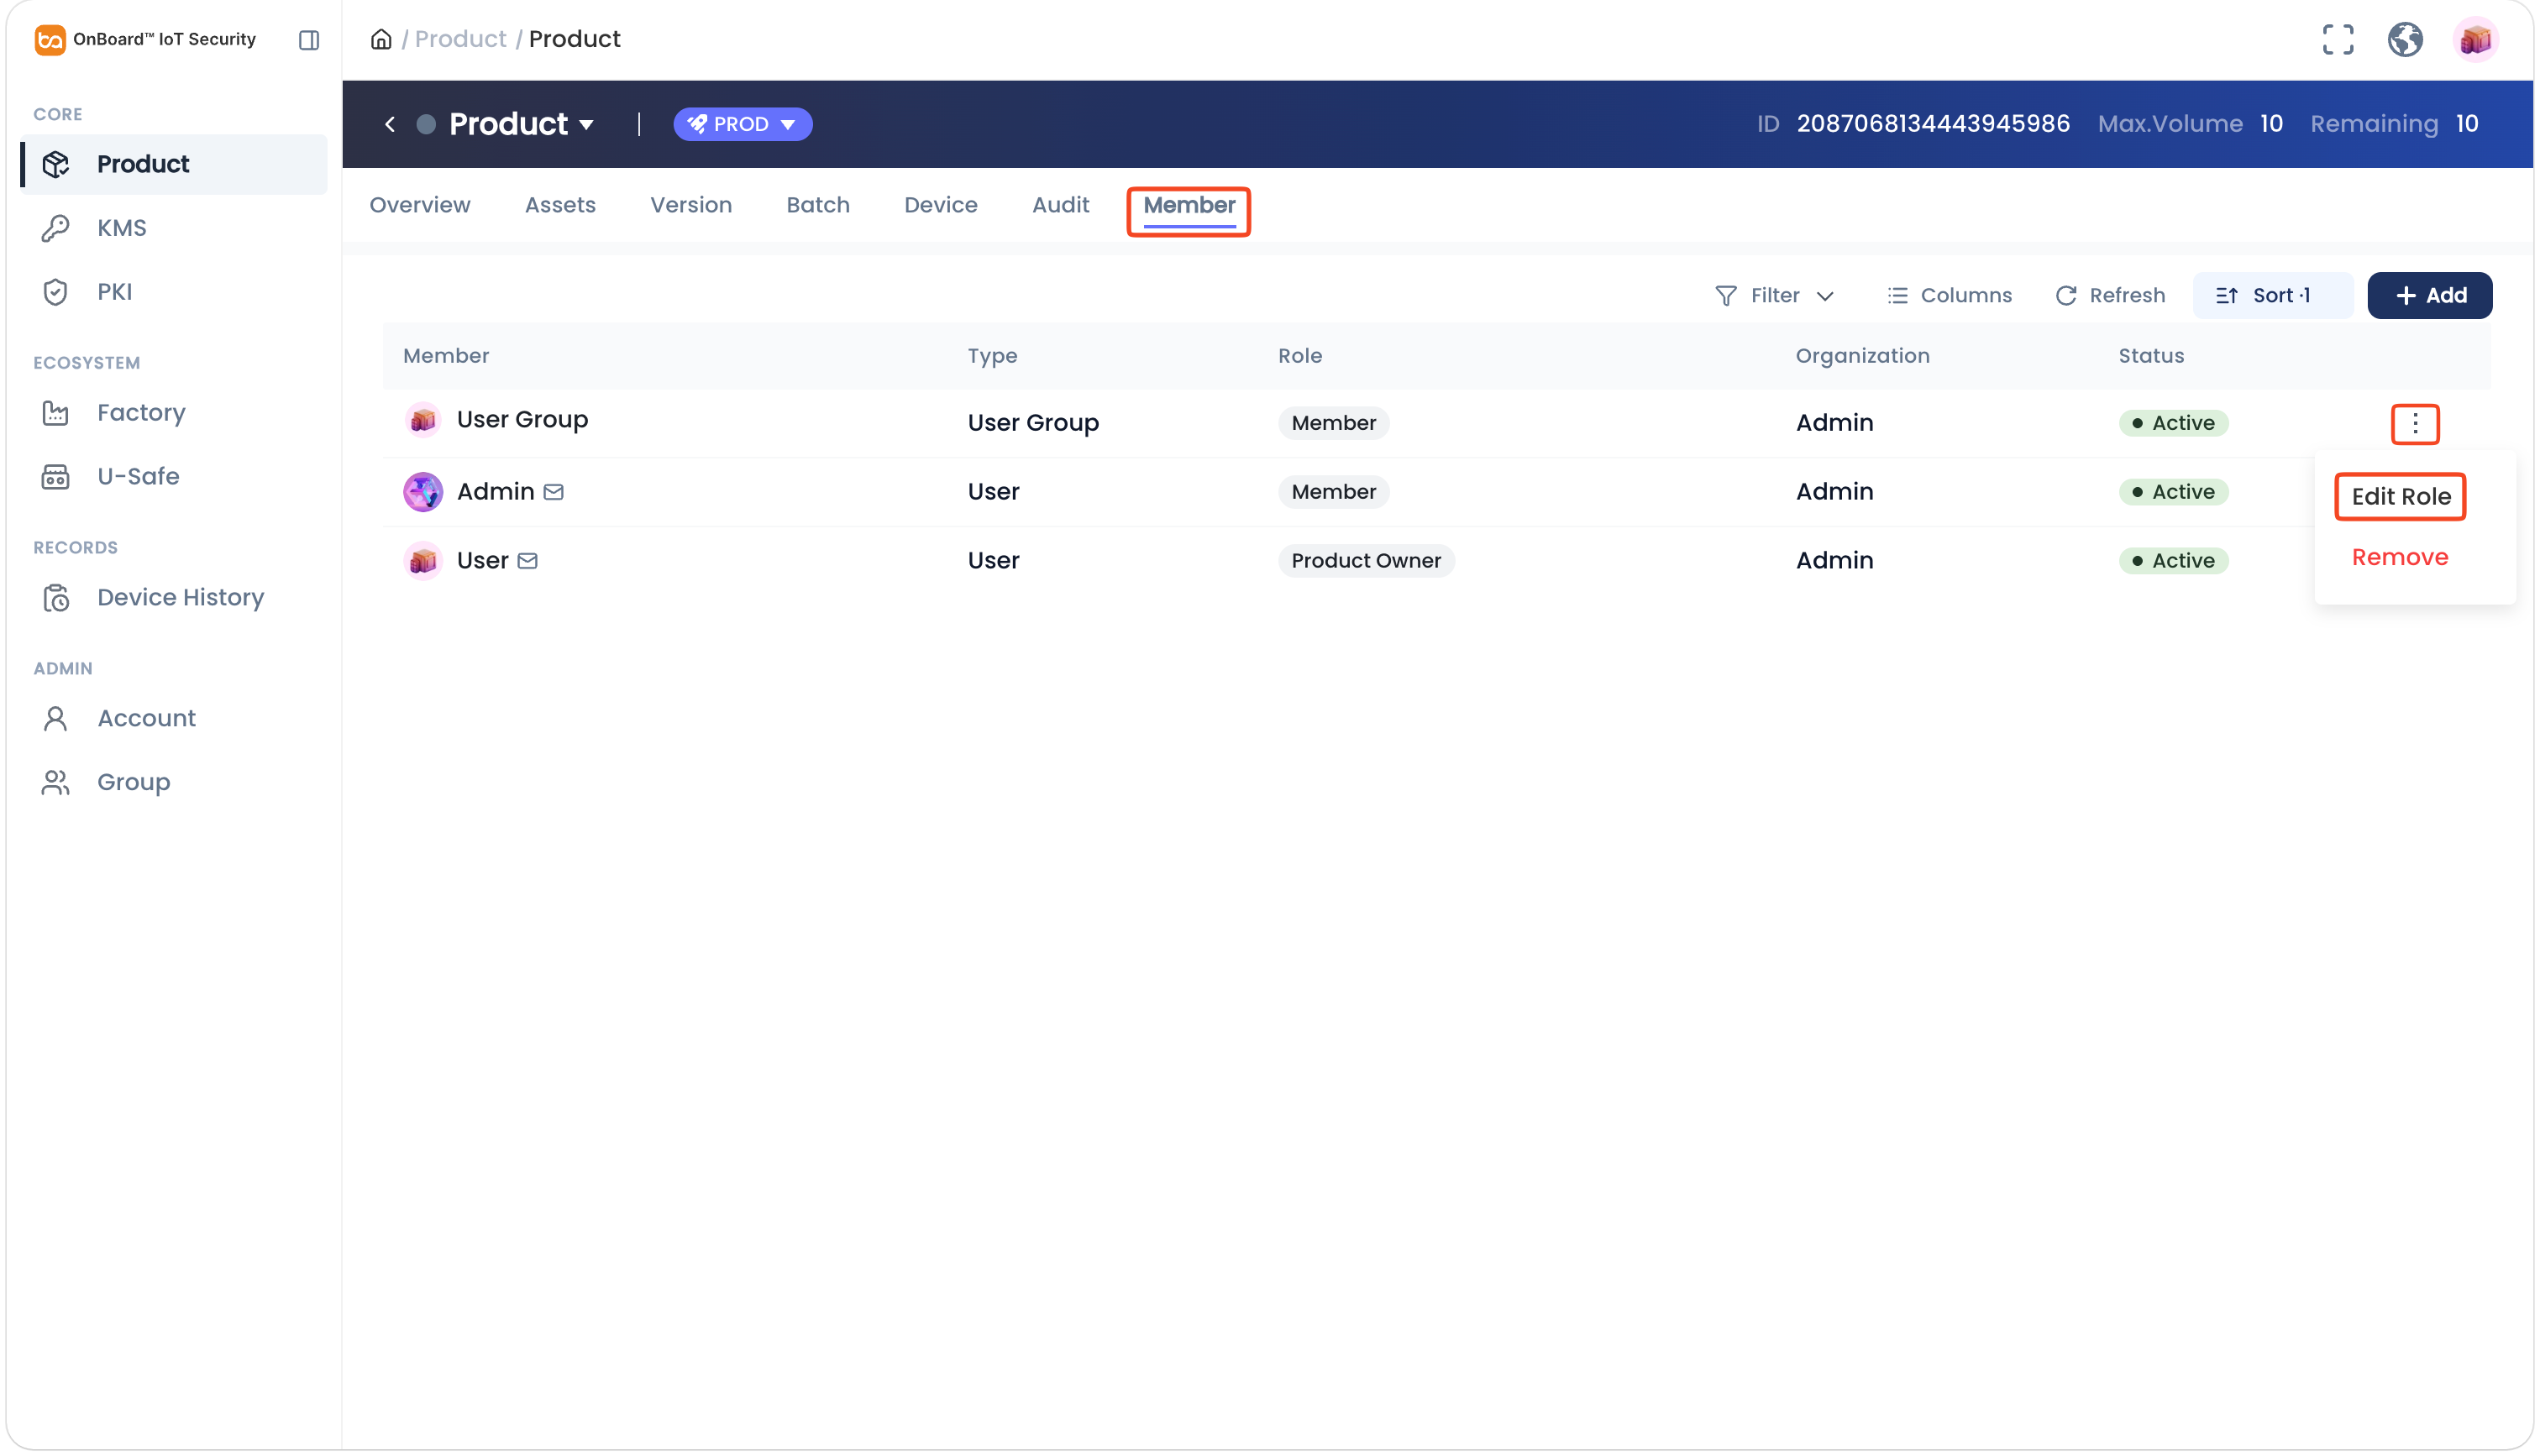
-
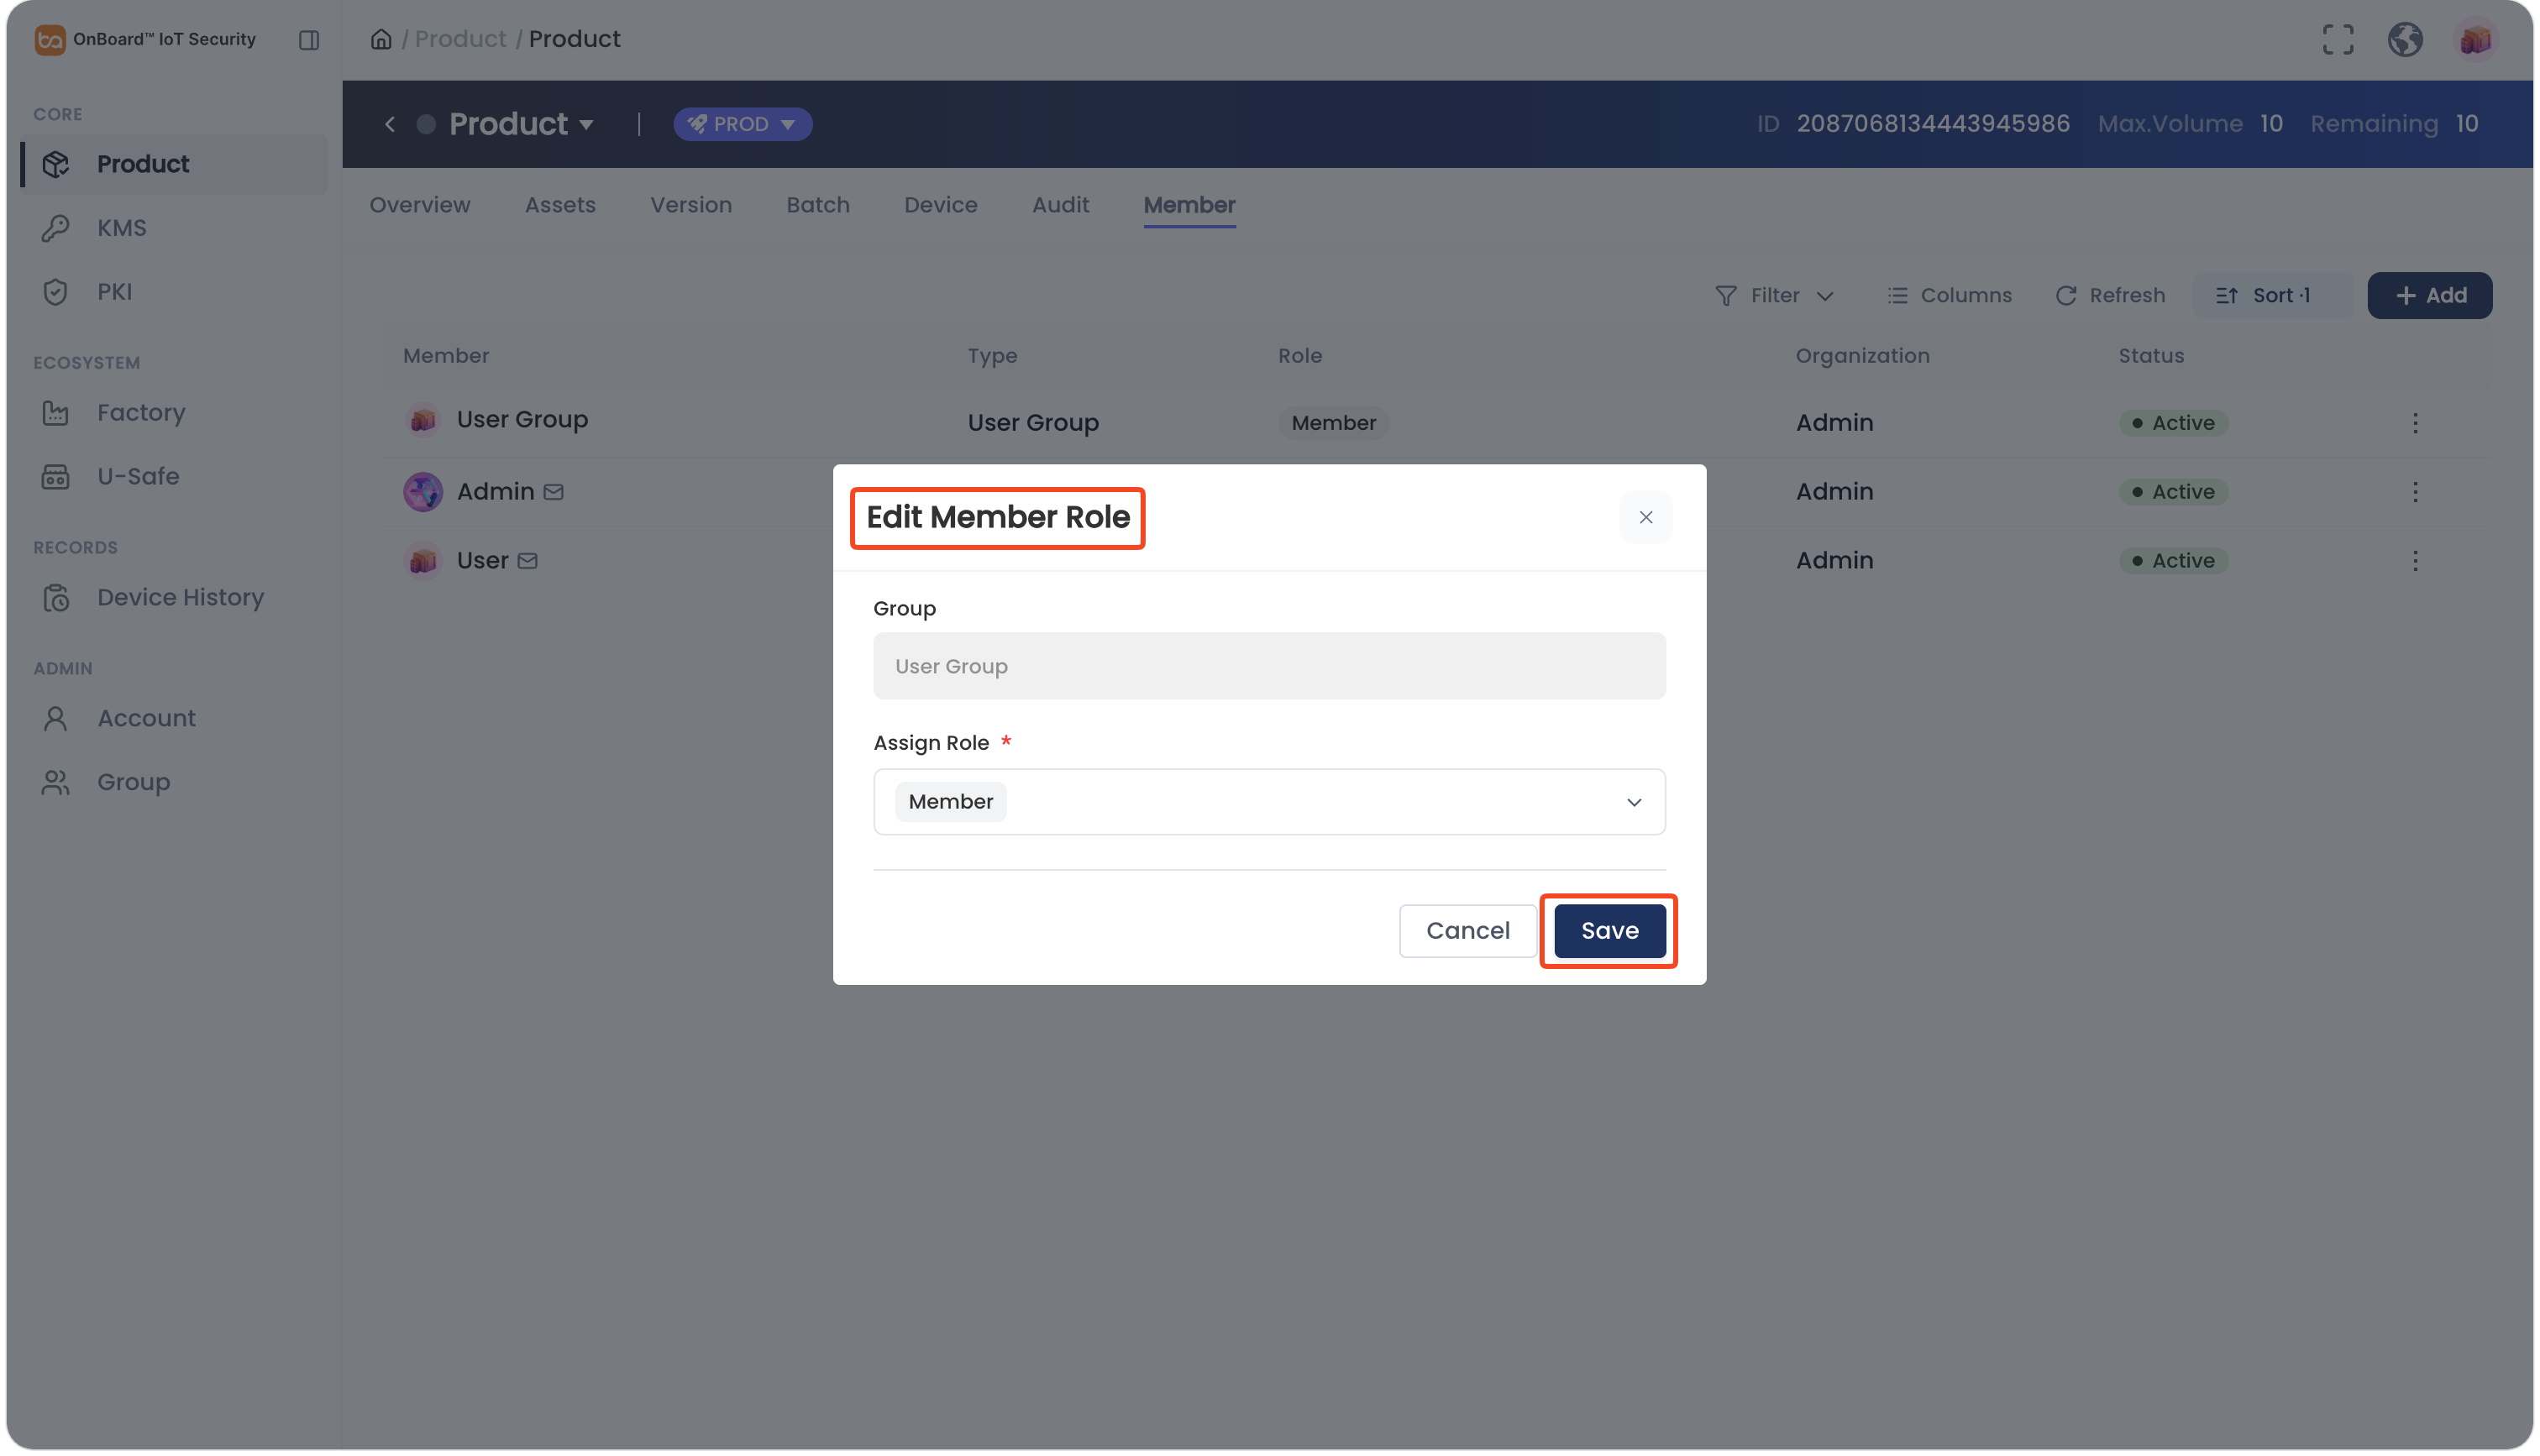
In the Edit Member Role window, select the corresponding roles and then click Save to complete the update.
Remove a user group
-
Sign in to OBIS.
-
In the Core section of the left menu, click Product, and then select the corresponding product to navigate to the product page.
-
On the product page, select the Member tab. Click the Options
icon for the corresponding user group and then select Remove.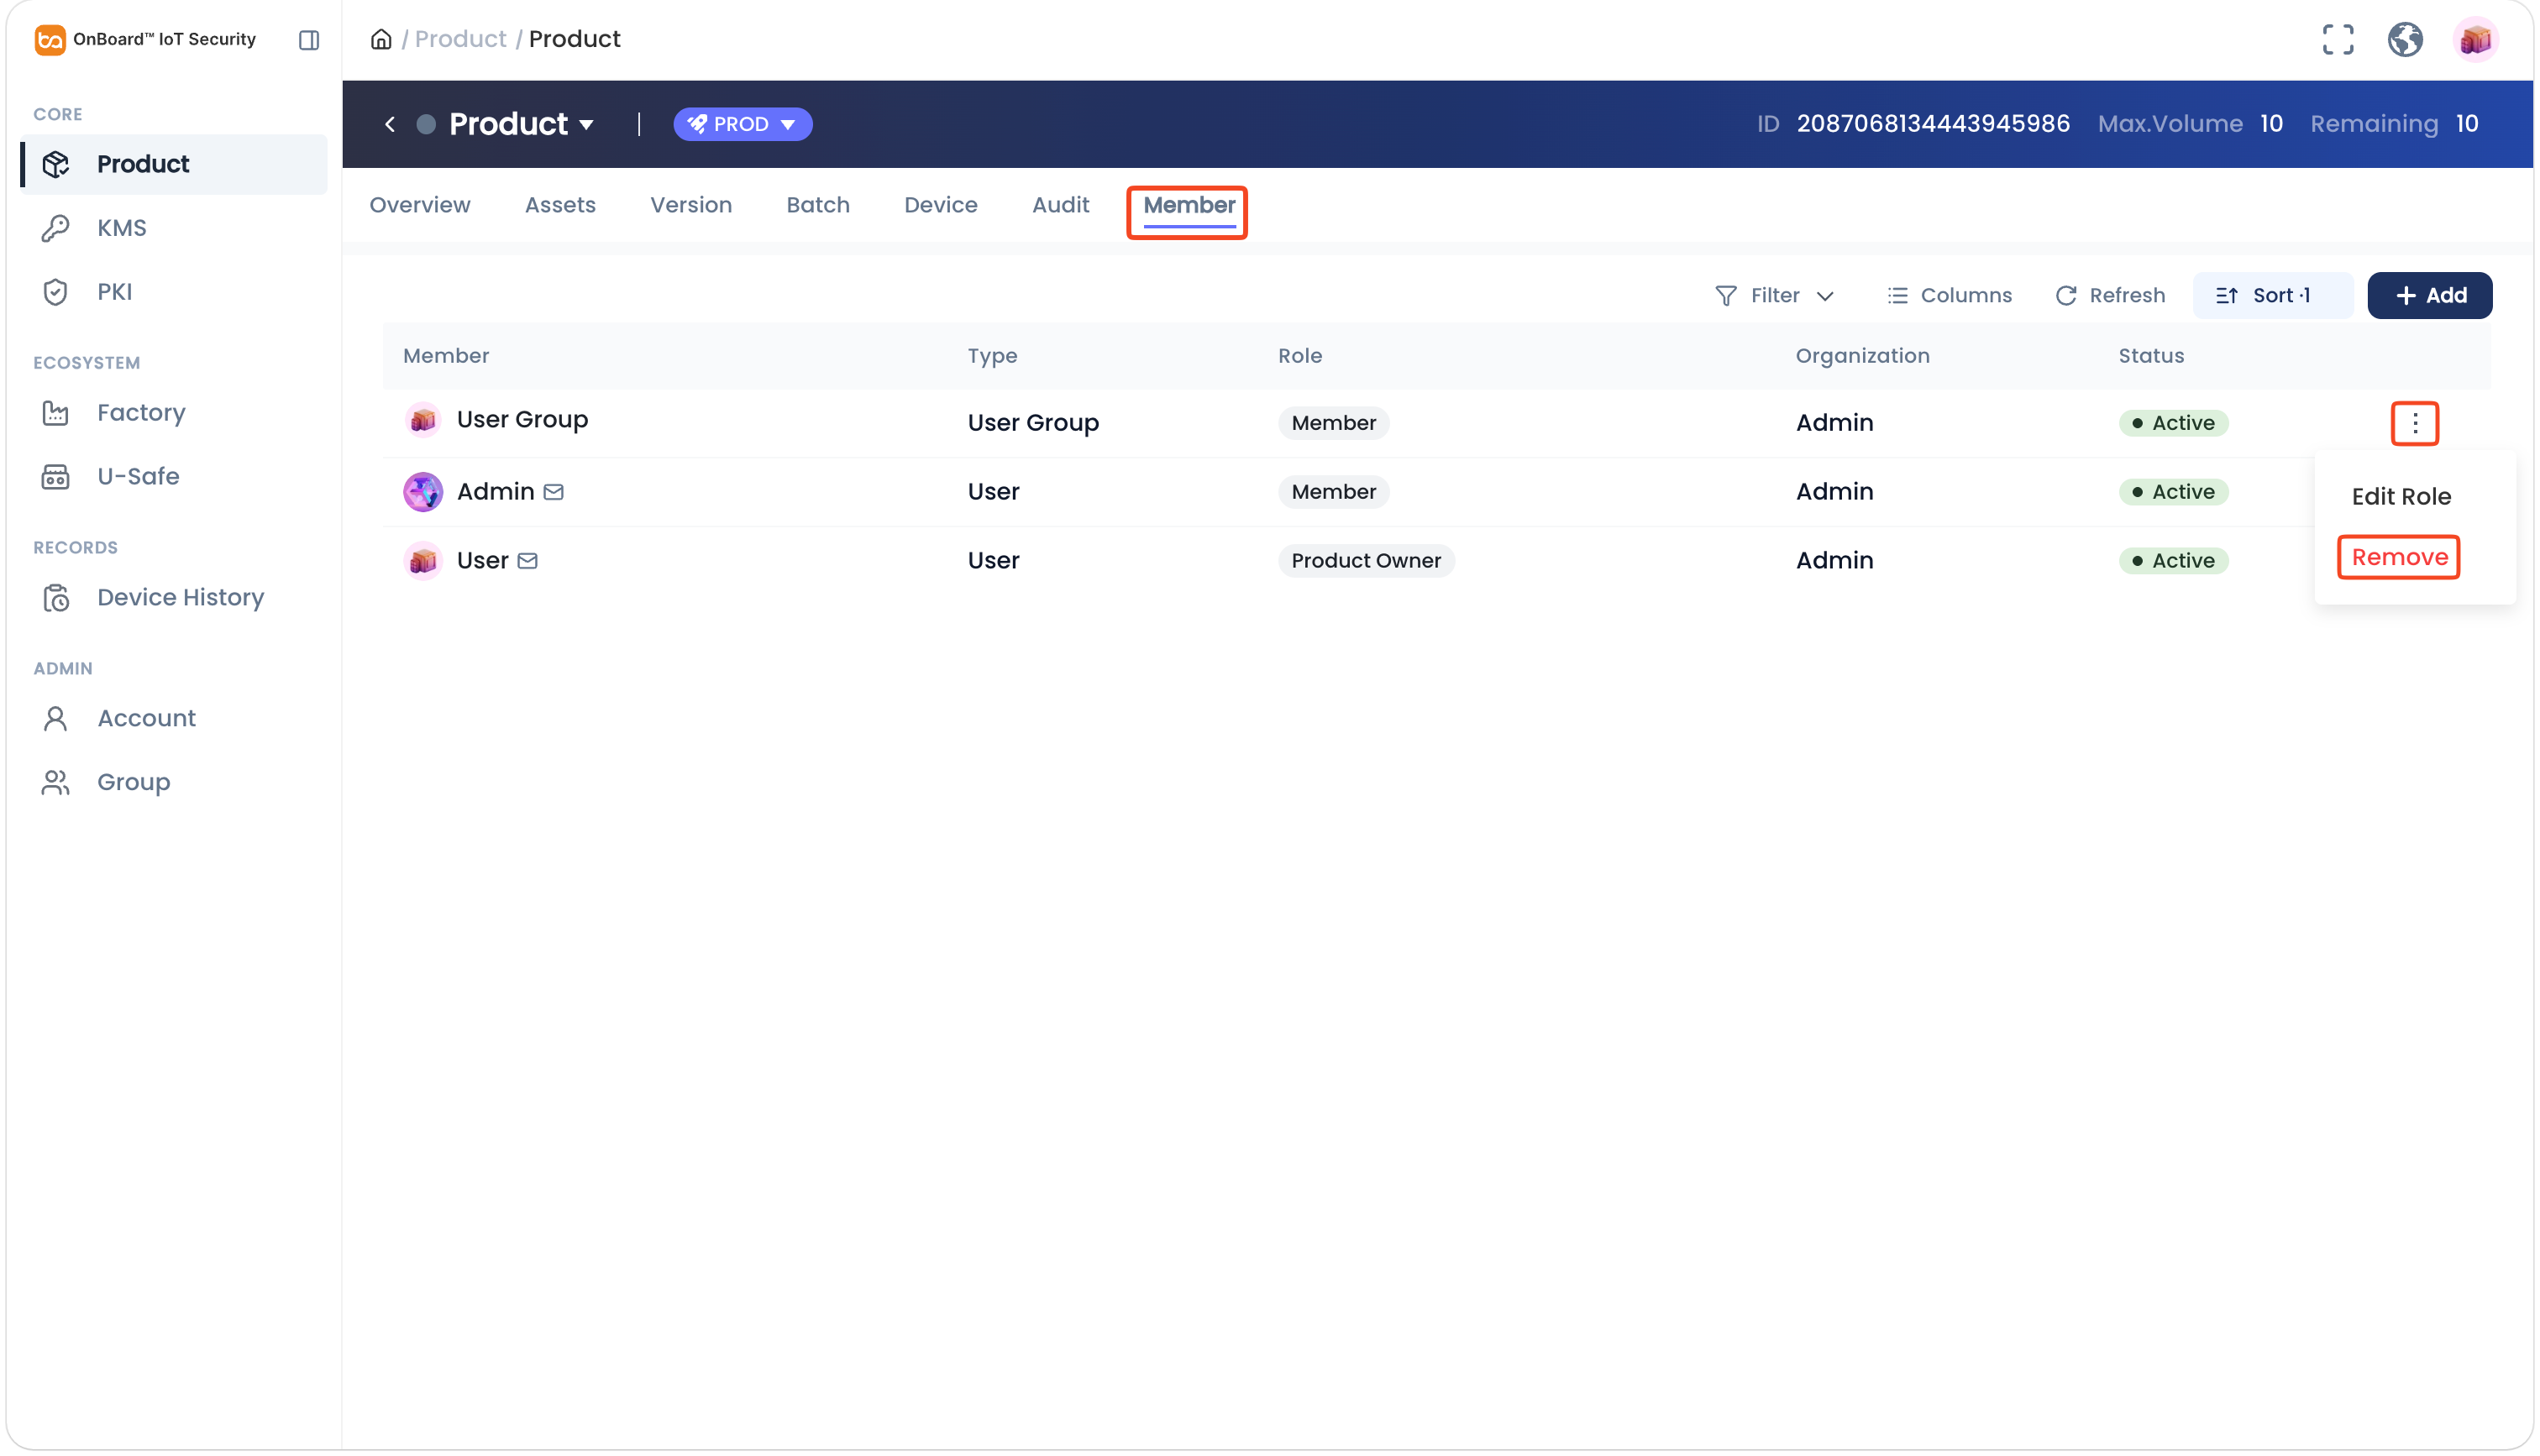
-
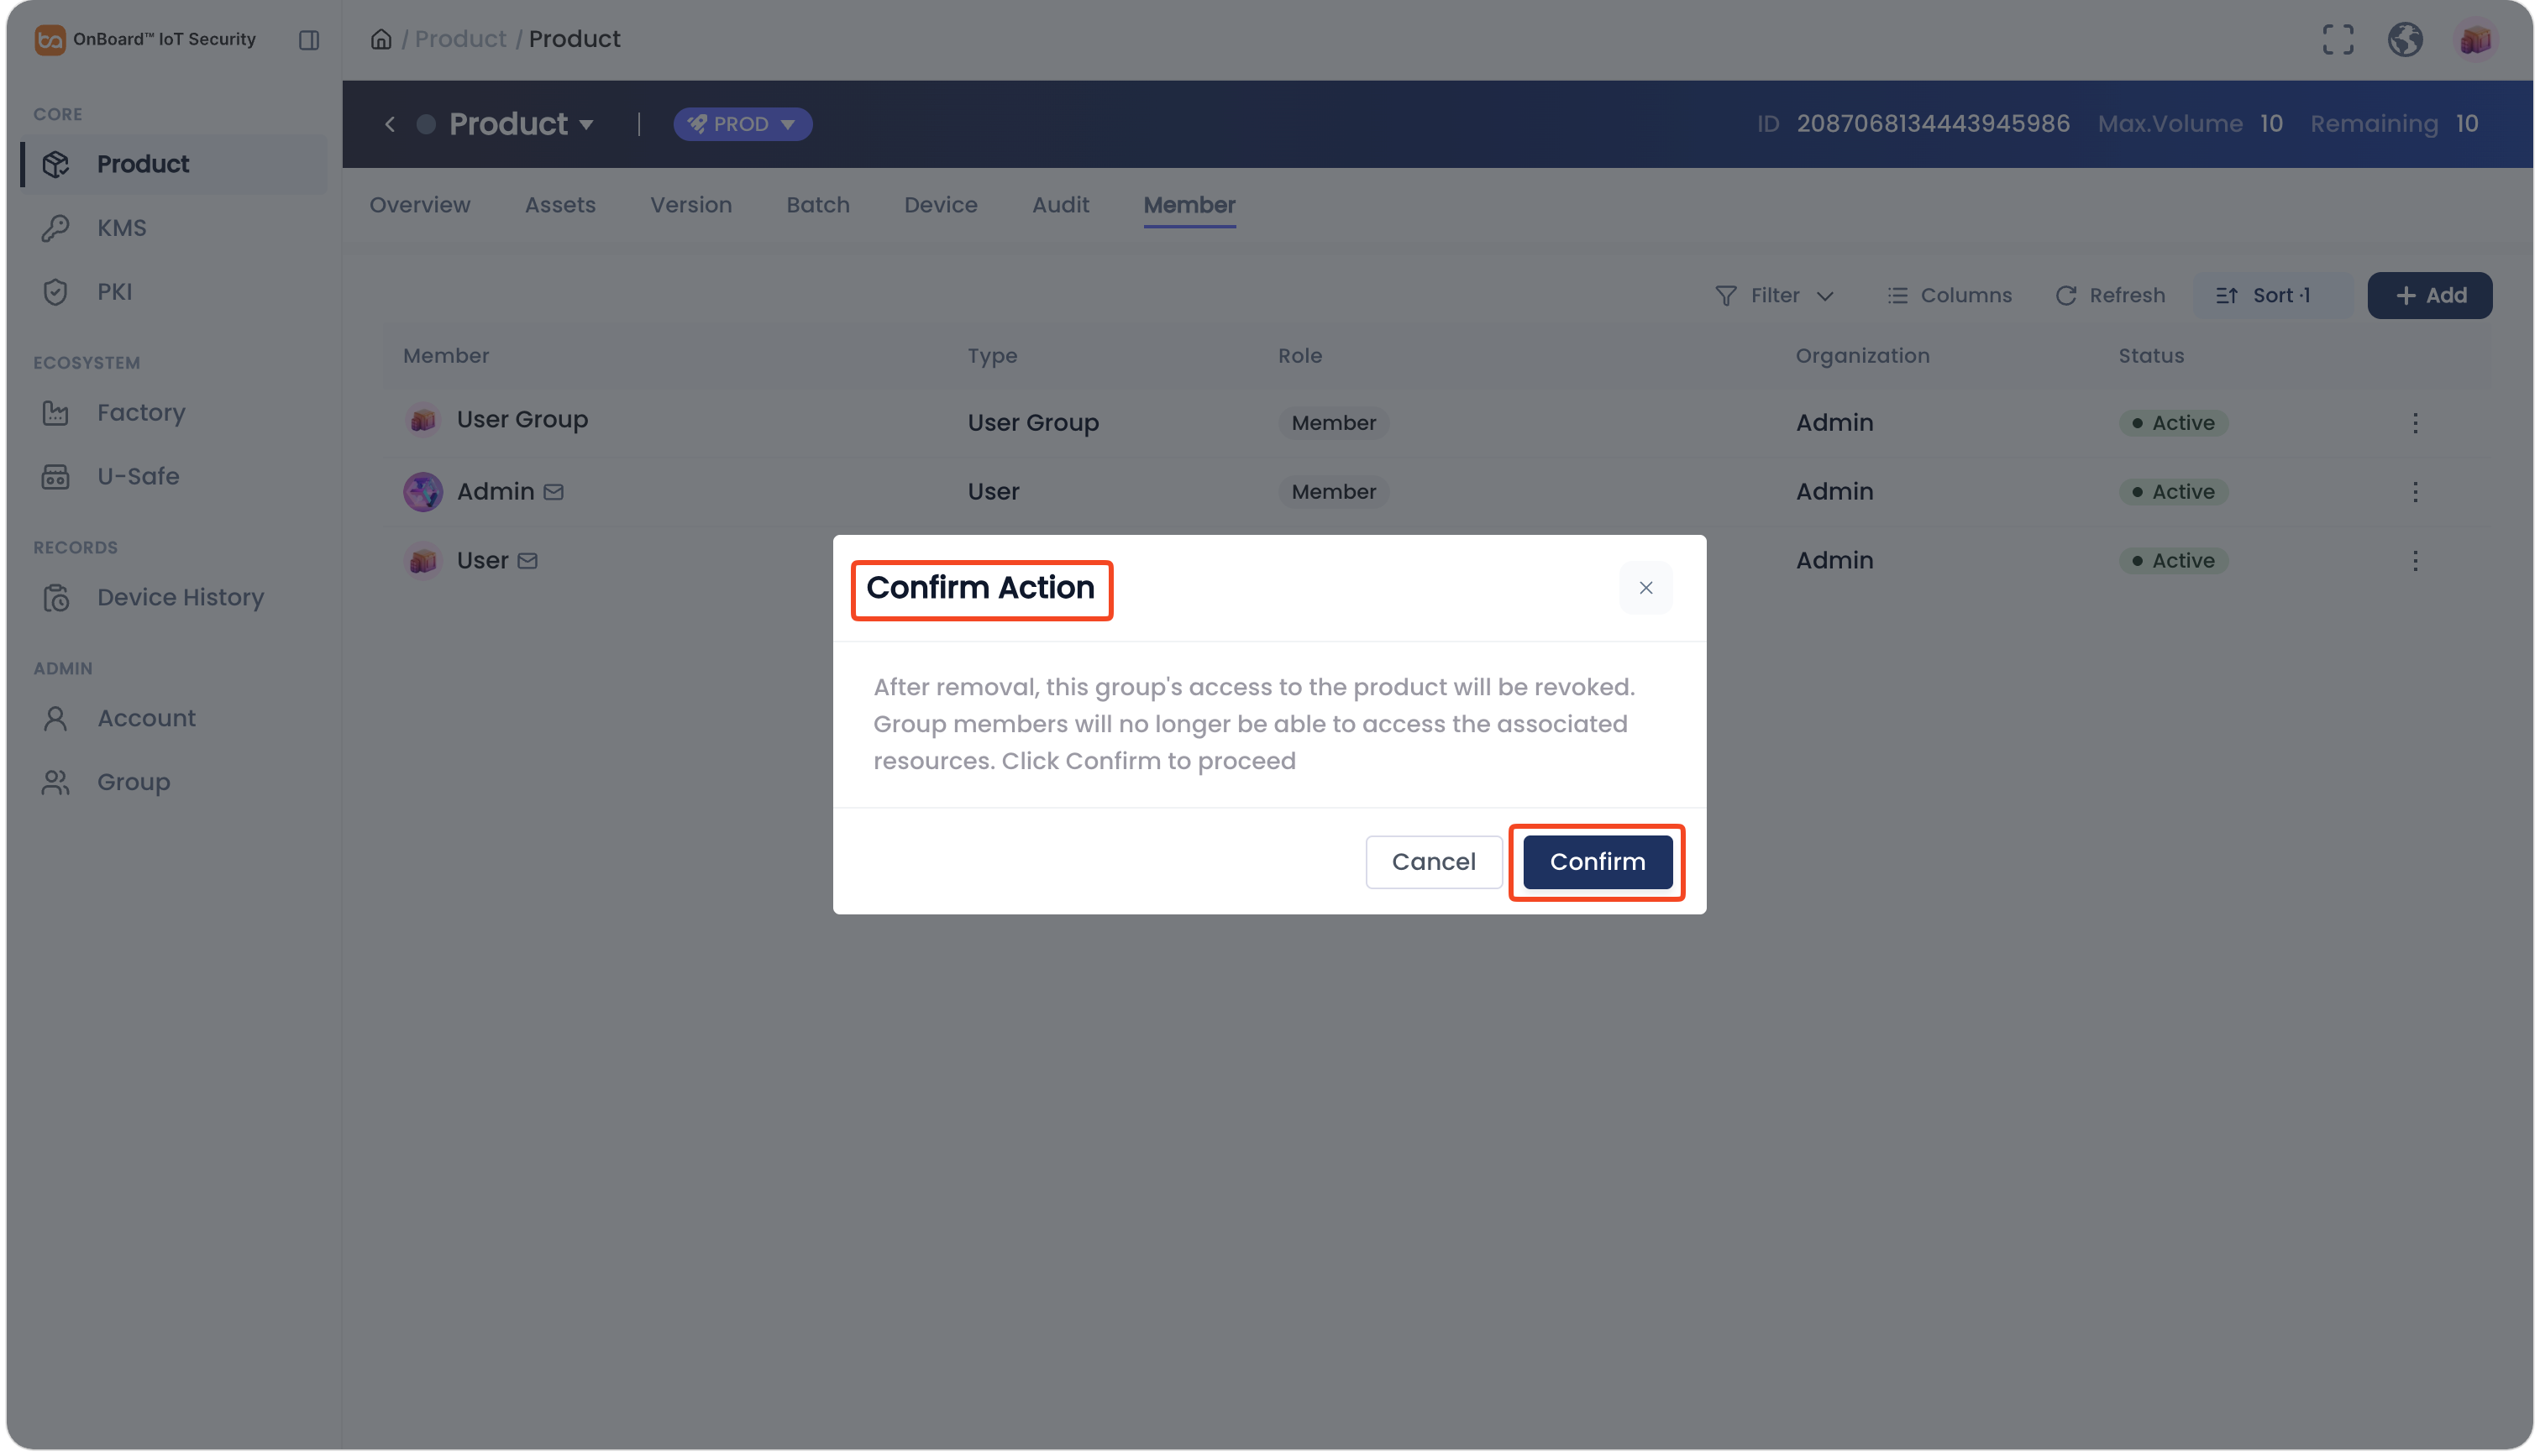
In the Confirm Action window, verify the information and then click Confirm to remove the user group.

 Download User Manual