How to configure a product in OnBoard™ IoT Security
This article will guide you through the following operations in OnBoard™ IoT Security (OBIS) to configure product materials and prepare for version creation:
- Select the environment
- Configure assets
Prerequisites
Before getting started, please ensure that:
- You have product role permissions for the corresponding product: Product Owner, Product Manager, or Resource Manager.
- The certificates and keys have already been created.
Instructions
Step one: Select the environment
-
Sign in to OBIS.
-
In the Core section of the left menu, click Product, and then select the corresponding product to navigate to the product page.
-
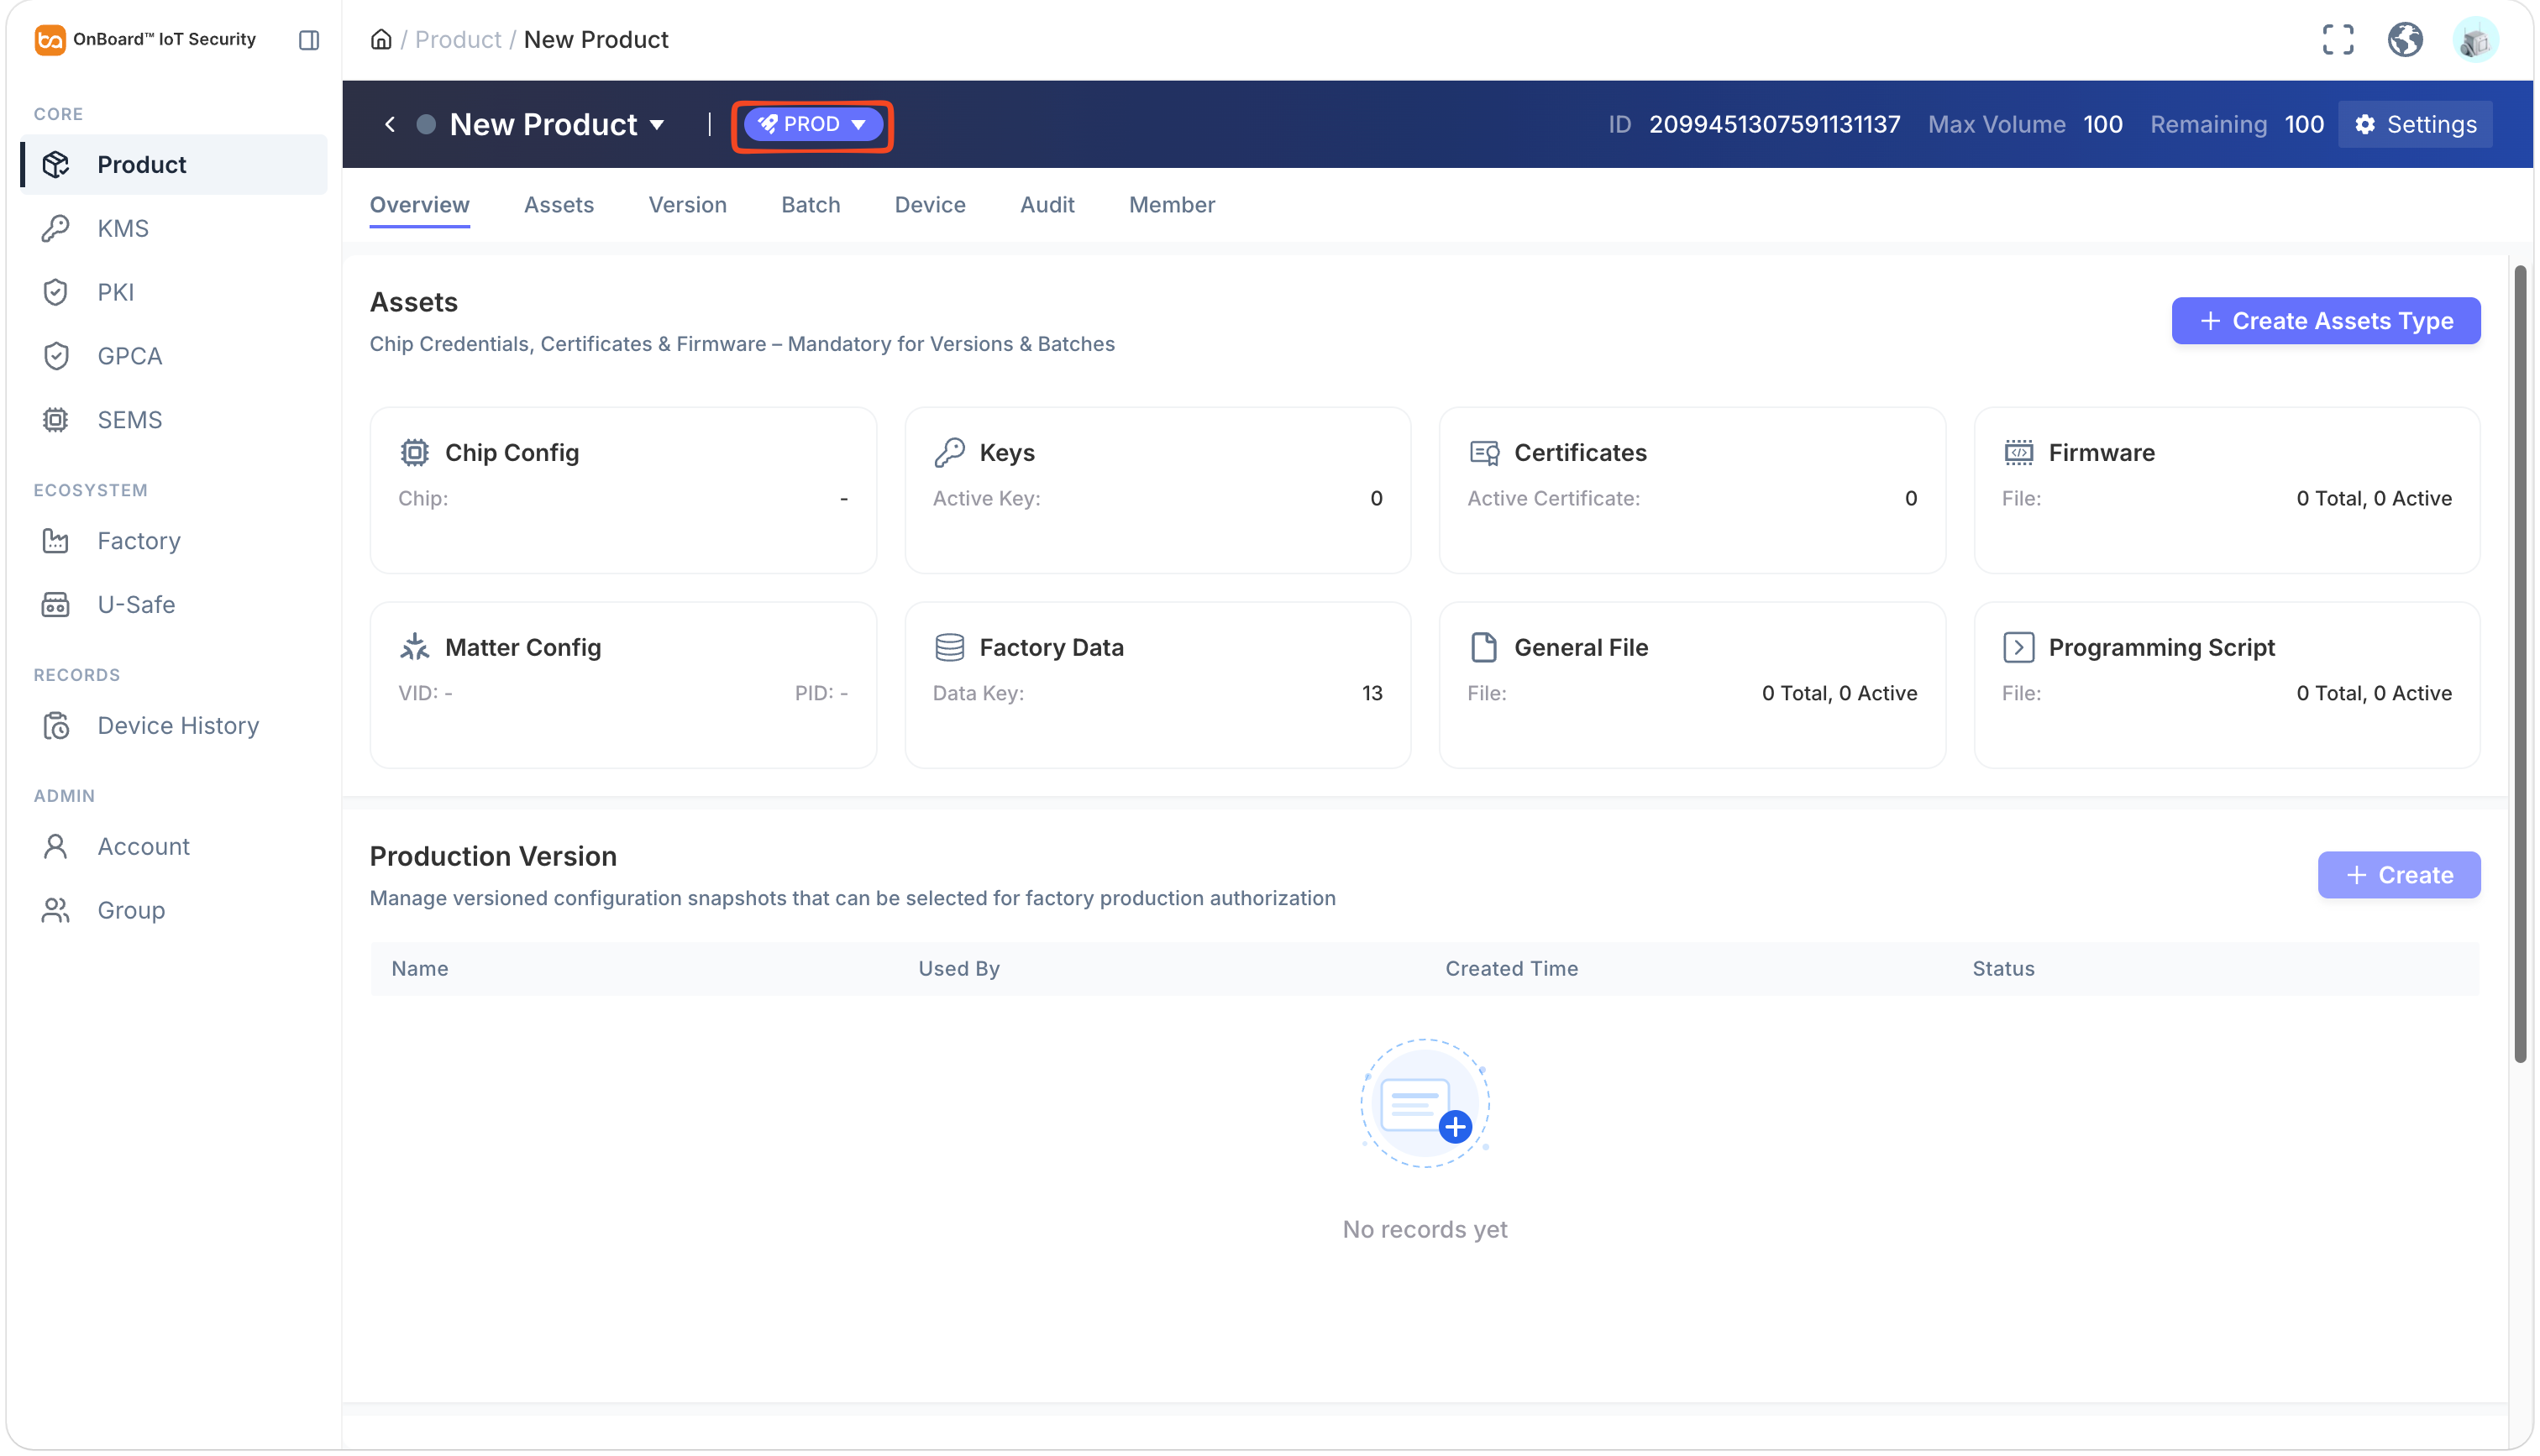
On the product page, select the TEST or PROD environment.
-
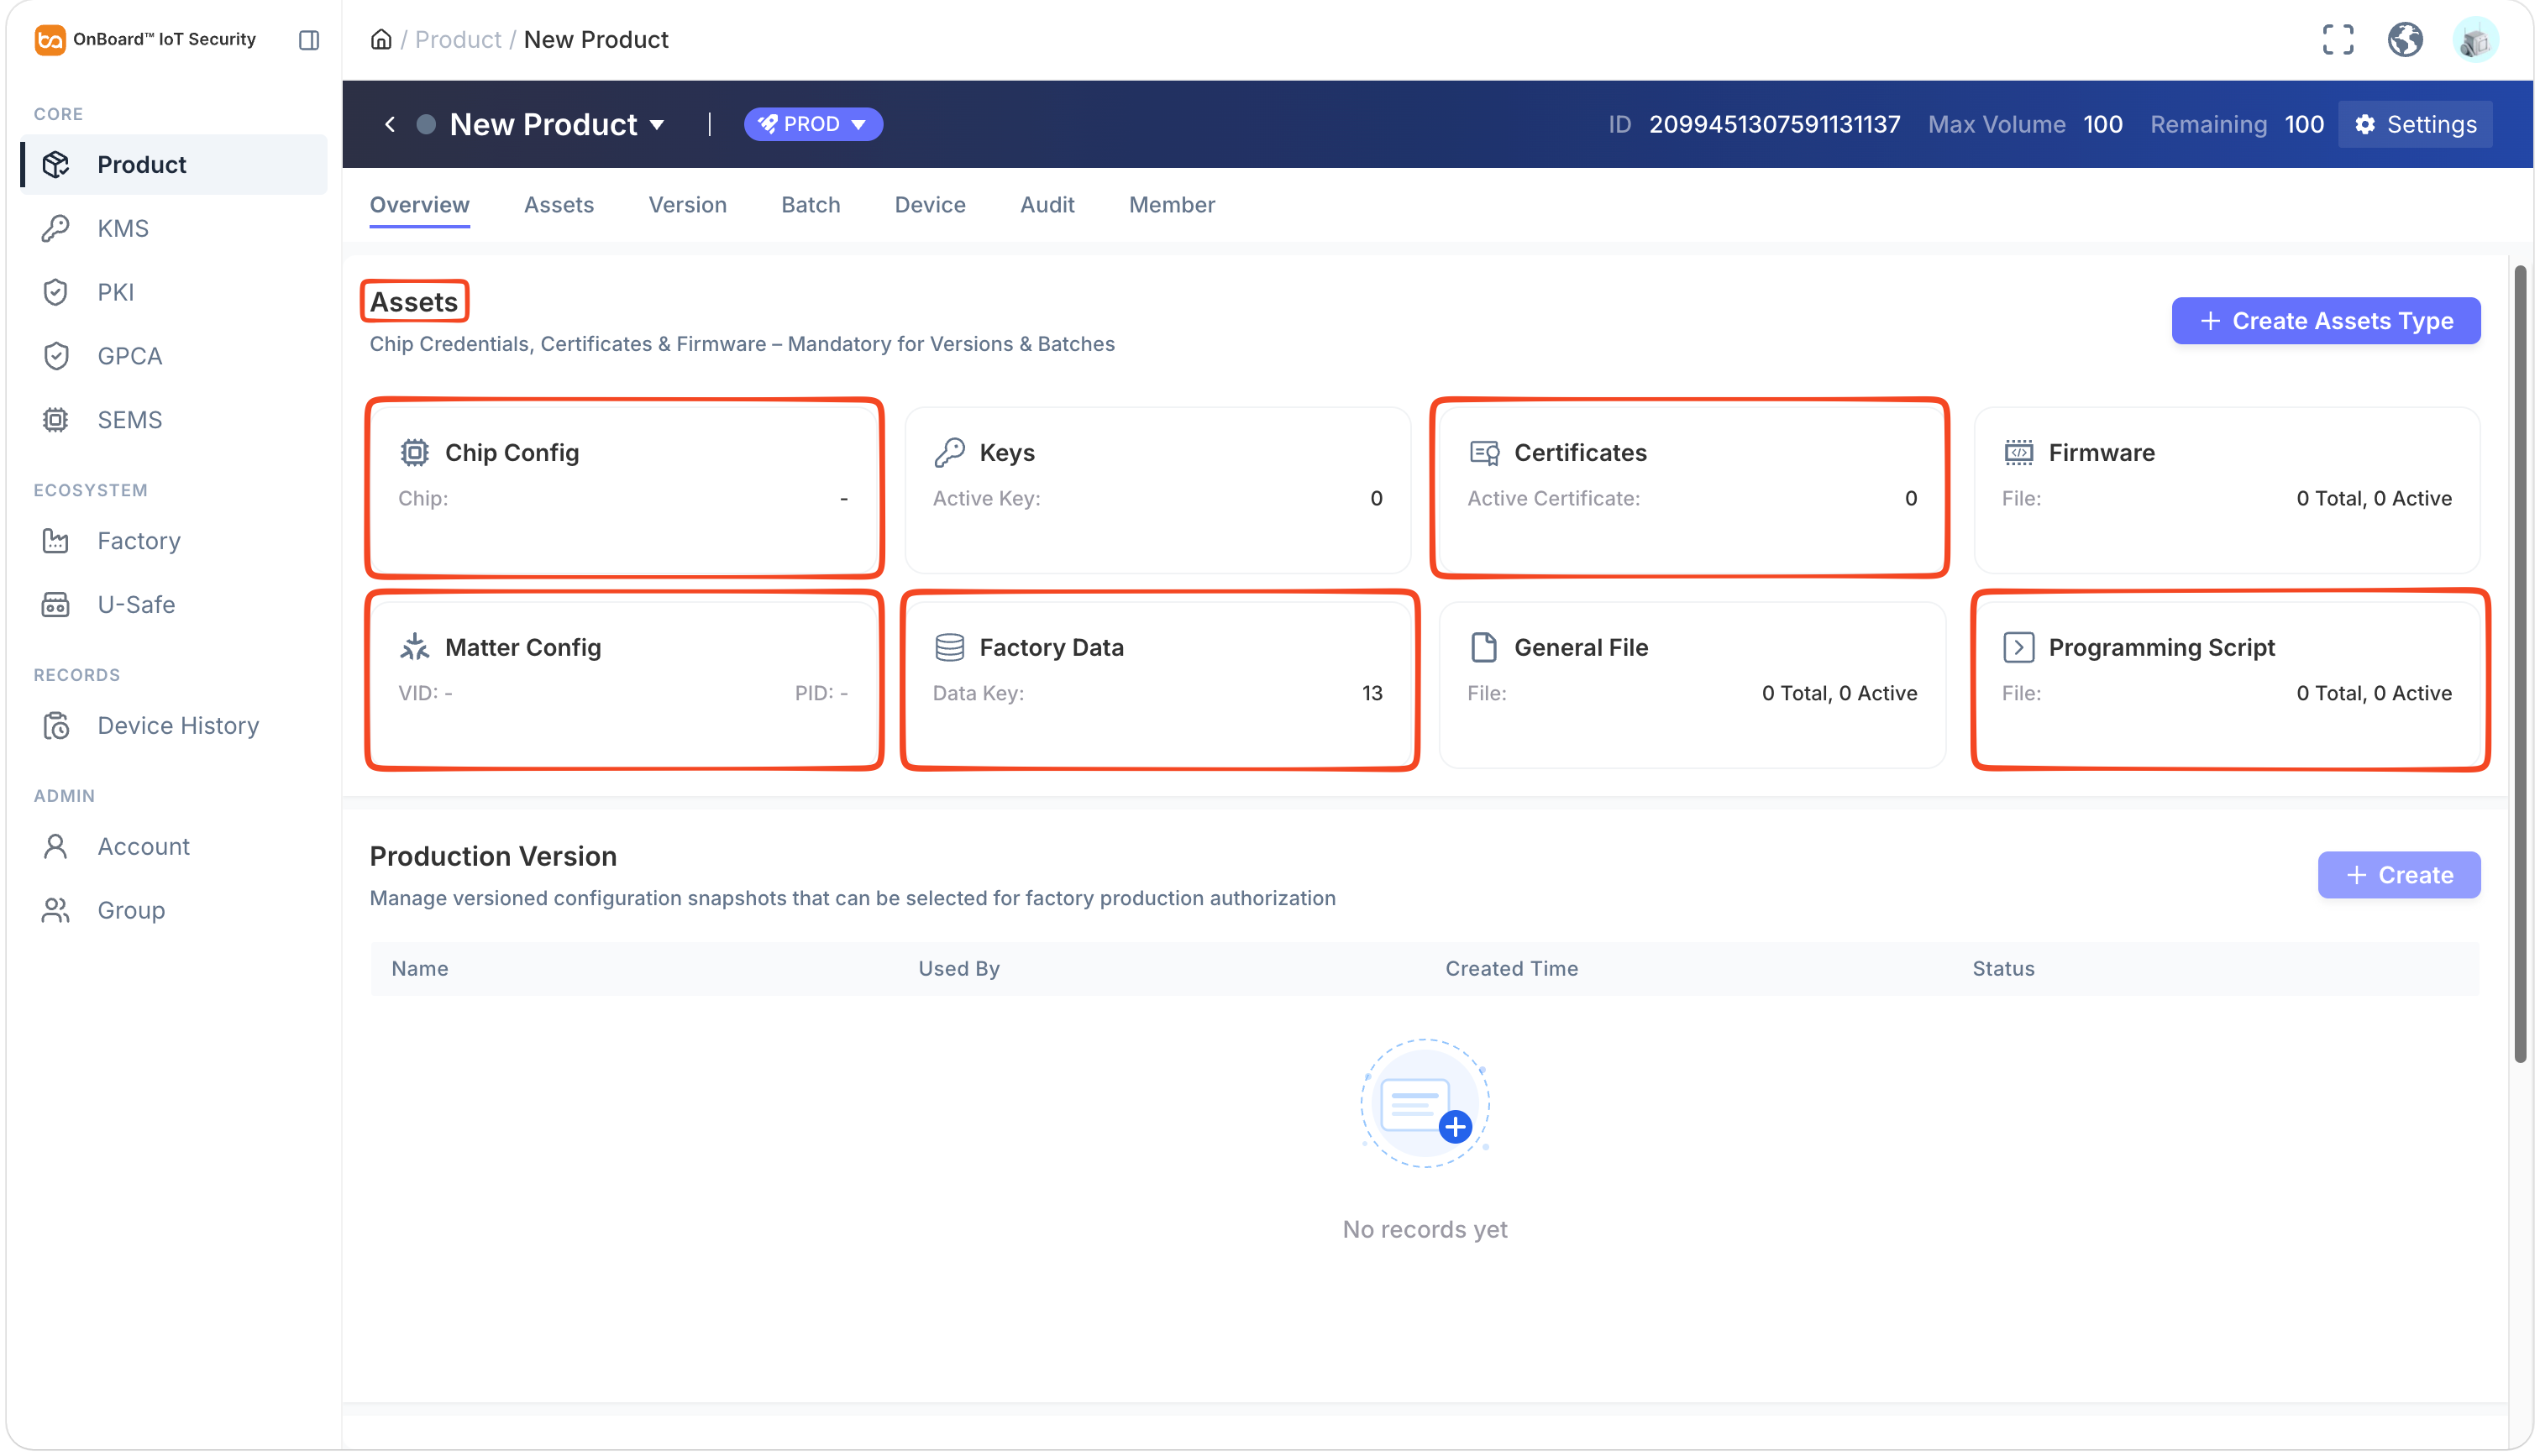
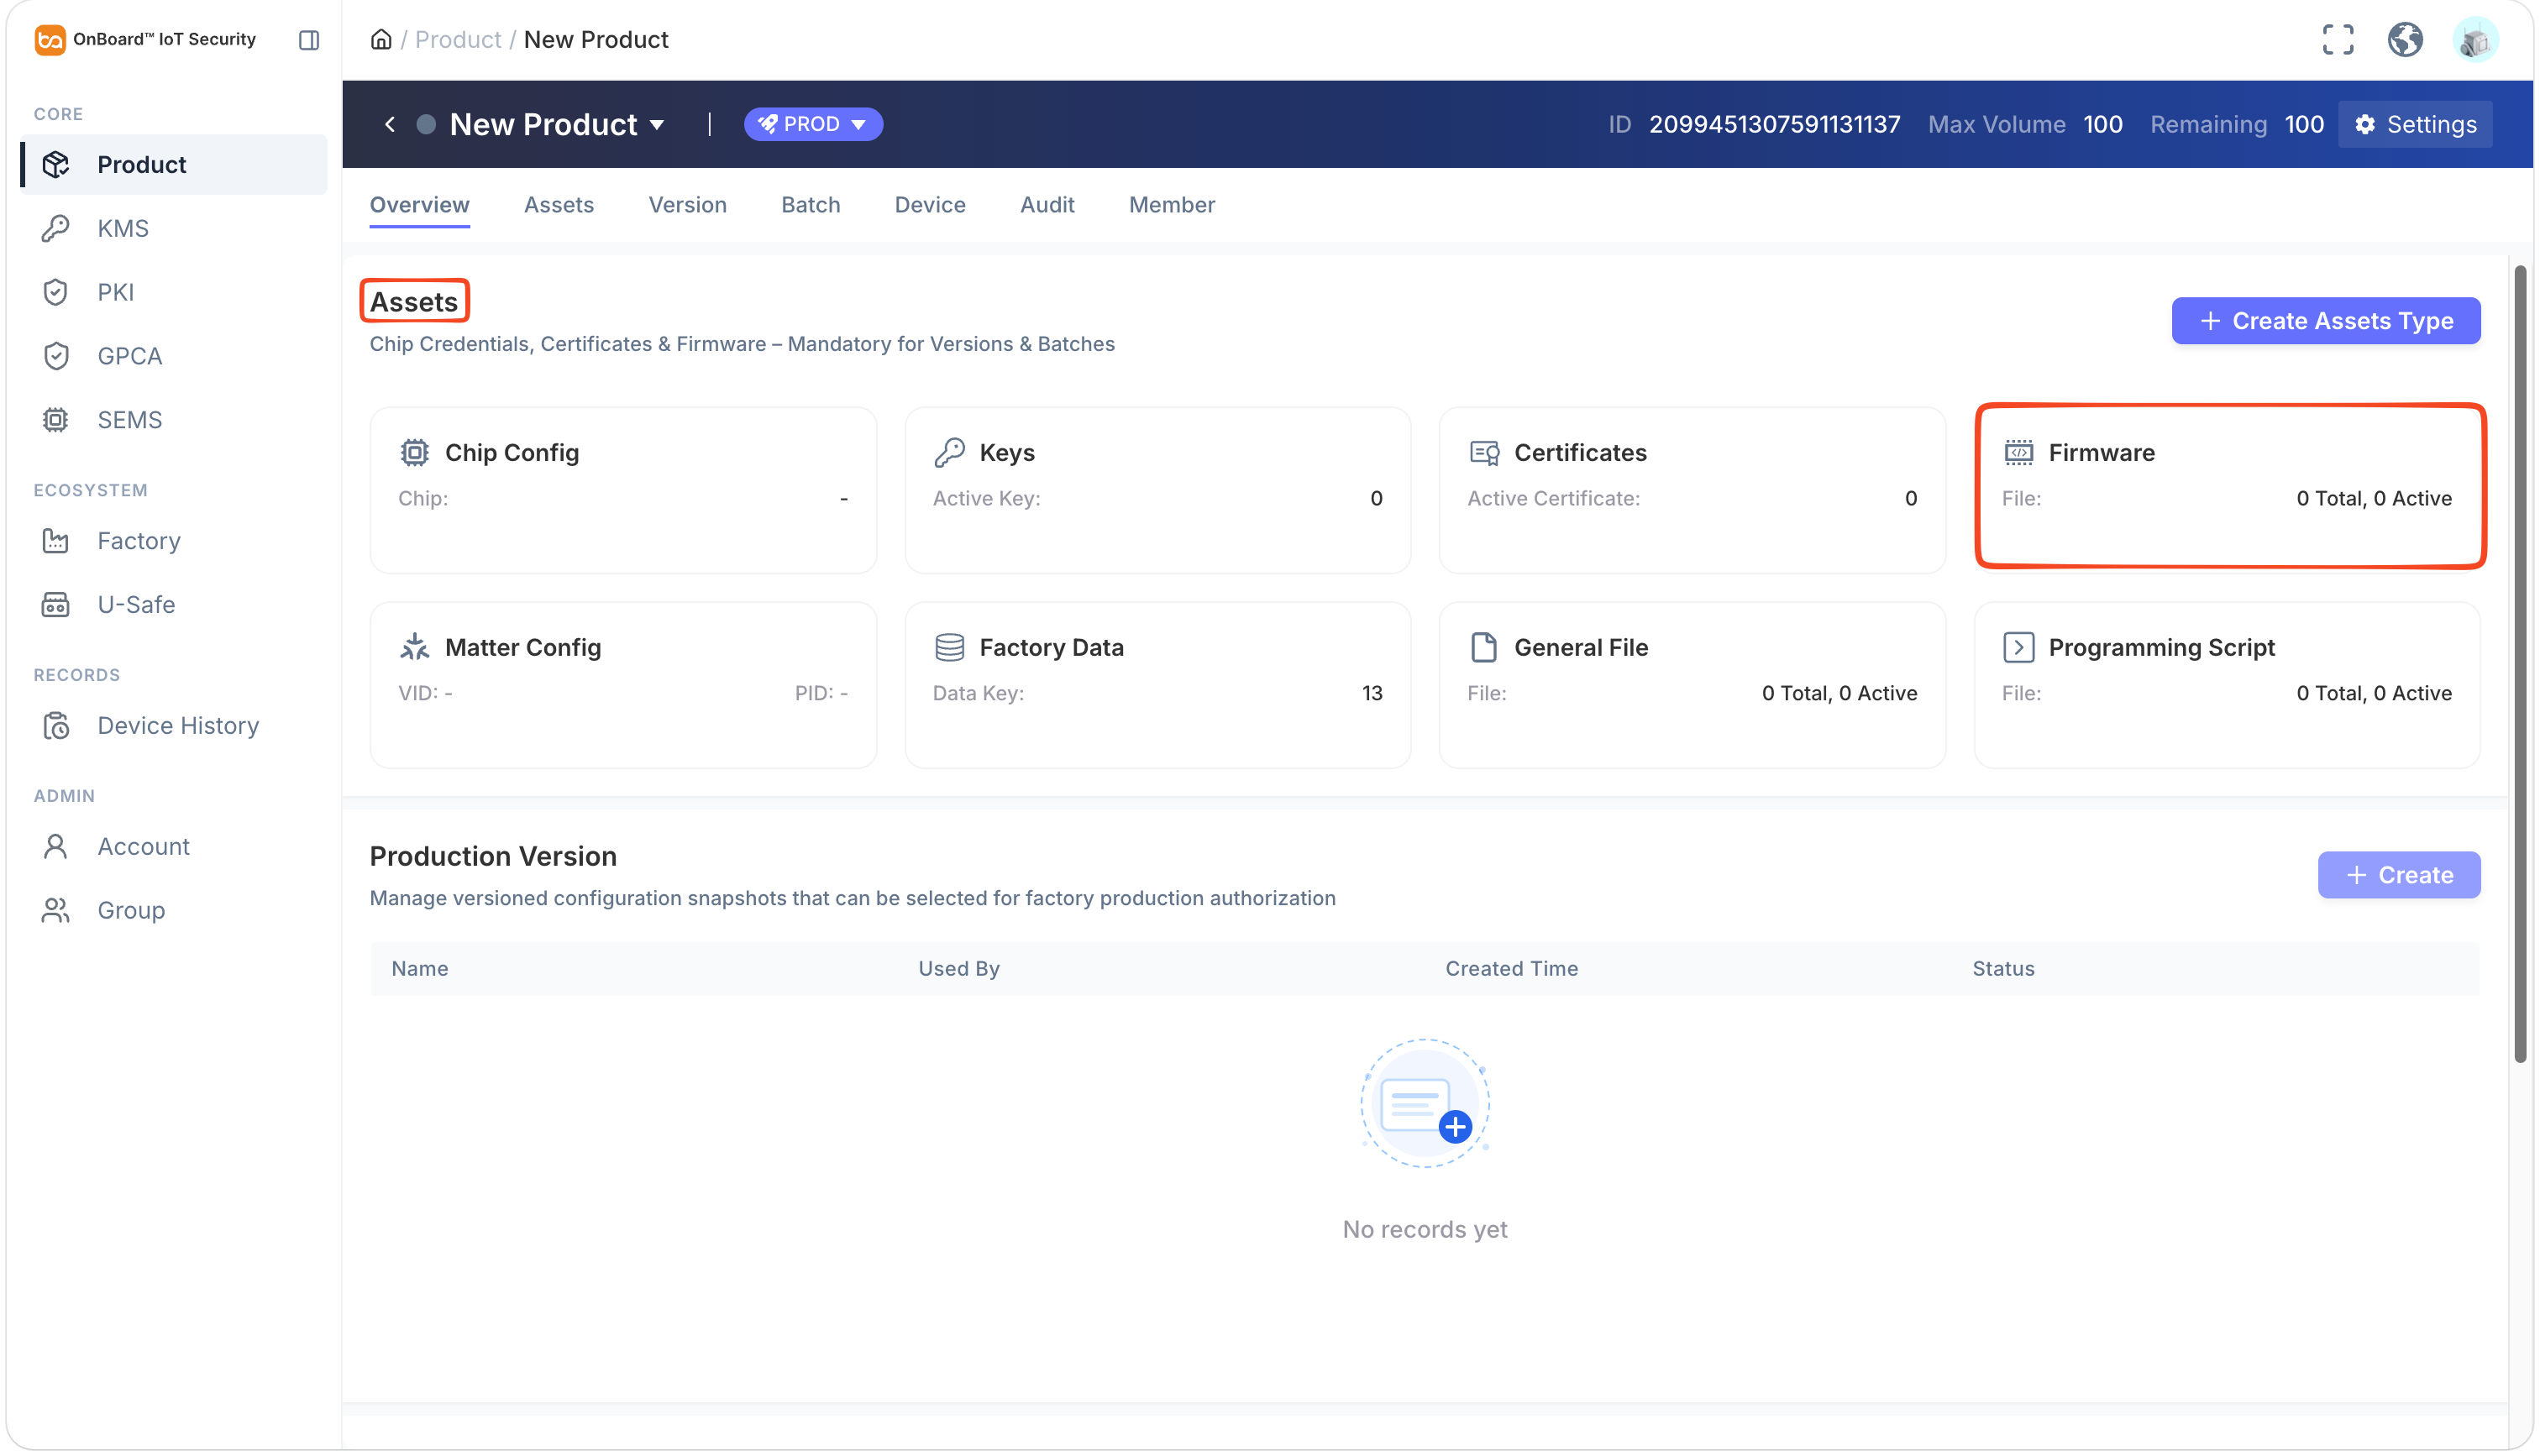
Complete the configuration of relevant assets in the Assets section.
info- Configure the necessary assets for the product (Chip Config, Certificates, Matter Config, and Factory Data). If the required configuration is not completed, version creation will be blocked, and the product status will remain in Draft.
- Upload the necessary files for programming in Programming Script. Alternatively, you can select a programming script for a specific batch later in the Programming Station client.
Step two: Configure assets
Chip Config (required)
 Chip Config (required)
Chip Config allows you to select and set the chip part and security options used by the product. Different chip parts provide corresponding security options, and you can configure them as needed. Once a version is created, the chip configuration can't be modified. To make adjustments, create a new product.
Please refer to the supported chip settings for the detailed list. Additional chip vendors, series, and parts will be added based on demand.
-
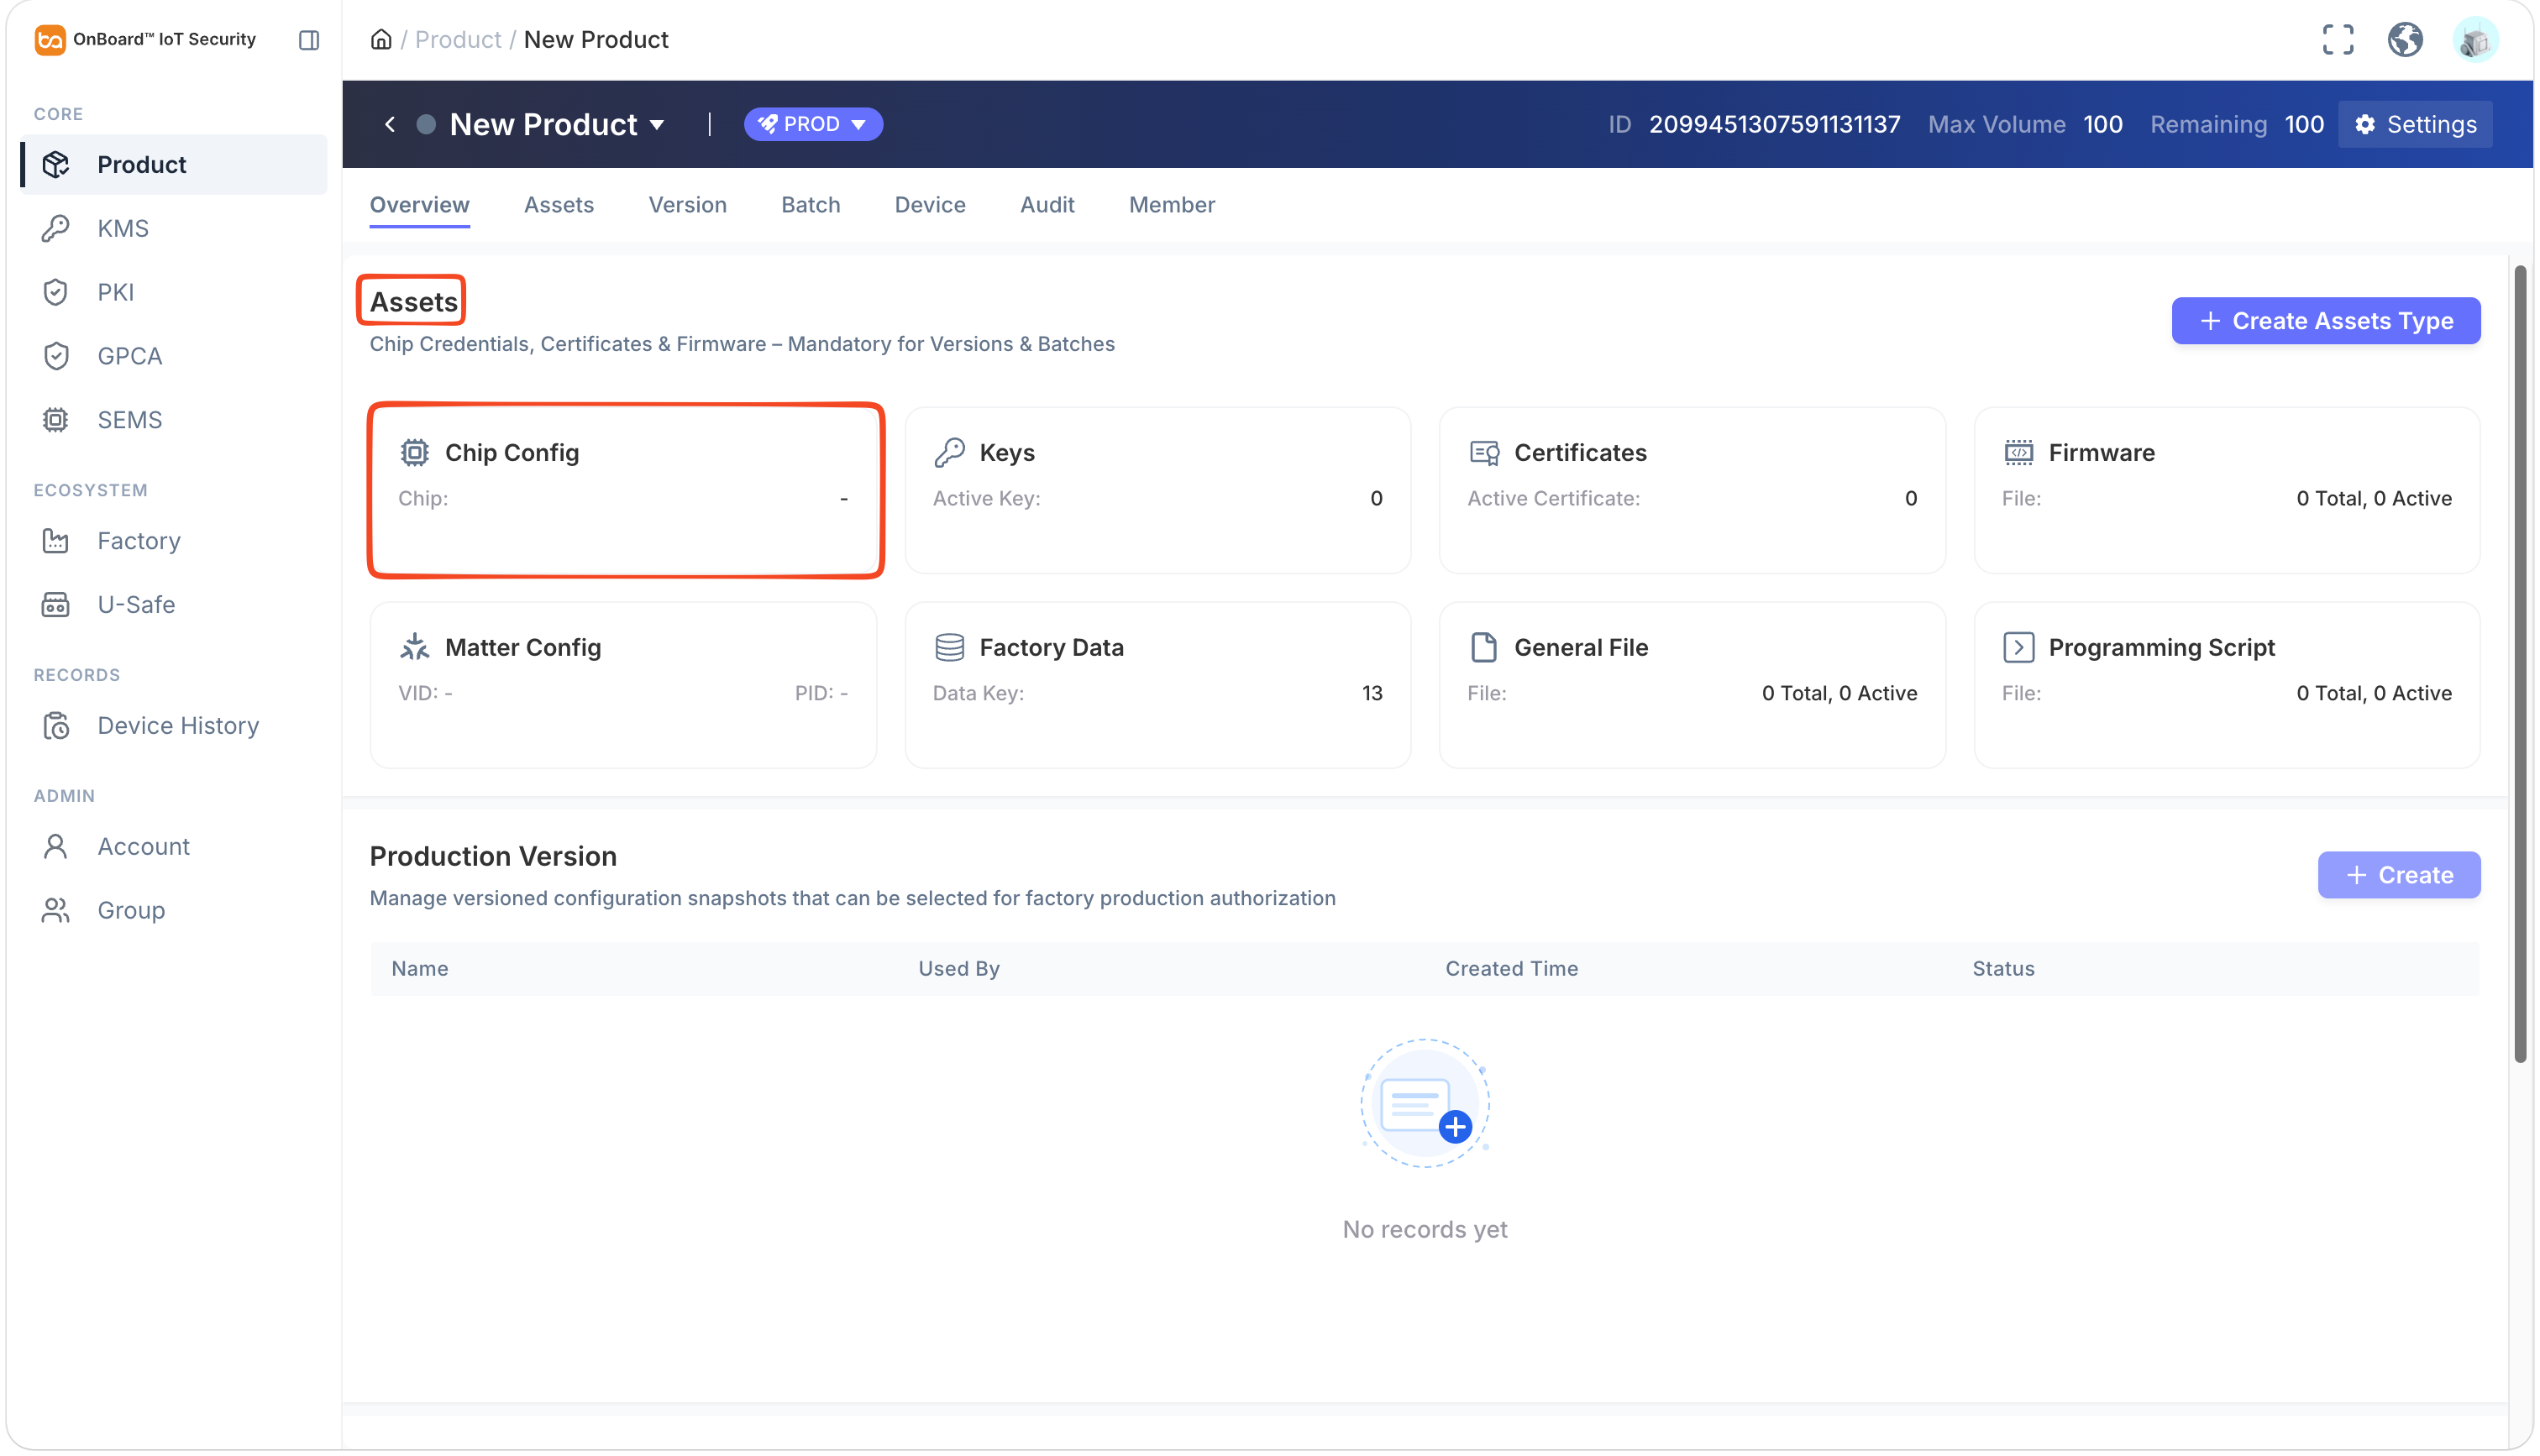
On the product page, select Chip Config in the Assets section to navigate to the Assets tab.
-
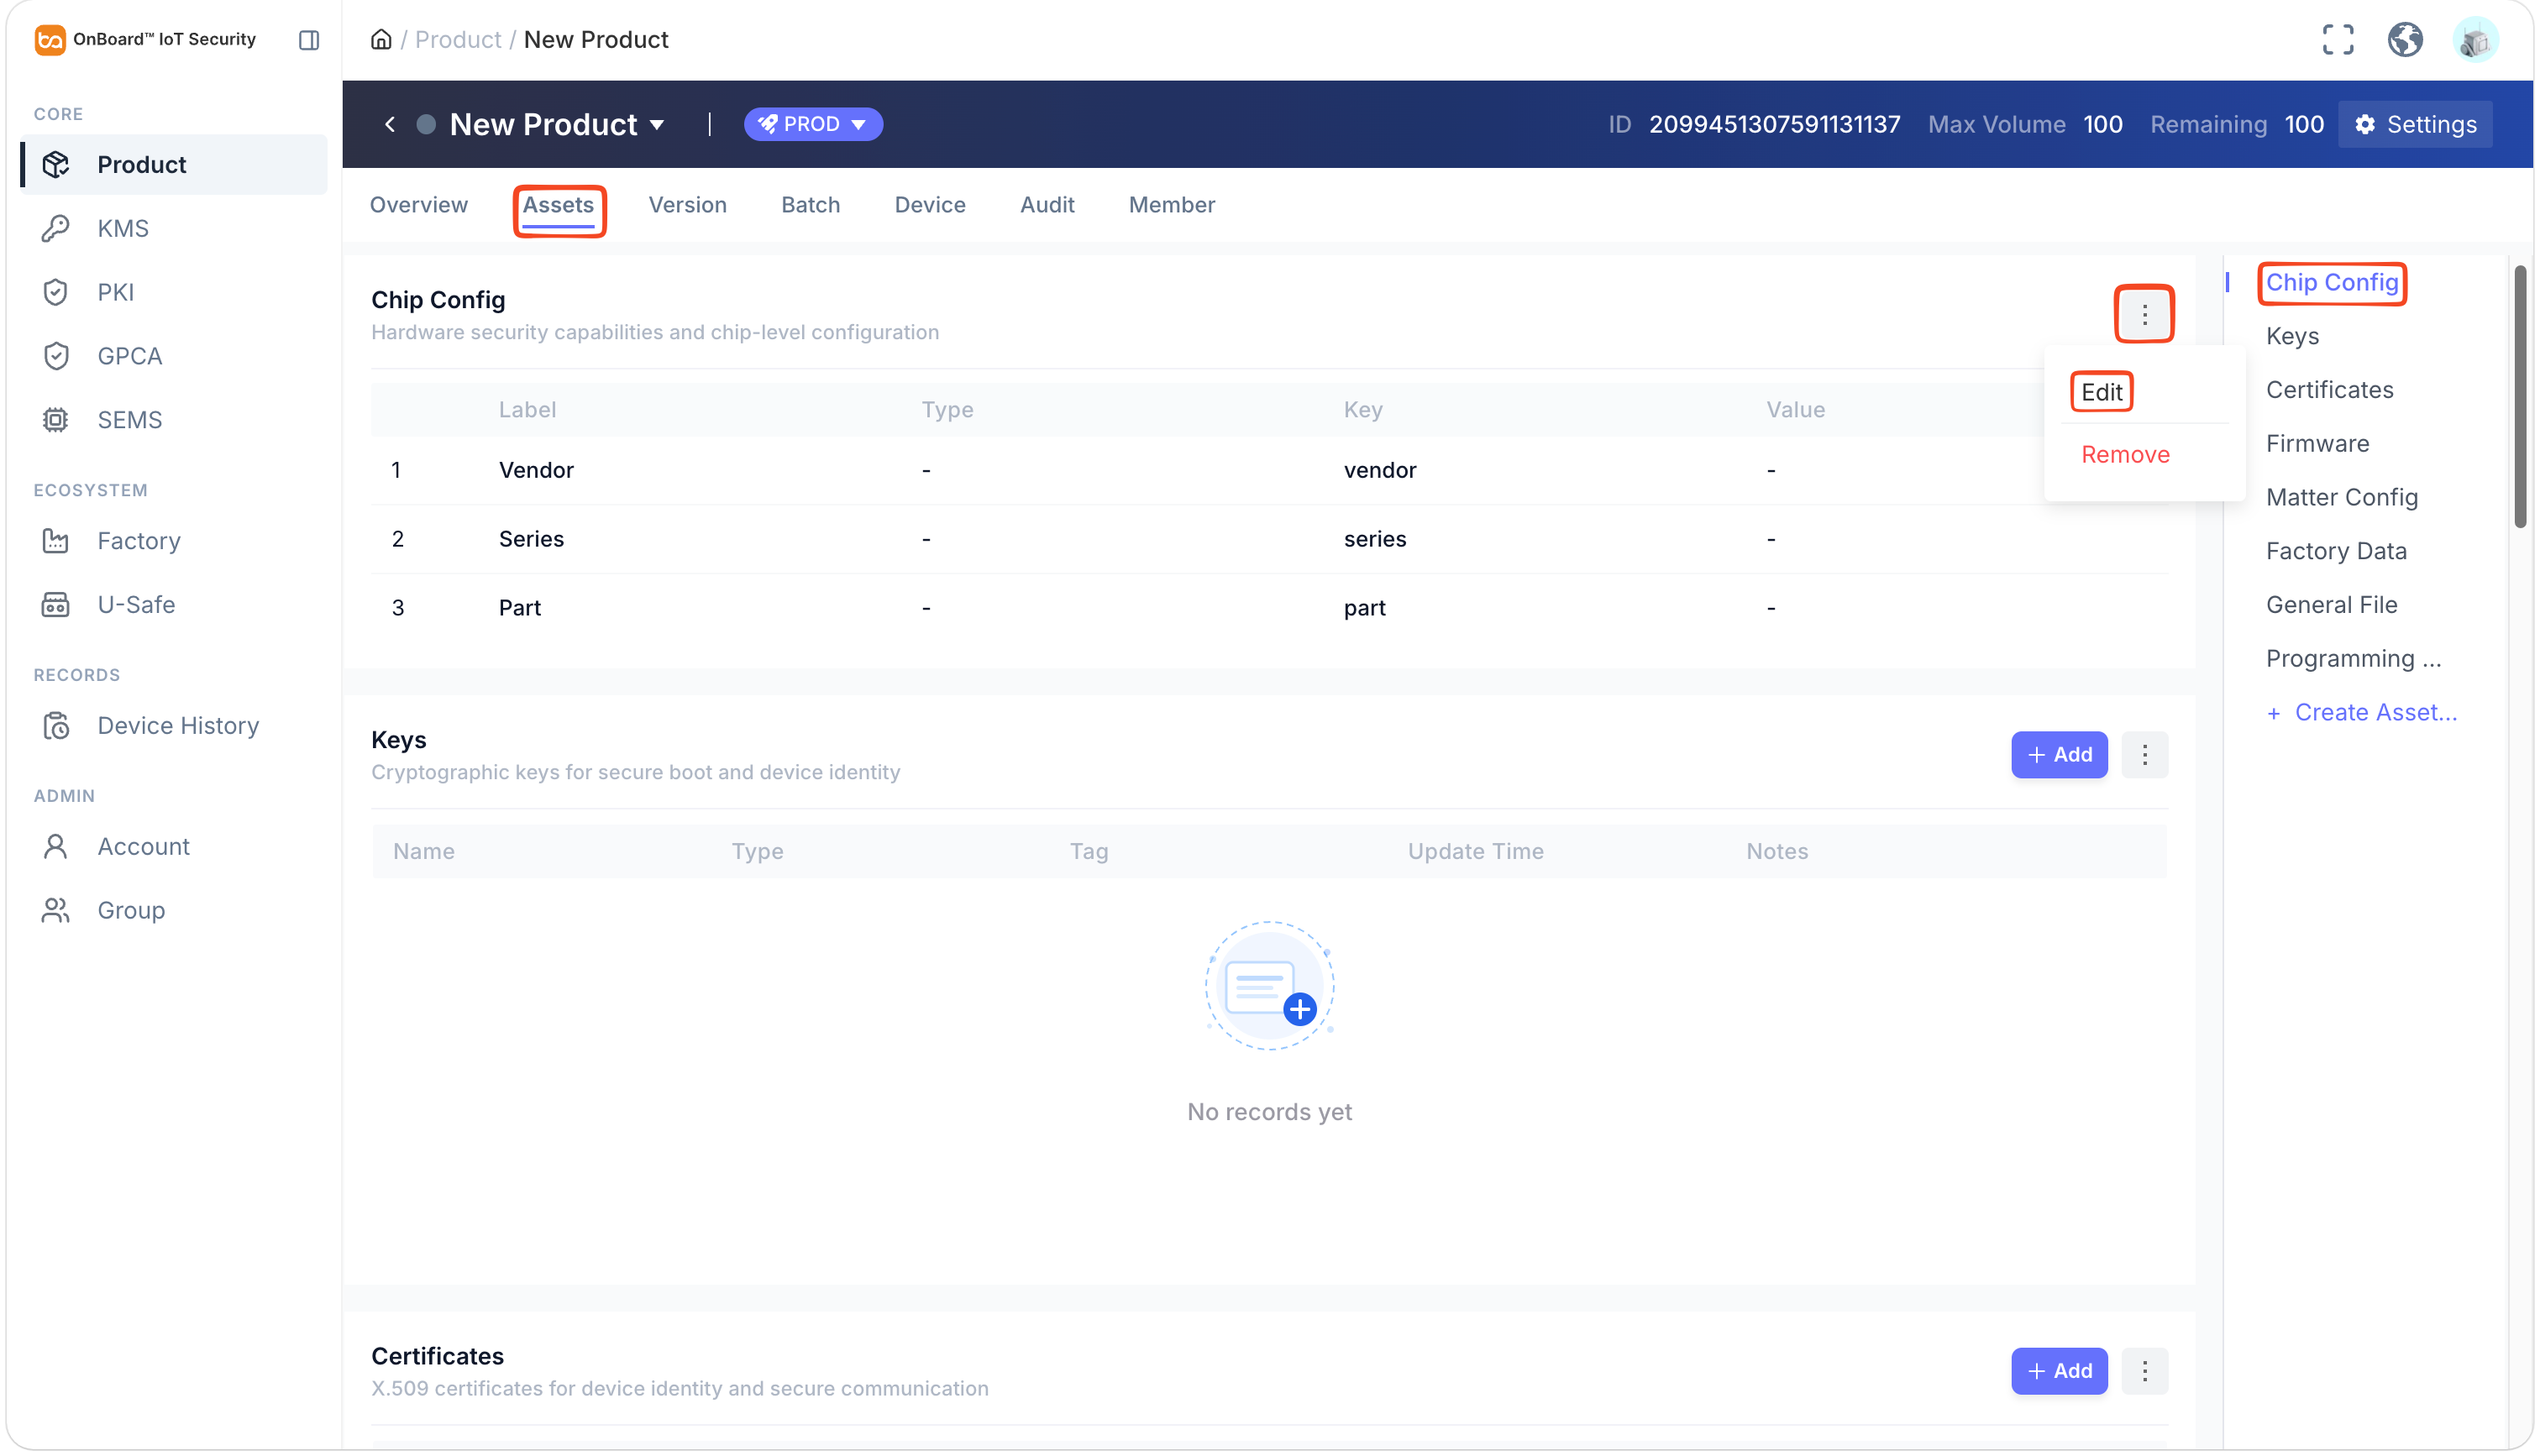
In the Chip Config section, click the Options
 icon and then select Edit. Select and enter the chip-related information.
Description of Chip Config information:
tipWhen creating a batch, if you need to enable the Secure Debug Reopen feature to support chip reprogramming, the Secure Debug feature must be enabled first.
The supported data types in the Custom fields include: String, Number, Boolean, Key, Cert, and File.
Information Mandatory Type Description Vendor Yes - Chip manufacturer. For more information, refer to supported chip settings. Series Yes - Series of the chip. For more information, refer to supported chip settings. Part Yes - Part number of the chip. For more information, refer to supported chip settings. Enable Secure Boot No Boolean Enable the Secure Boot feature as needed. A security protection mechanism that prevents unauthorized software from being loaded. Enable Secure Debug No Boolean Enable the Secure Debug feature as needed. A security protection mechanism to prevent unauthorized debugging. Secure Boot Key No Key Select the key added in the Keys configuration. The key is used to verify the firmware and ensure the secure boot of the device. Secure Boot Key Hash No Hex The hash value of the Secure Boot Key. Secure Debug Key No Key Select the key added in the Keys configuration. The key is used to authorize debugging access. MCU Boot Key No Key Select the key added in the Keys configuration. The key is used for device authentication and data encryption. Debug Plaintext No Hex Unencrypted debug data. DAC Partition Address No Hex Set the storage address in flash for downloading DAC certificates. Currently supported chip settings:
Vendor Series Part Silicon Labs EFR32MG24 - EFR32MG24B210F1536IM48
- EFR32MG24B020F1536IM48
- EFR32MG24A110F1024IM48
- EFR32MG24A020F1536IM48
- EFR32MG24A420F1536IM48
- EFR32MG24B020F1536IM40
- EFR32MG24A010F1024IM40
- EFR32MG24A020F1536IM40
- EFR32MG24A420F1536IM40
- EFR32MG24B010F1024IM48
- EFR32MG24A010F1024IM48
- EFR32MG24B110F1536IM48
- EFR32MG24A021F1024IM40
- EFR32MG24B010F1536IM40
- EFR32MG24B220F1536IM48
- EFR32MG24A020F1024IM40
- EFR32MG24A010F1536IM40
- EFR32MG24B010F1536IM48
- EFR32MG24A410F1536IM48
- EFR32MG24A010F1536IM48
- EFR32MG24B120F1536IM48
- EFR32MG24A410F1536IM40
- EFR32MG24B310F1536IM48
- EFR32MG24B020F1024IM48
- EFR32MG24A020F1024IM48
SIMG301 SiMG301M103WIH SiMG301M113WIH Telink TL323x TL3238C TLSR92x TLSR9268J Qorvo QPG6200 QPG6200 ESP ESP32C3 ESP32C3 Amlogic A113L A113L Nordic NRF52840 NRF52840 Beken BK7238 BK7238 NXP s32k1 s32k144 TI CC2755 CC2755R10 Realtek RTL877xG Series RTL8777G -
Click Save to complete the setting of the Chip Config.
Keys (optional)
Keys (optional)
Keys allows you to add keys from KMS to the product. Added keys can be selected during the Chip Config.
Keys can be created in KMS. For more information, refer to the steps for creating a key.
-
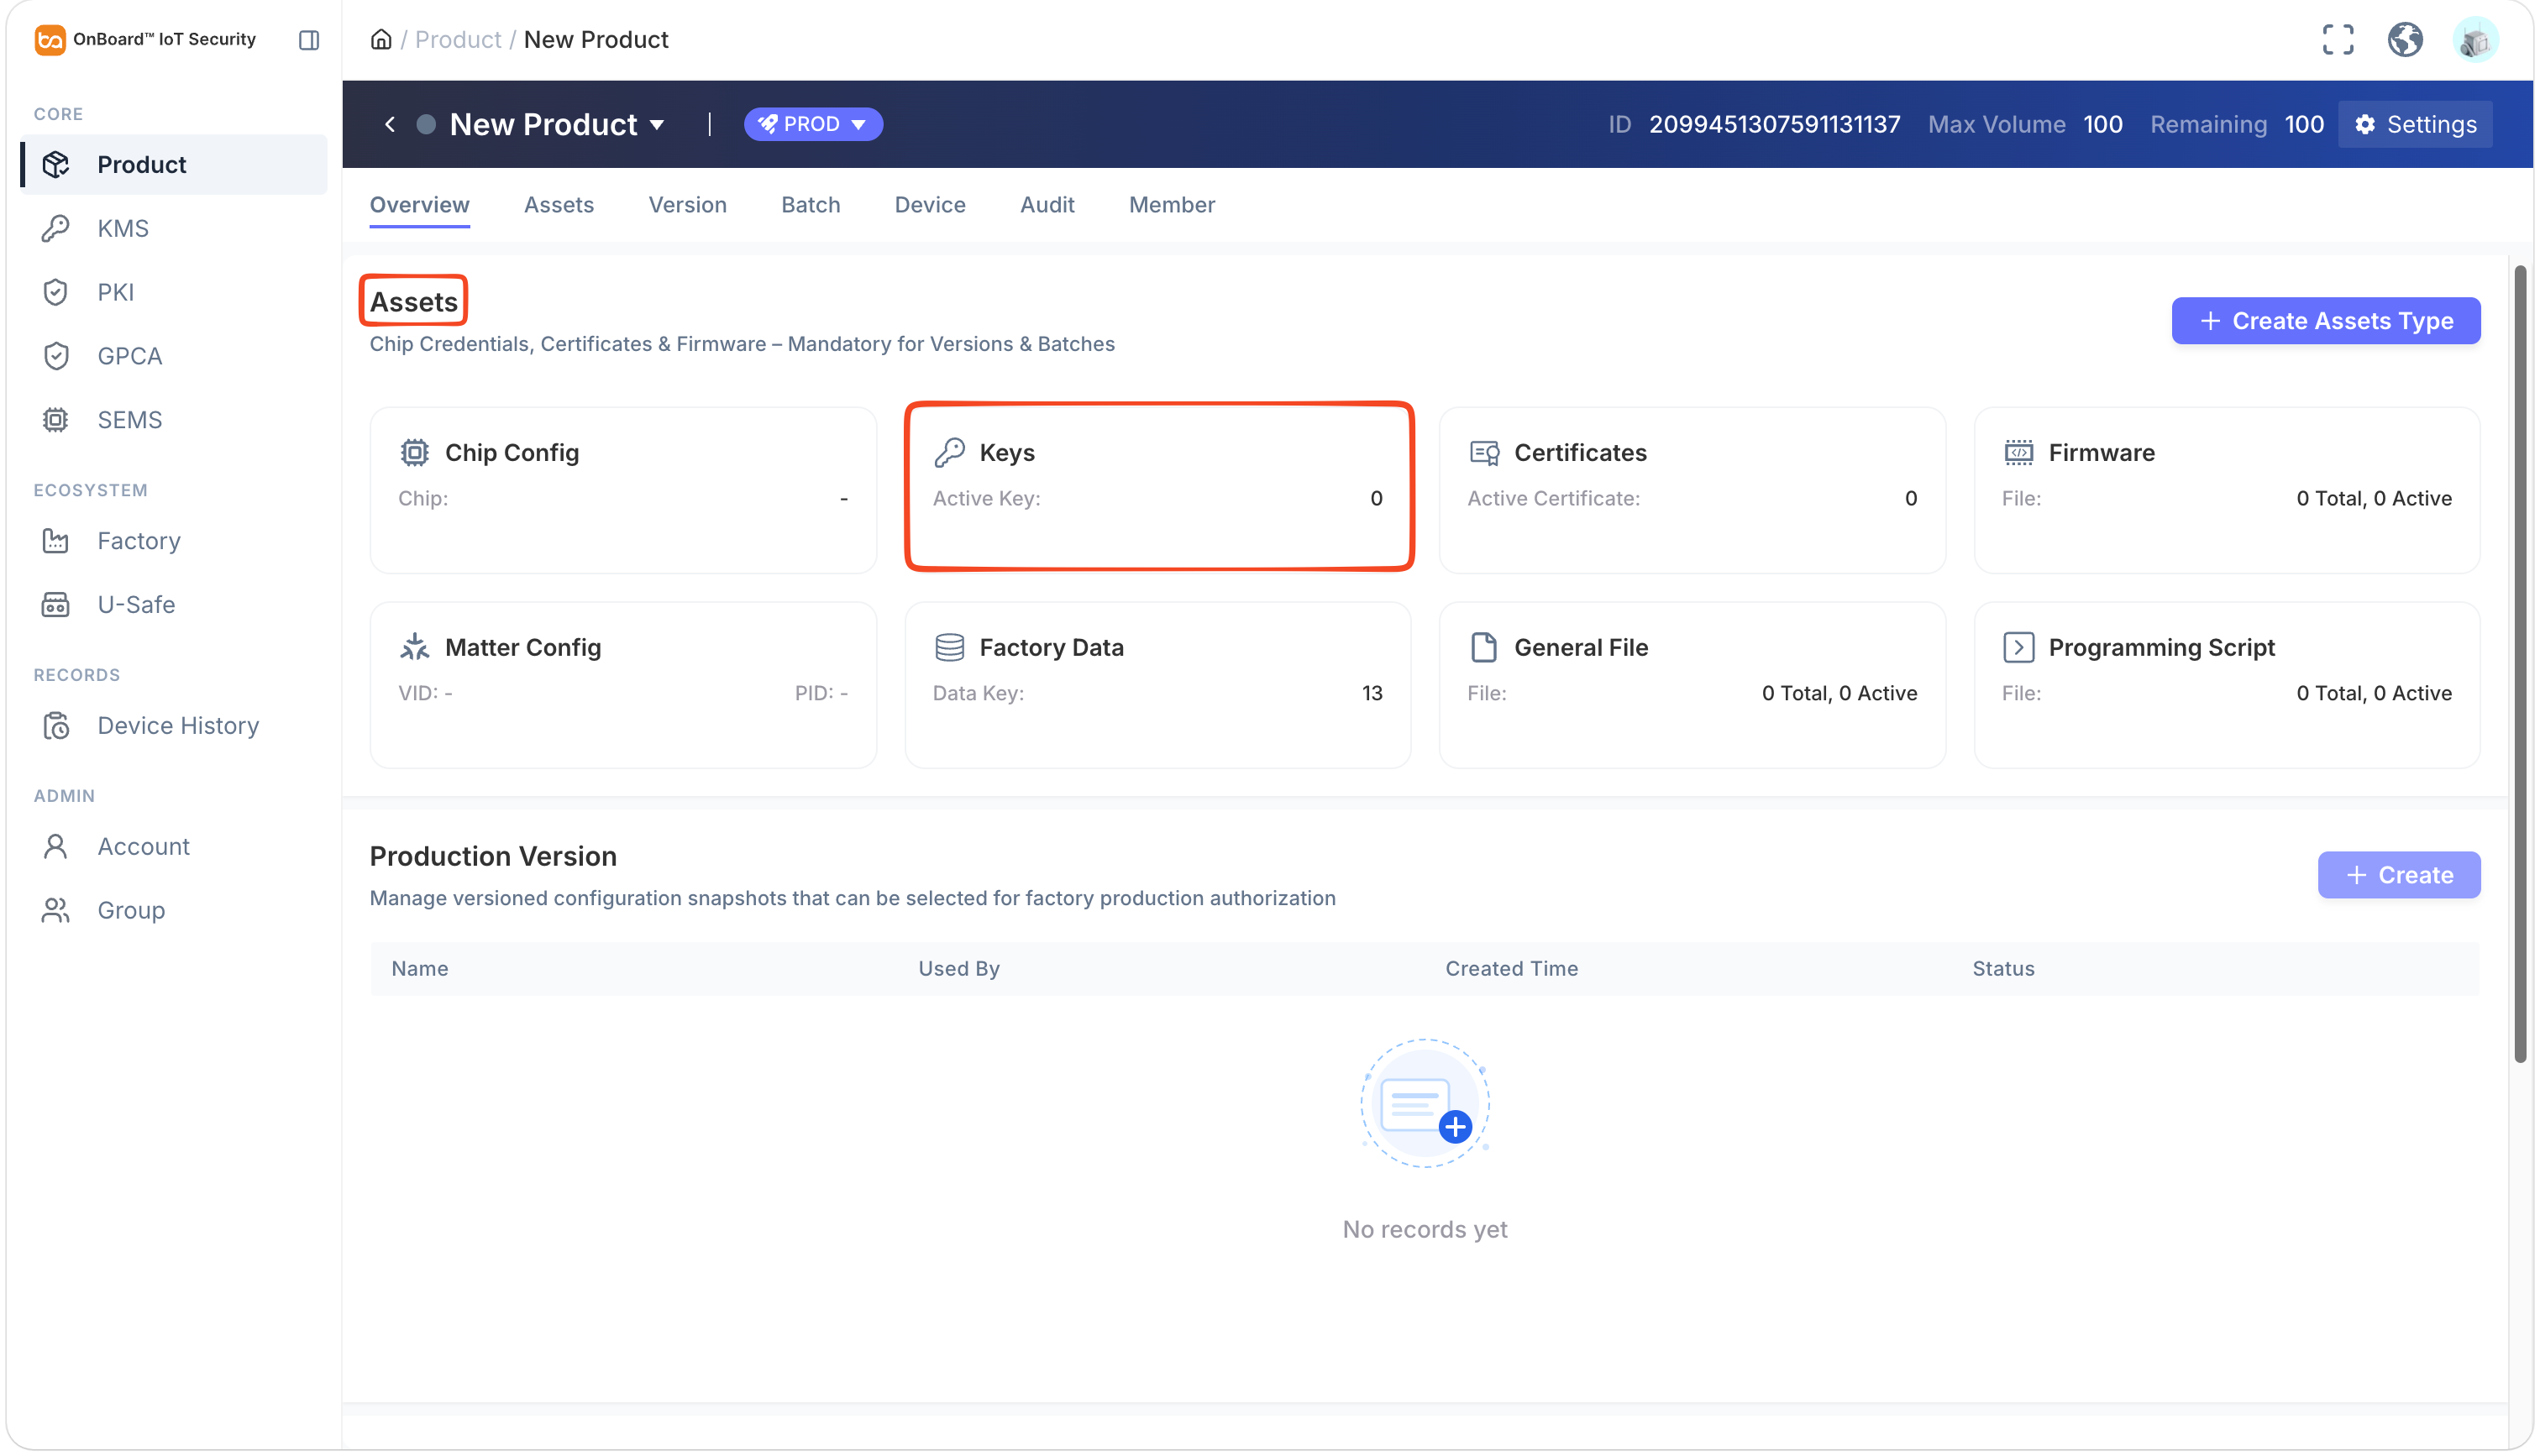
On the product page, select Keys in the Assets section to navigate to the Assets tab.
-
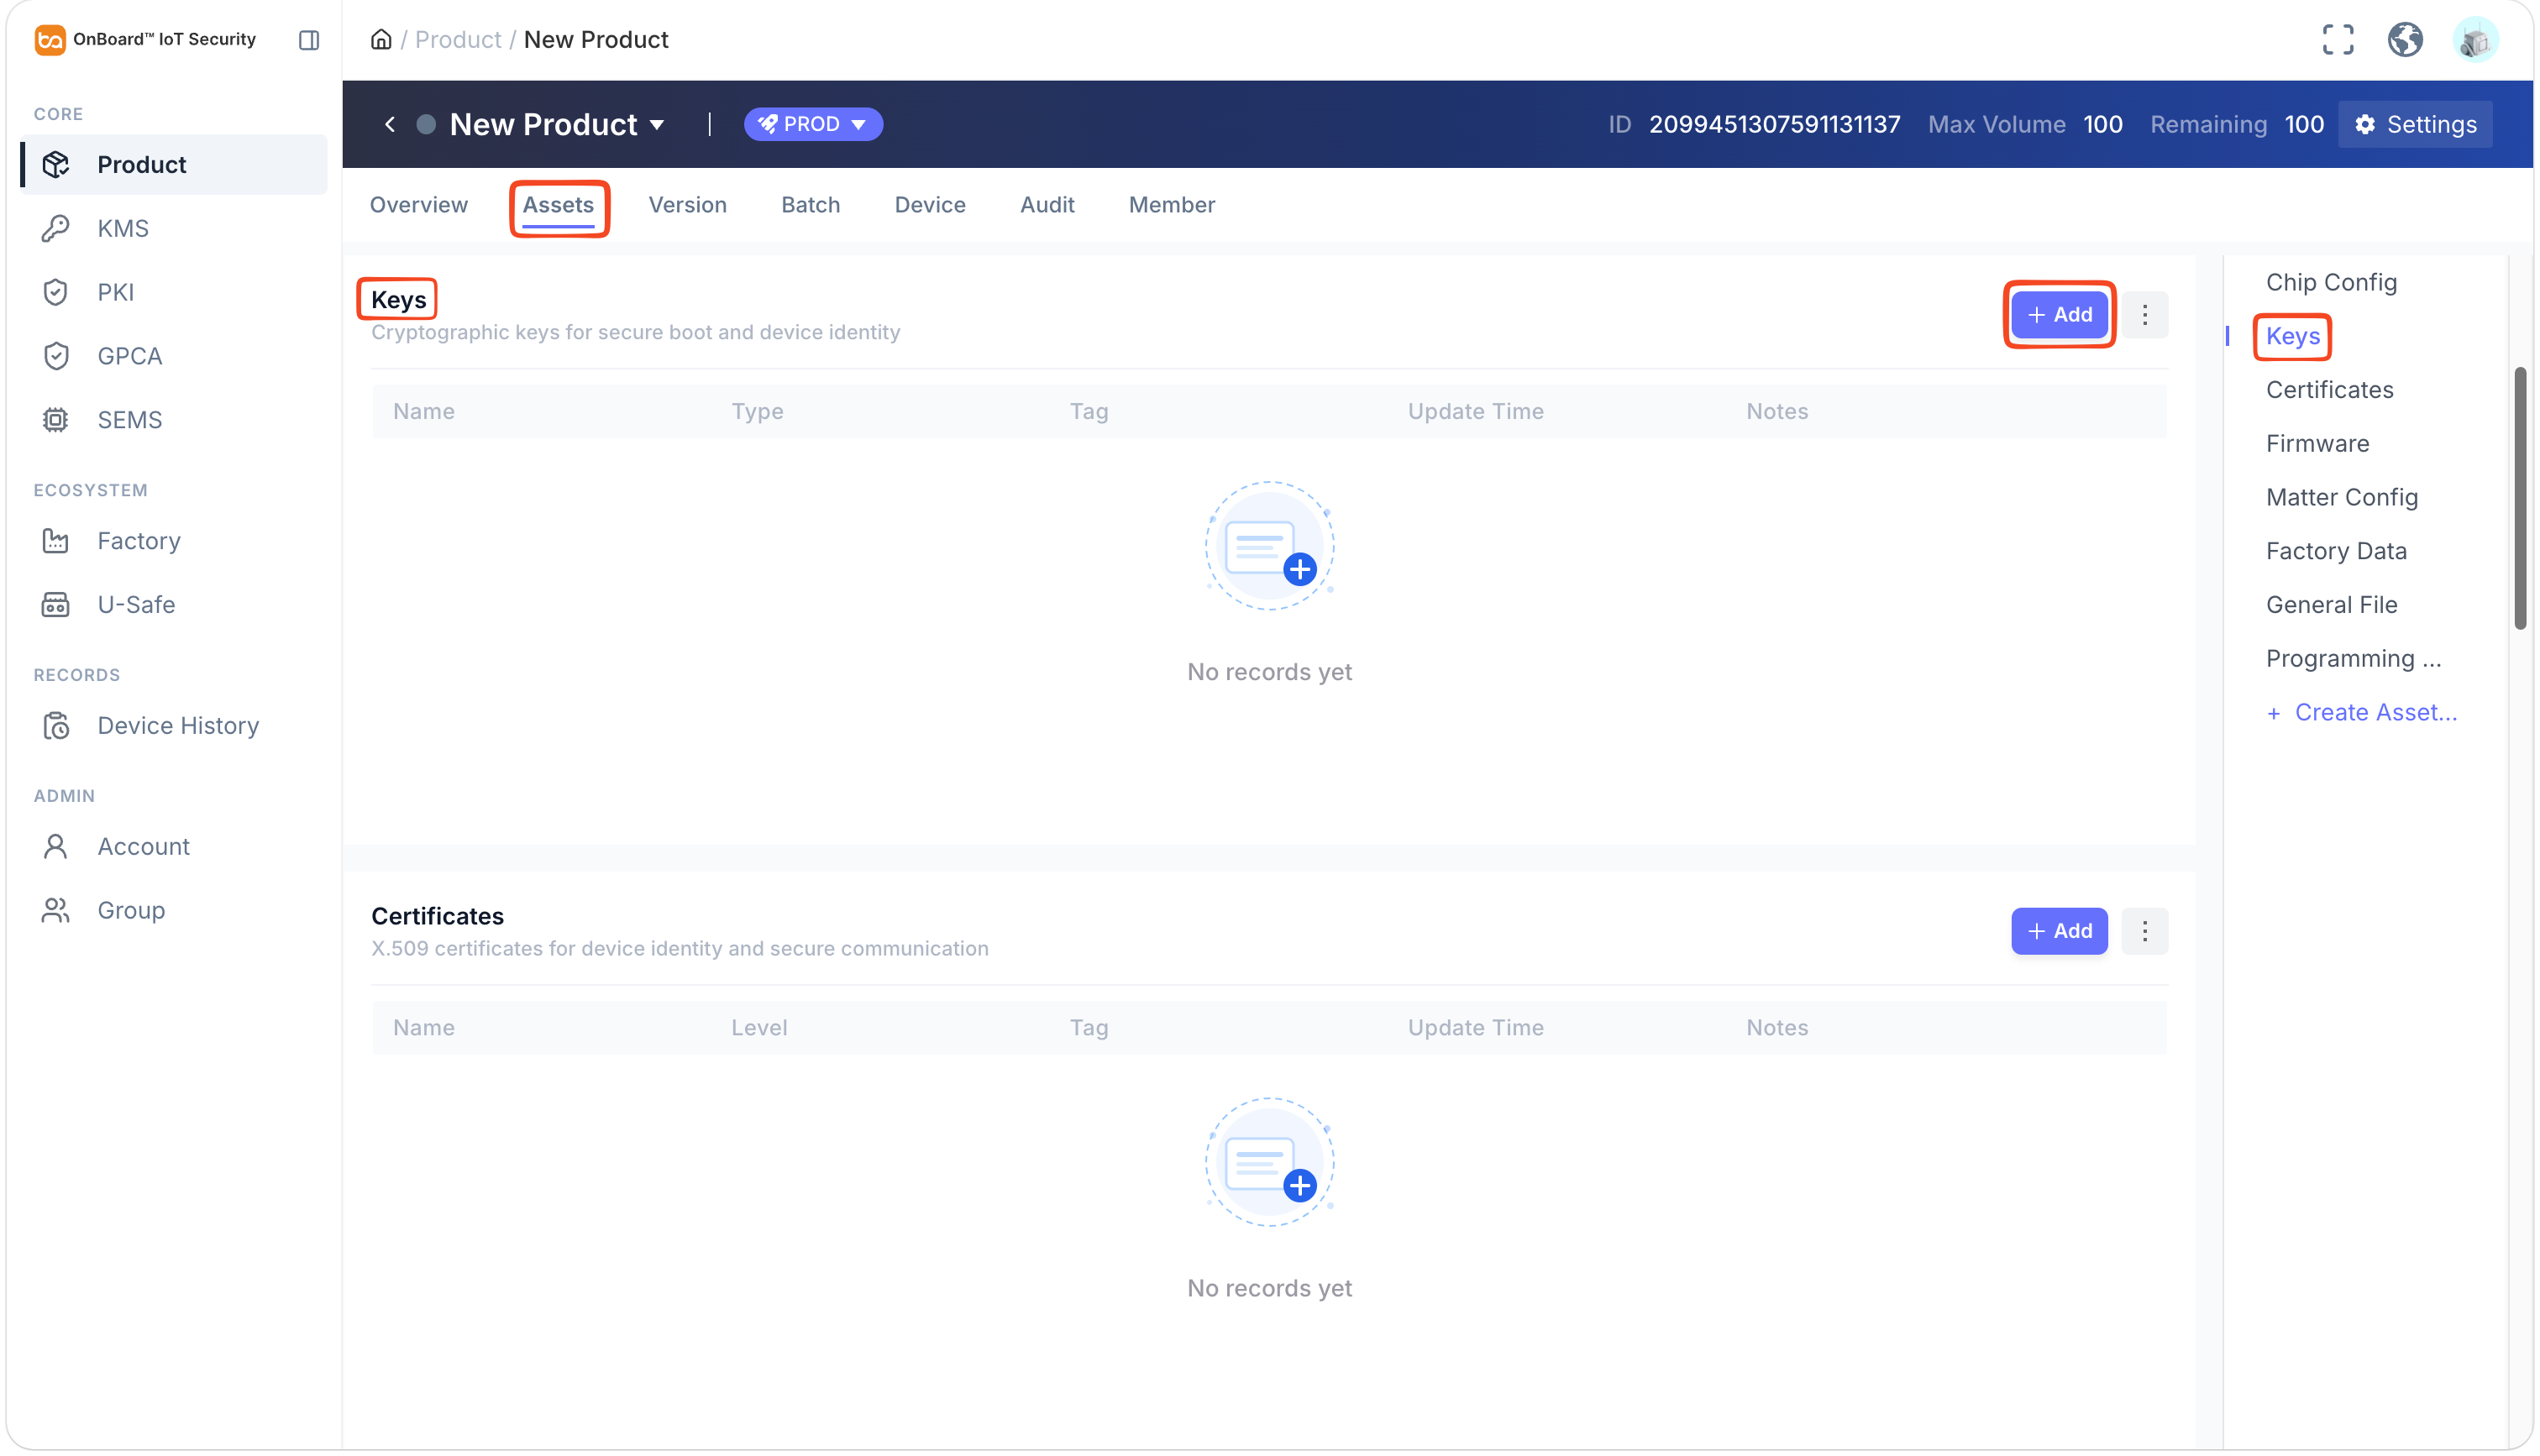
In the Keys section, click Add.
-
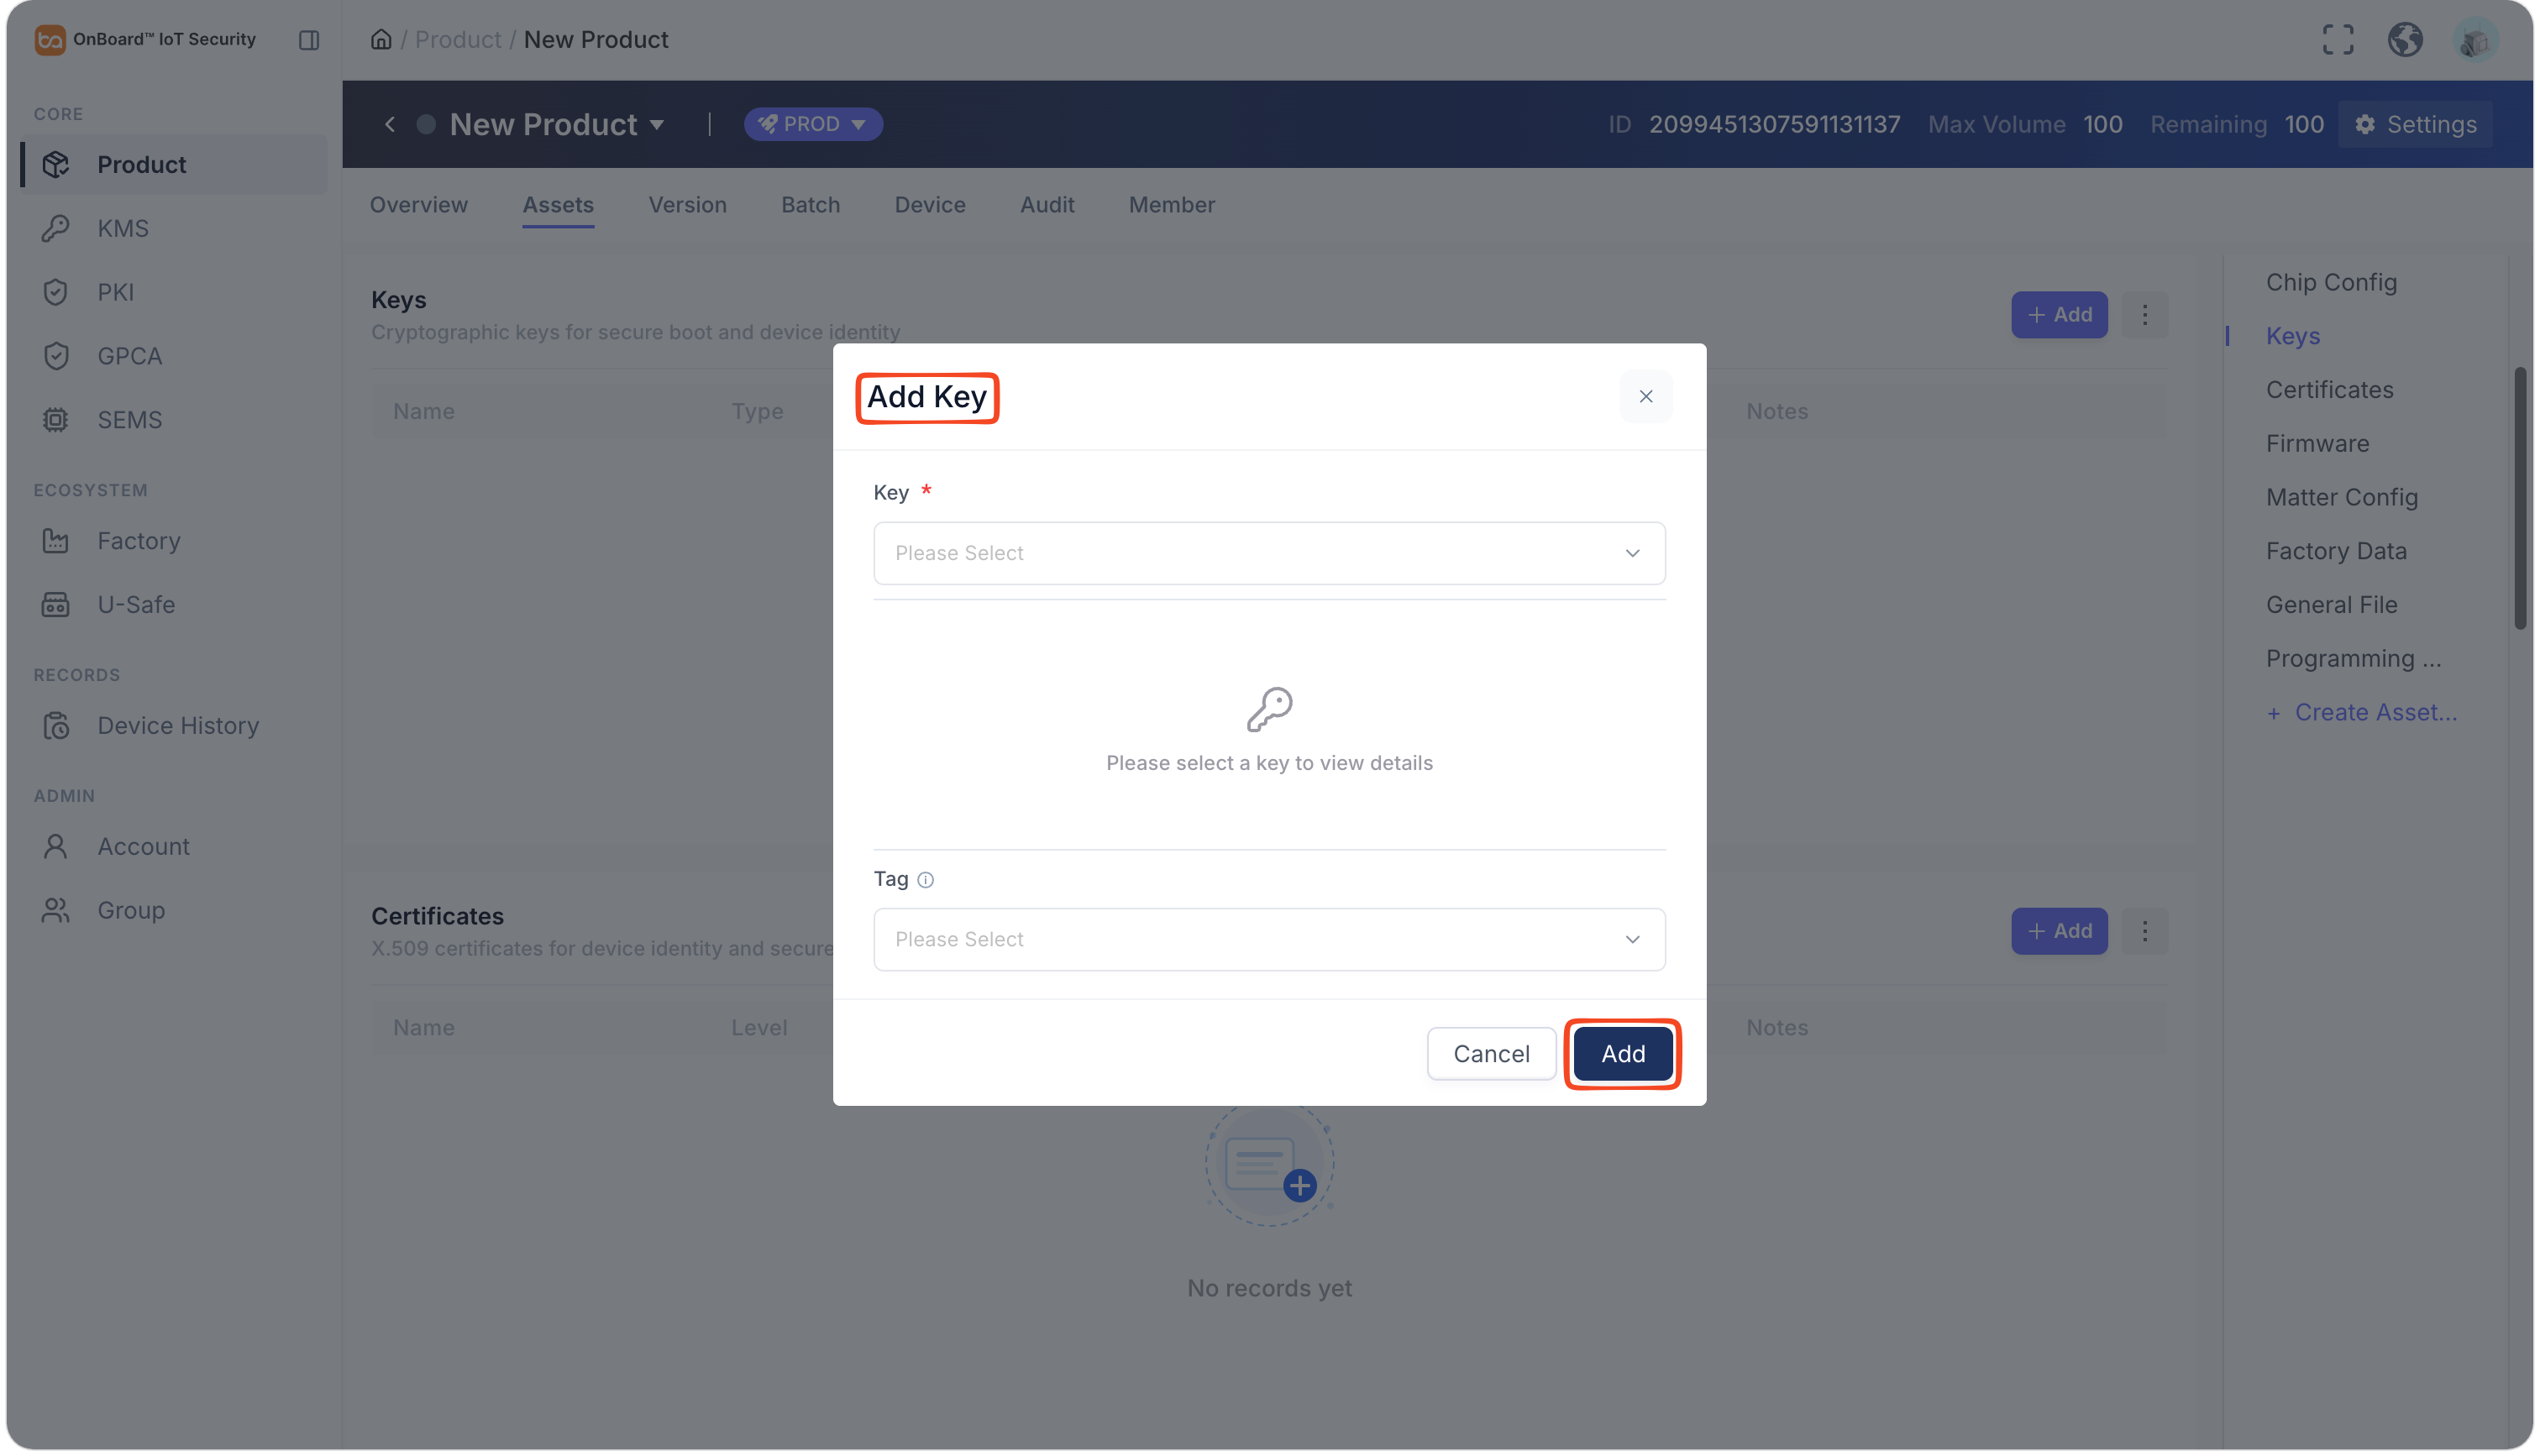
In the Add Key window, select the key to be assigned and click Add. Meanwhile, you can also create and add a custom tag in the Tag field as needed (this tag allows programming scripts to automatically identify and select the corresponding key later).
Certificates (required)
Certificates (required)
Certificates allows you to add CA templates (End Entity templates, DAC templates, or Device templates) from PKI to the product. Added certificates can be selected during the Matter Config.
Certificates can be created in PKI. For more information, refer to the steps to create a certificate.
-
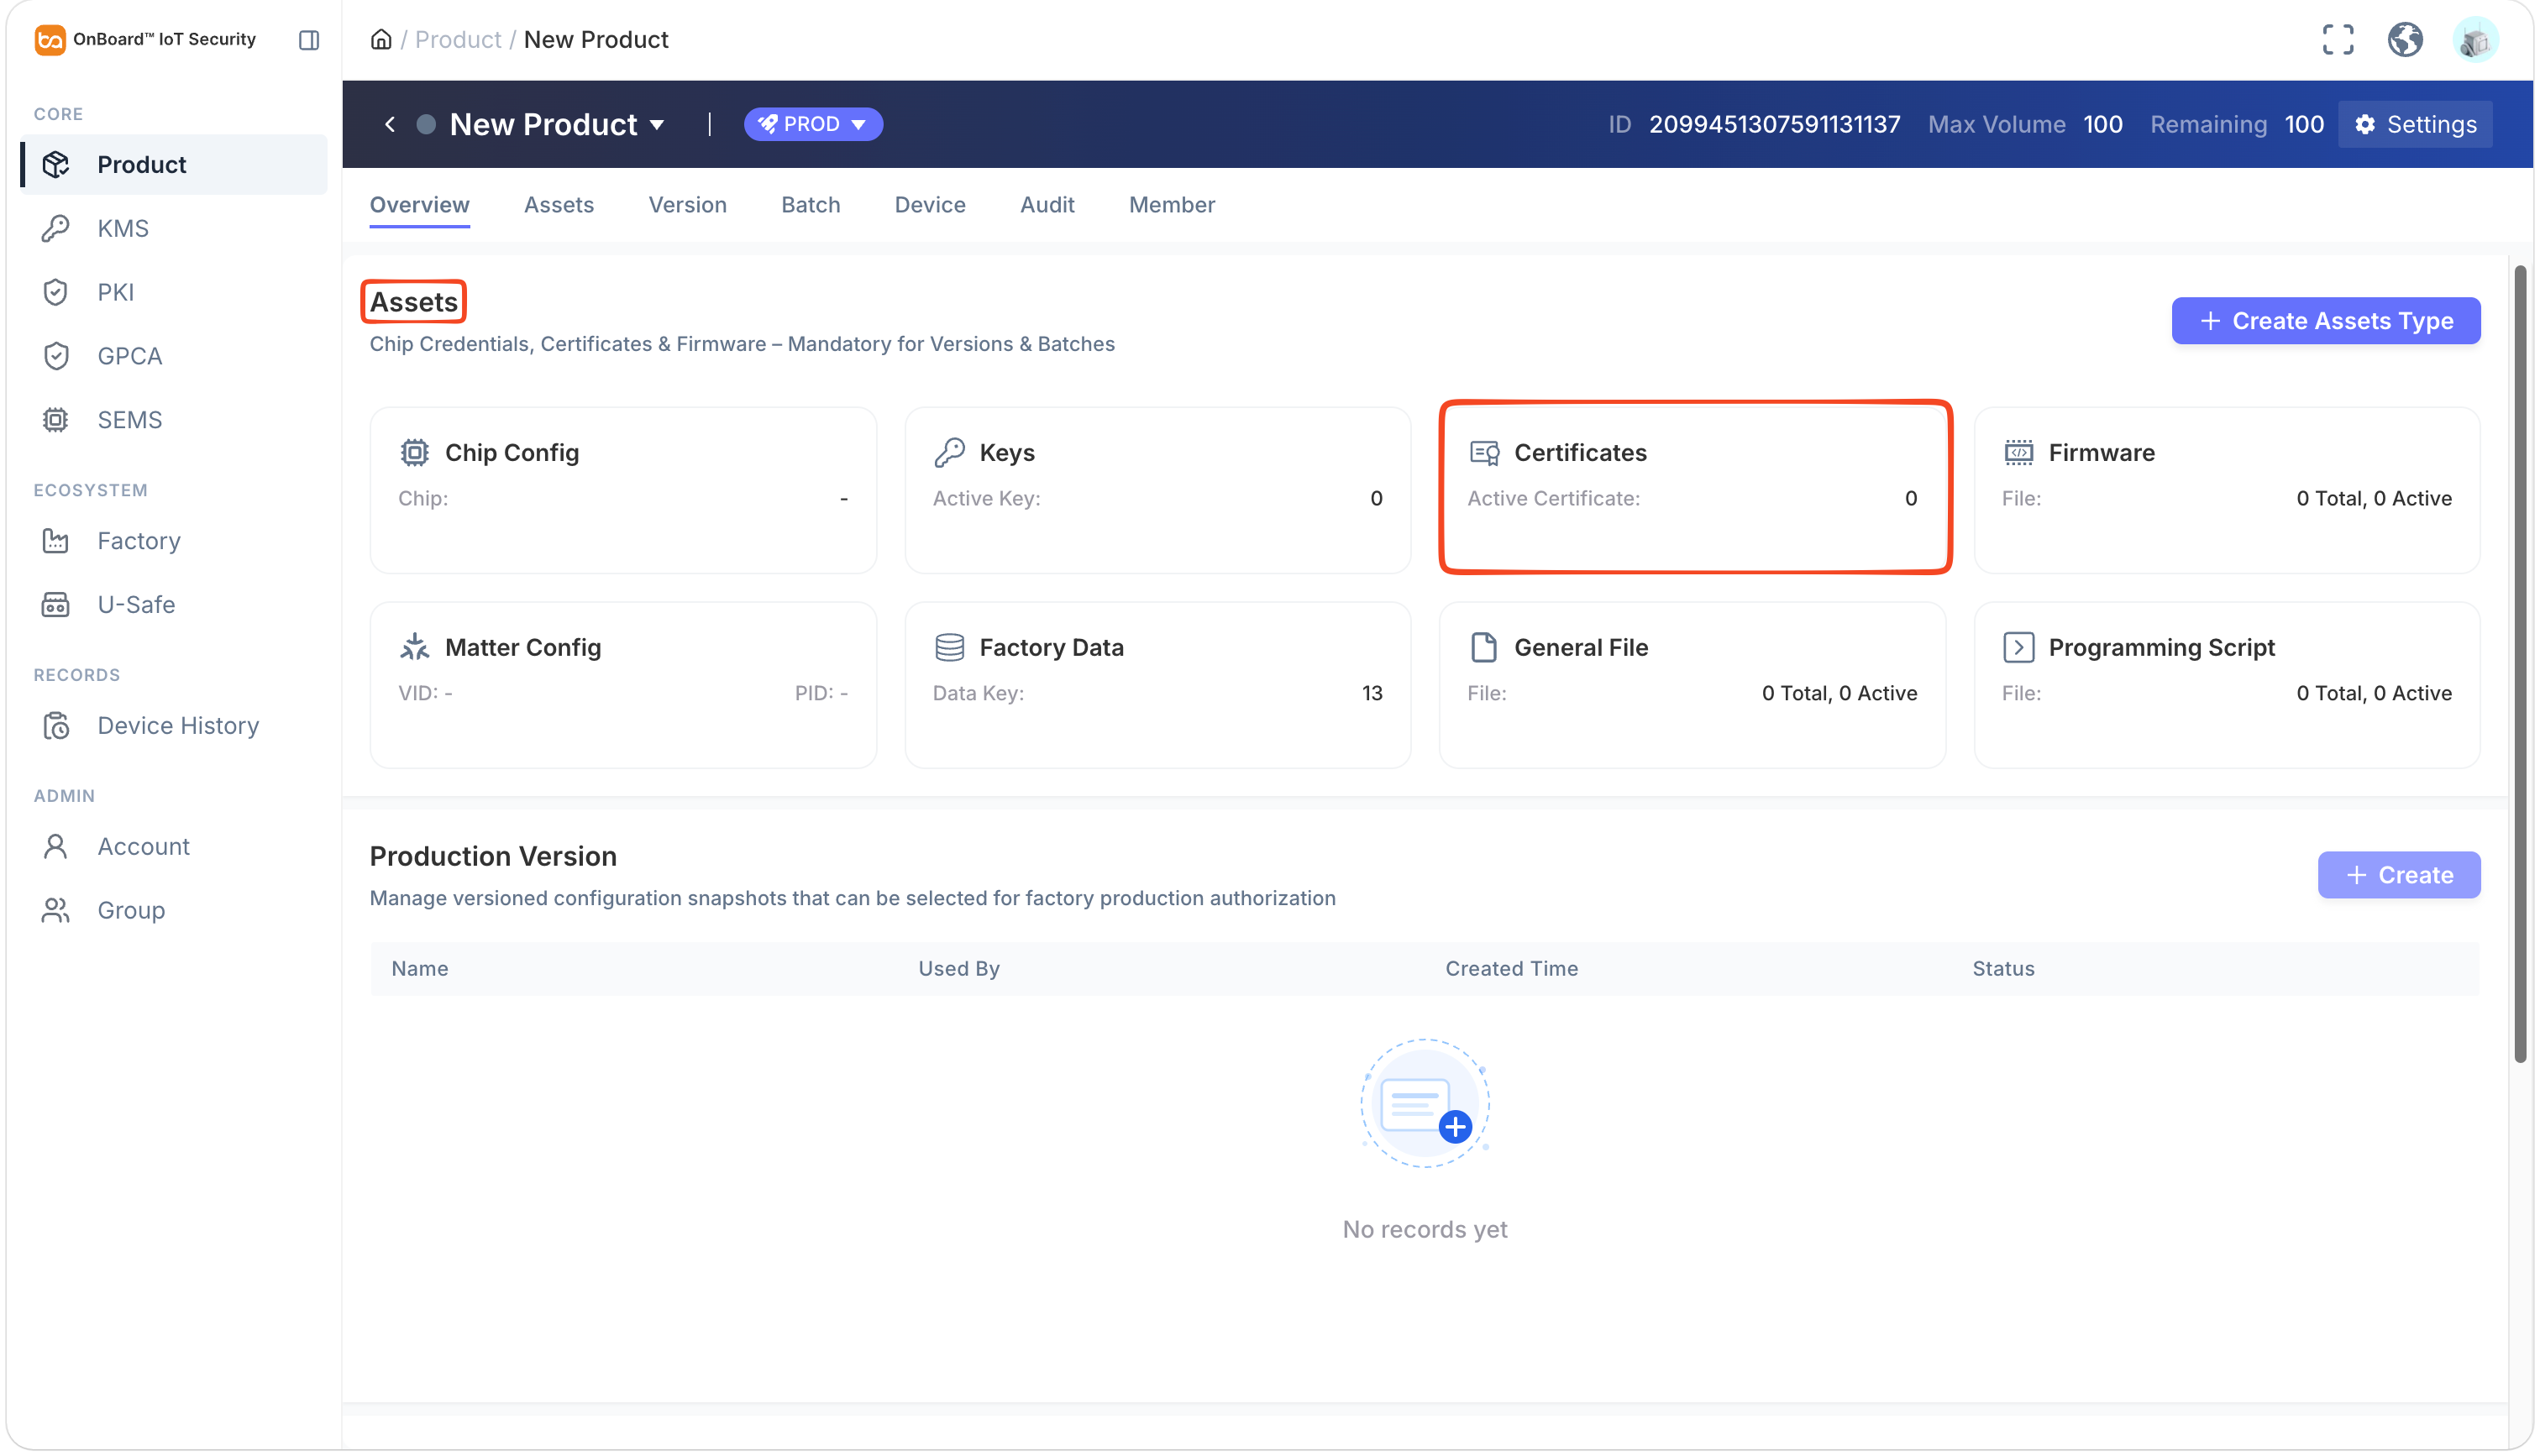
On the product page, select Certificates in the Assets section to navigate to the Assets tab.
-
In the Certificates section, click Add.
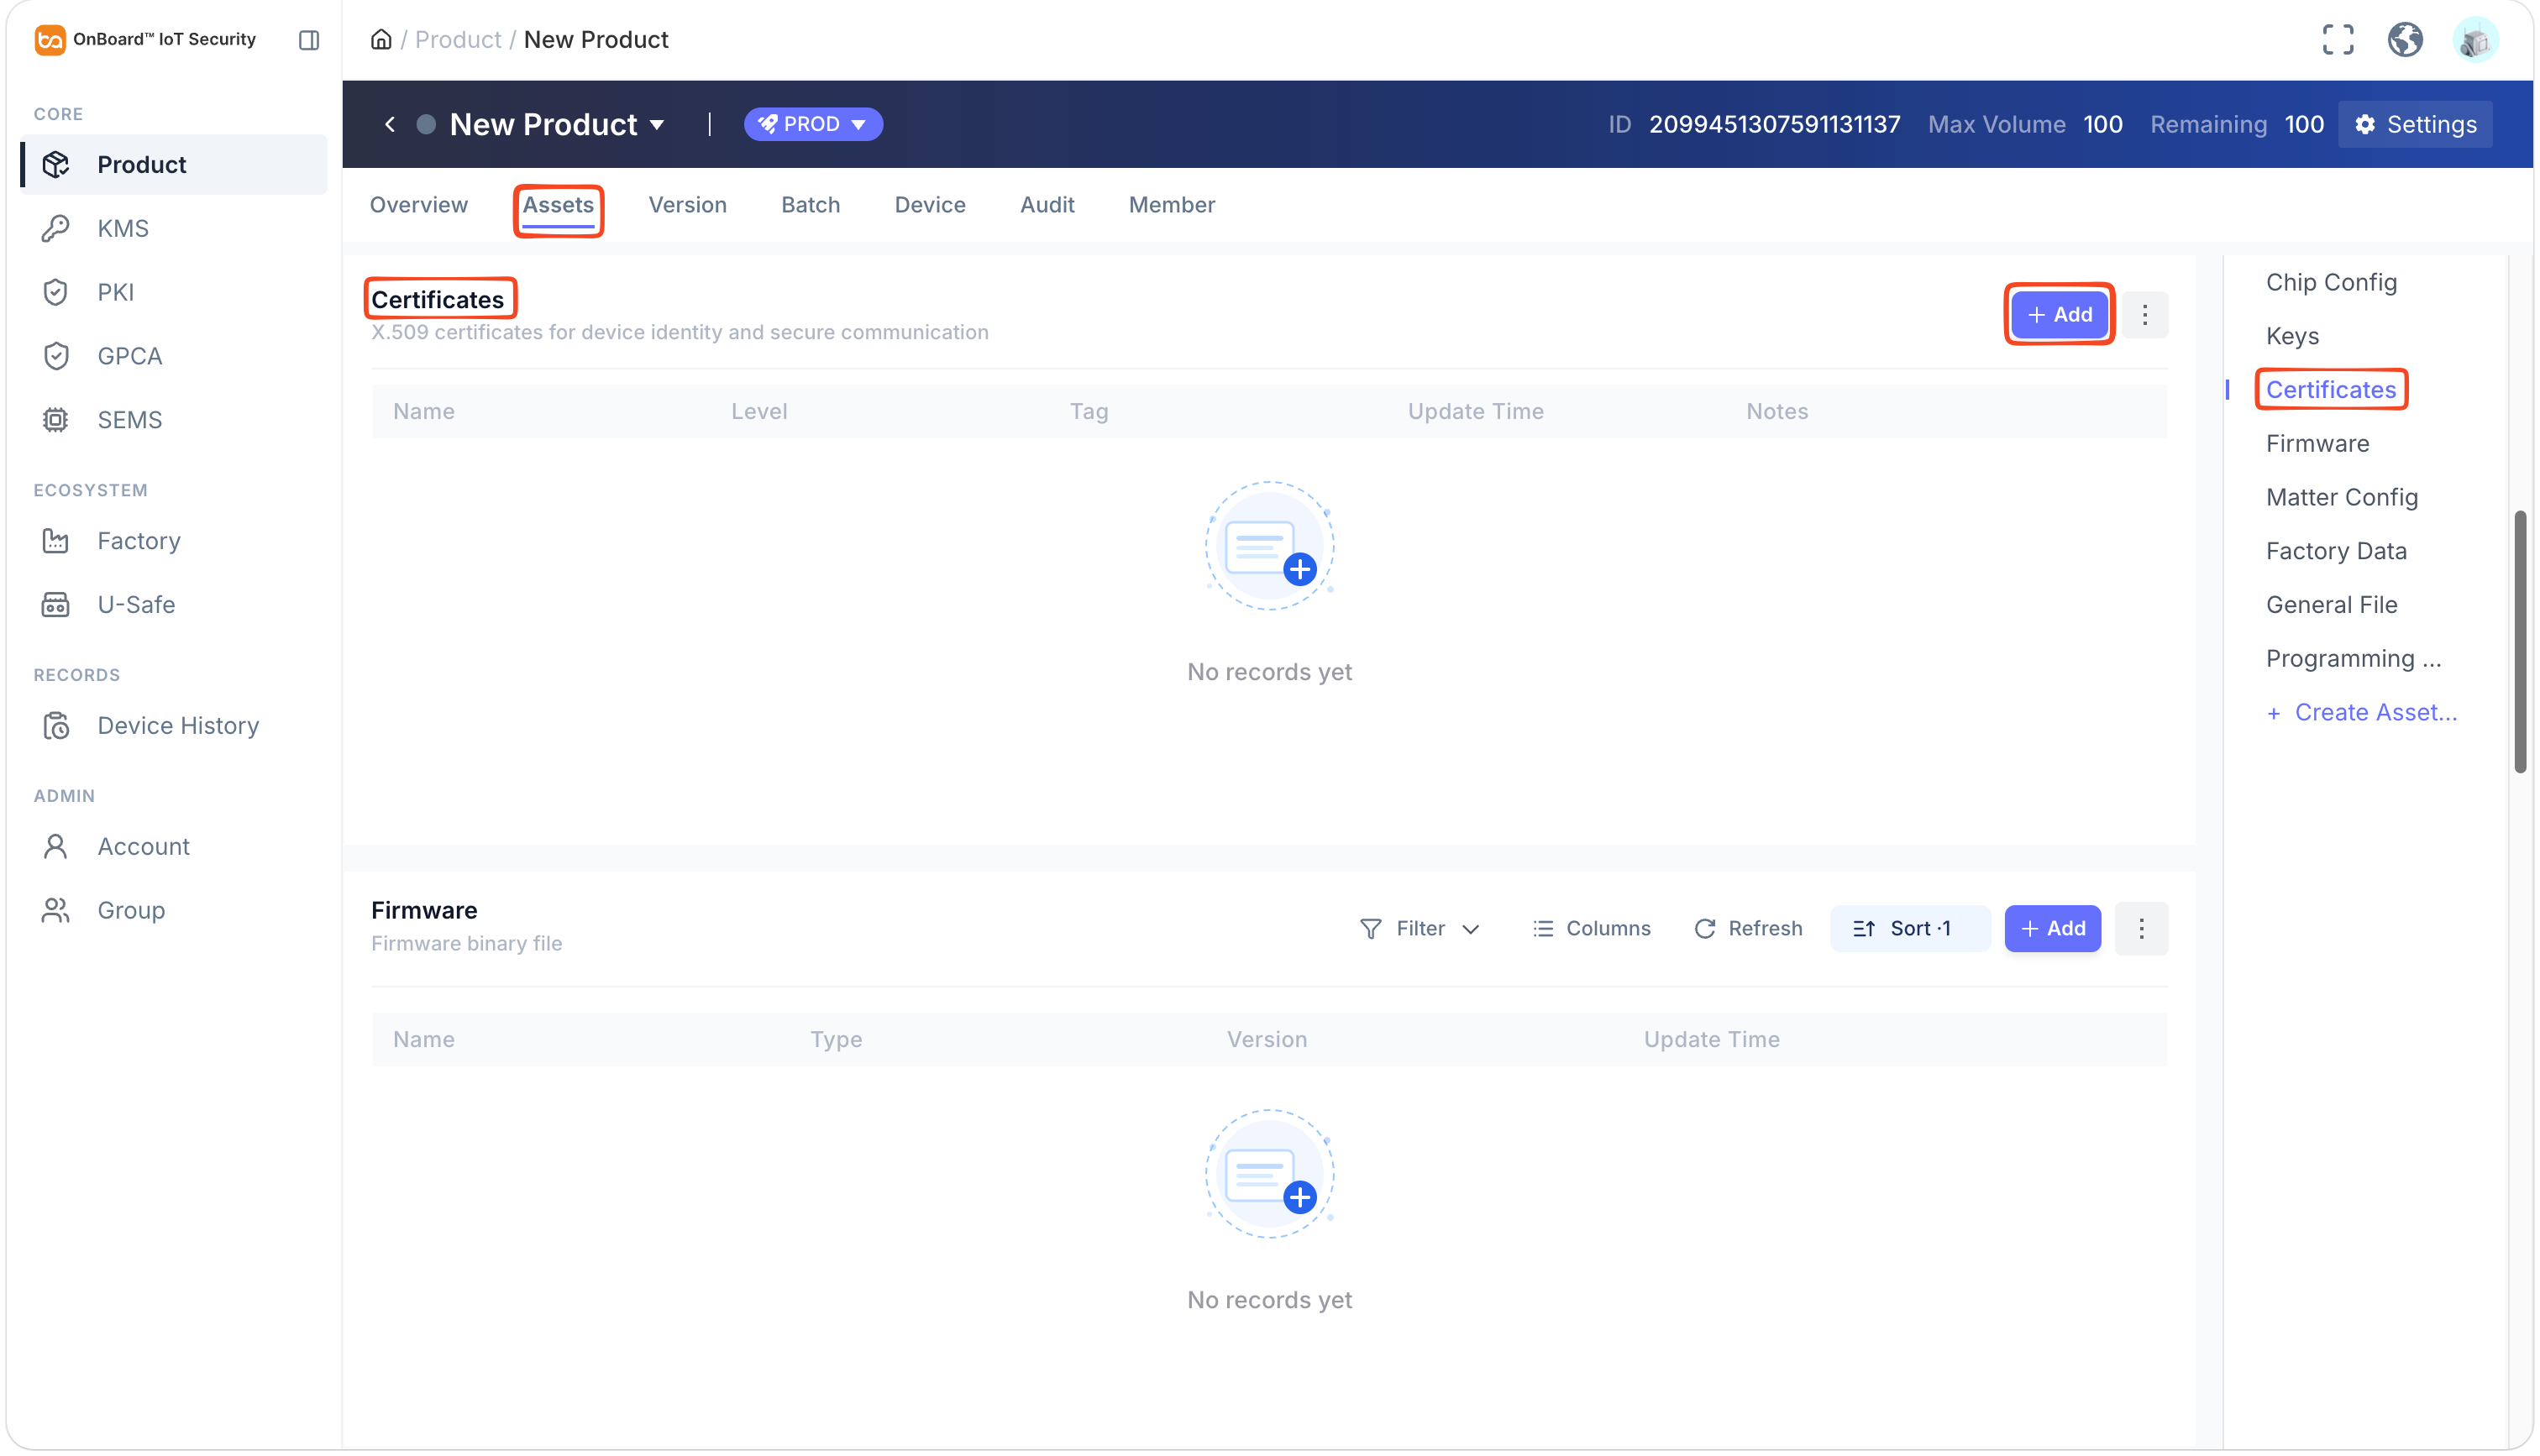 obis-product-certificate.png (Screenshot displays how to add a certificate)
-
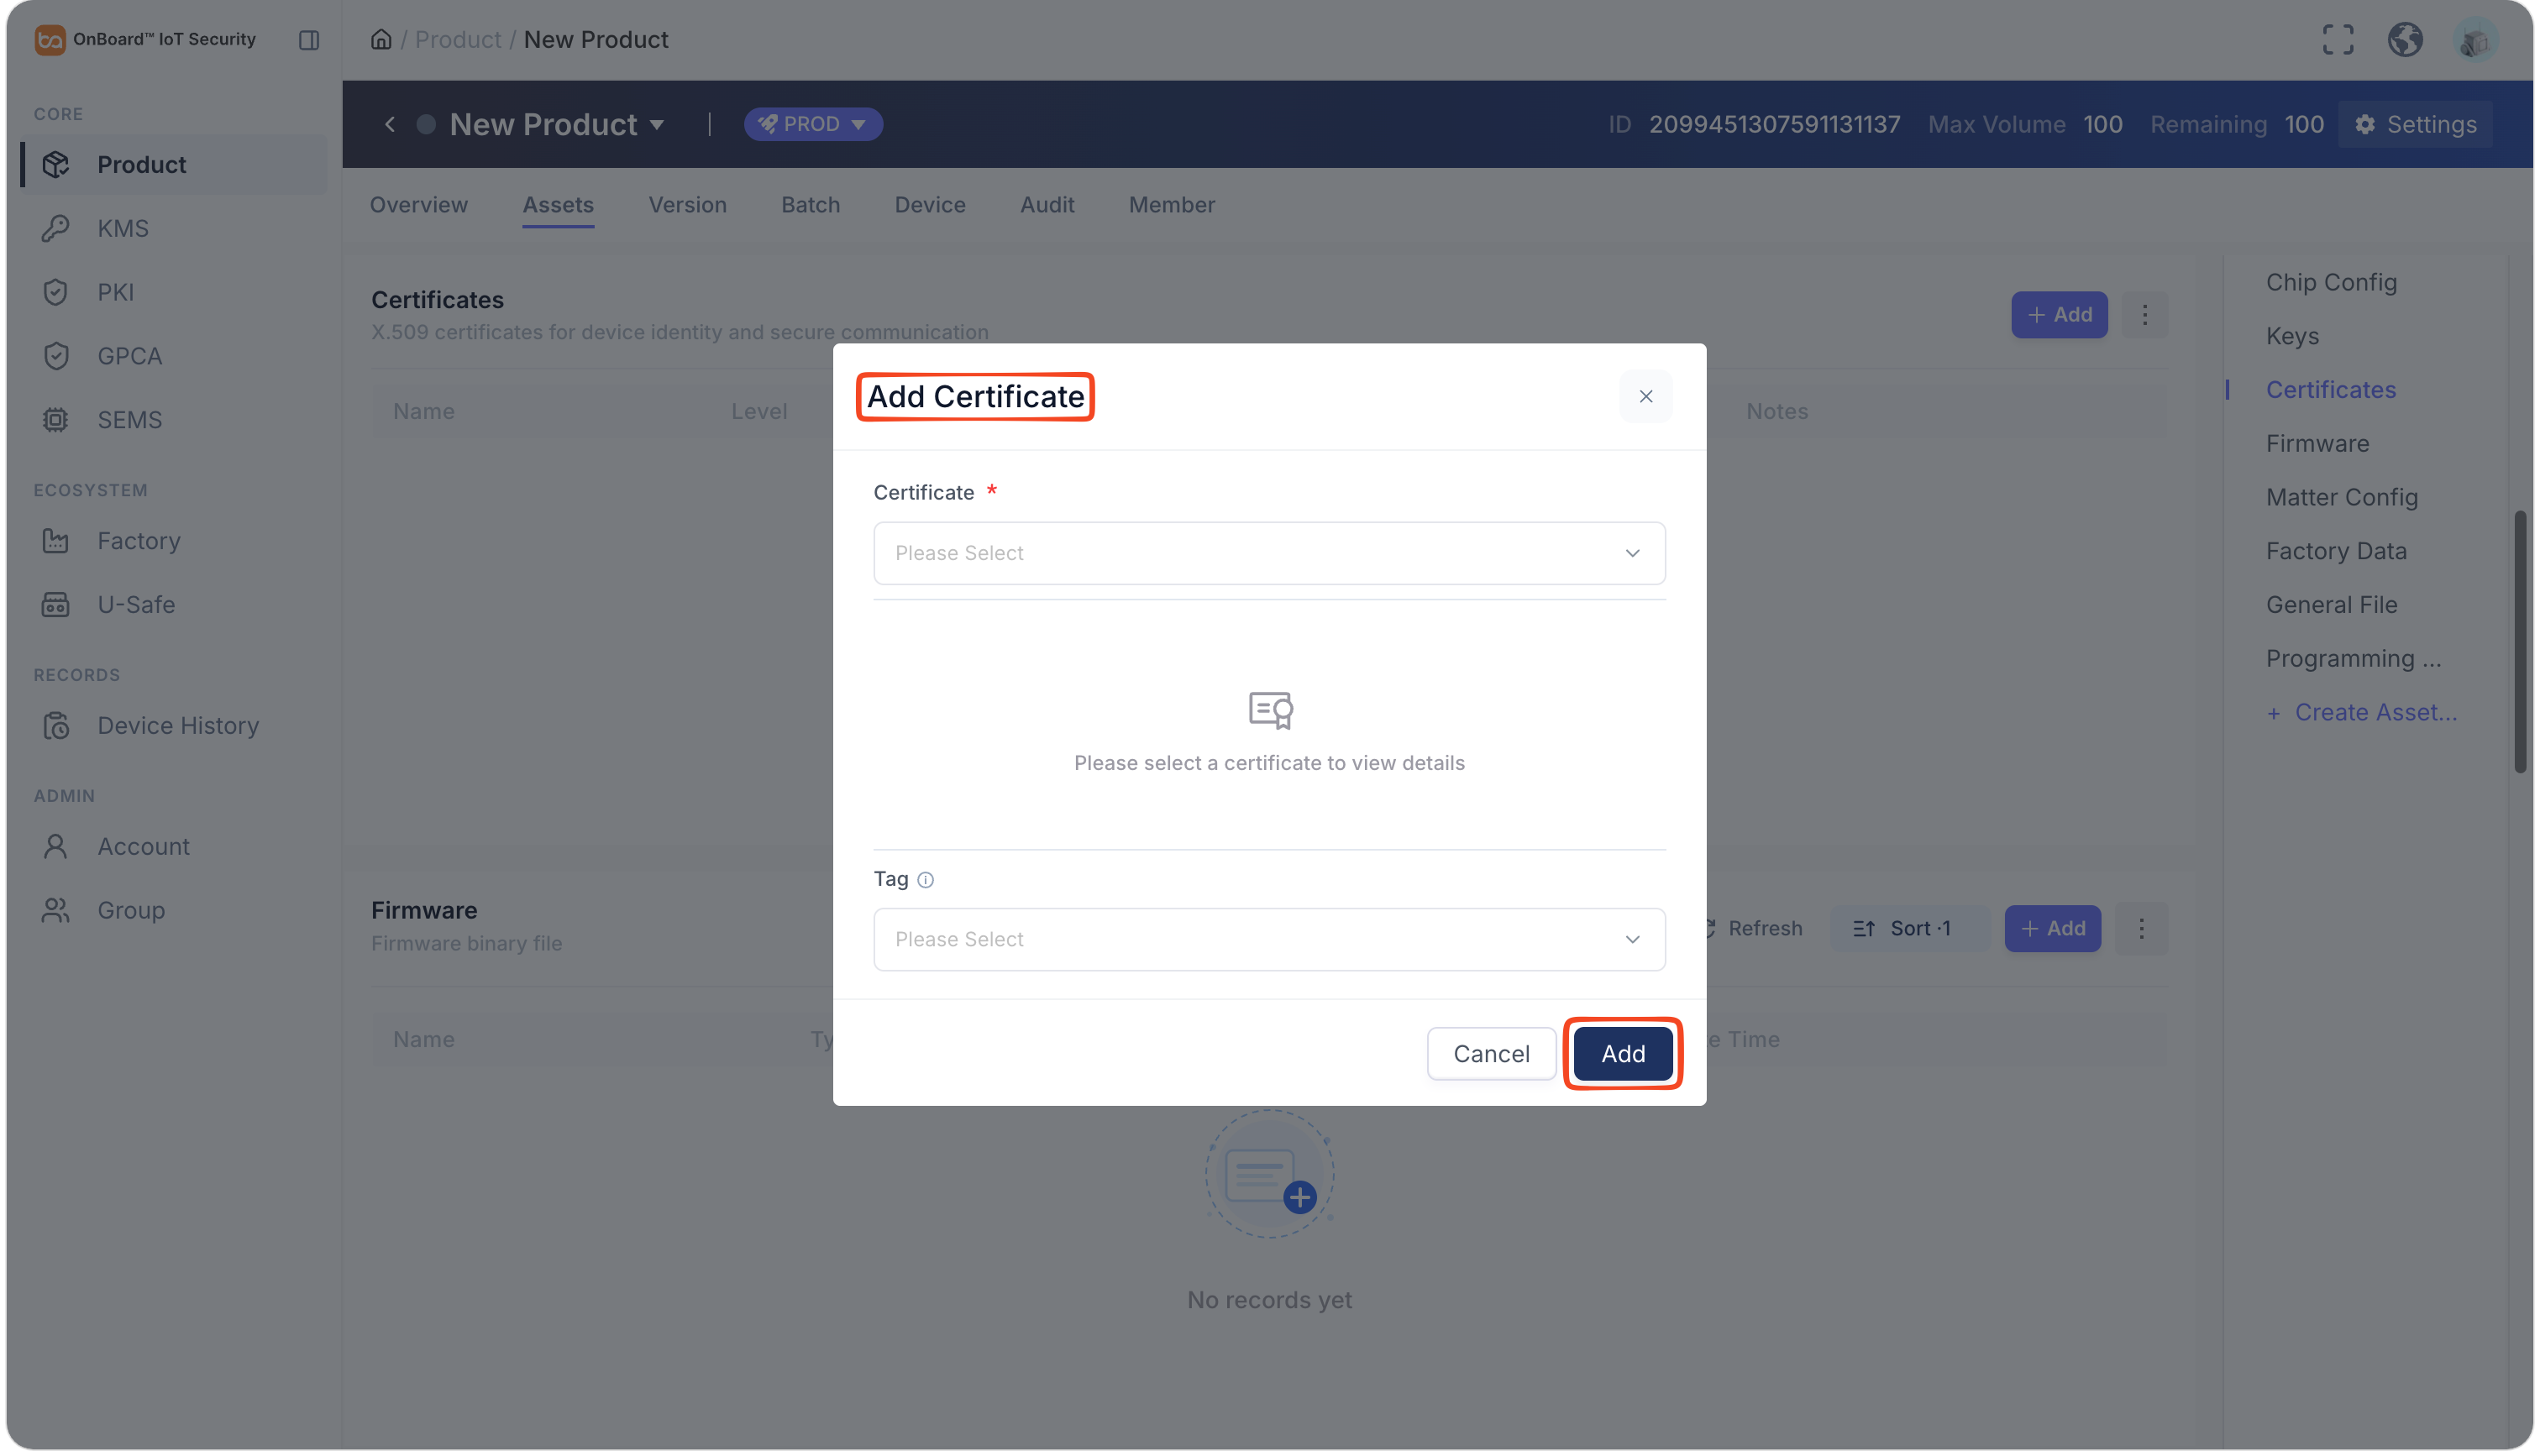
In the Add Certificate window, select the certificate to be assigned and click Add. Meanwhile, you can set the Tag to Matter, Google, or a custom tag as needed (this tag allows programming scripts to automatically identify and select the corresponding certificate later).
Firmware (optional)
Firmware (optional)
Firmware allows you to upload the firmware files required for programming the product. Firmware formats supported: .bin, .hex, and .s37. Then, the uploaded firmware files can be selected when creating a version. You may upload firmware as needed.
The files uploaded during configuration can be downloaded by users within the same tenant.
-
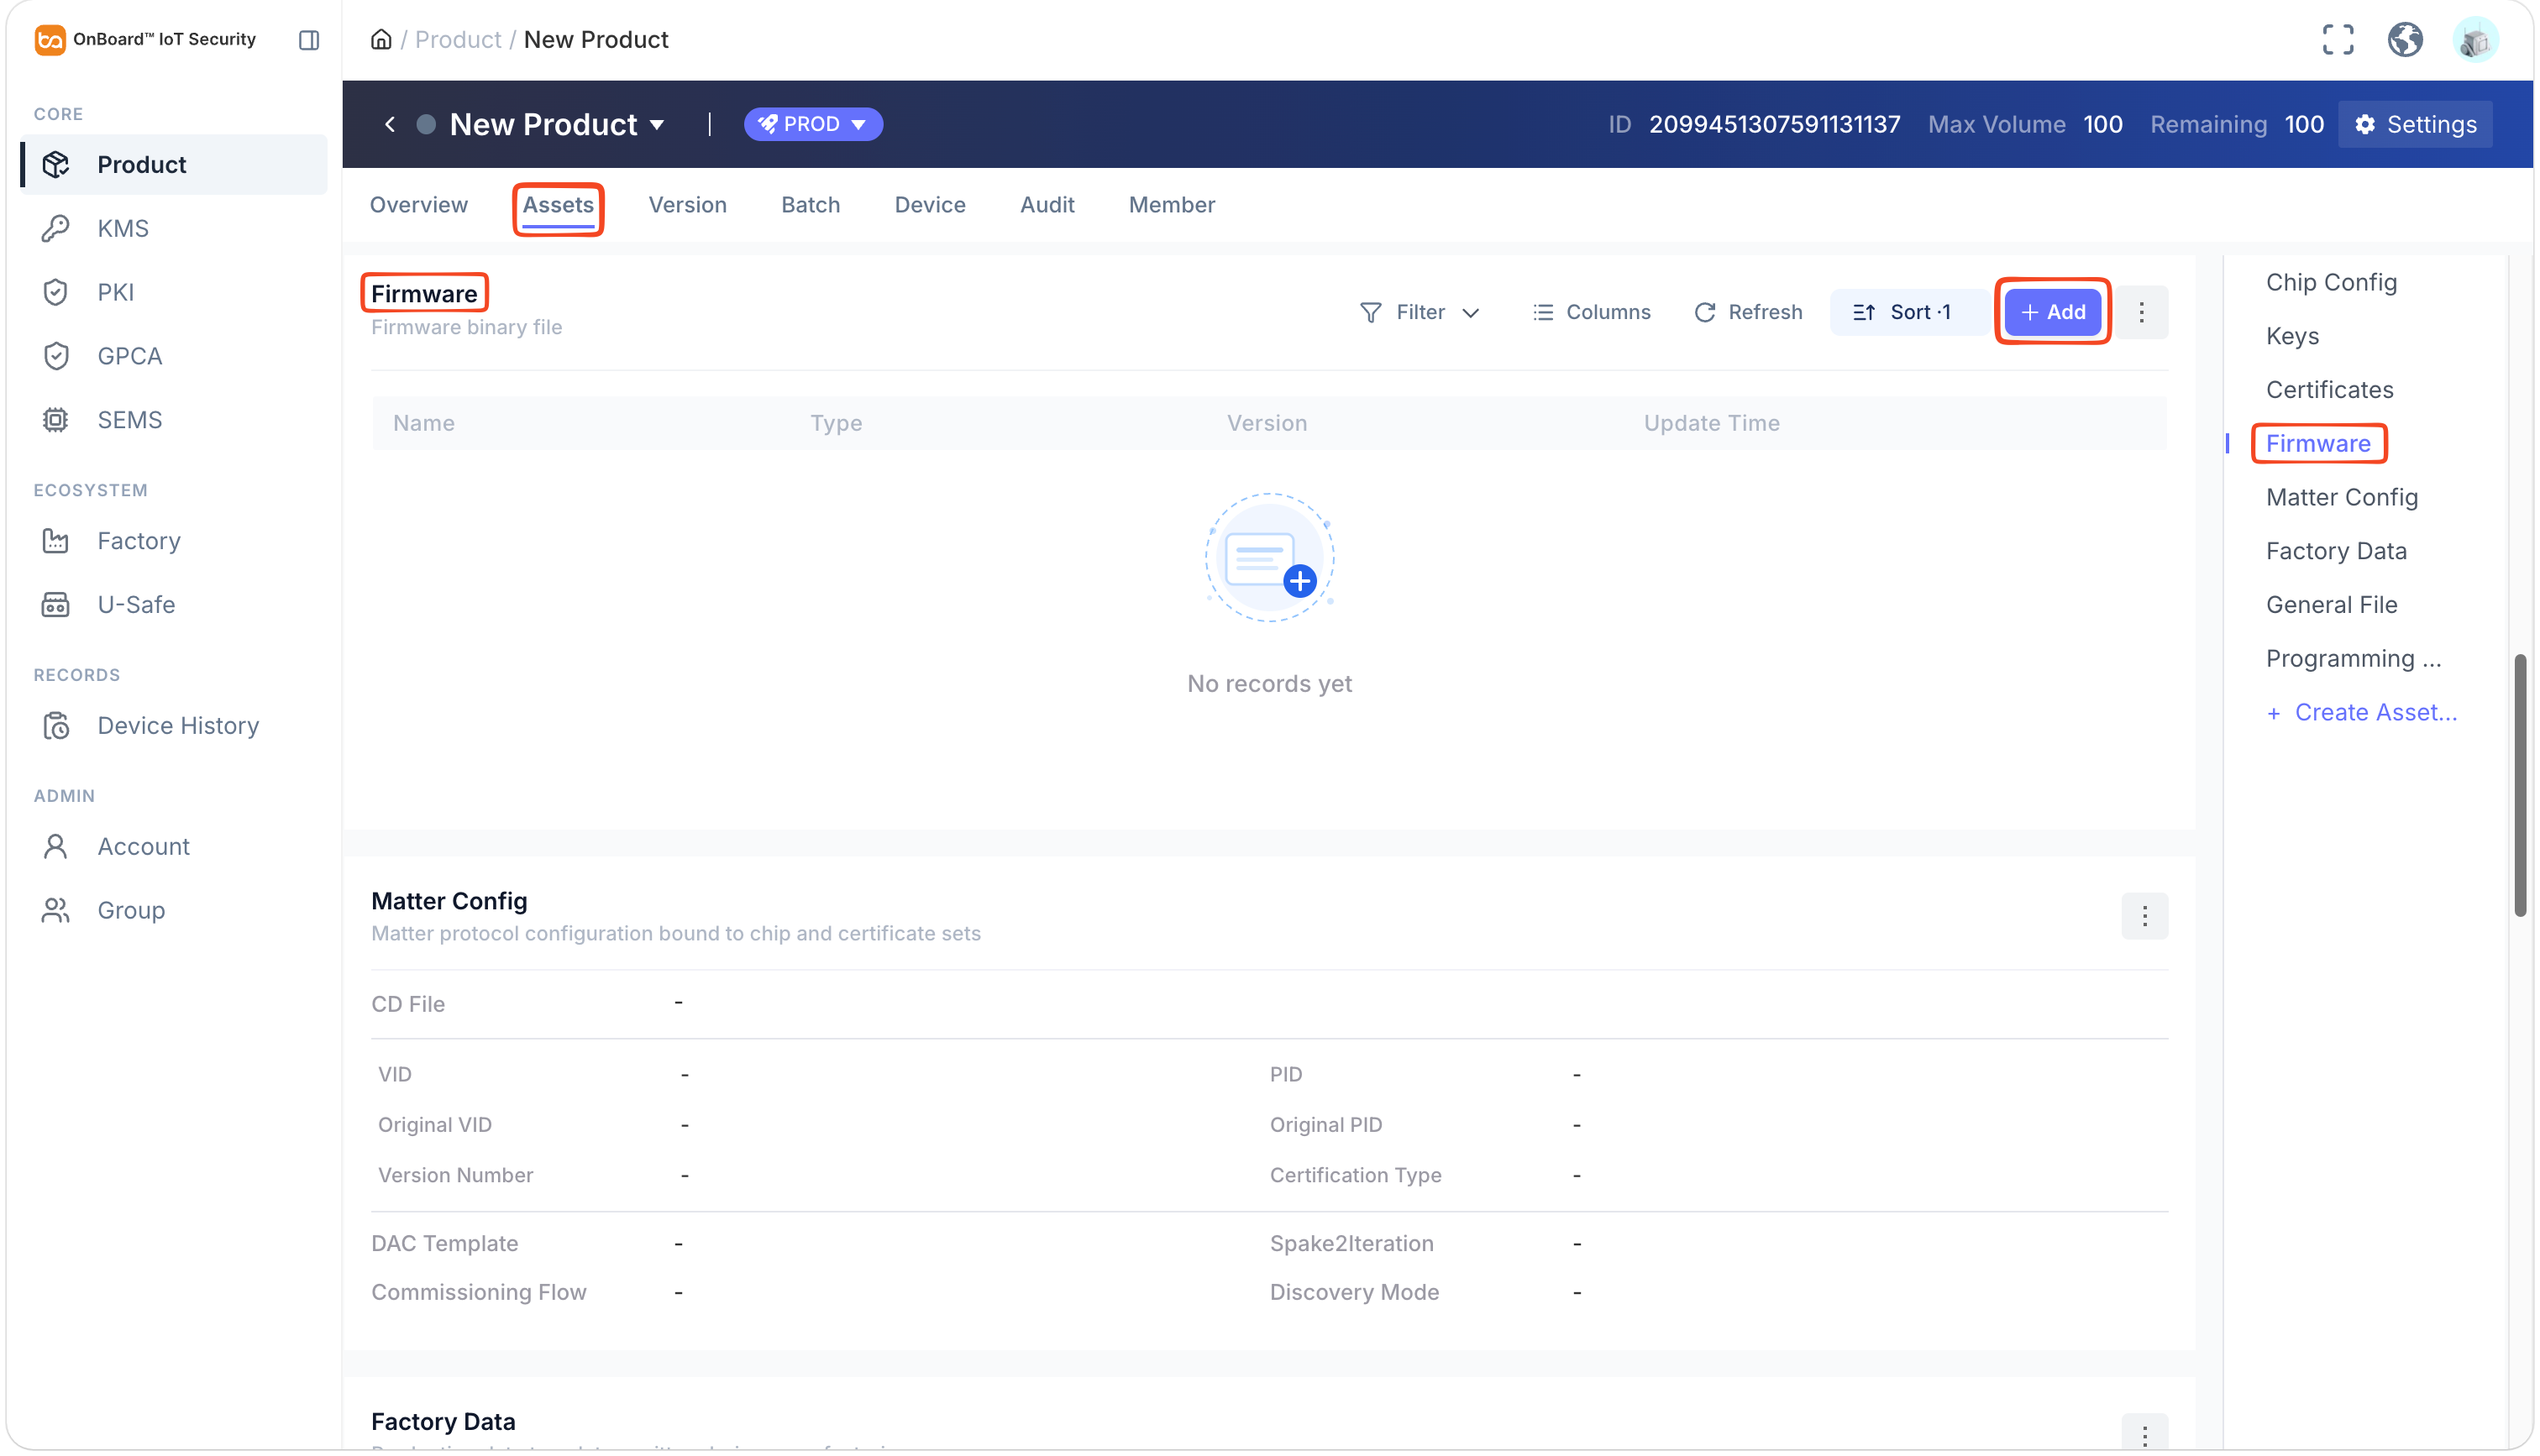
On the product page, select Firmware in the Assets section to navigate to the Assets tab.
-
In the Firmware section, click Add.
-
In the Add Firmware window, select and enter the firmware-related information.
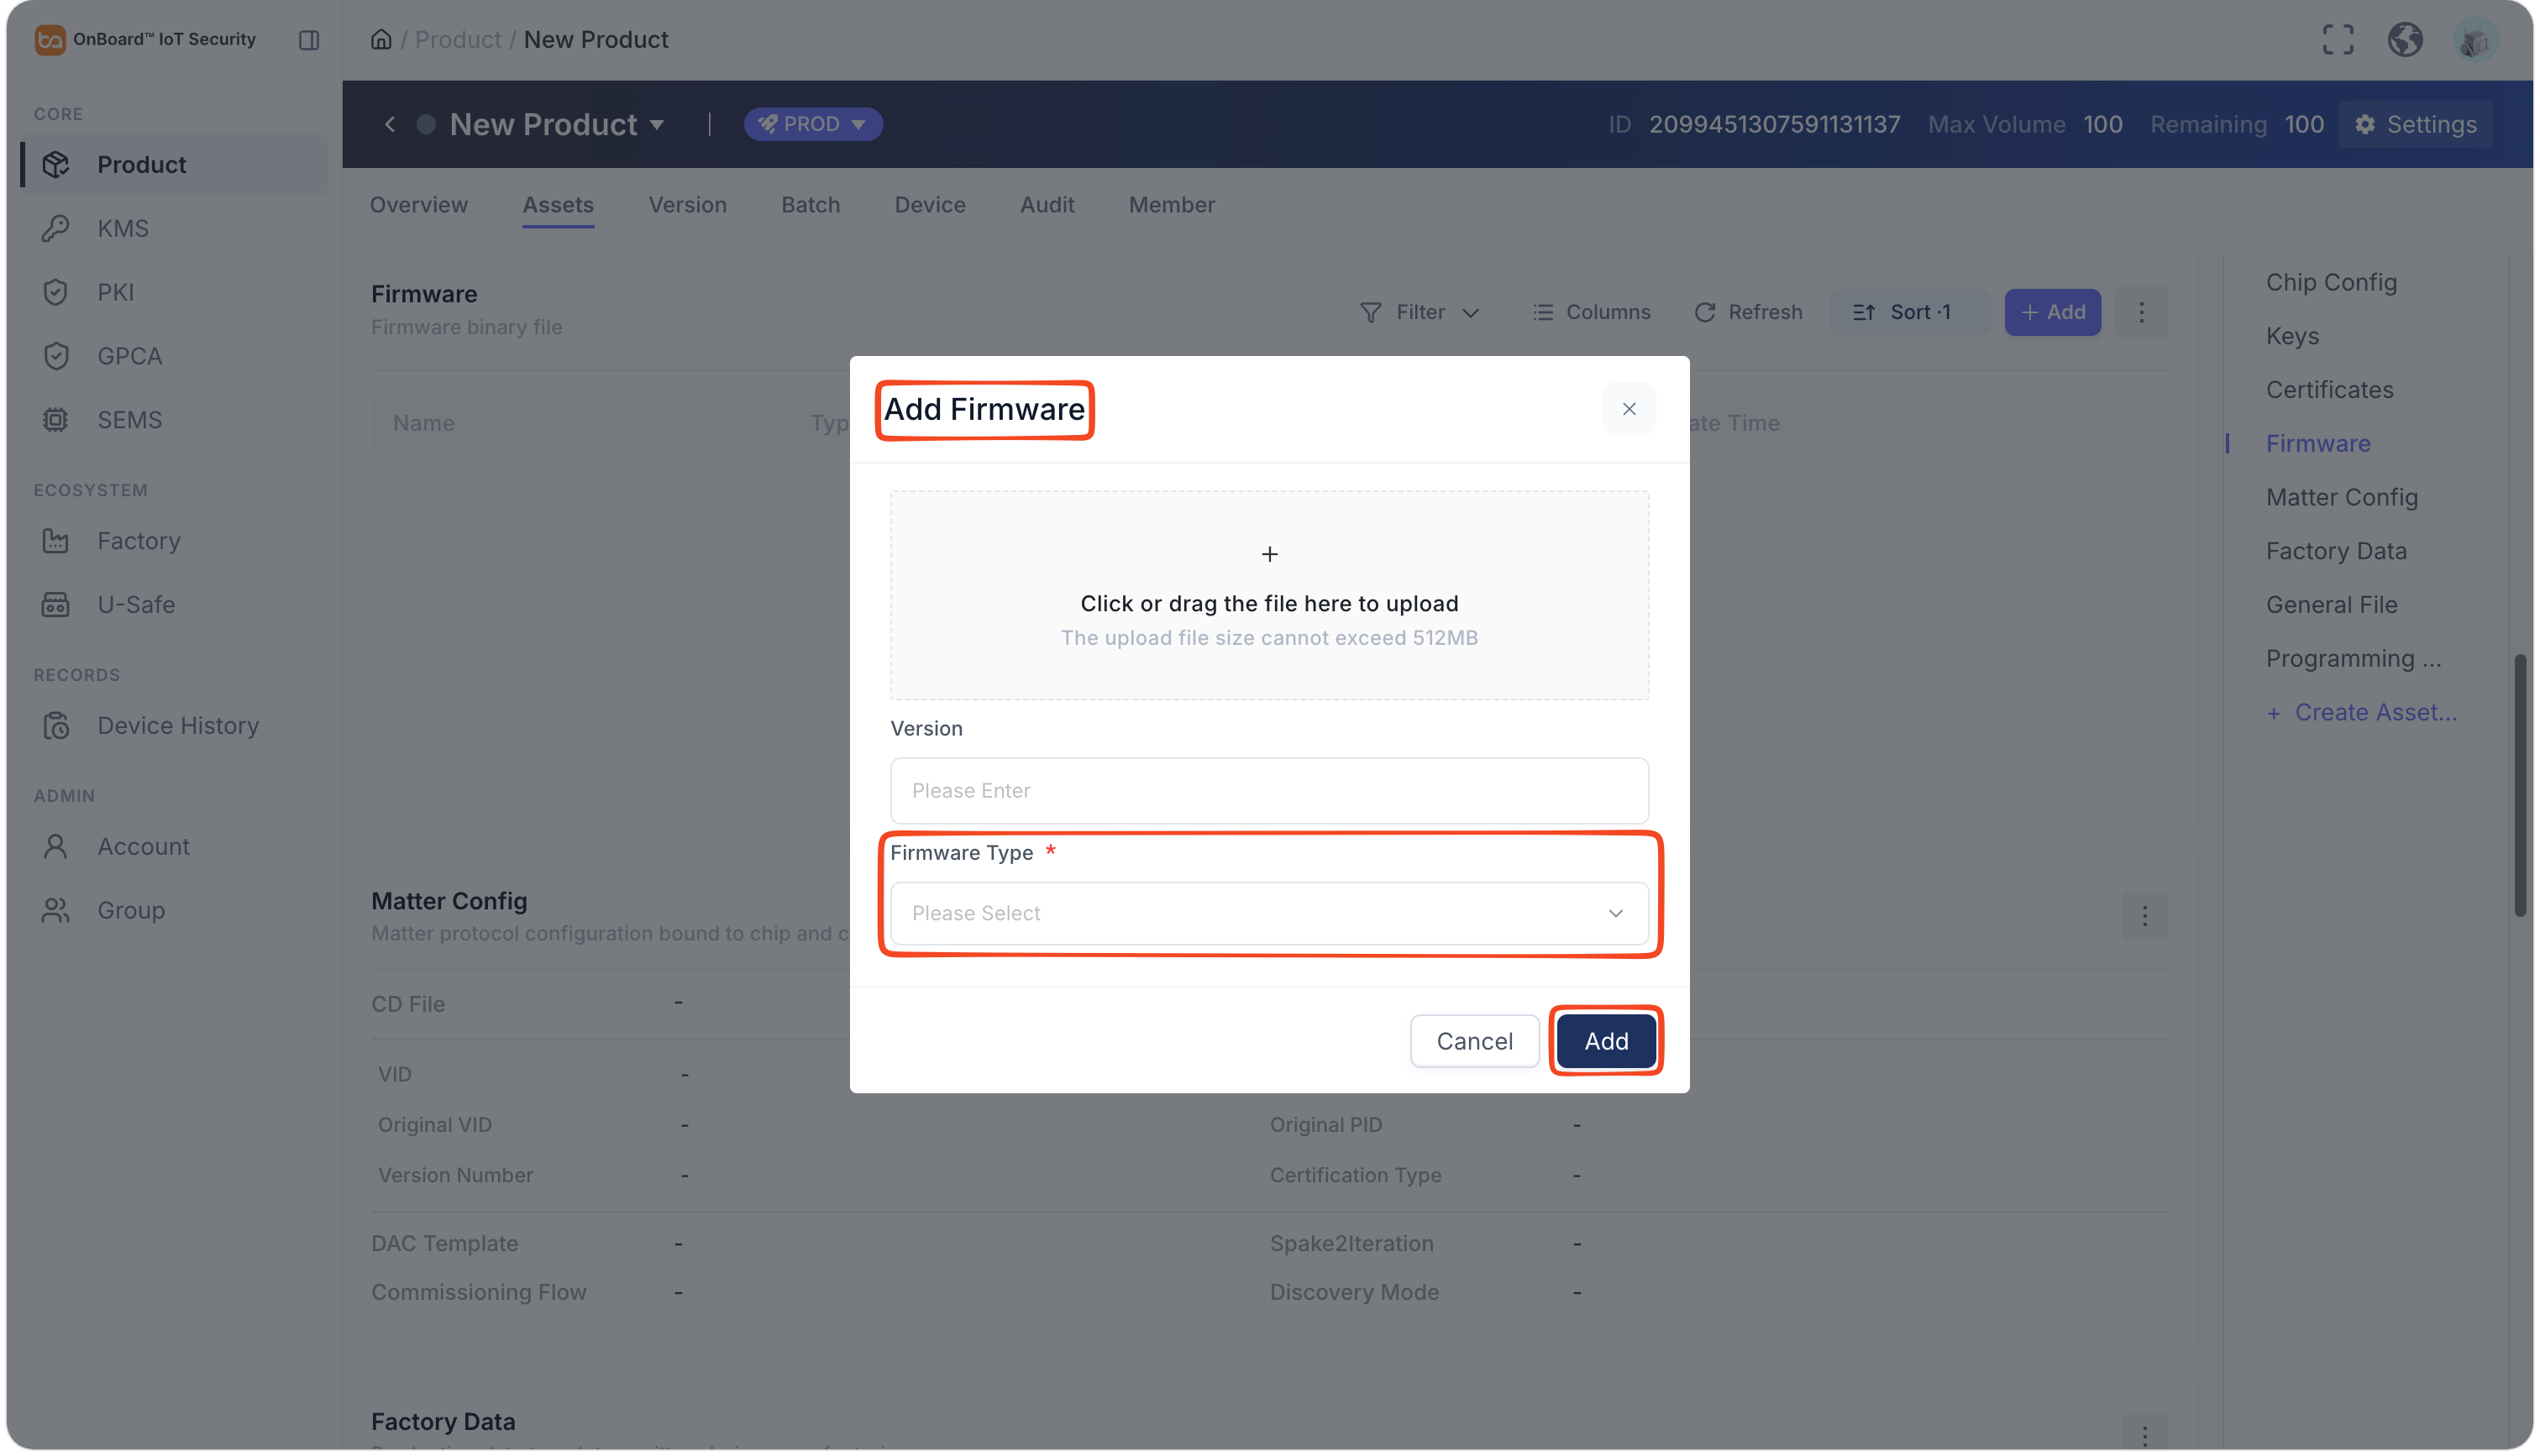
Description of Firmware information:
Information Mandatory Description Upload File Yes Upload files by selecting the local firmware files. The maximum supported file size is 512 MB.
Note: When uploading a file in .bin format, you need to specify the start address of the firmware.Version No Indicate the firmware version. Firmware Type Yes Two types of firmware are supported:
- Application: Used to implement device functionality, relying on the environment provided by the Bootloader.
- Bootloader: Used for hardware initialization, firmware loading, and updates.
-
Click Add to complete the configuration of the Firmware.
Matter Config (required)
Matter Config (required)
Matter Config allows you to select and configure settings related to the Matter protocol.
In this step, you need to select and upload the CD file and select the DAC template added in the Certificates configuration. Please ensure that the VID (Vendor ID) and PID (Product ID) in the CD file match those in the DAC template.
You can replace the CD file with another one as needed when creating a version later.
The CD files uploaded during configuration can be downloaded by users within the same tenant.
-
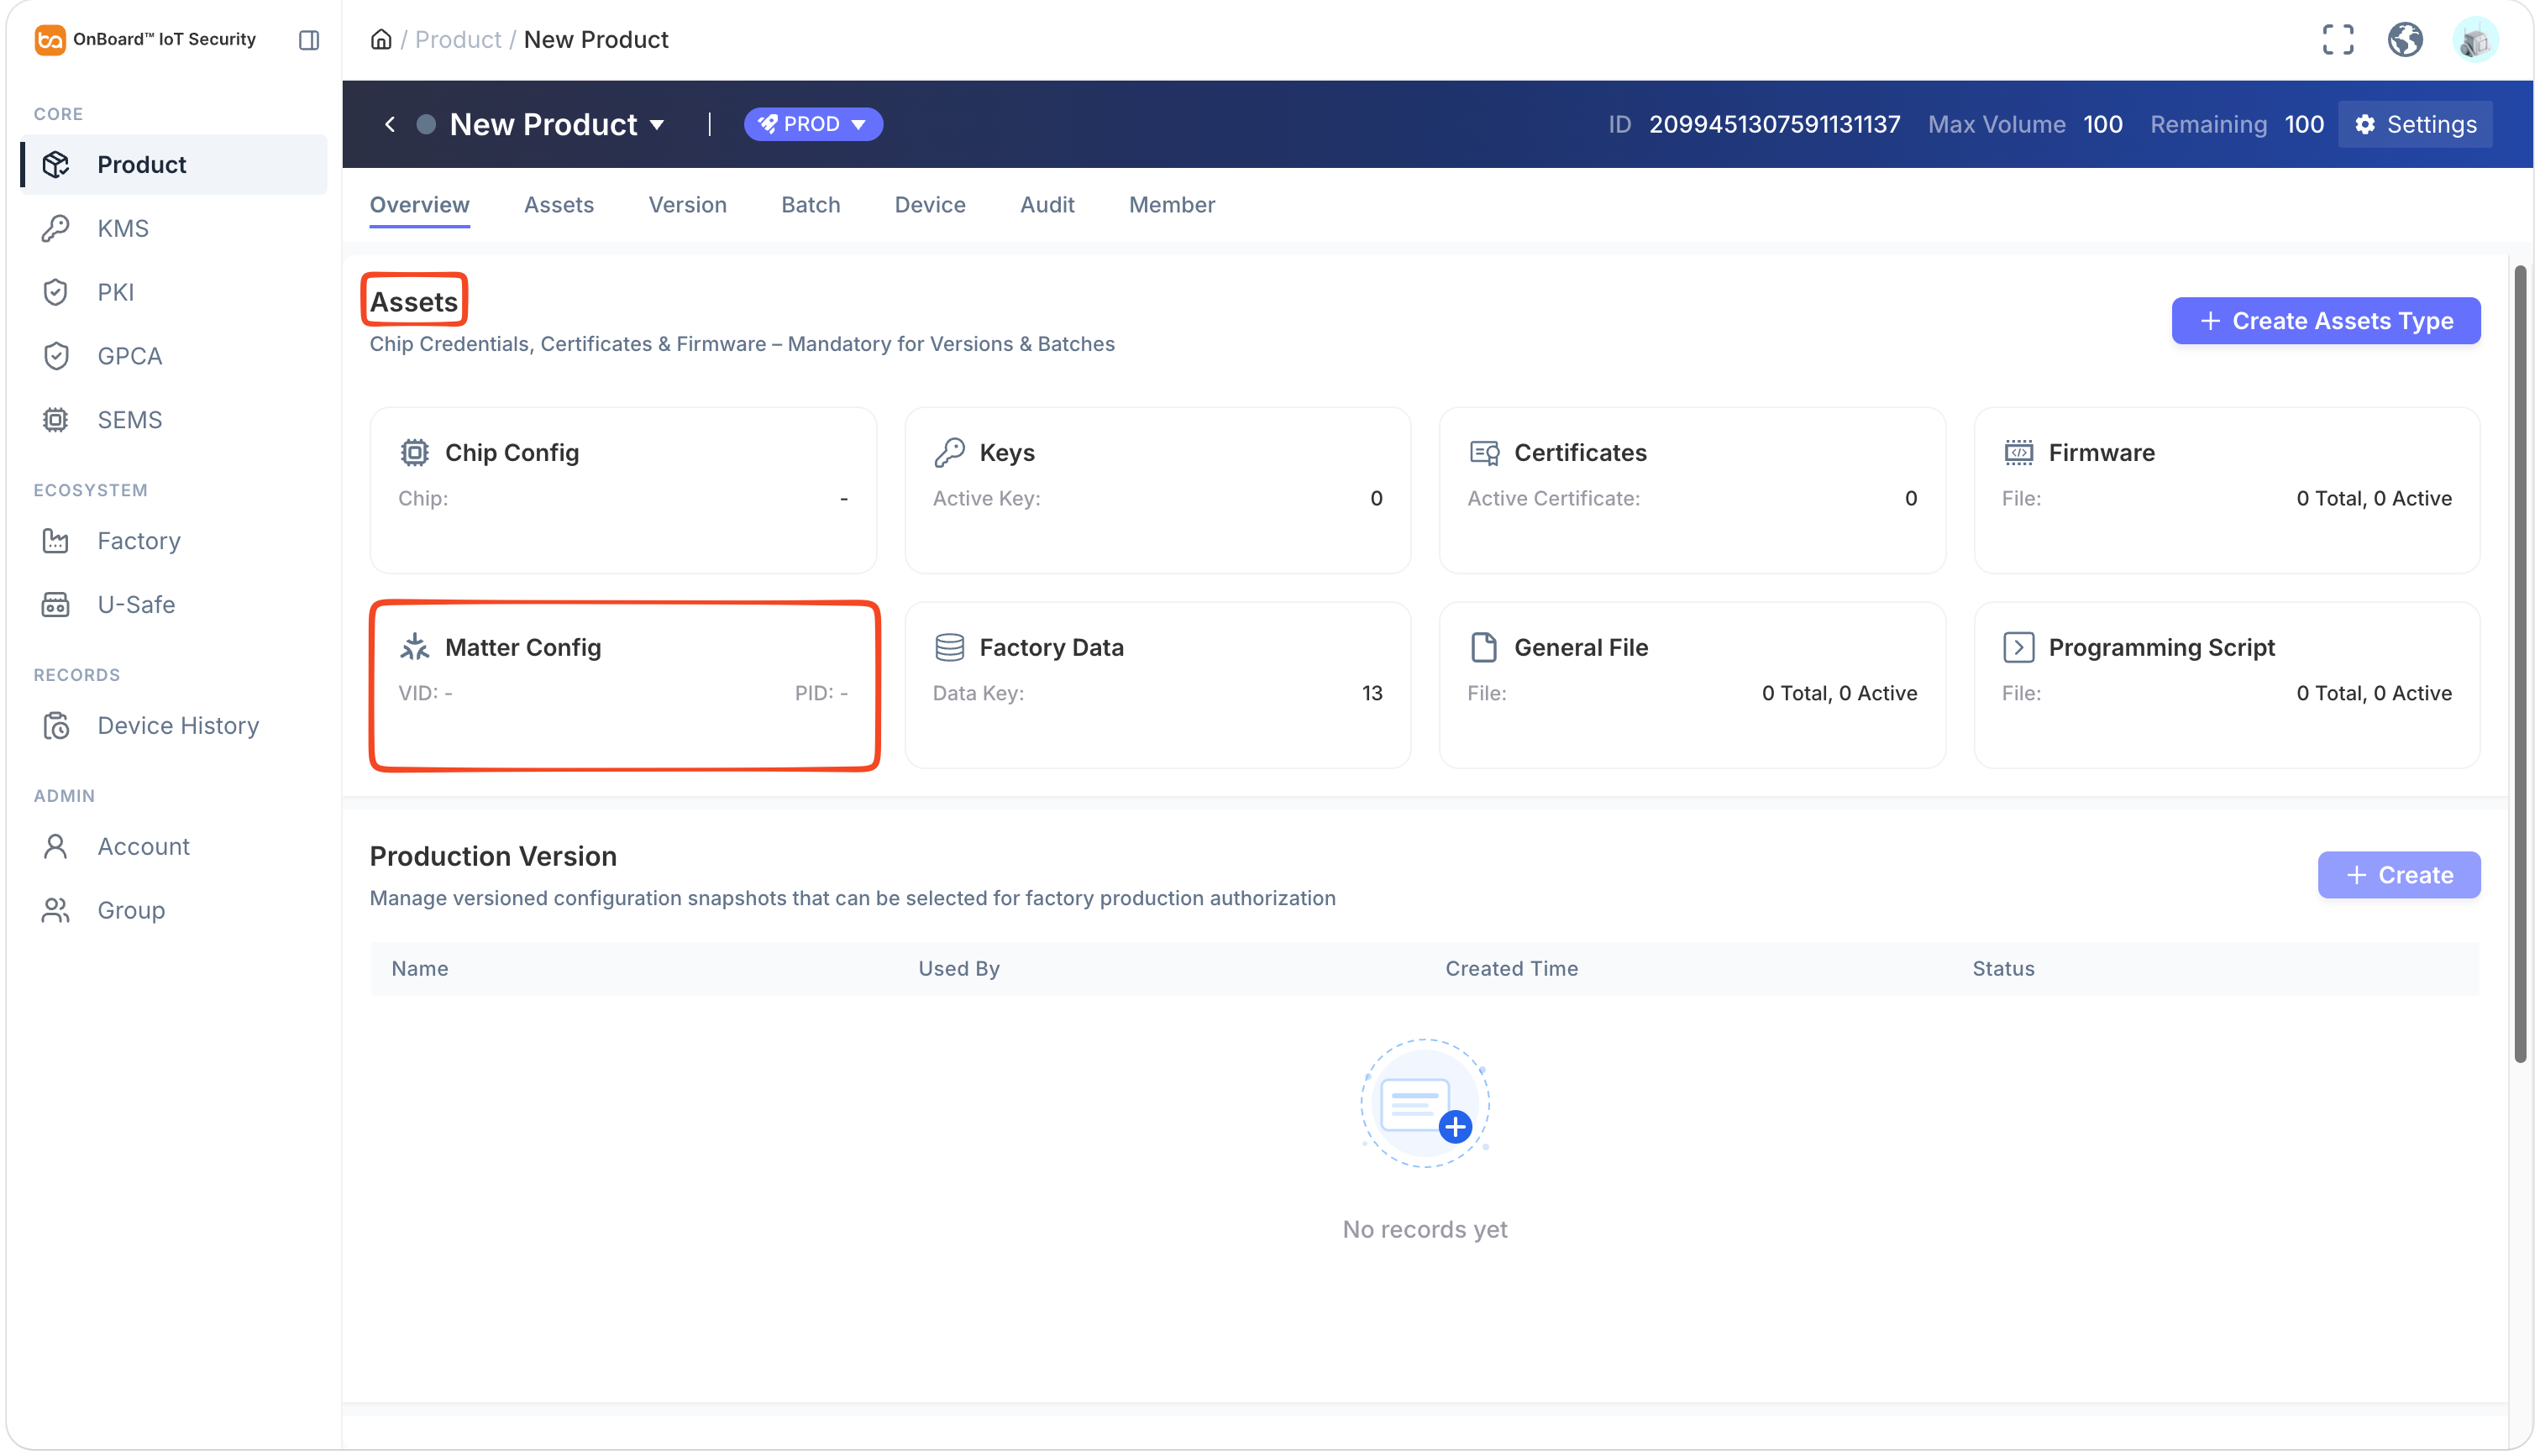
On the product page, select Matter Config in the Assets section to navigate to the Assets tab.
-
In the Matter Config section, click the Options
icon and then select Edit. Select and enter the Matter Config information.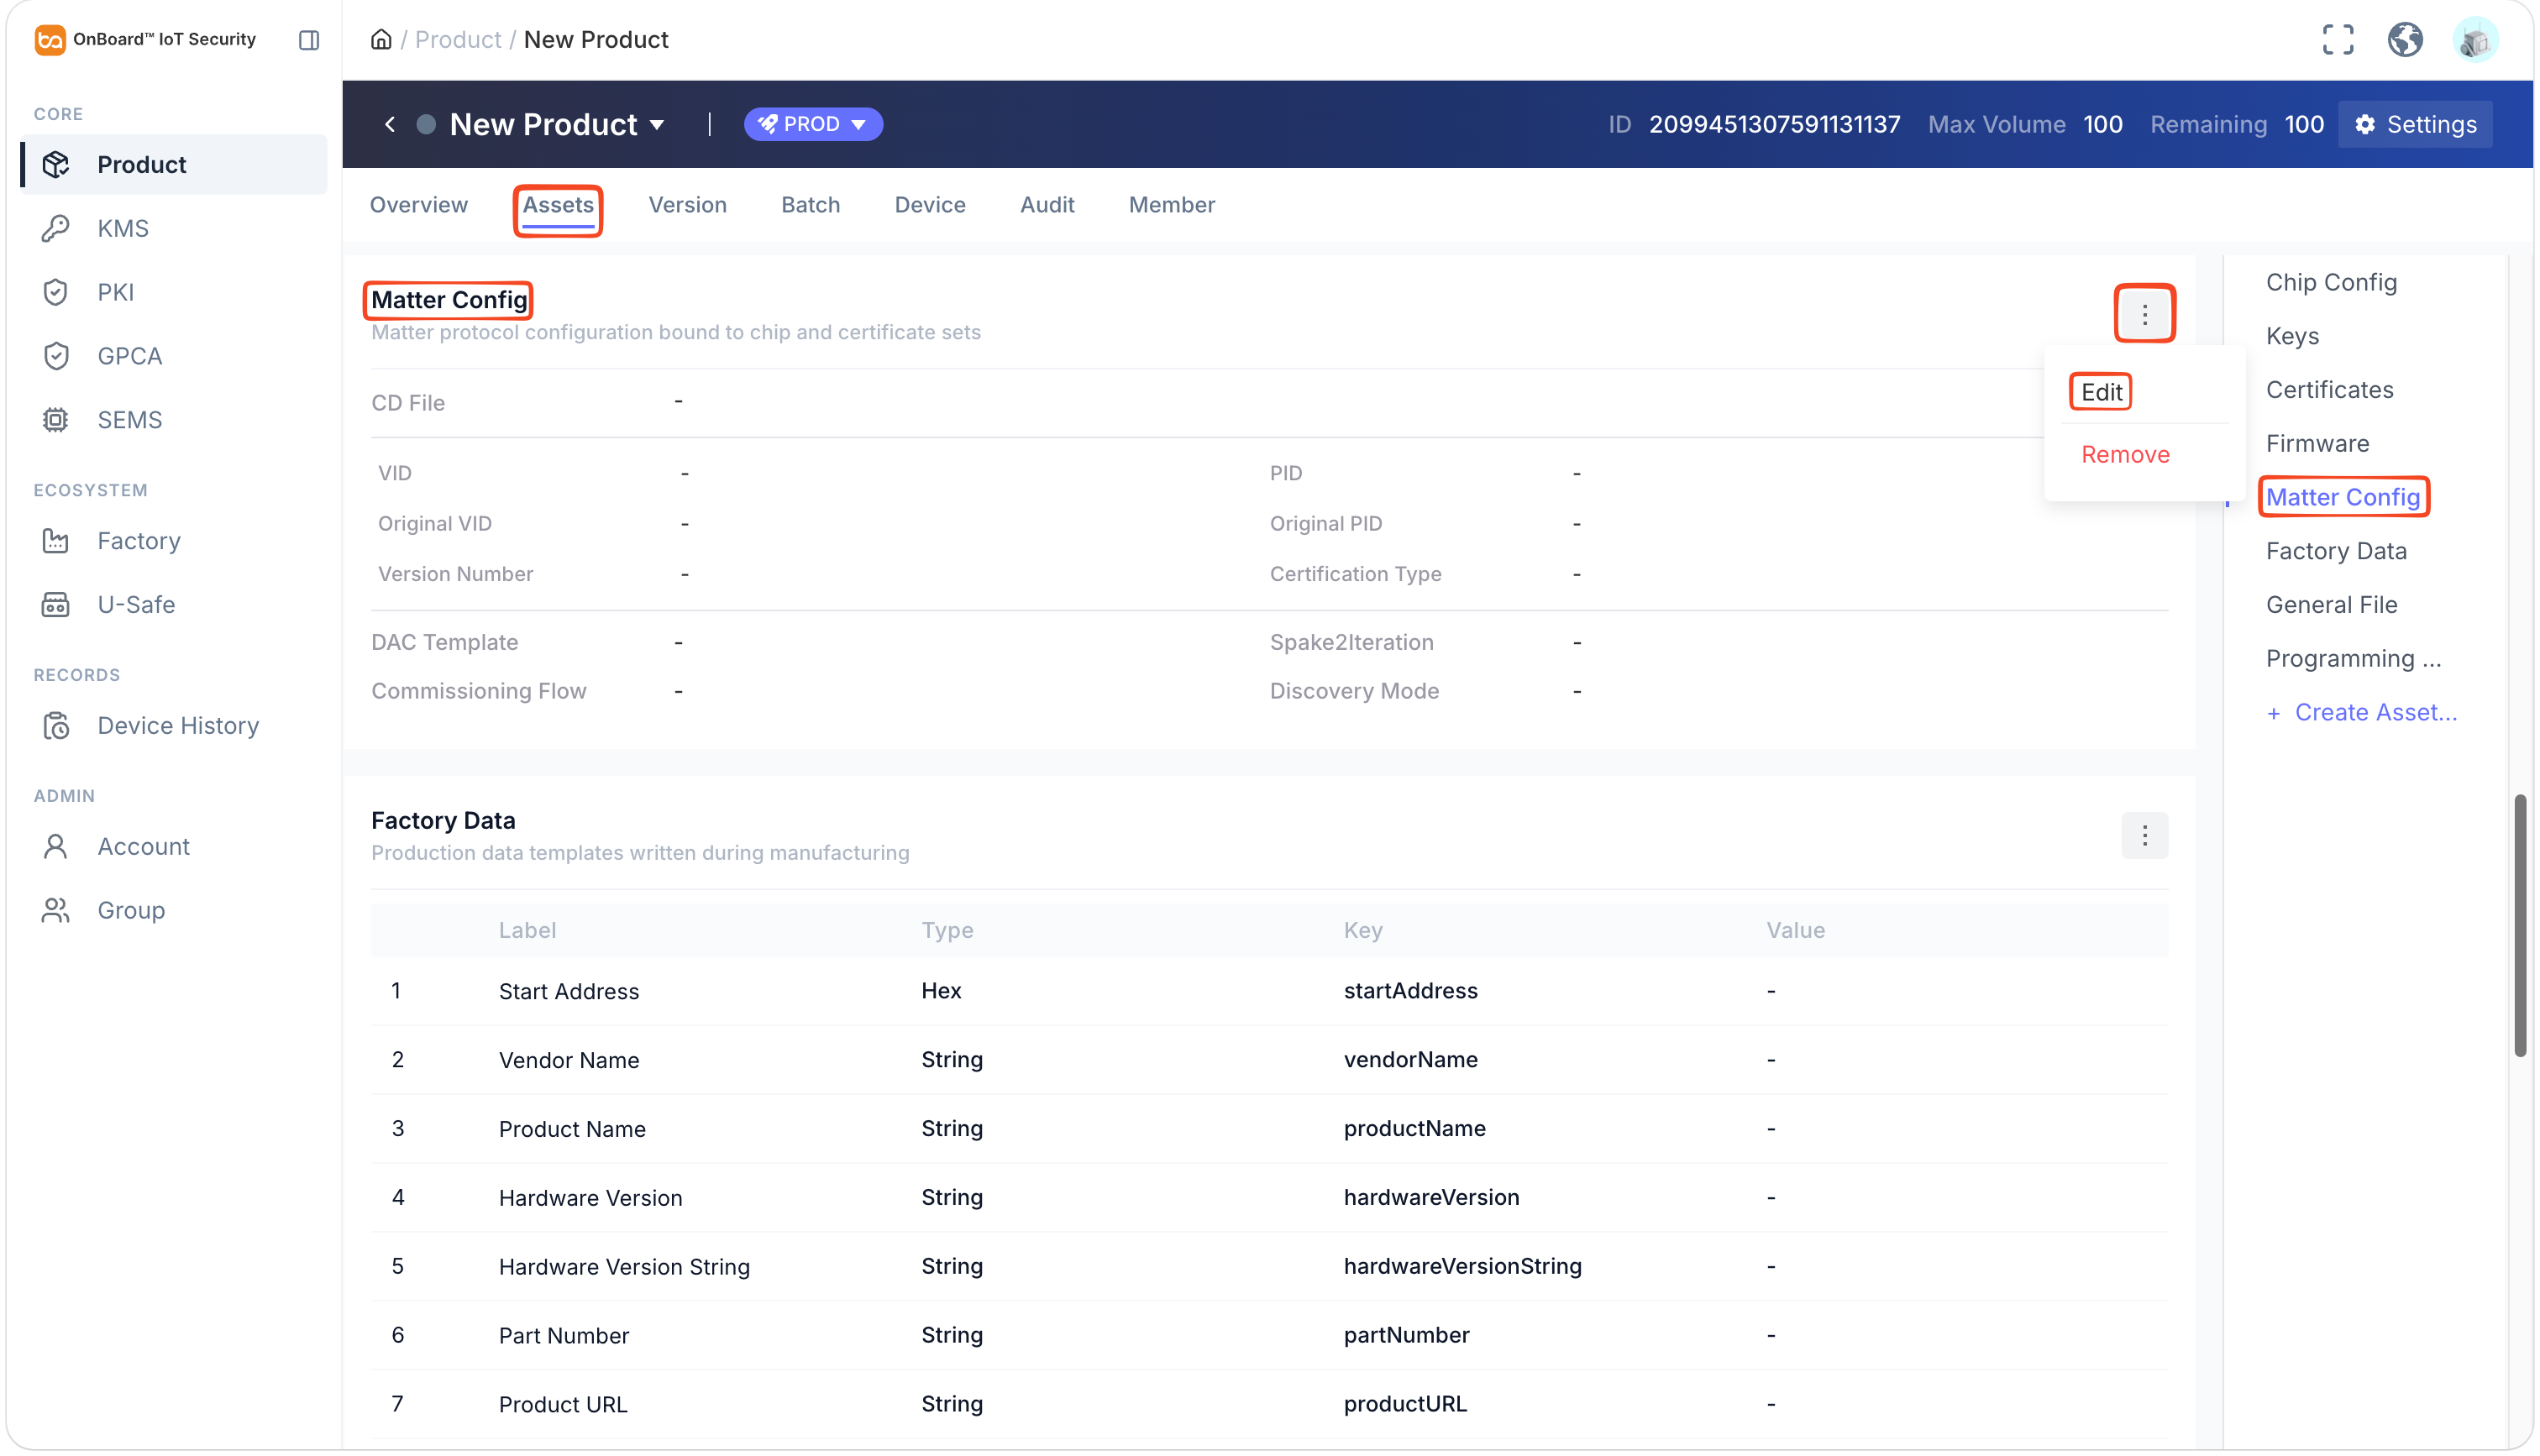
Description of Matter Config information:
Information Mandatory Description CD File Yes Notes for uploading files:
- The VID and PID in the CD file must match those in the DAC template.
- If the CD file contains multiple PIDs, at least one must match the PID in the DAC template.
Note: Only .der format CD files are supported.
DAC Template Yes Select the DAC template configured in Certificates. The VID and PID in the DAC template must match those in the CD file. Refer to DAC Template. PID Yes After uploading the CD file, the corresponding PID will be displayed. Commissioning Flow Yes The device commissioning flow, adaptable to different scenarios:
- Standard Commissioning Flow
- User-Intent Commissioning Flow
- Custom Commissioning Flow
Spake2Iteration Yes A parameter of the SPAKE2+ protocol used during Matter commissioning, ensuring the security of the commissioning process. Discovery Mode Yes Supported discovery modes:
- BLE: Bluetooth Low Energy.
- On IP network: Discovery through an IP network.
-
Click Save to complete the setting of the Matter Config.
Factory Data (required)
Factory Data (required)
Factory Data allows you to configure factory-related information and supports all fields required by the Matter specification. You can change the Factory Data as needed when creating a version later.
The files uploaded during configuration can be downloaded by users within the same tenant.
-
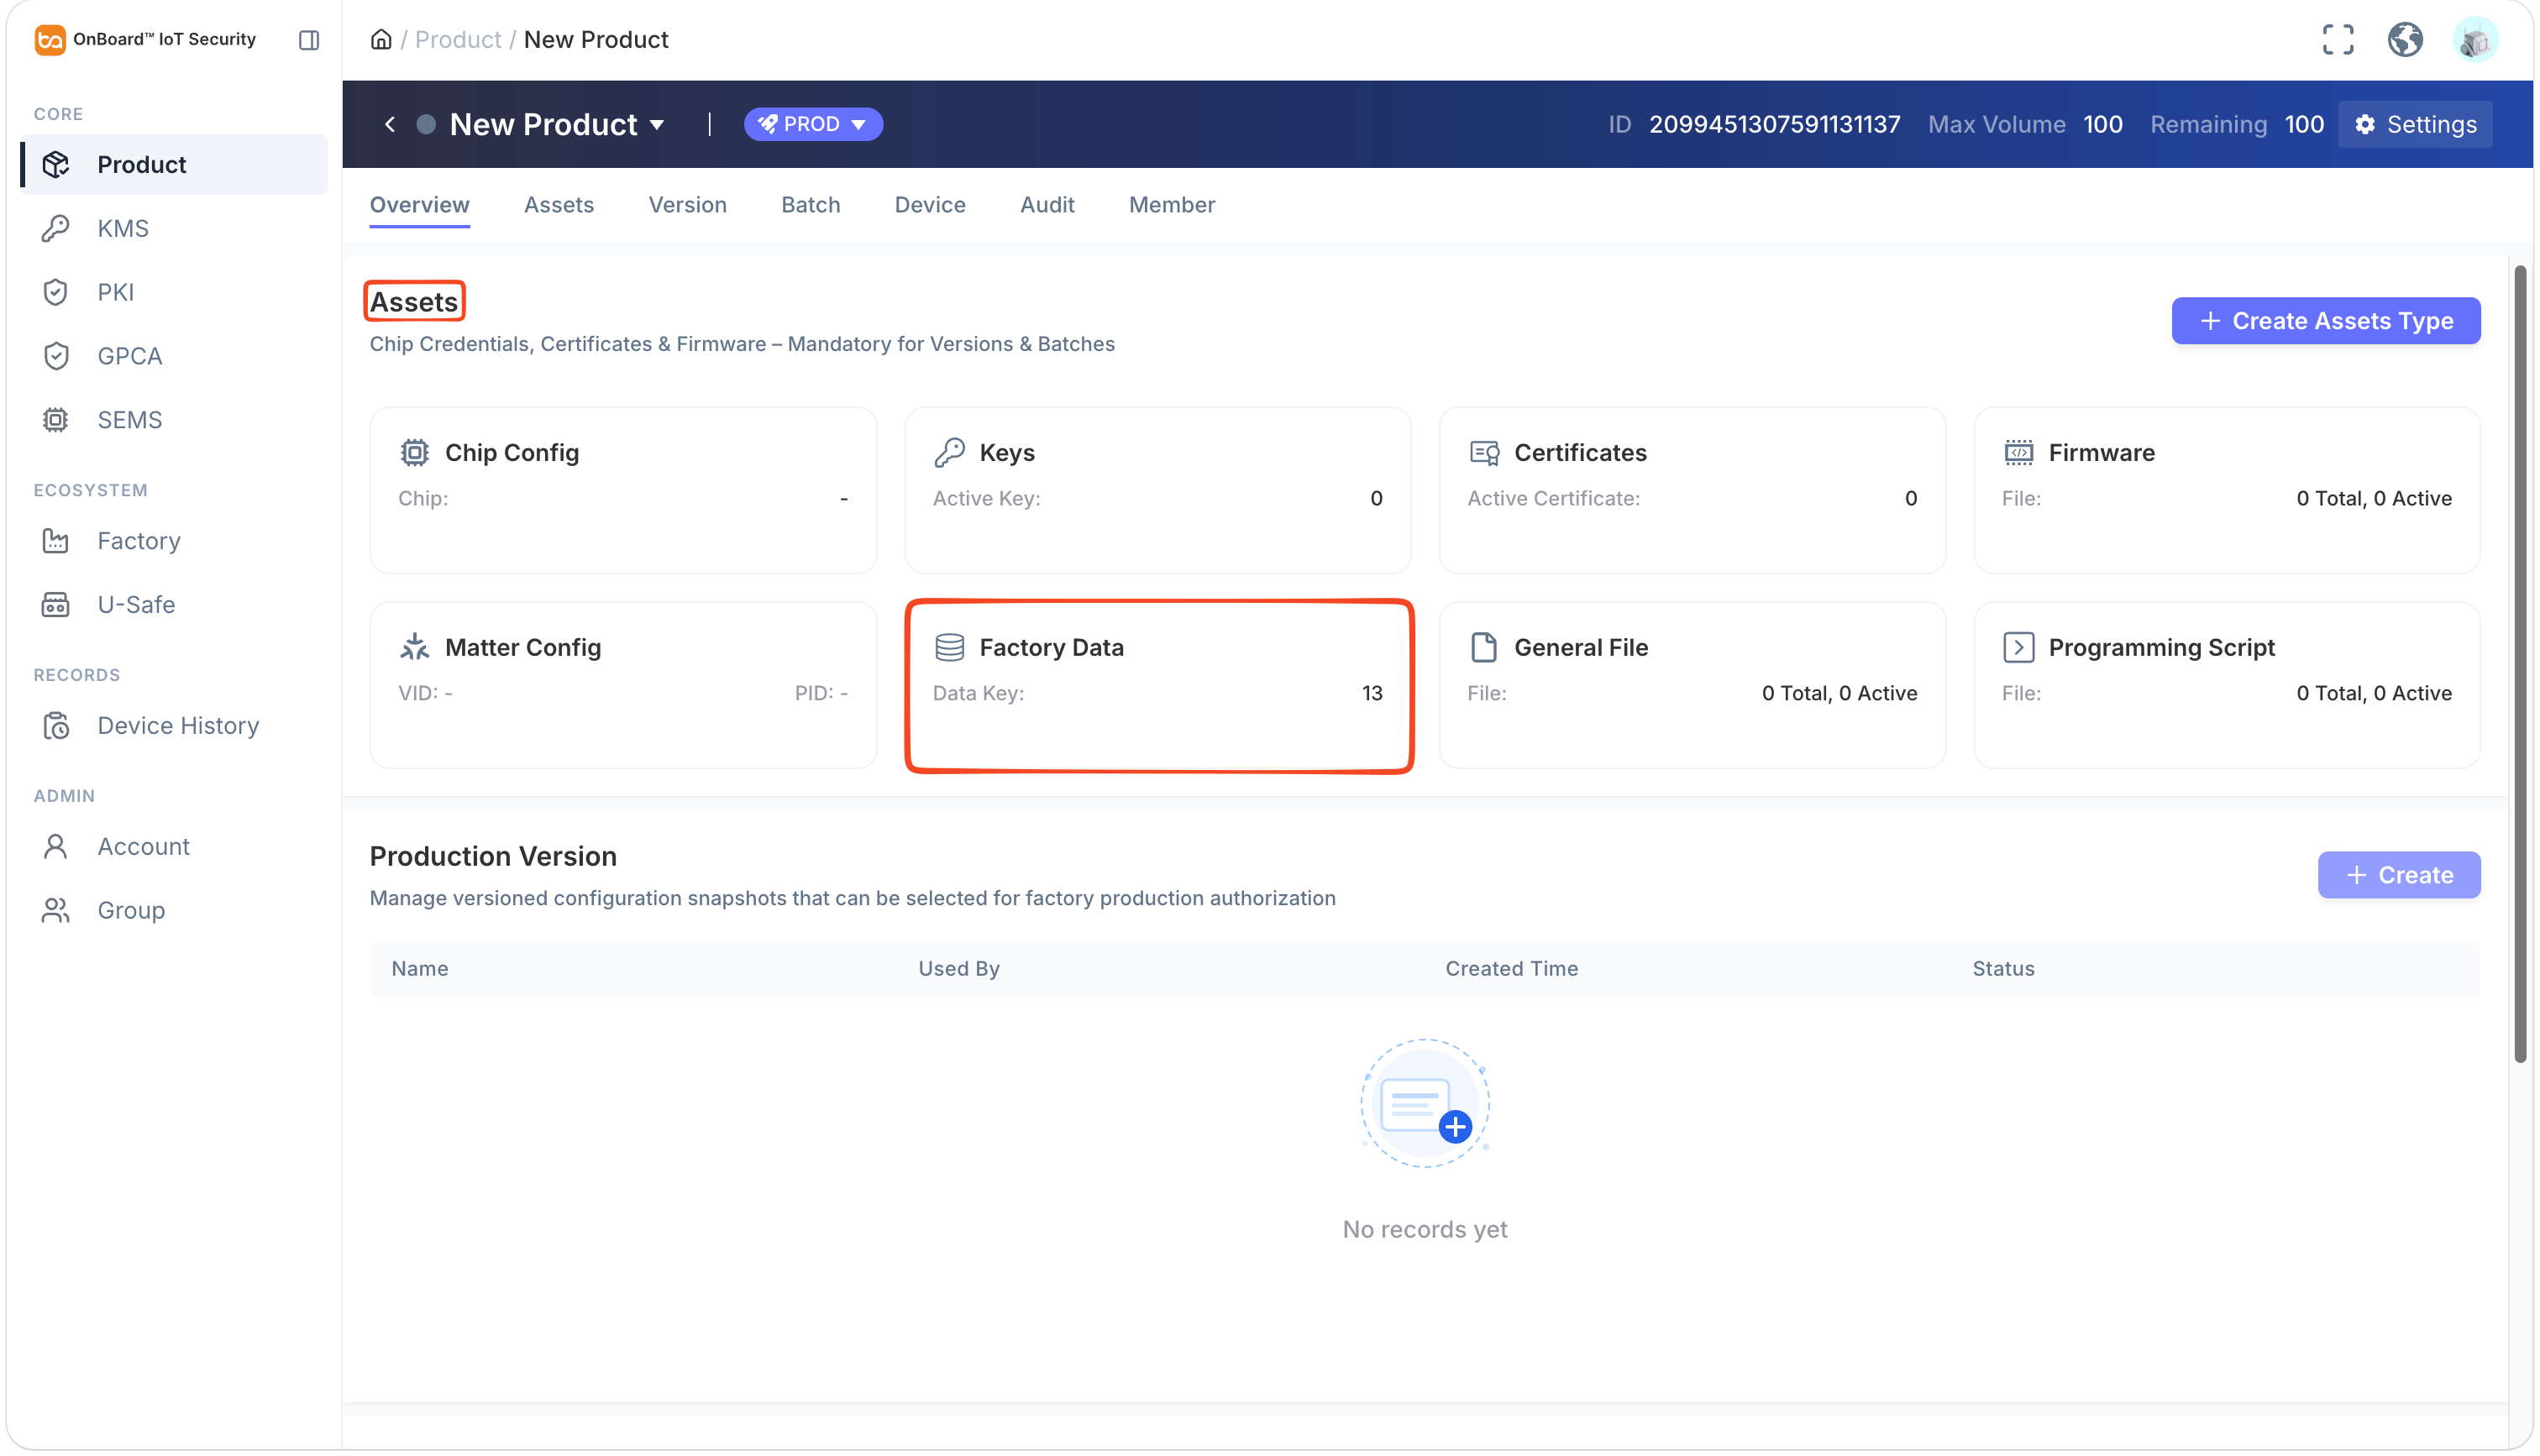
On the product page, select Factory Data in the Assets section to navigate to the Assets tab.
-
In the Factory Data section, click the Options
icon and then select Edit. Enter the Factory Data information of the product (values can be left empty).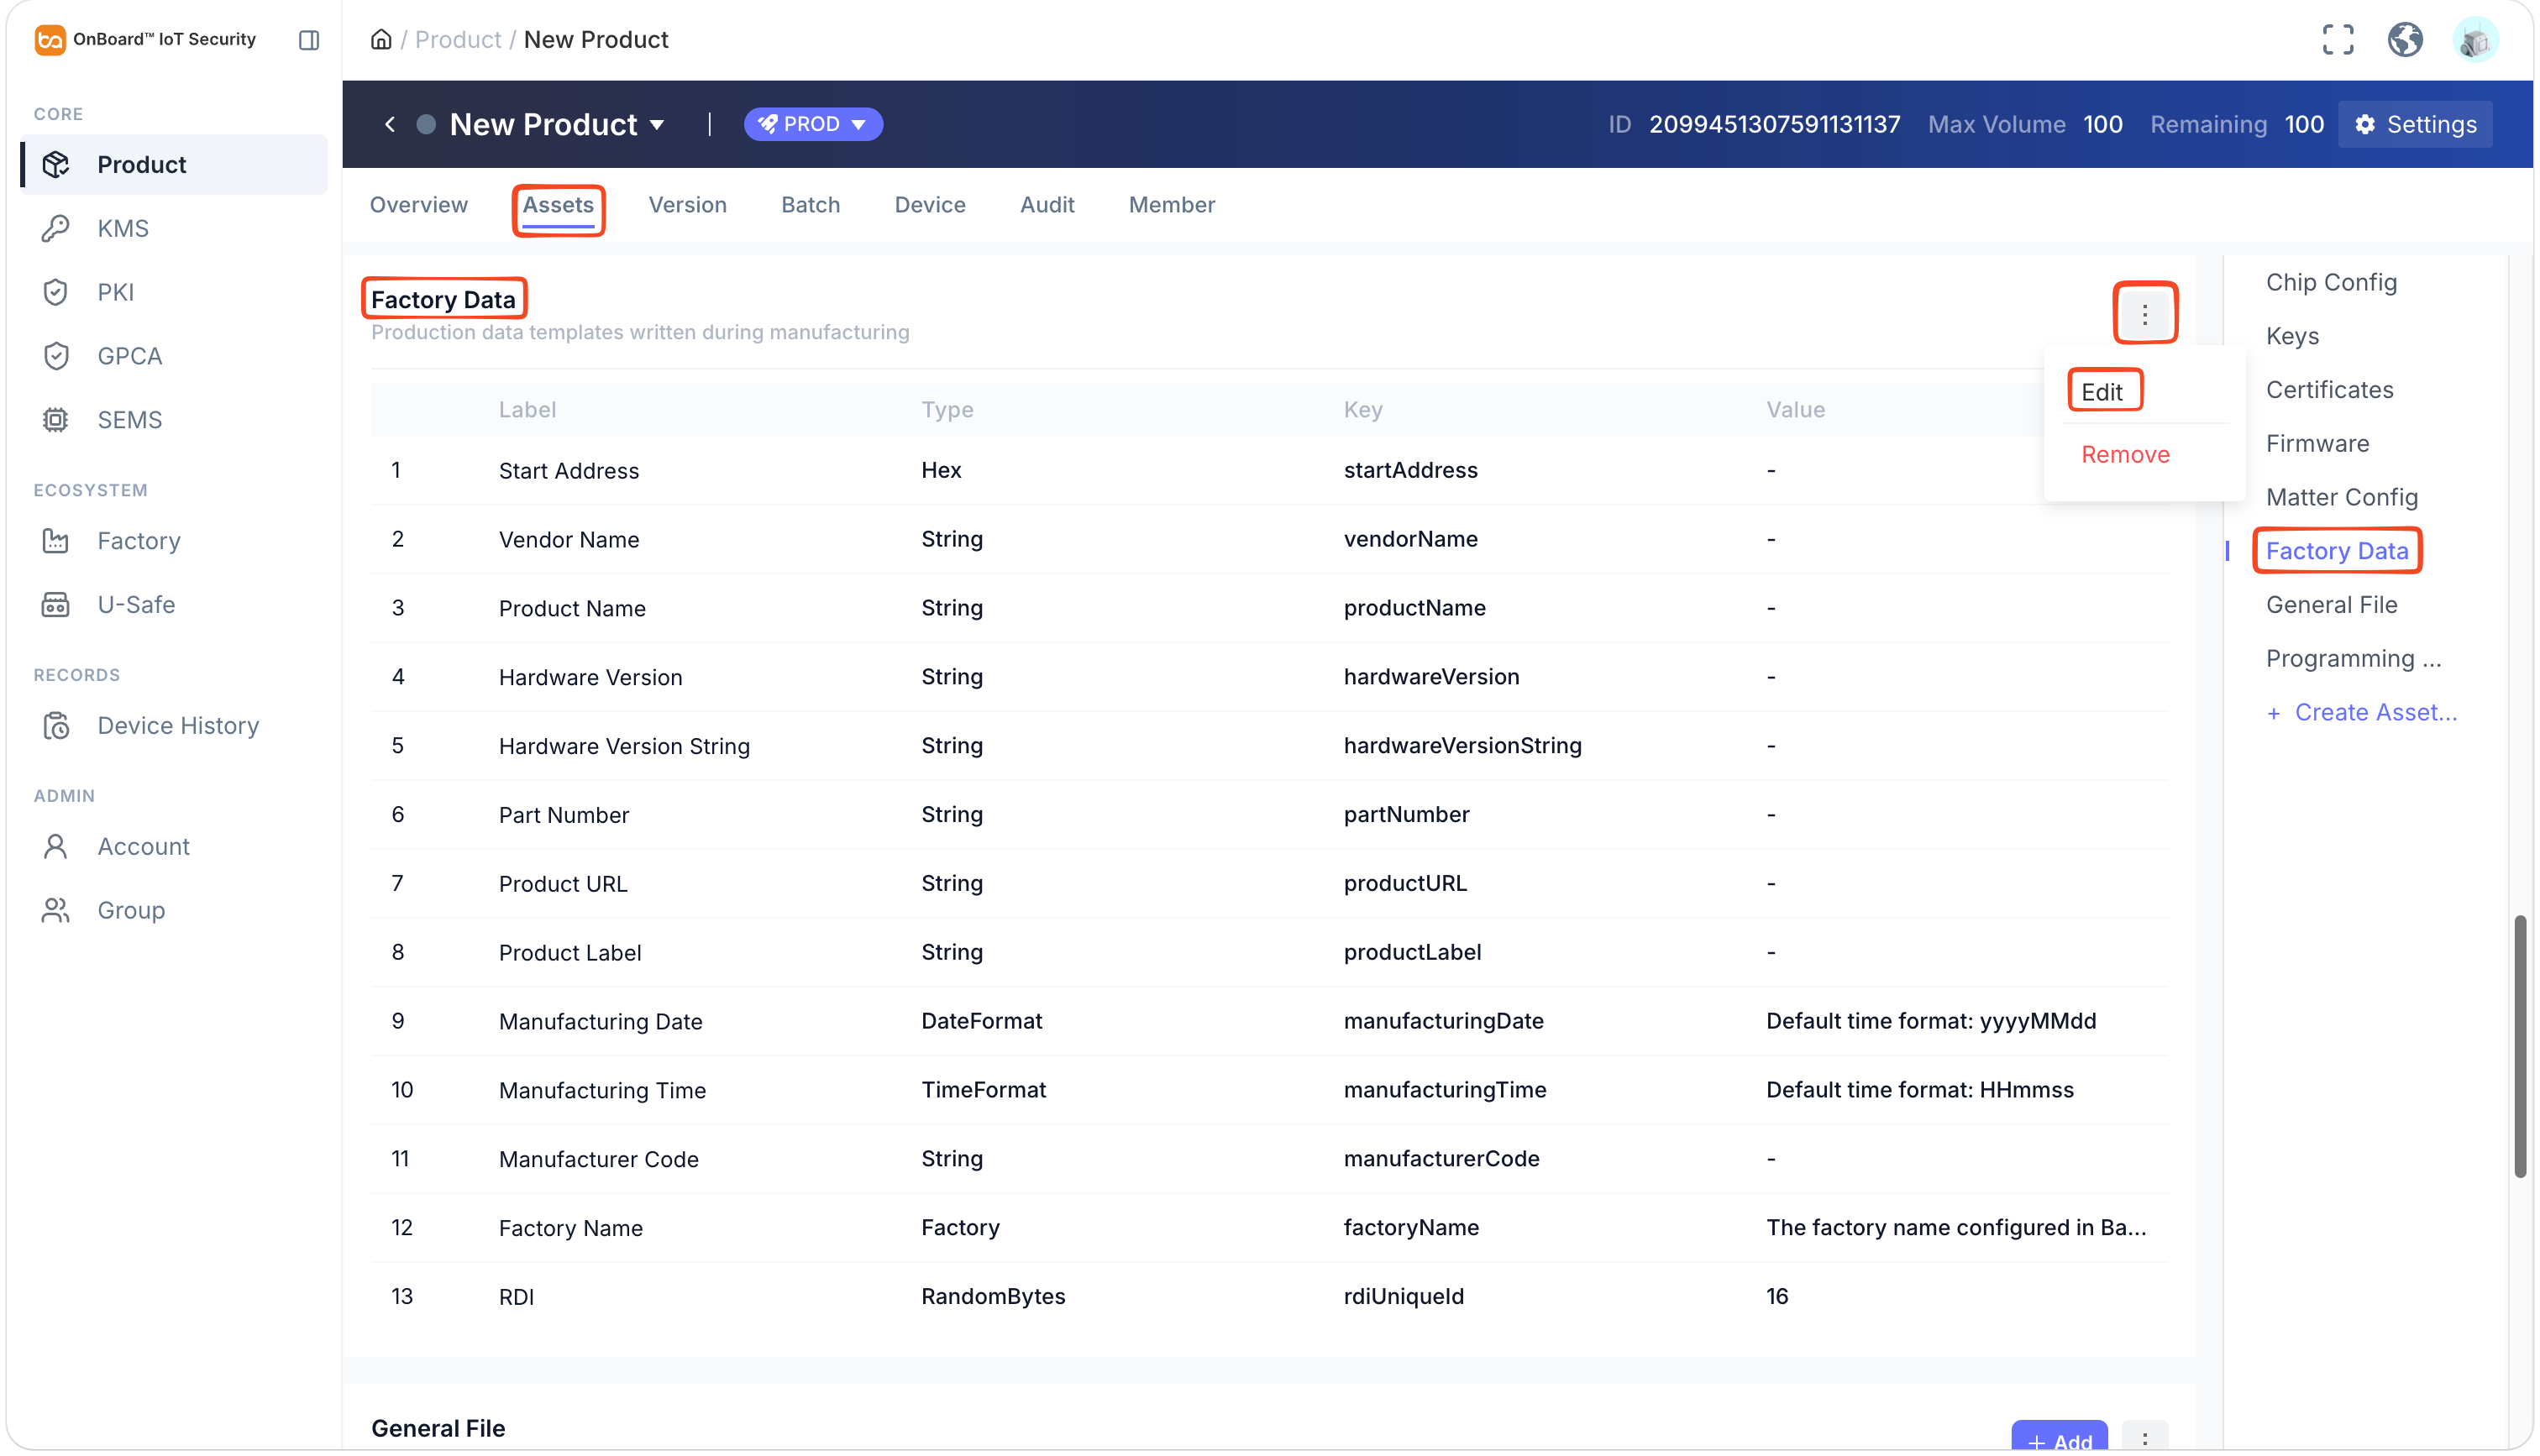 note
If the checkbox in the Mandatory column of a Factory Data item is selected, members must enter a value for that item when creating a version.
Description of Factory Data information:
tipThe supported data types include: String, Number, Hex, Factory, DateFormat, TimeFormat, File, and RandomBytes.
Information Type Description Start Address Hex Start address. Vendor Name String Vendor name. Product Name String Product name. Hardware Version String Hardware version. Hardware Version String String Hardware version information presented as a string, which may include a more detailed version description. For example, HW_V1.0_20240101. Part Number String Part number. Product URL String Product link. Product Label String Product label. Manufacturing Date DateFormat Manufacturing date, default format is yyyyMMdd. Manufacturing Time TimeFormat Manufacturing time, default format is HHmmss. Manufacturing Code String Manufacturing code. Factory Name Factory The factory name configured in batch. -
Click Save to complete the configuration of the Factory Data.
General File (optional)
General File (optional)
General File allows you to upload other files required for version and batch creation (excluding firmware and programming scripts). Files in any format are supported.
The uploaded files can be selected when creating a version or batch.
The files uploaded during configuration can be downloaded by users within the same tenant.
-
On the product page, select General File in the Assets section to navigate to the Assets tab.
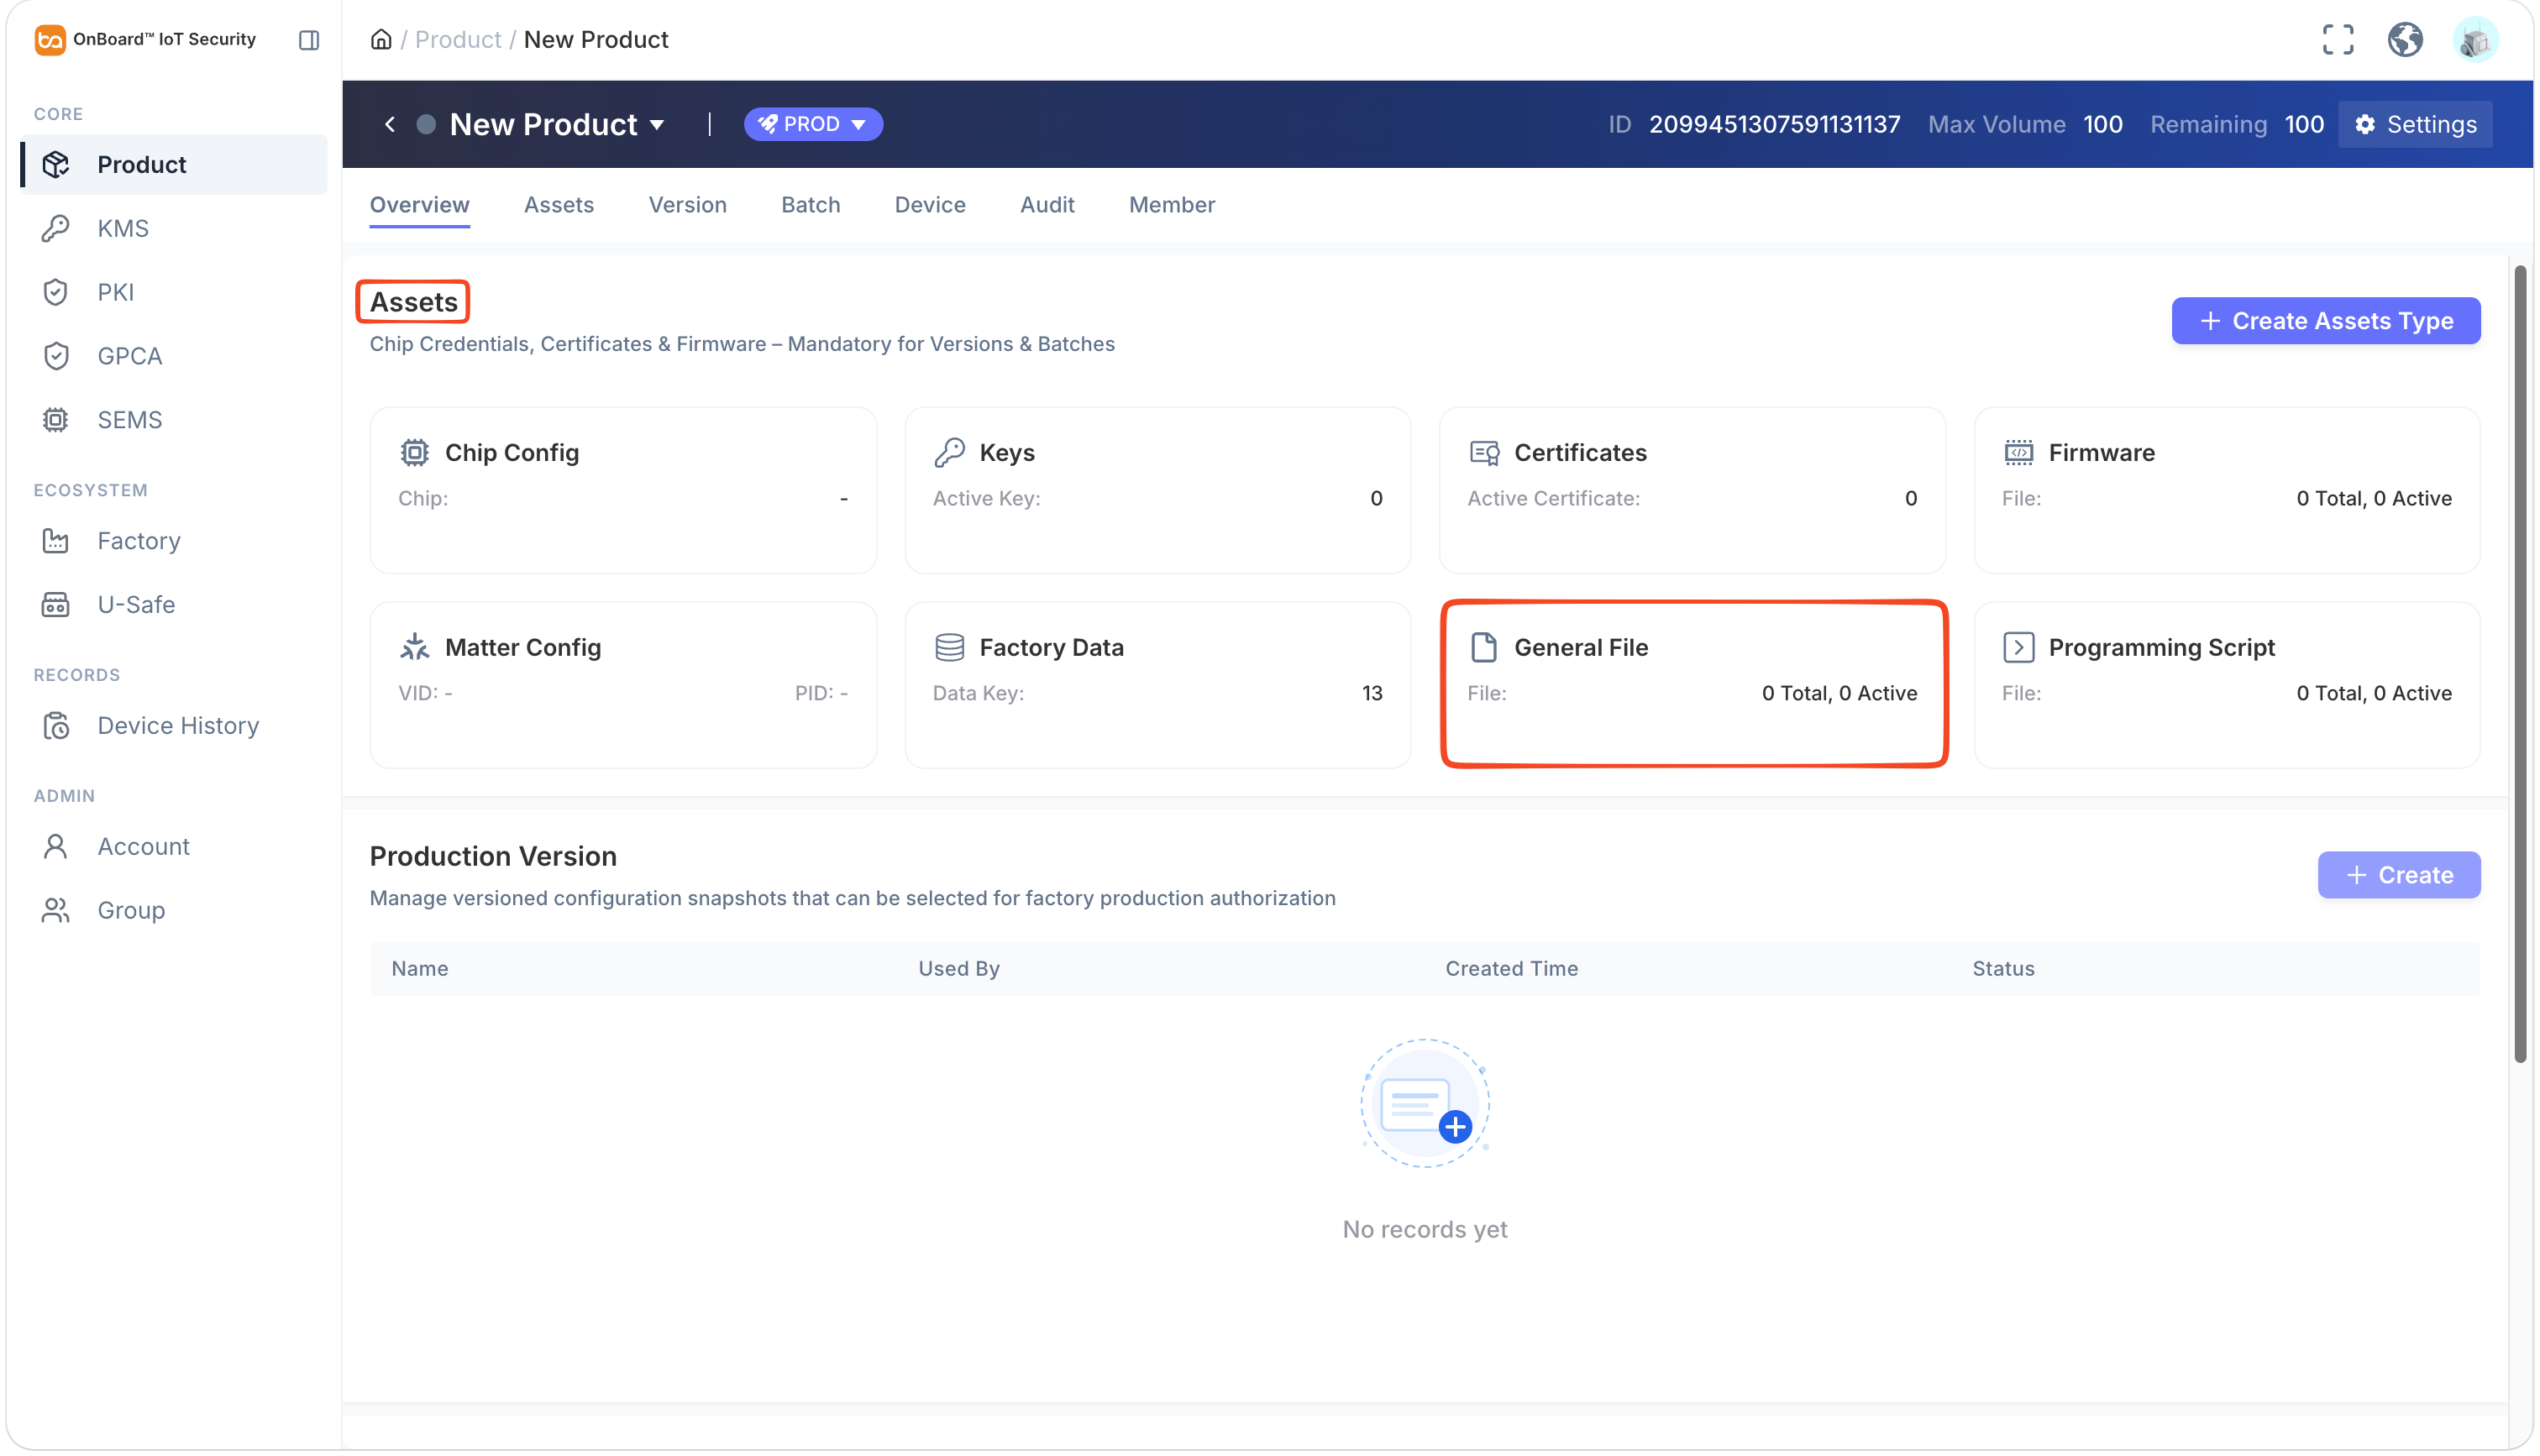
-
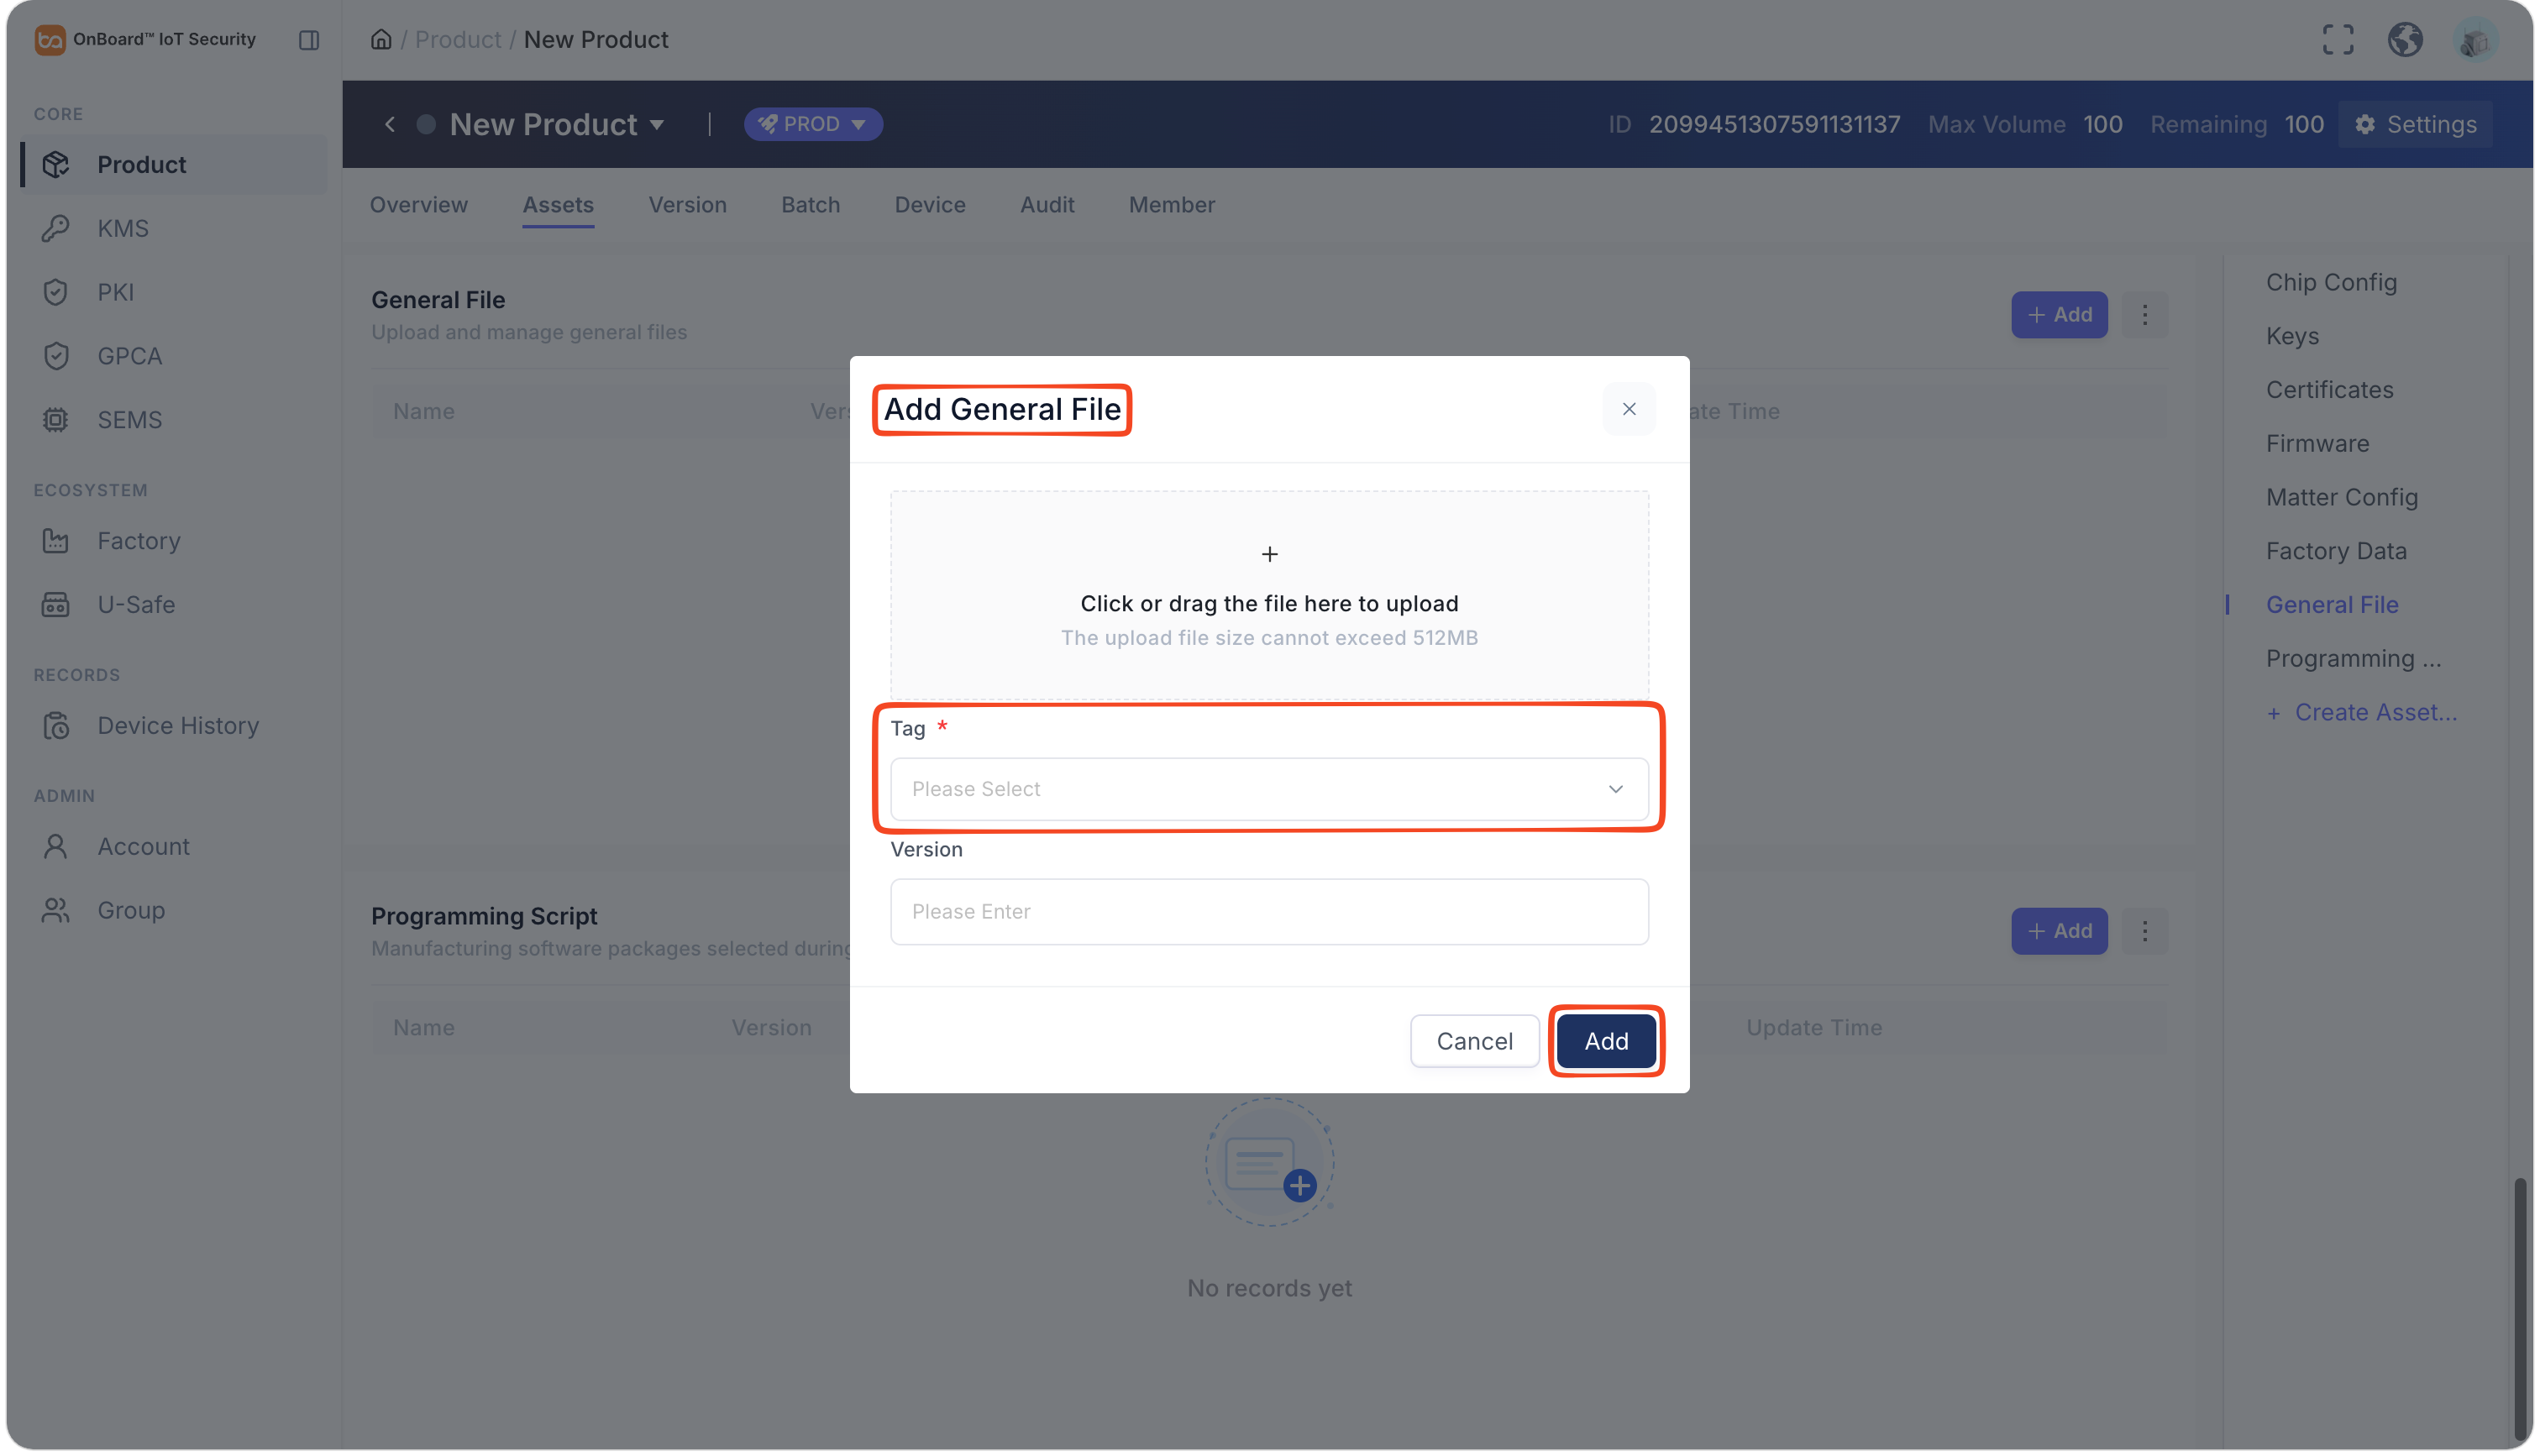
On the General File page, click Add.
-
In the Add General File window, select and enter the relevant information.
Description of General File information:
Information Mandatory Description Upload File Yes Upload files by selecting the local files. The maximum supported file size is 512 MB. Tag Yes Assign tags to files. During later programming, the programming script can retrieve and use the corresponding files through their tags.
Note: A file can be assigned multiple unique tags. Meanwhile, the same tag can also be assigned to multiple files. You can add new tags or select from existing tags.
Version No Identify the file version and use it to track file changes. -
Click Add to complete the configuration of the General File.
Programming Script (optional)
Programming Script (optional)
Files in the Programming Script section will be used for batch creation.
Programming Script allows you to upload script files used for device programming (any script format is supported). You can select and upload the programming script as needed. If it is not required at the moment, you can also select it for a specific batch later in the Programming Station client.
The files uploaded during configuration can be downloaded by users within the same tenant.
-
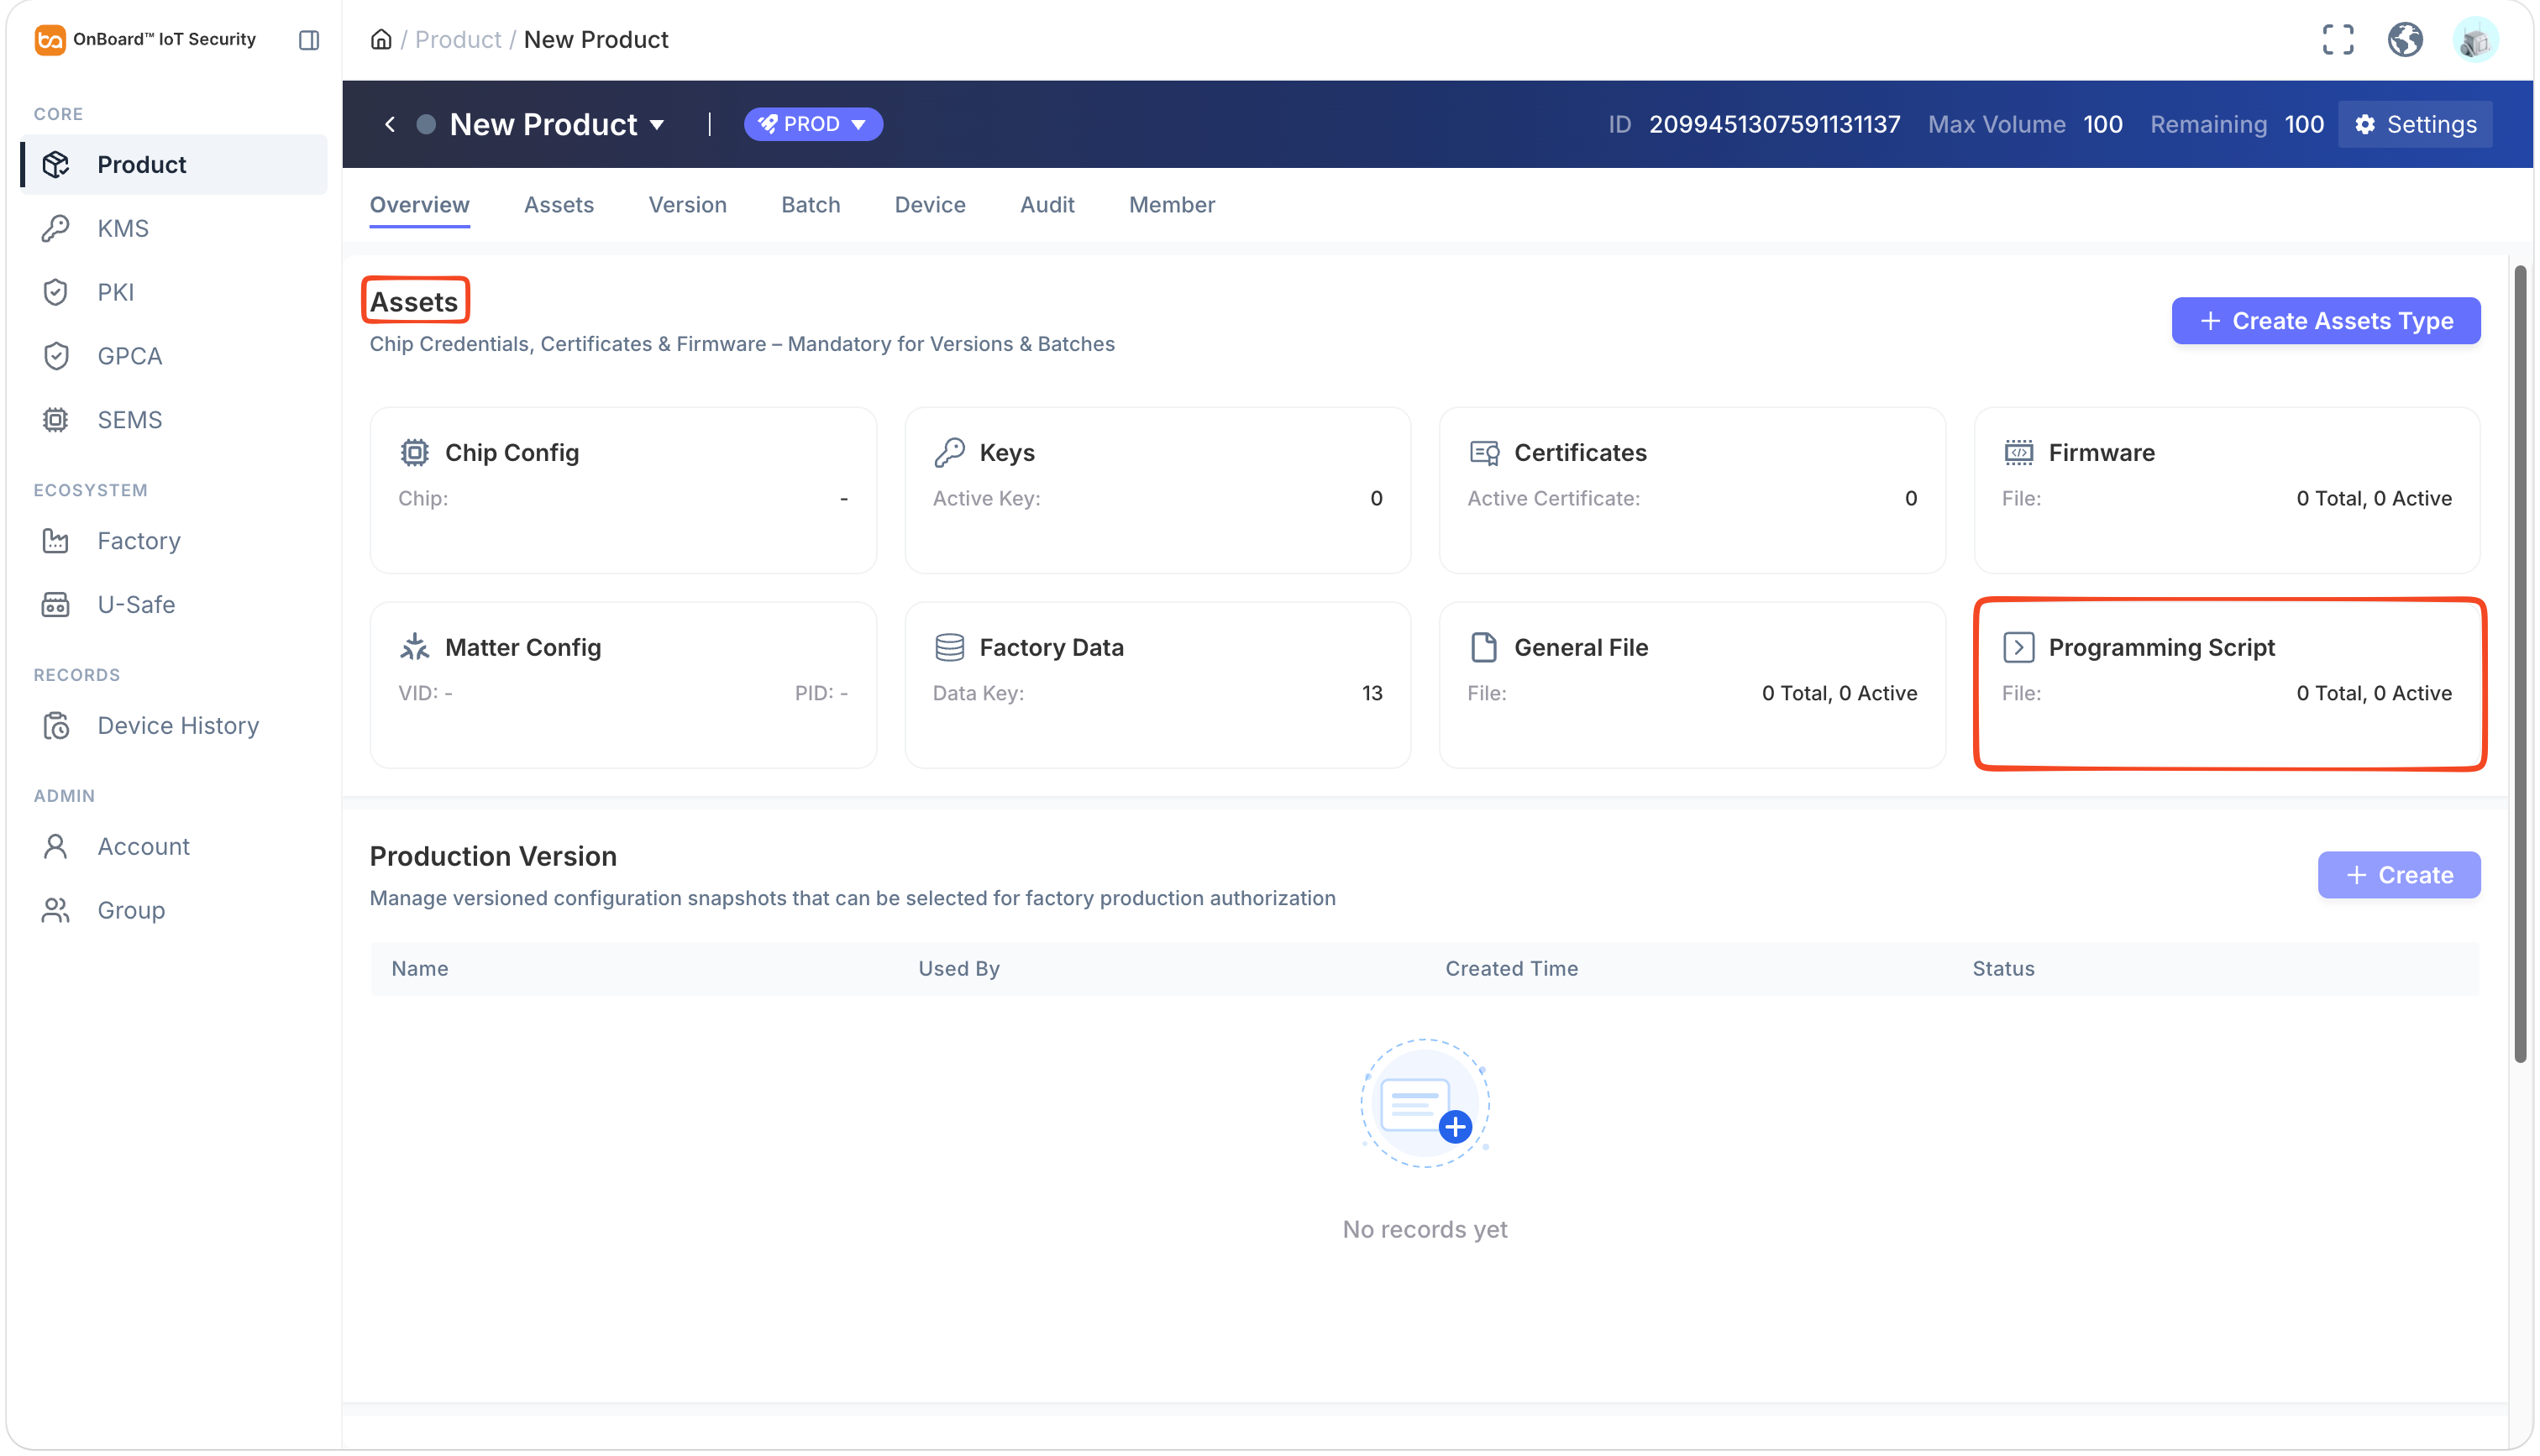
On the product page, select Programming Script in the Assets section to navigate to the Assets tab.
-
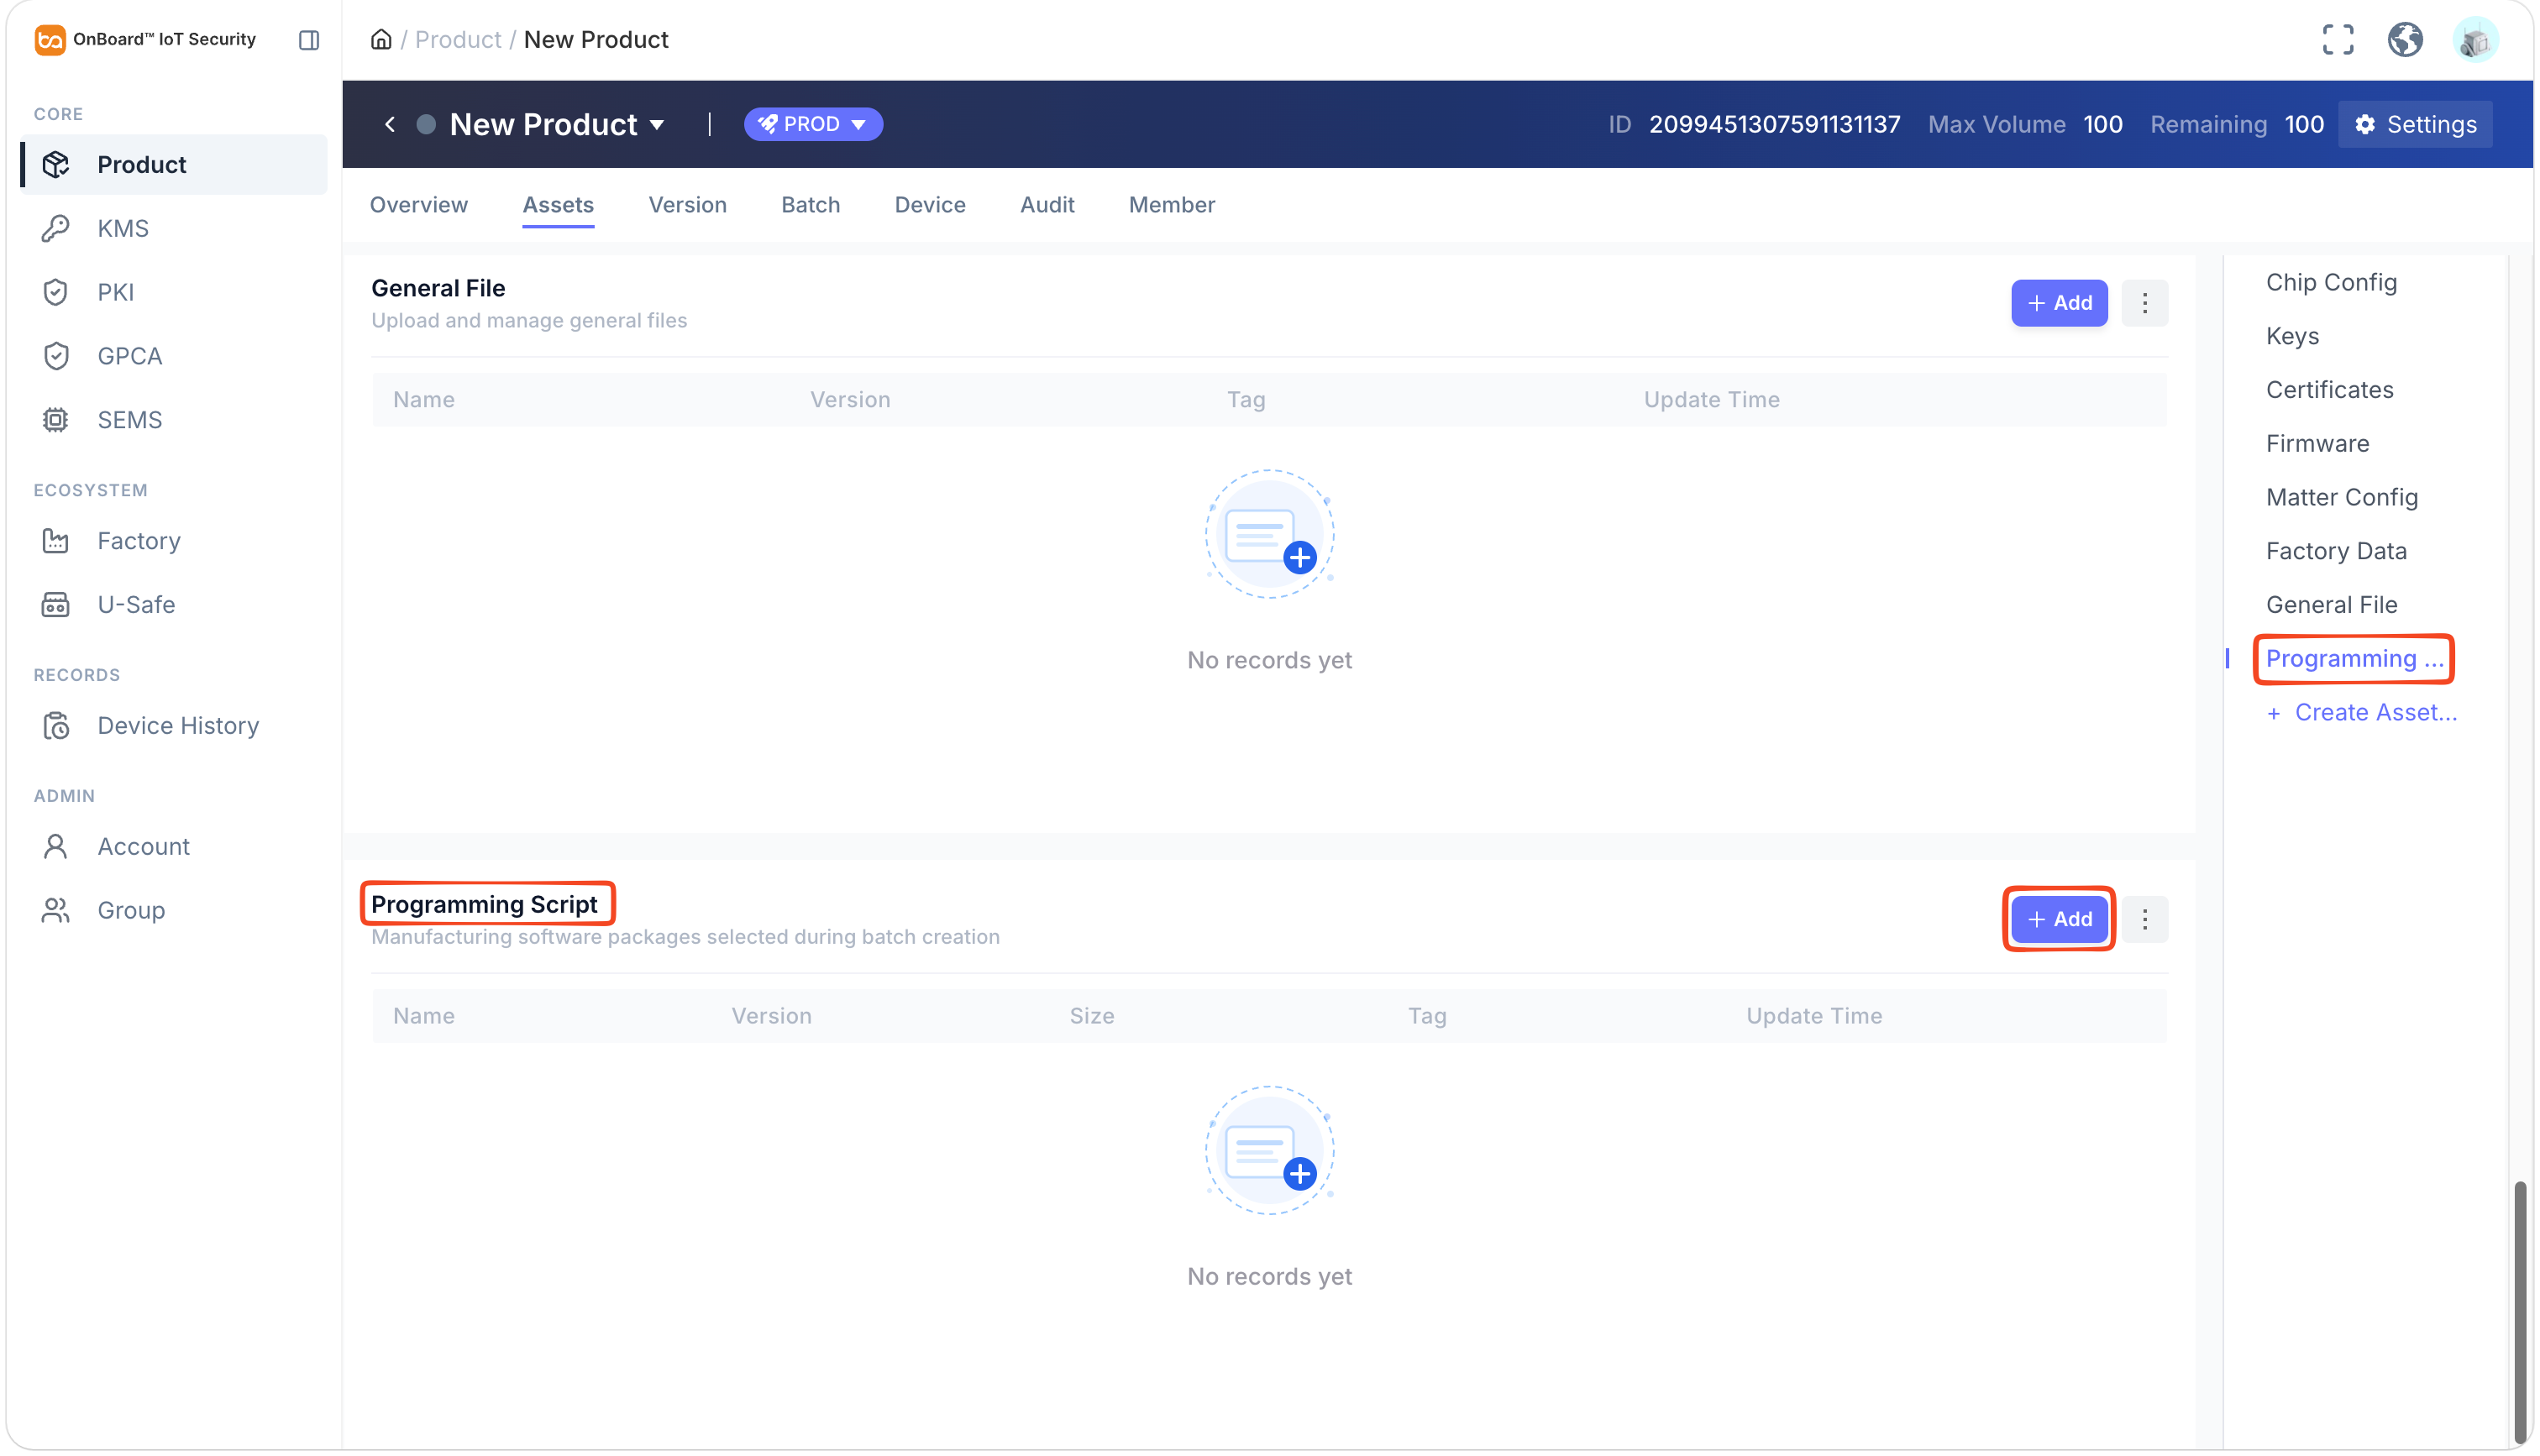
In the Programming Script section, click Add.
-
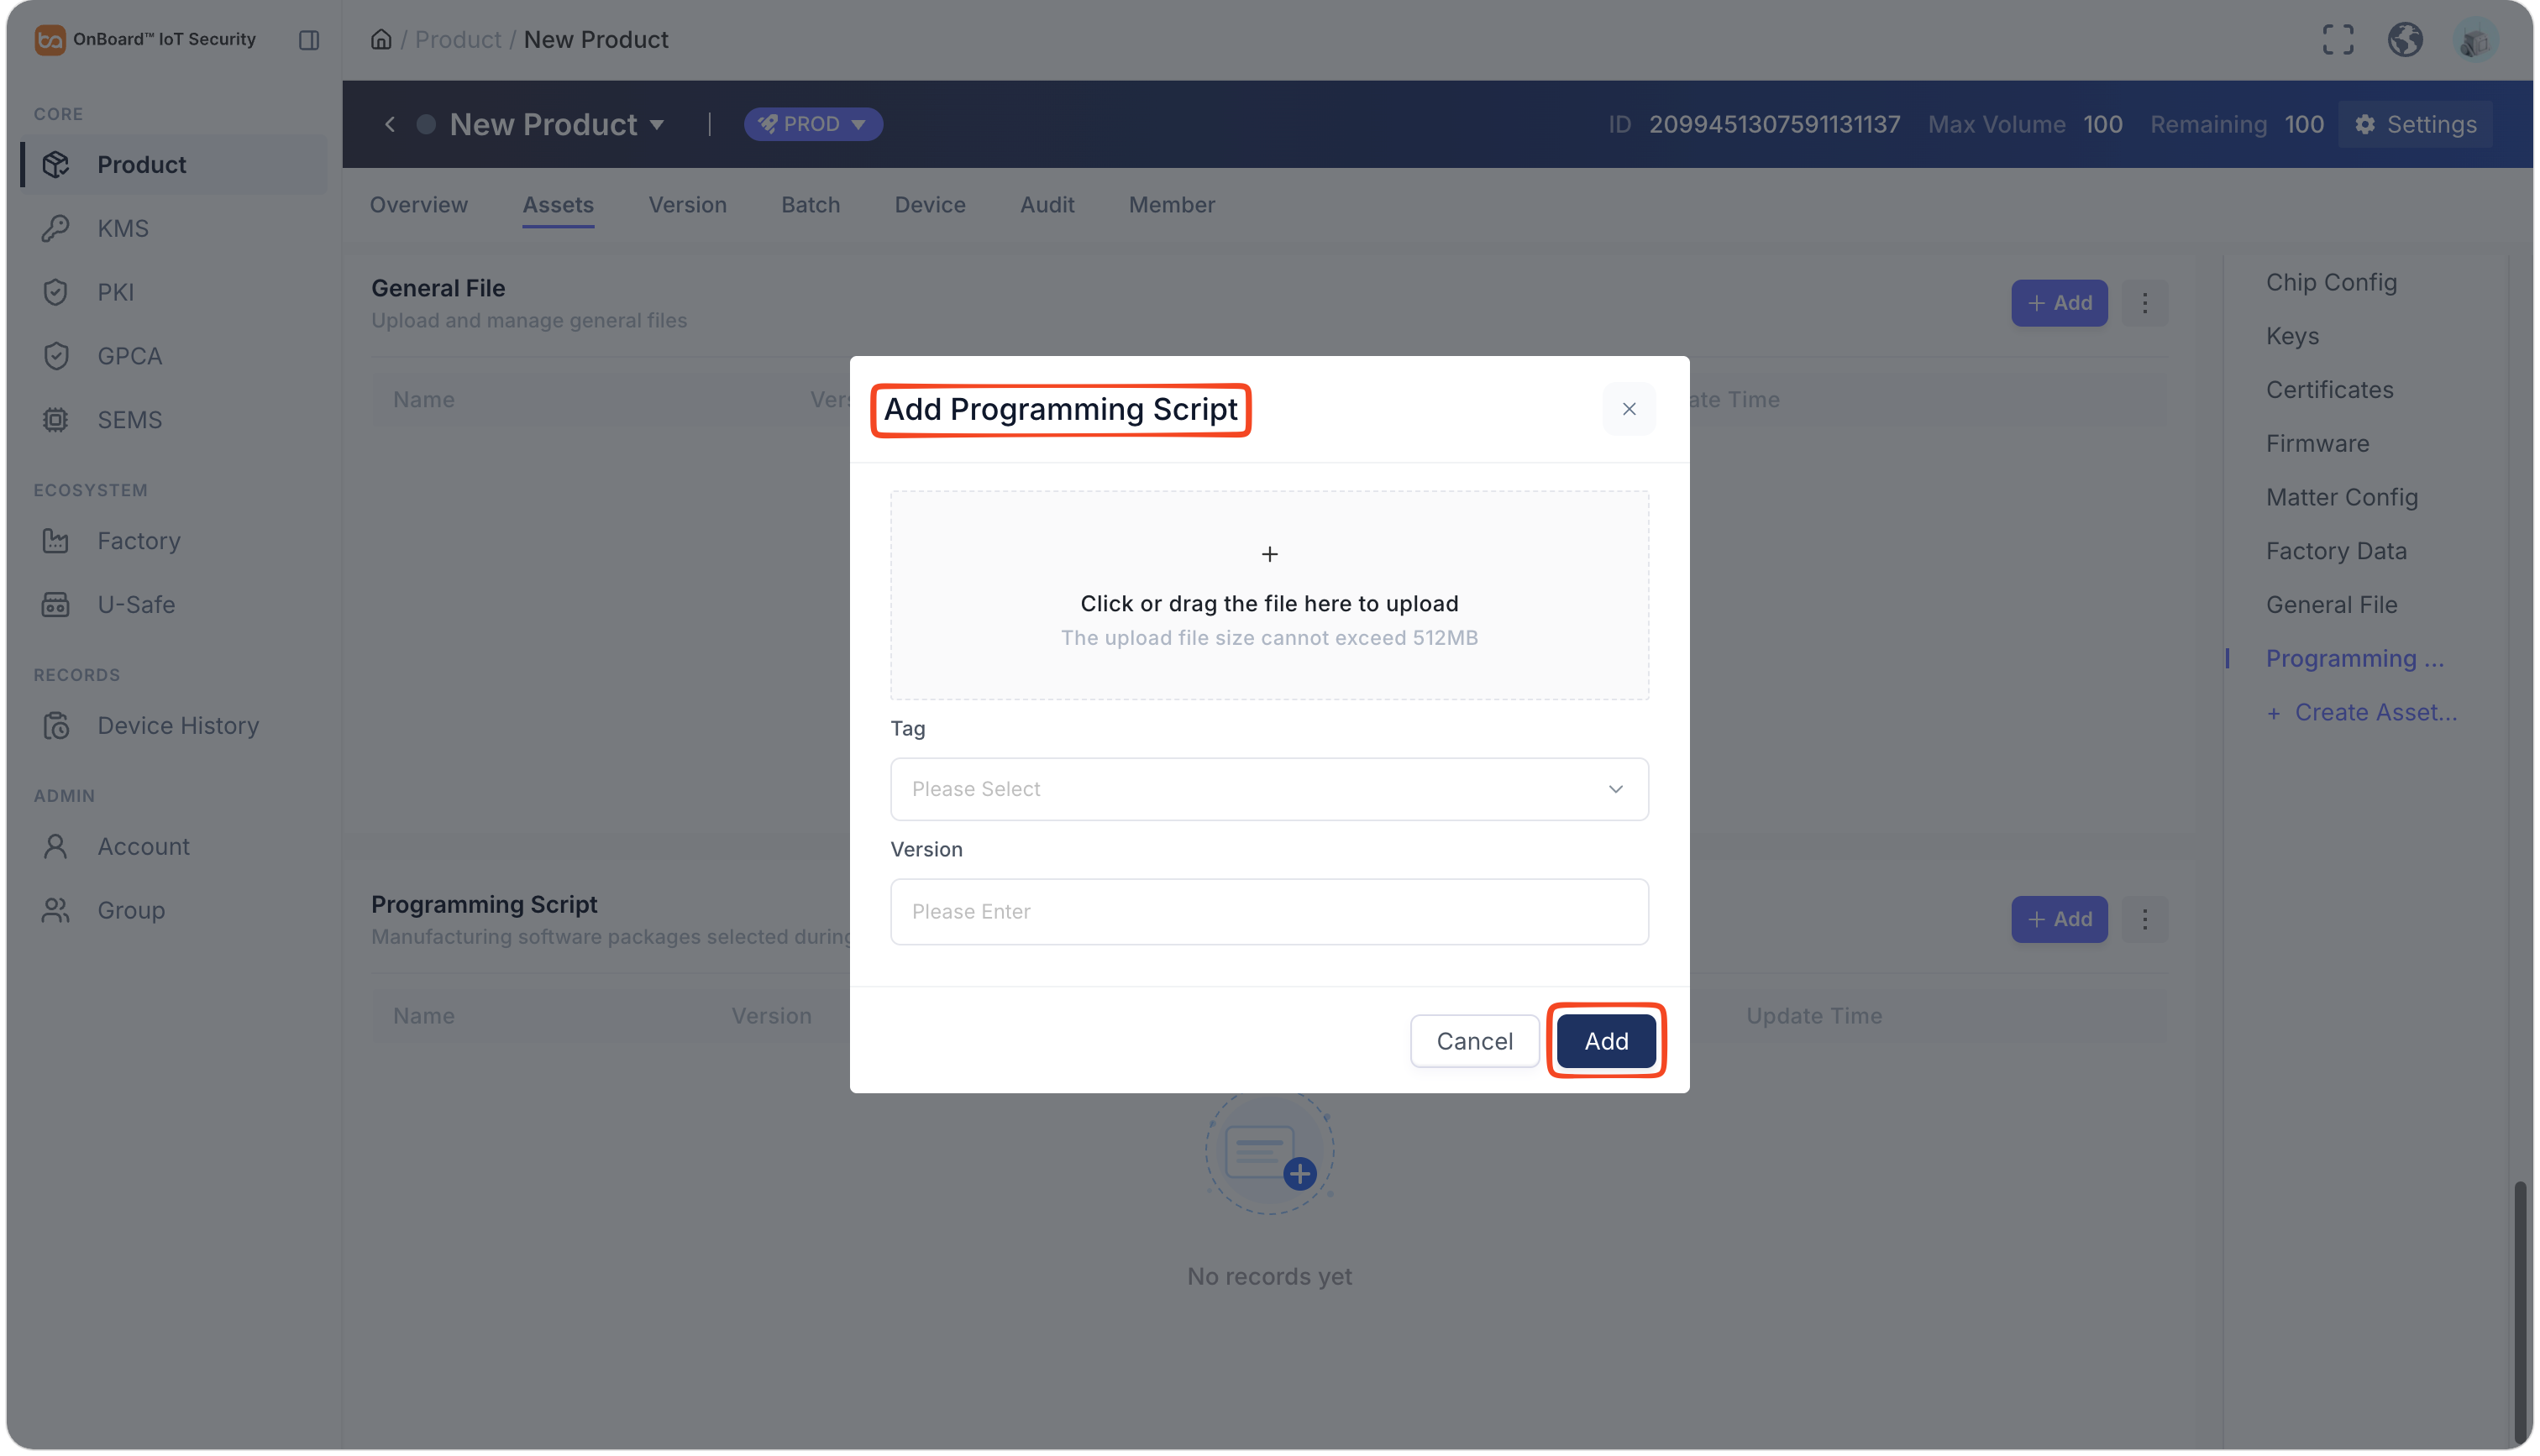
In the Add Programming Script window, select and enter the relevant information.
Description of Programming Script information:
Information Mandatory Description Upload File Yes Upload files by selecting the local programming script files. The maximum supported file size is 512 MB. Version No Indicate the version of the programming script. -
Click Add to complete the configuration of the Programming Script.
SE Profile (Optional)
SE Profile (Optional)
SE Profile allows you to add SE Profiles from SEMS to the product.
SE Profiles can be created in SEMS. For more information, refer to the steps to create an SE Profile.
-
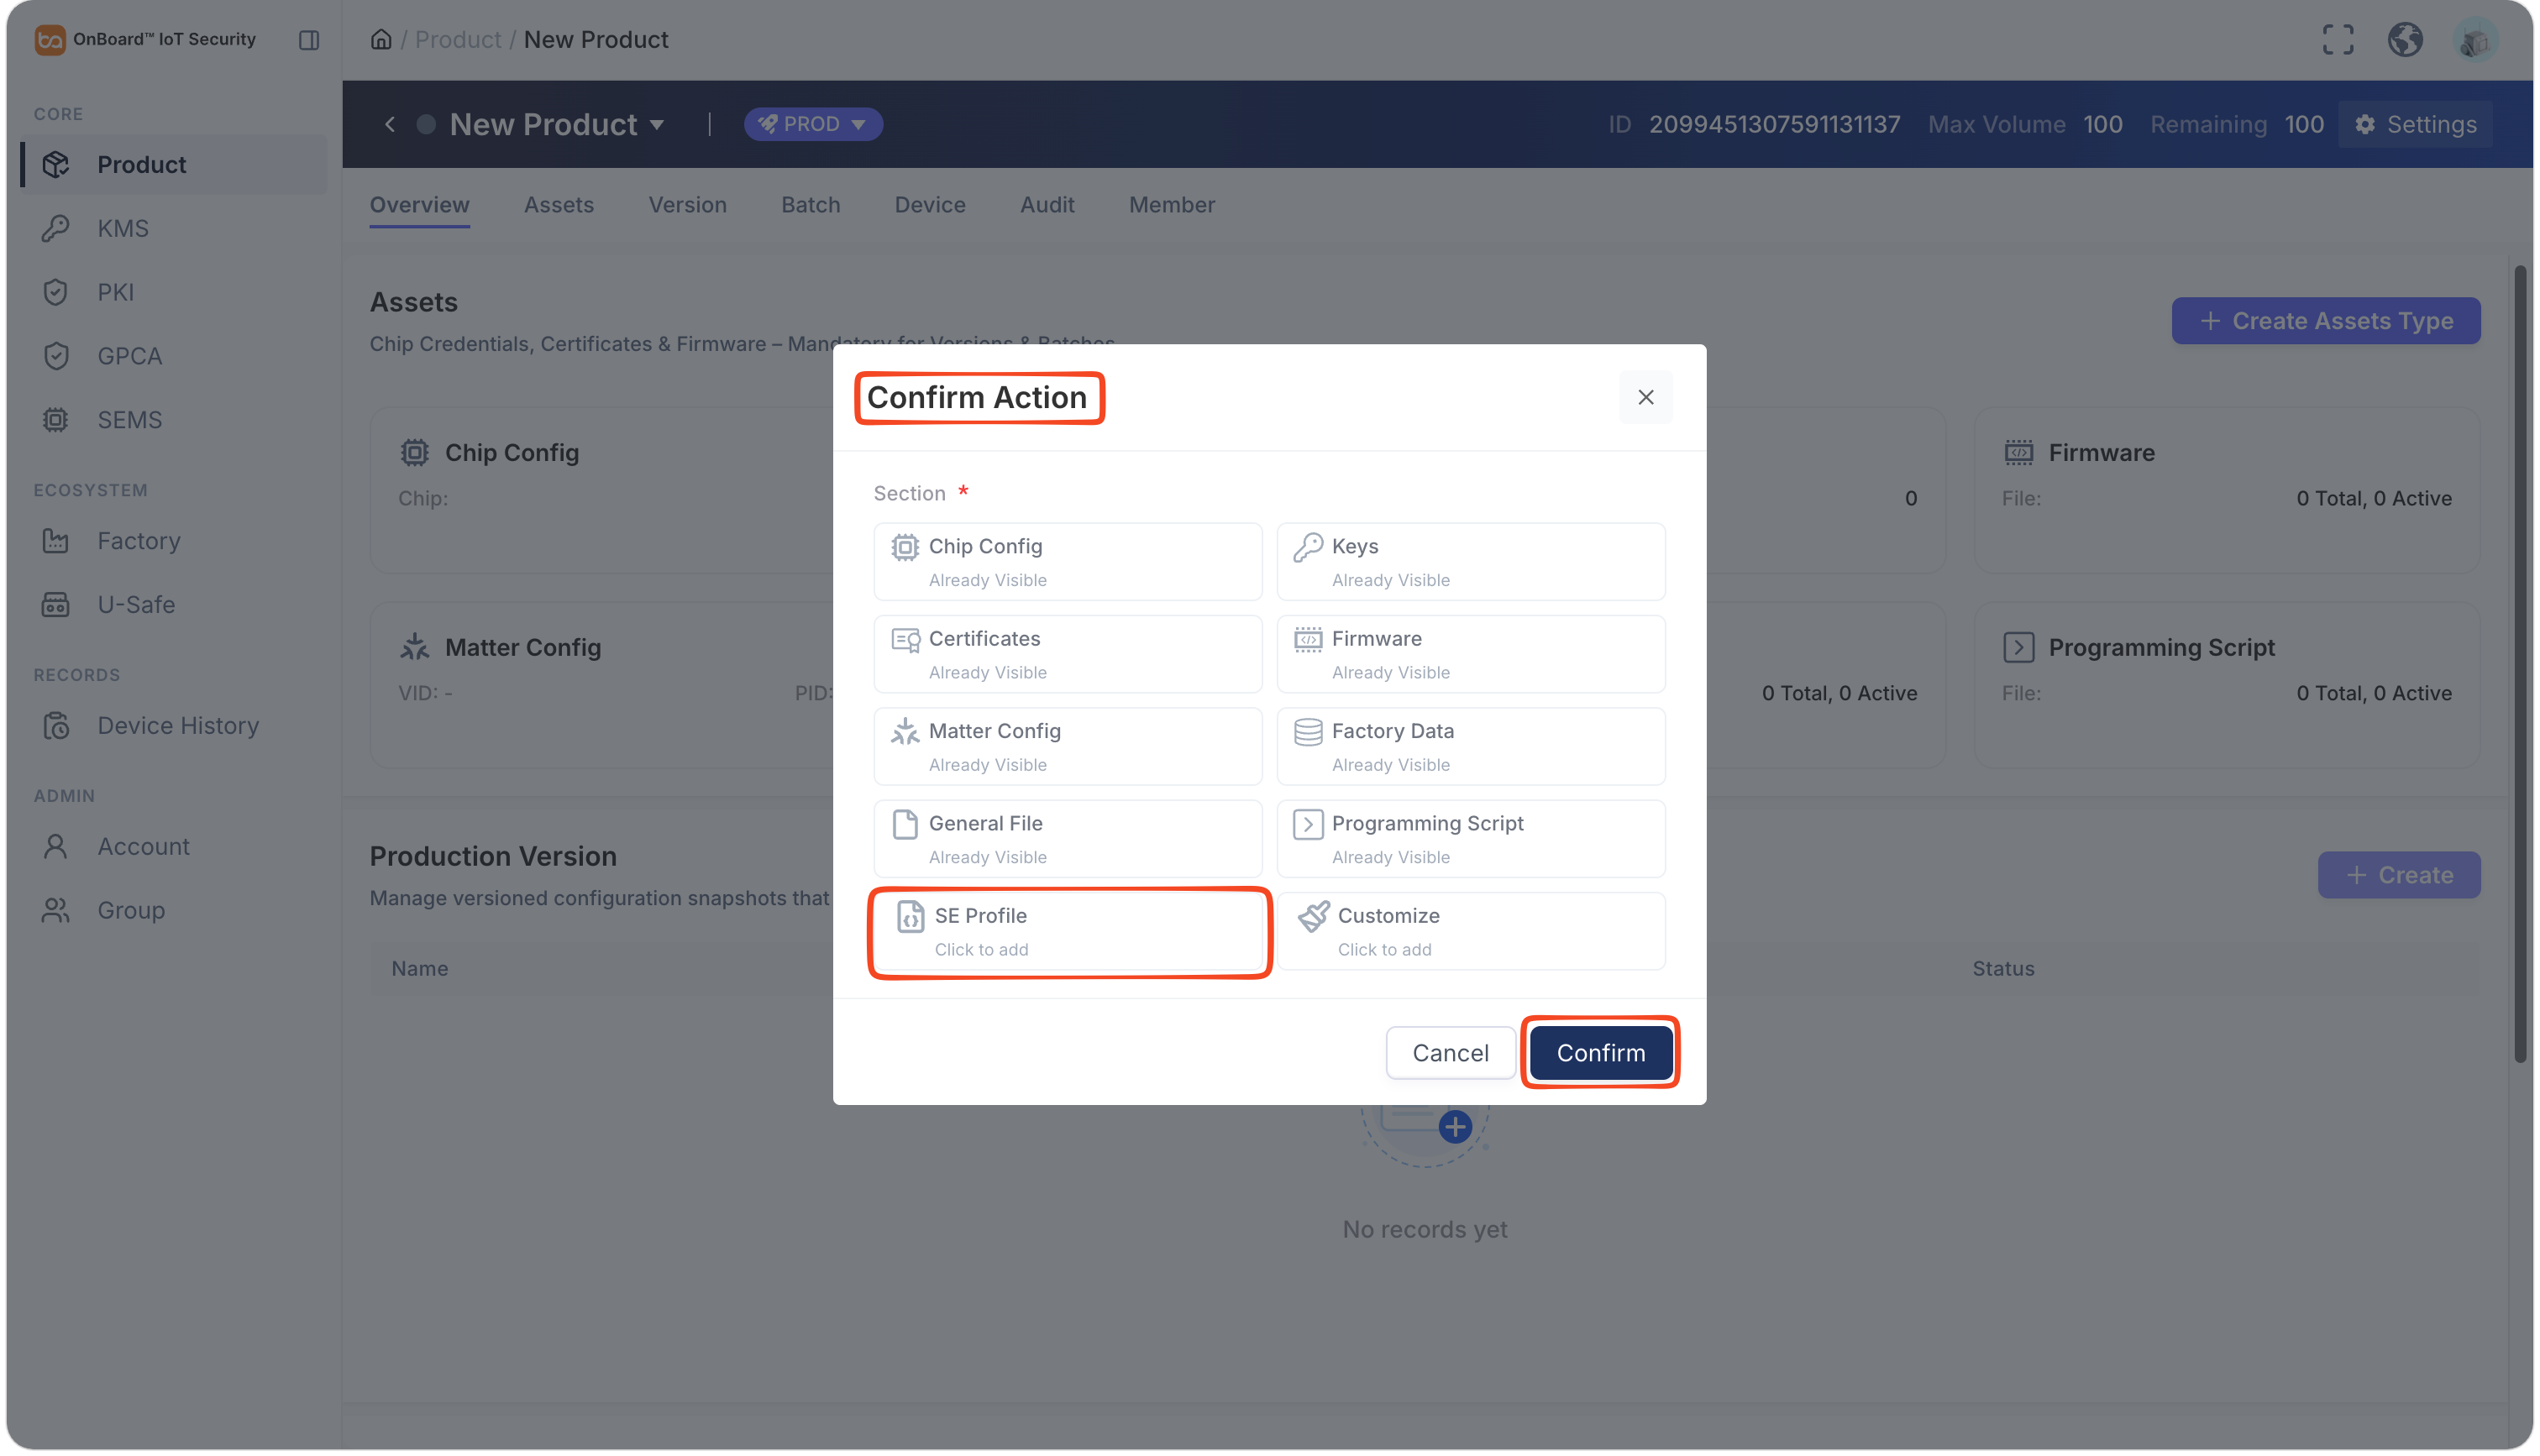
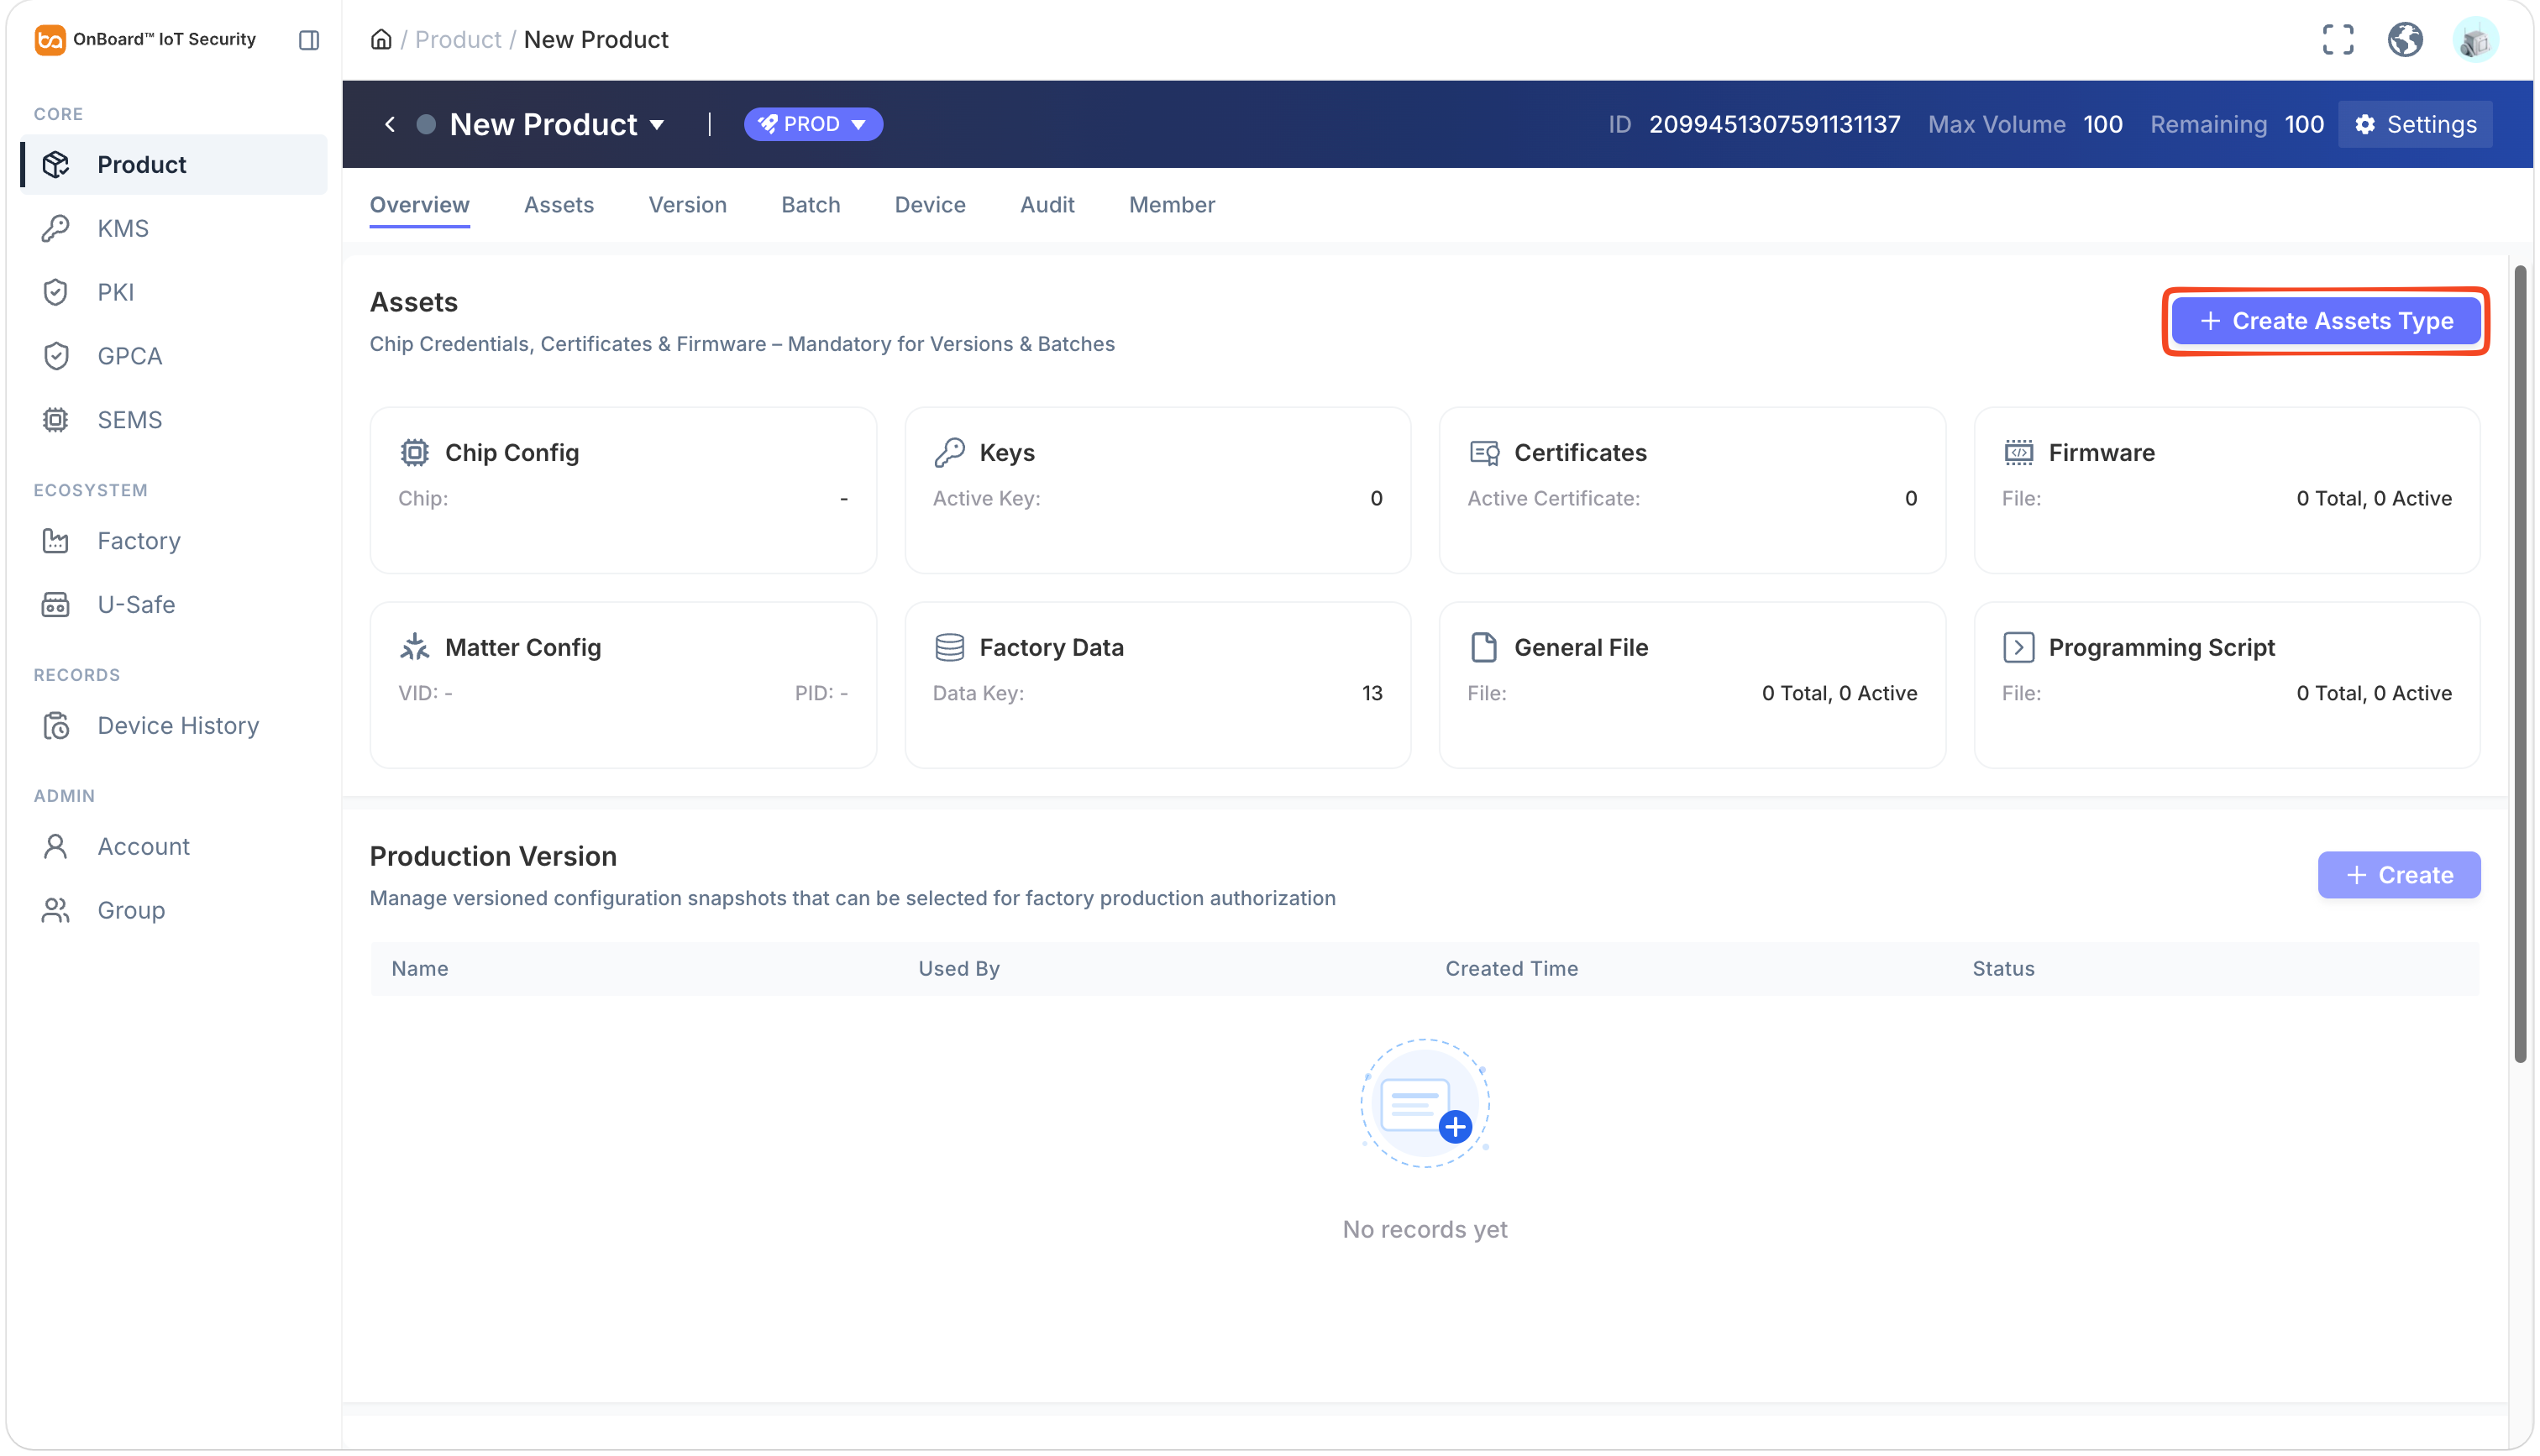
On the product page, click Create Assets Type.
-
In the Confirm Action window, select the SE Profile asset type, and then click Confirm to add the SE Profile asset.
-
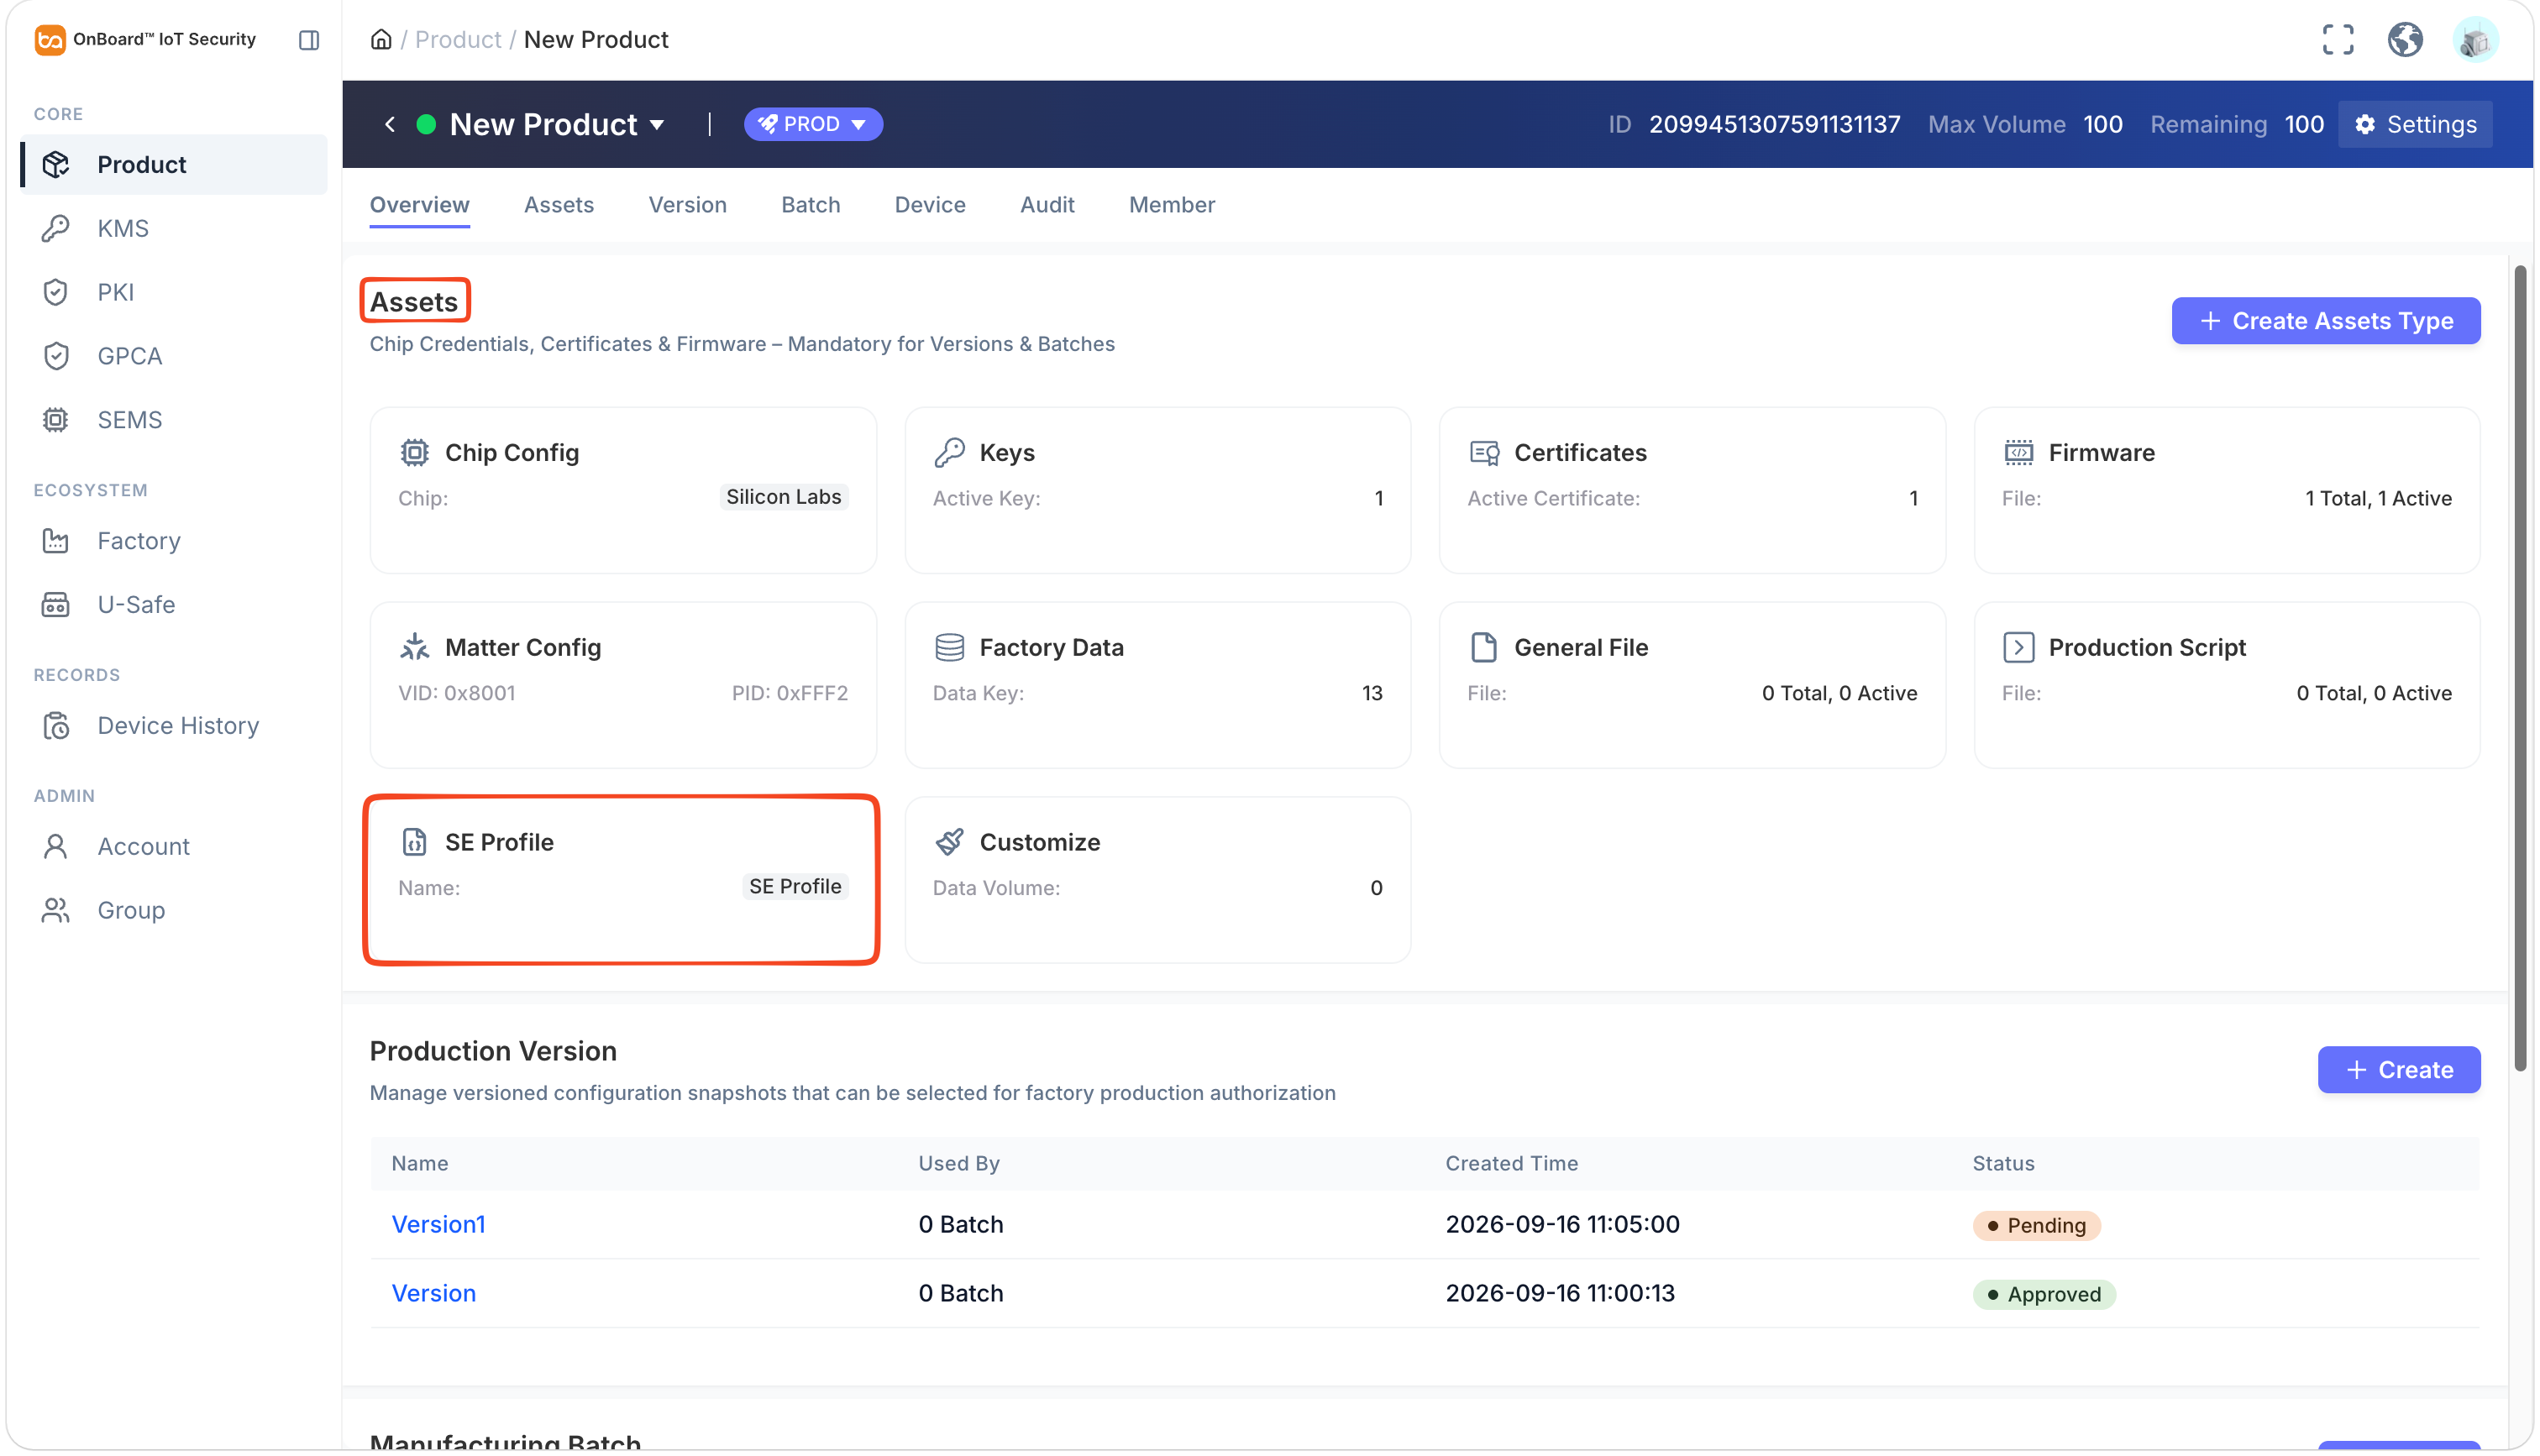
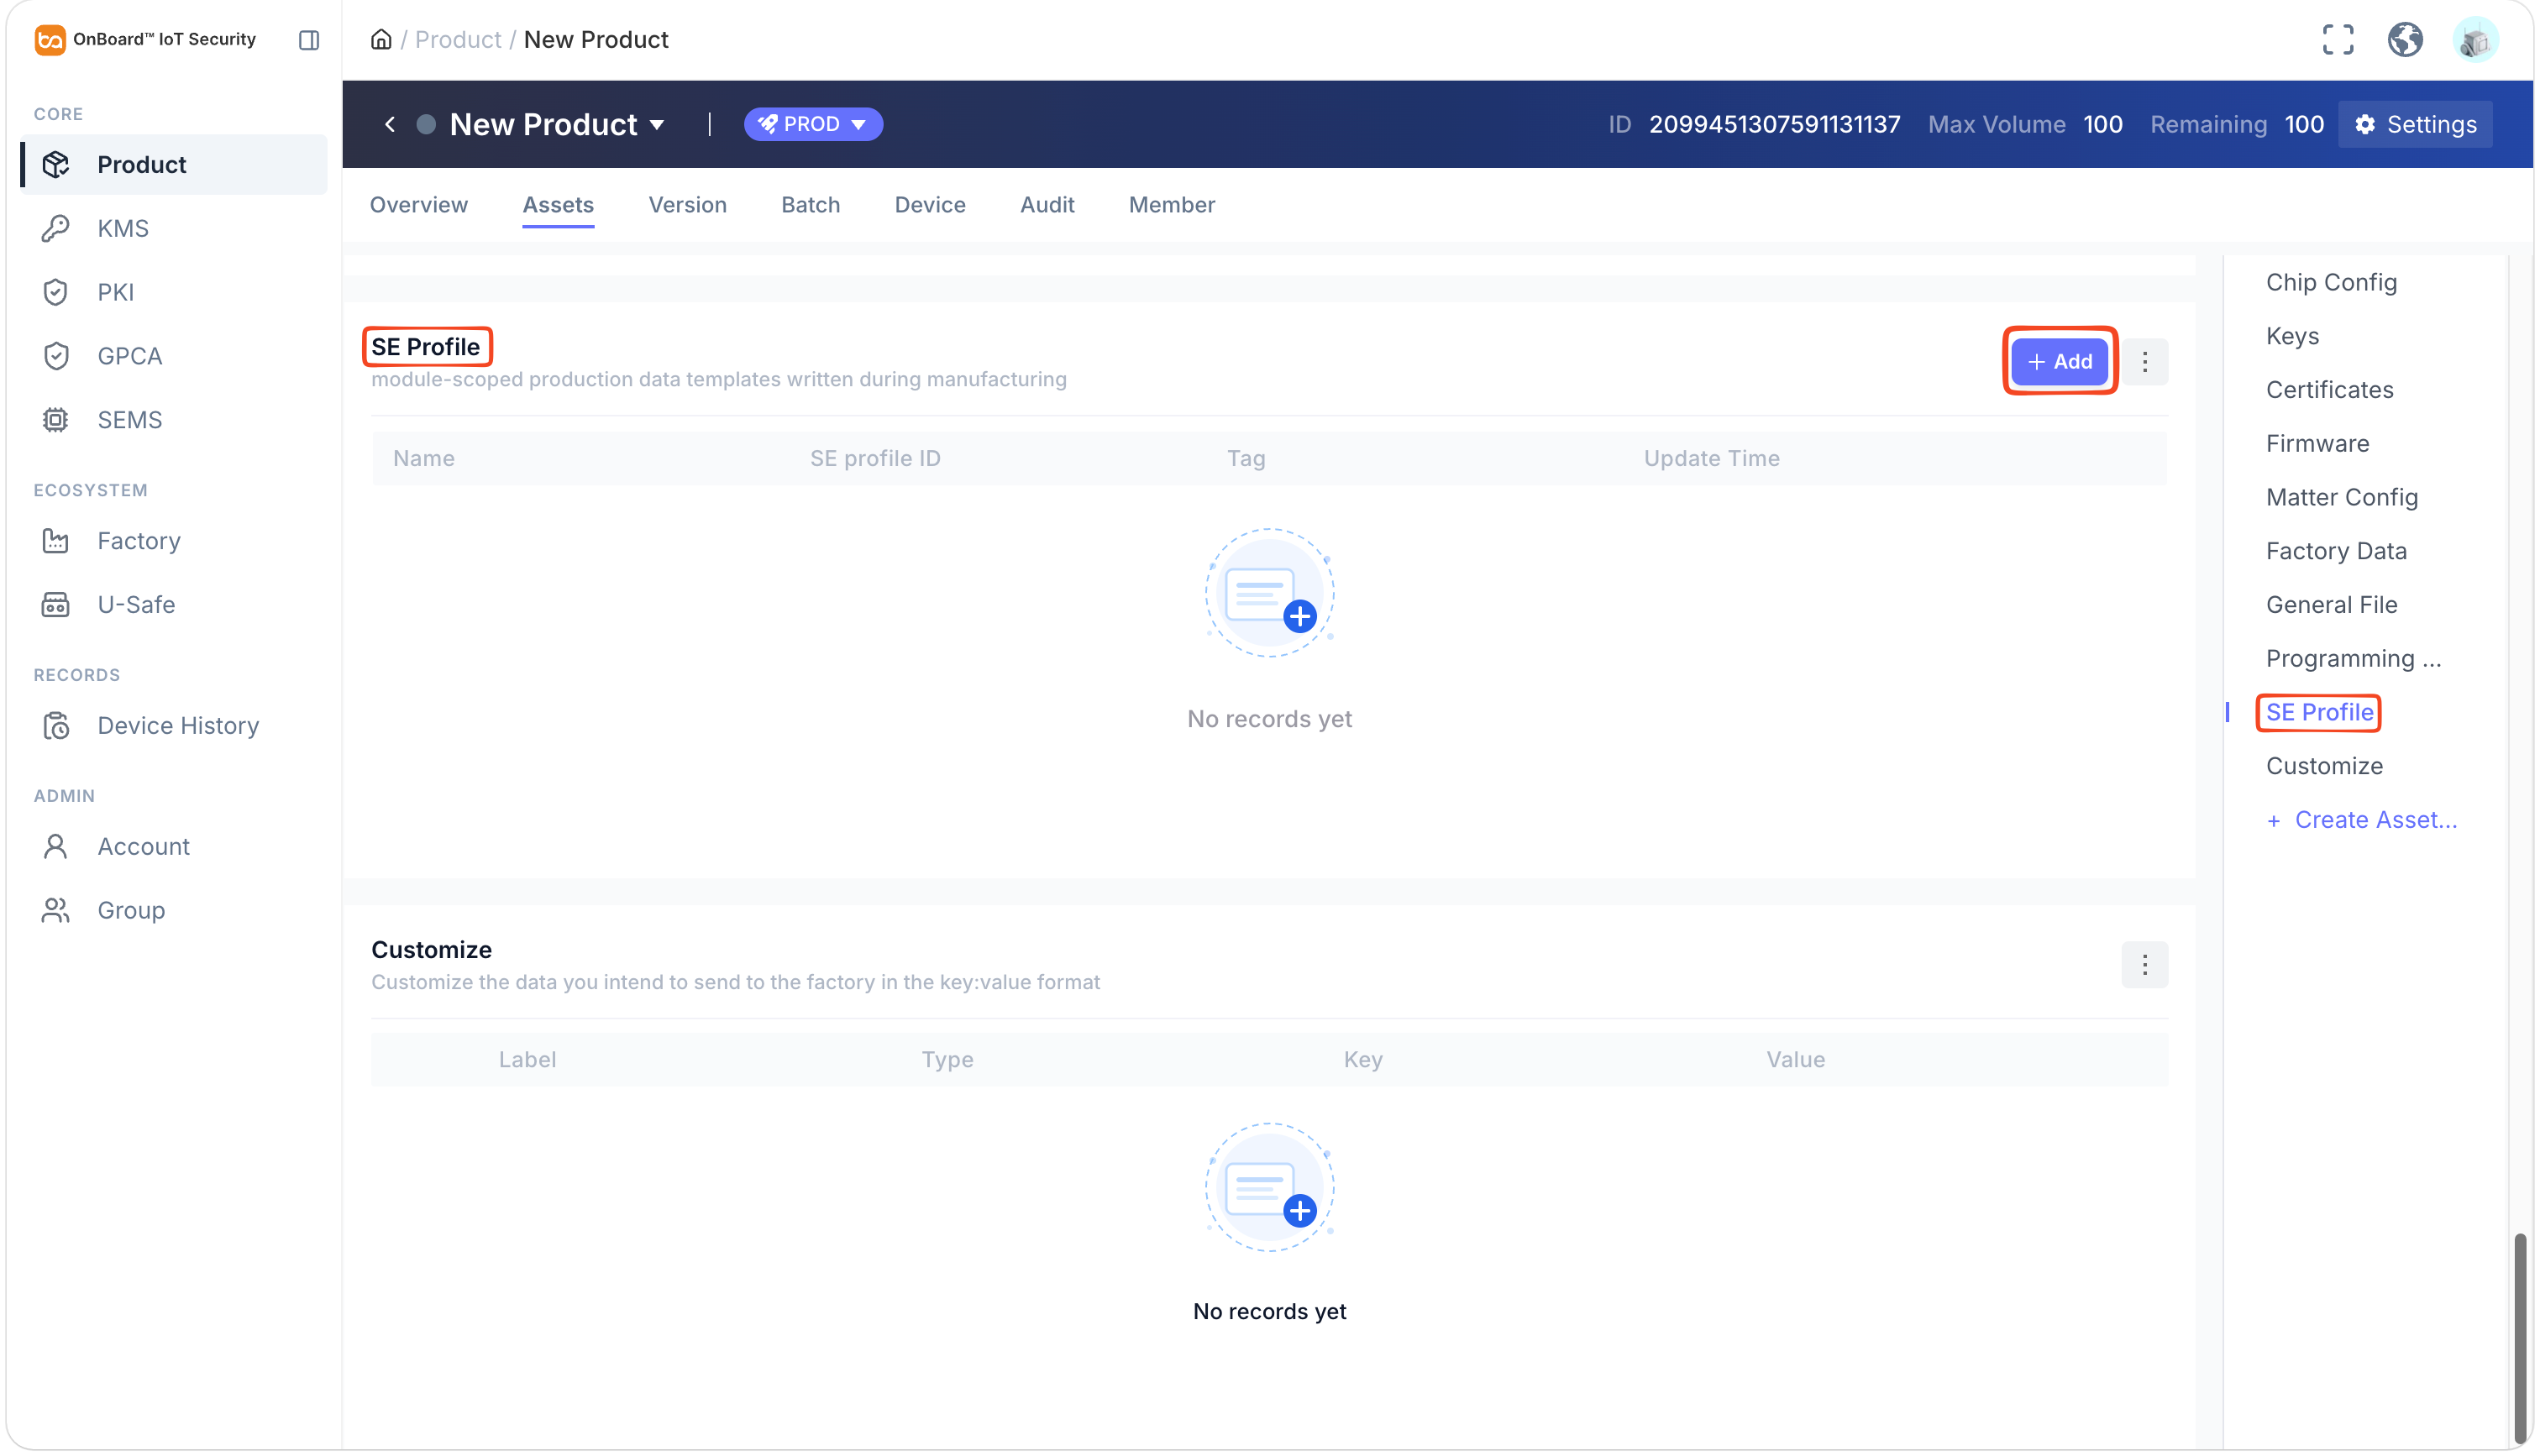
Select SE Profile in the Assets section to navigate to the Assets tab.
-
In the SE Profile section, click Add.
-
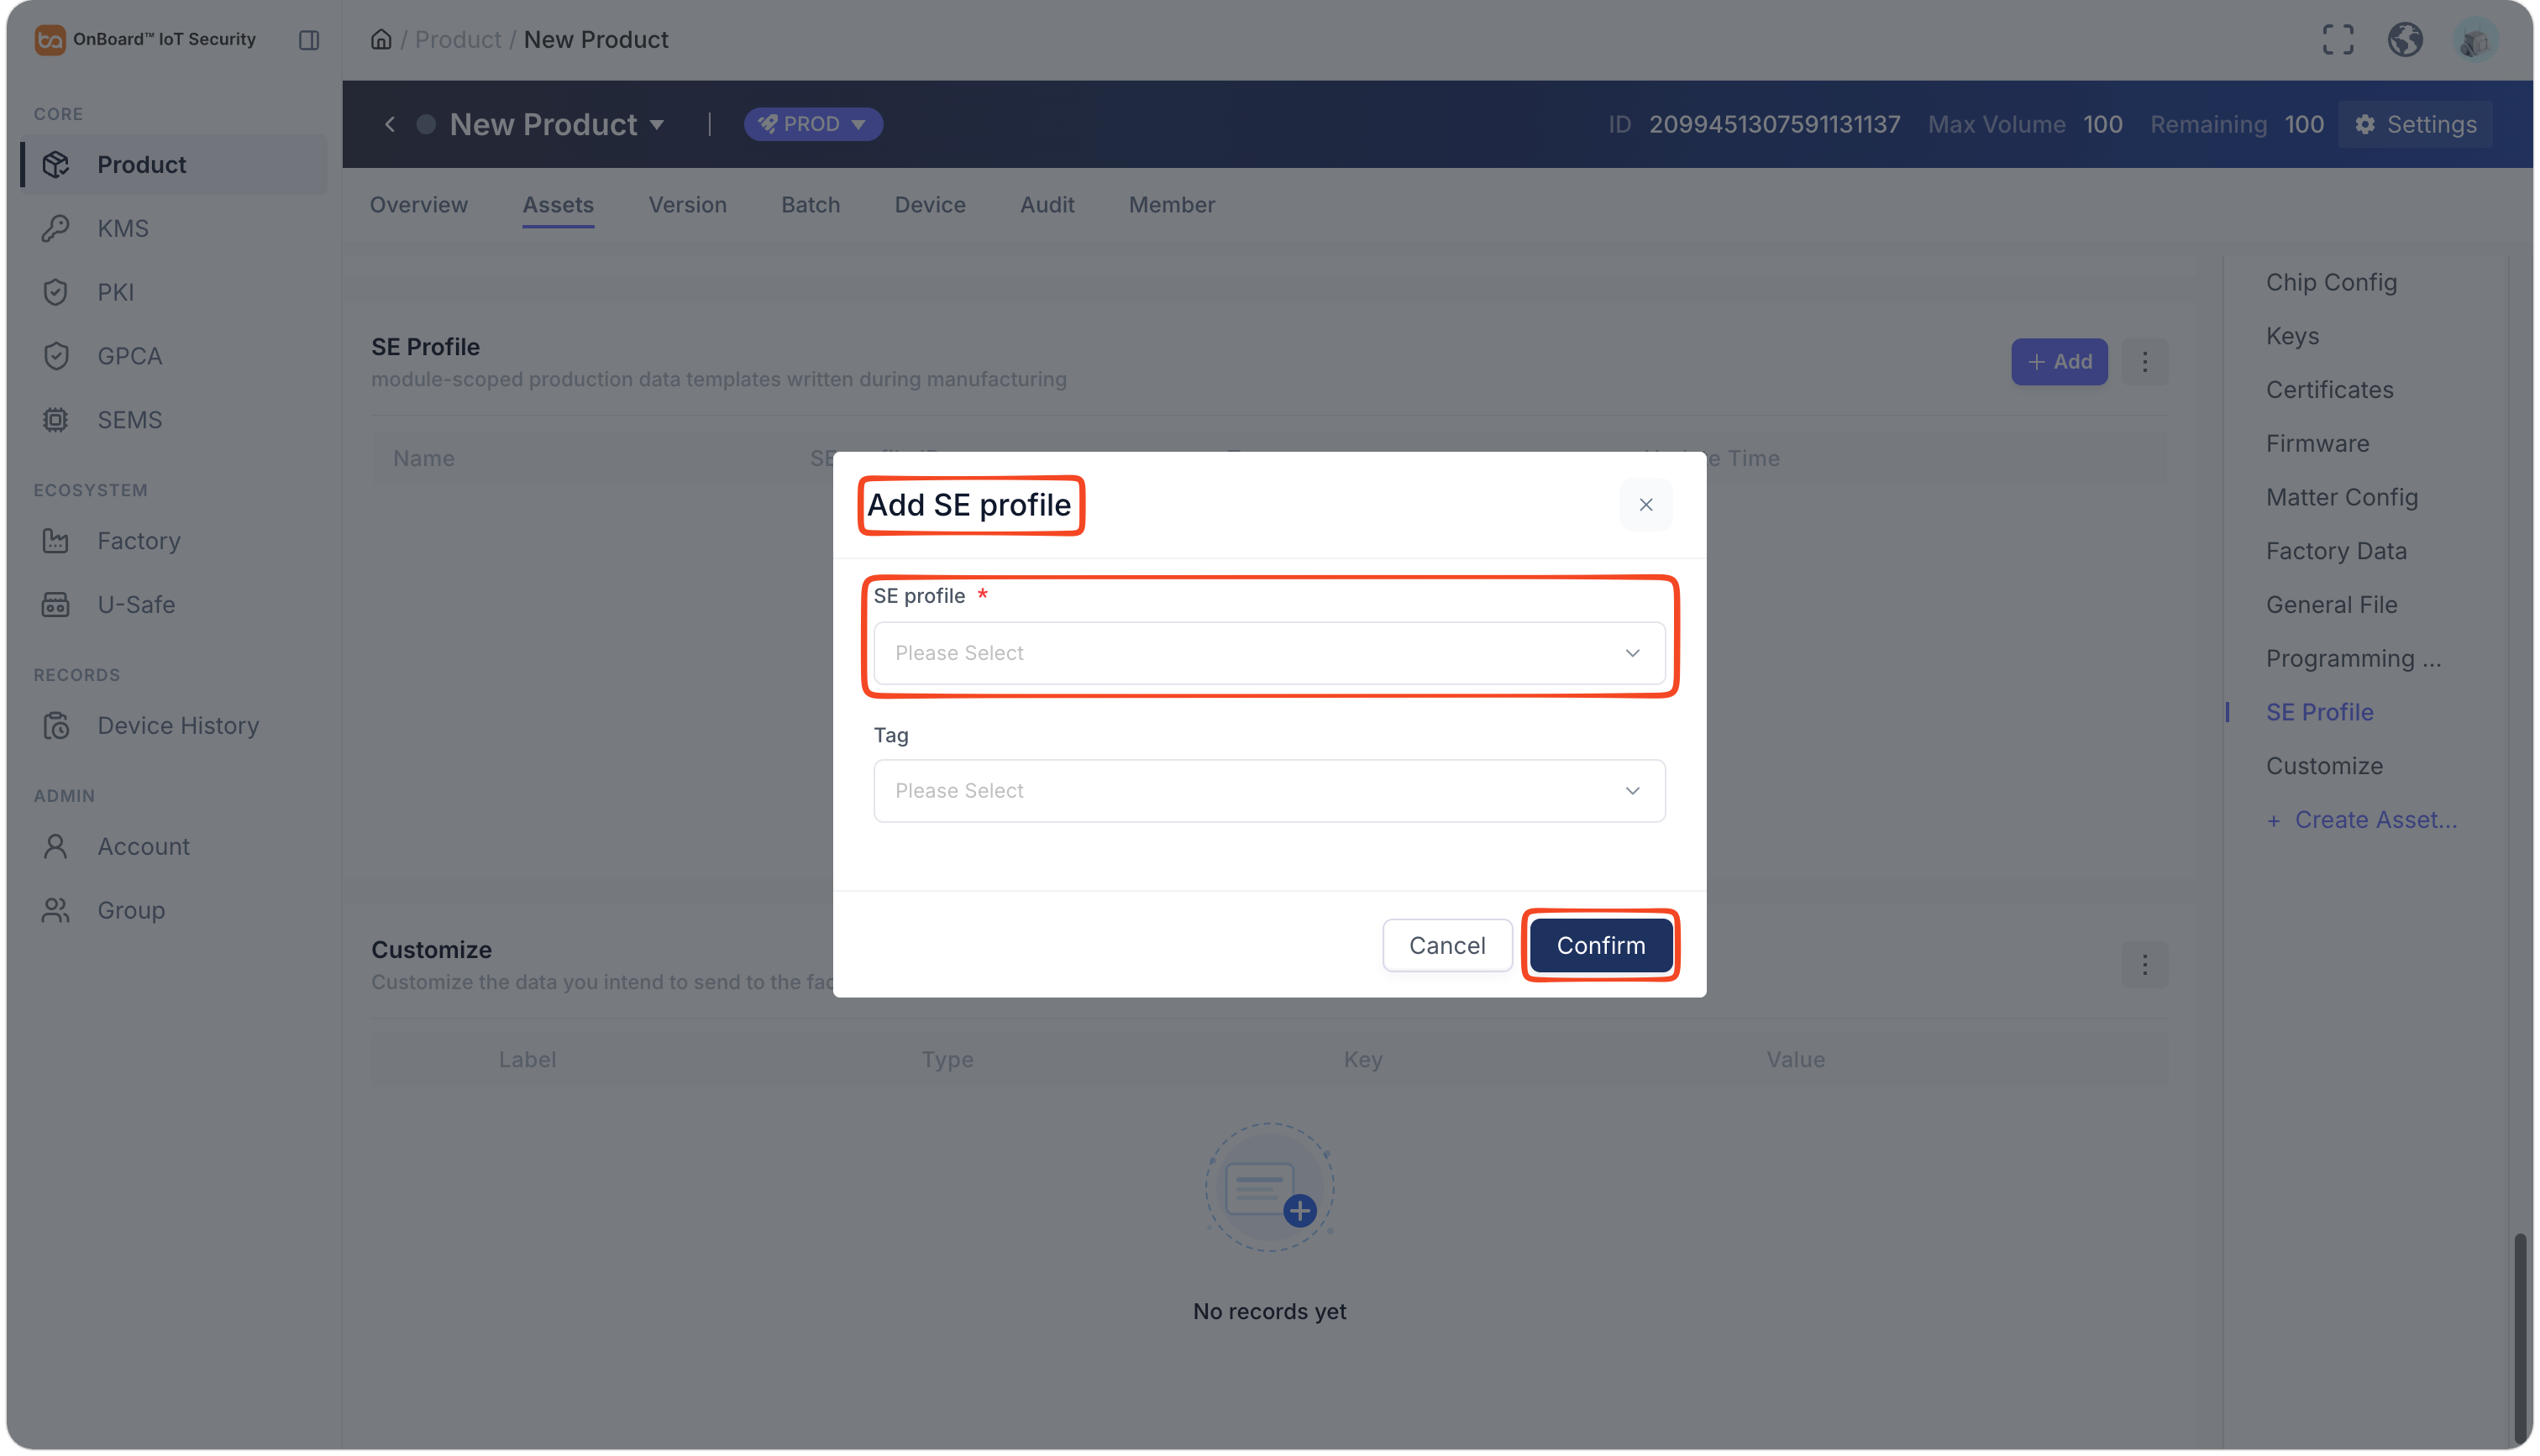
In the Add SE Profile window, select the SE Profile to be assigned and click Add. Meanwhile, you can also create and add a custom tag in the Tag field as needed (this tag allows programming scripts to automatically identify and select the corresponding SE Profile later).
Customize (Optional)
Customize (Optional)
Customize allows you to customize the data that needs to be sent to the factory using the key:value format.
-
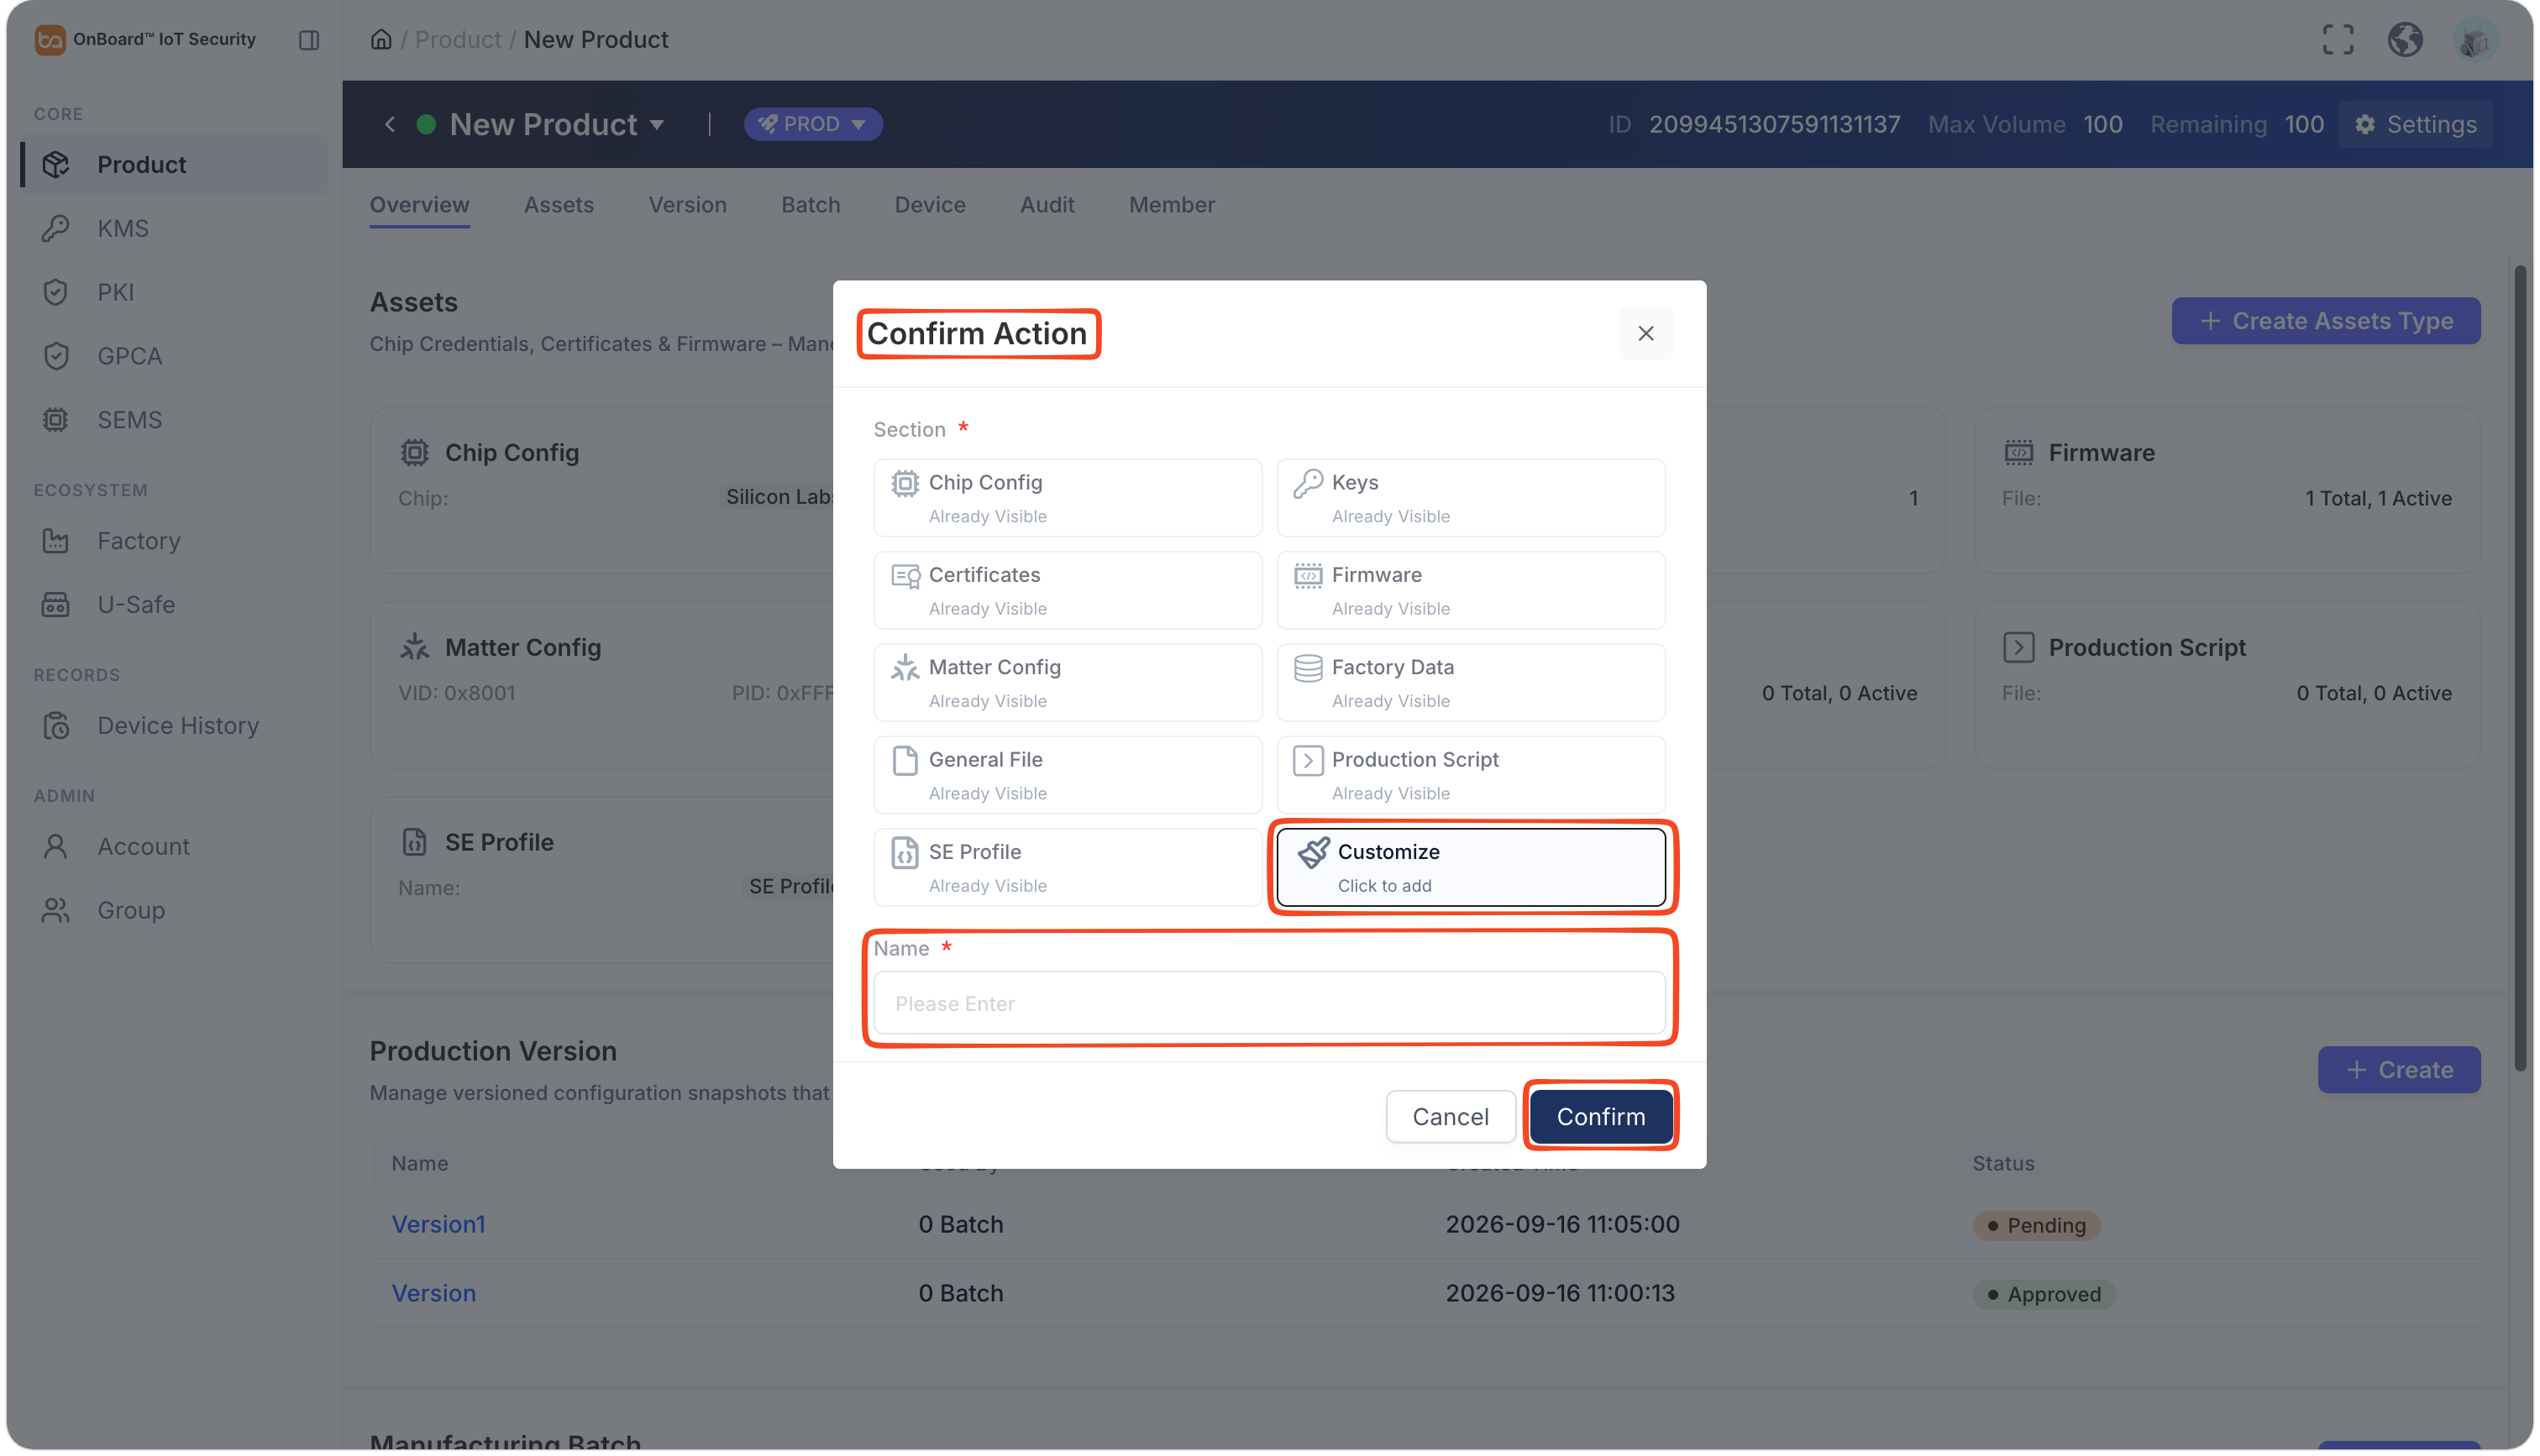
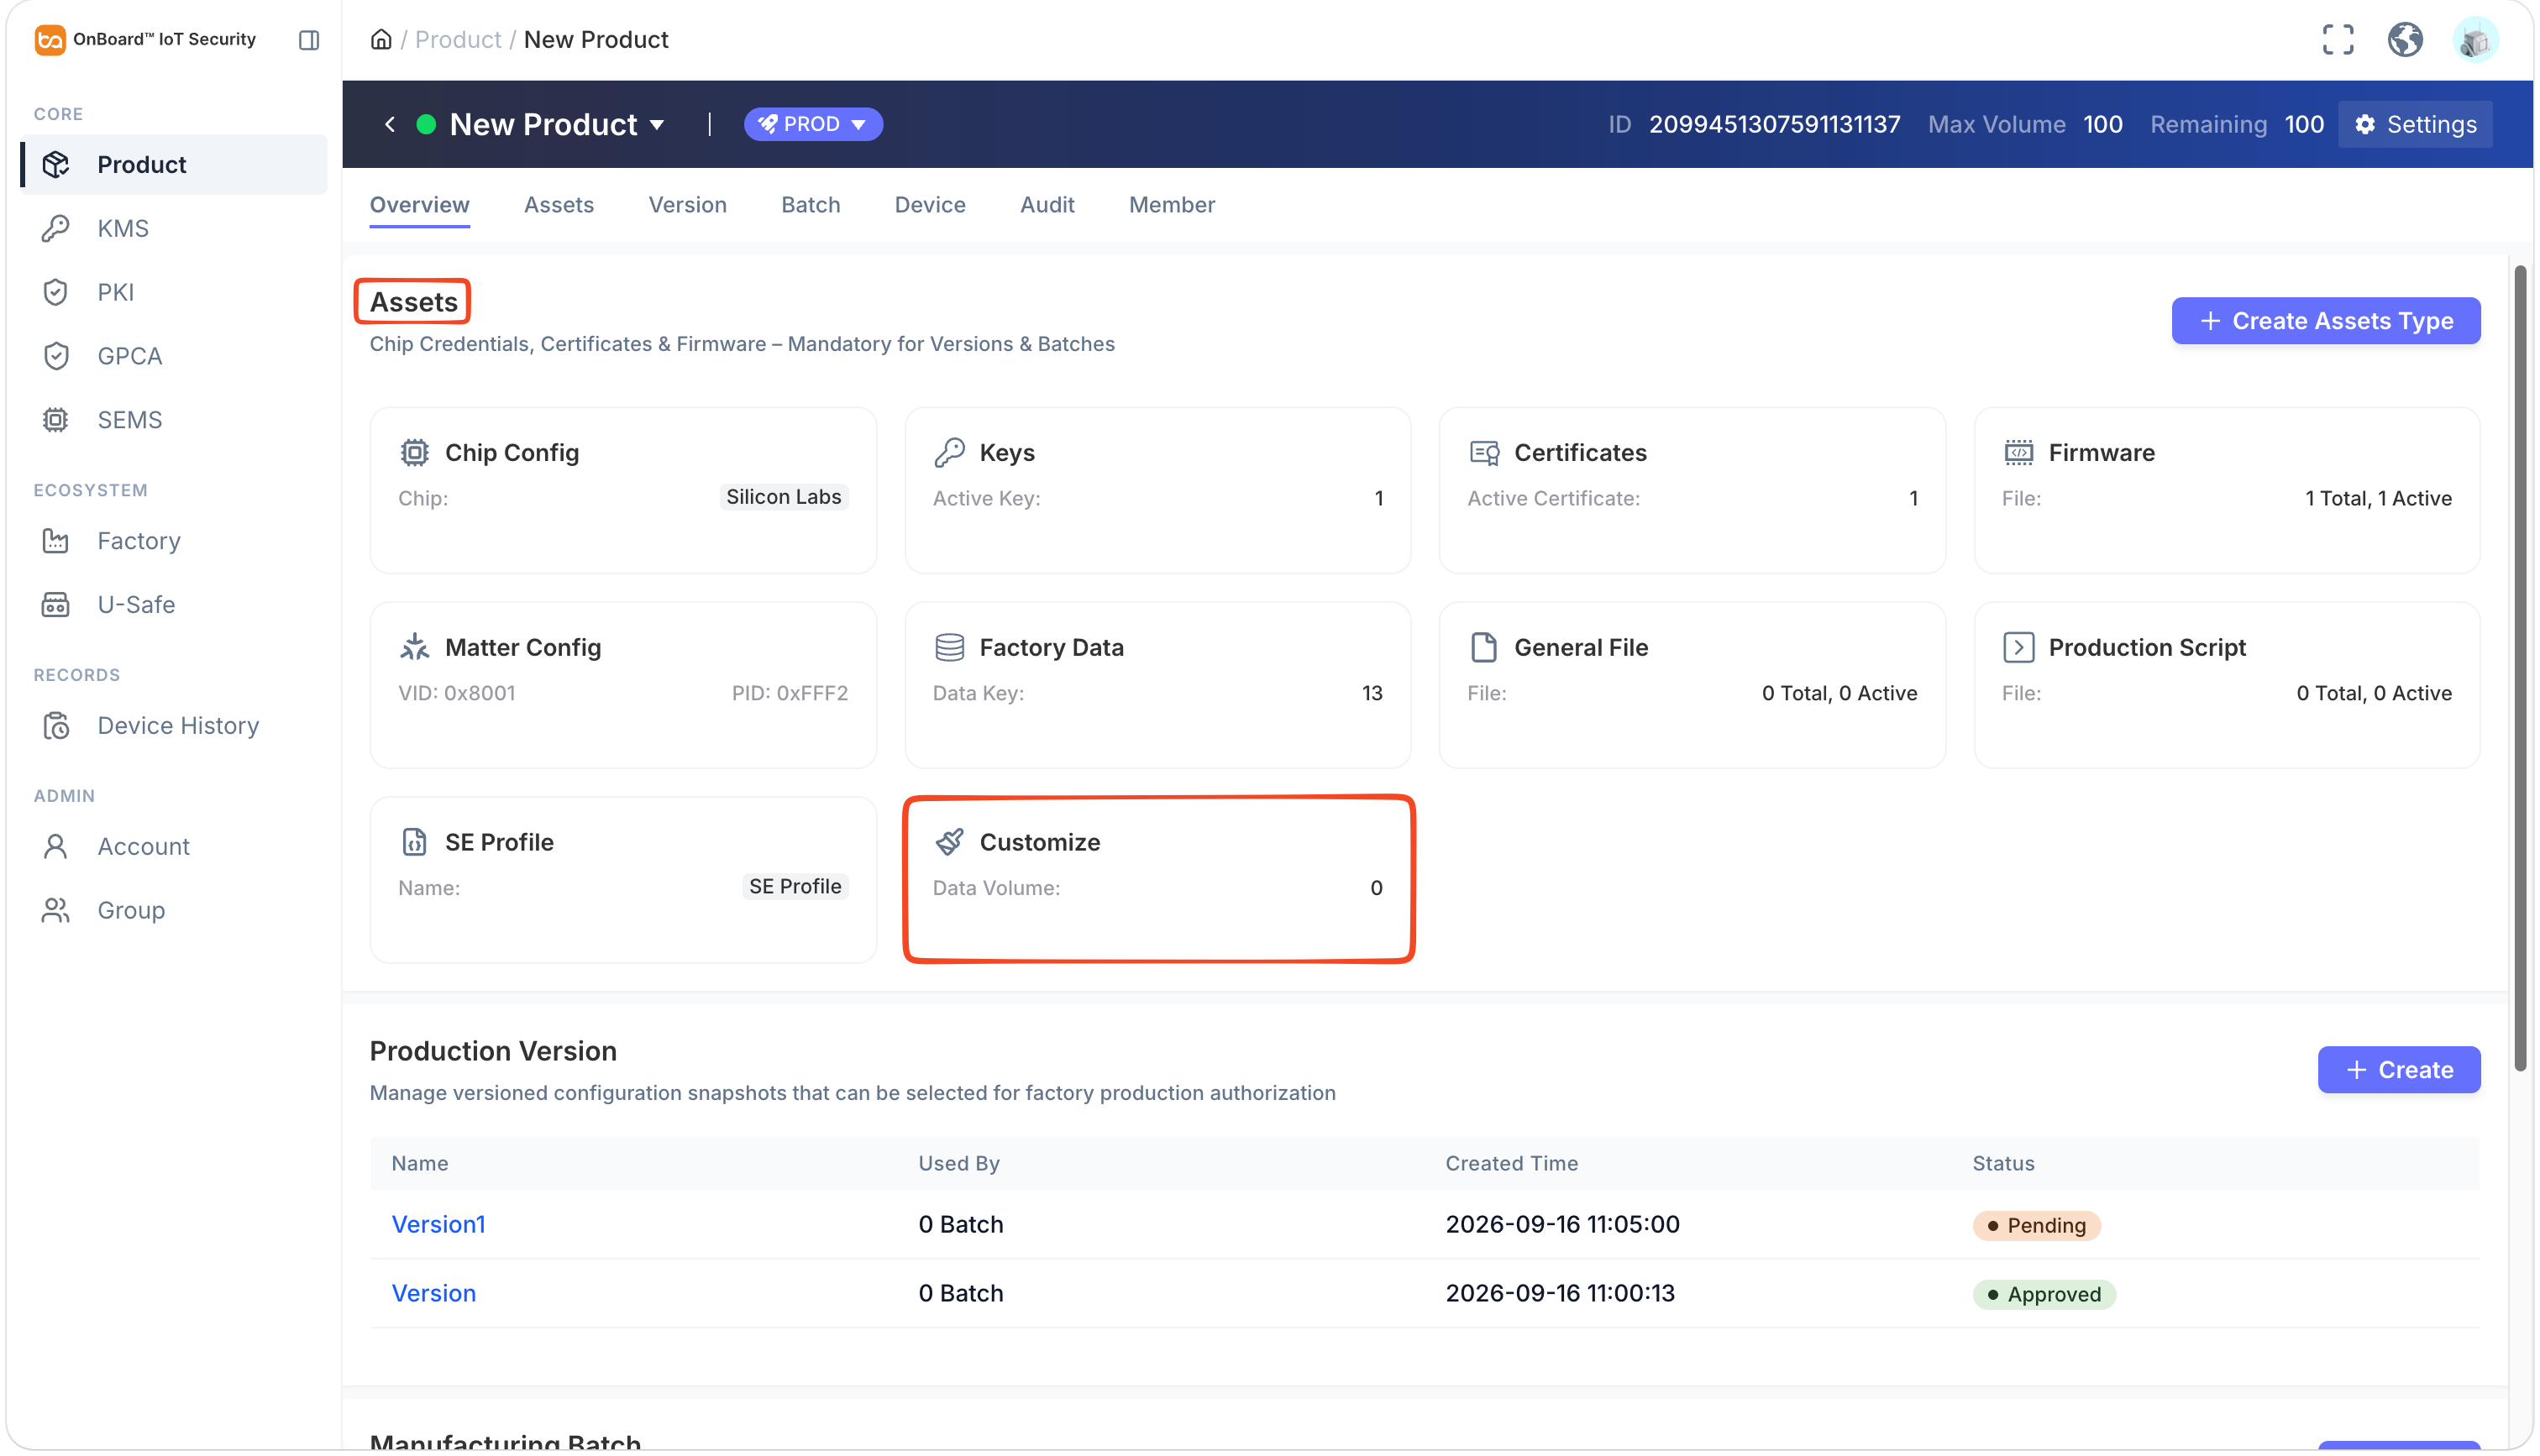
On the product page, click Create Assets Type.
-
In the Confirm Action window, select the Customize asset type and enter the asset name, then click Confirm to add the custom asset.
-
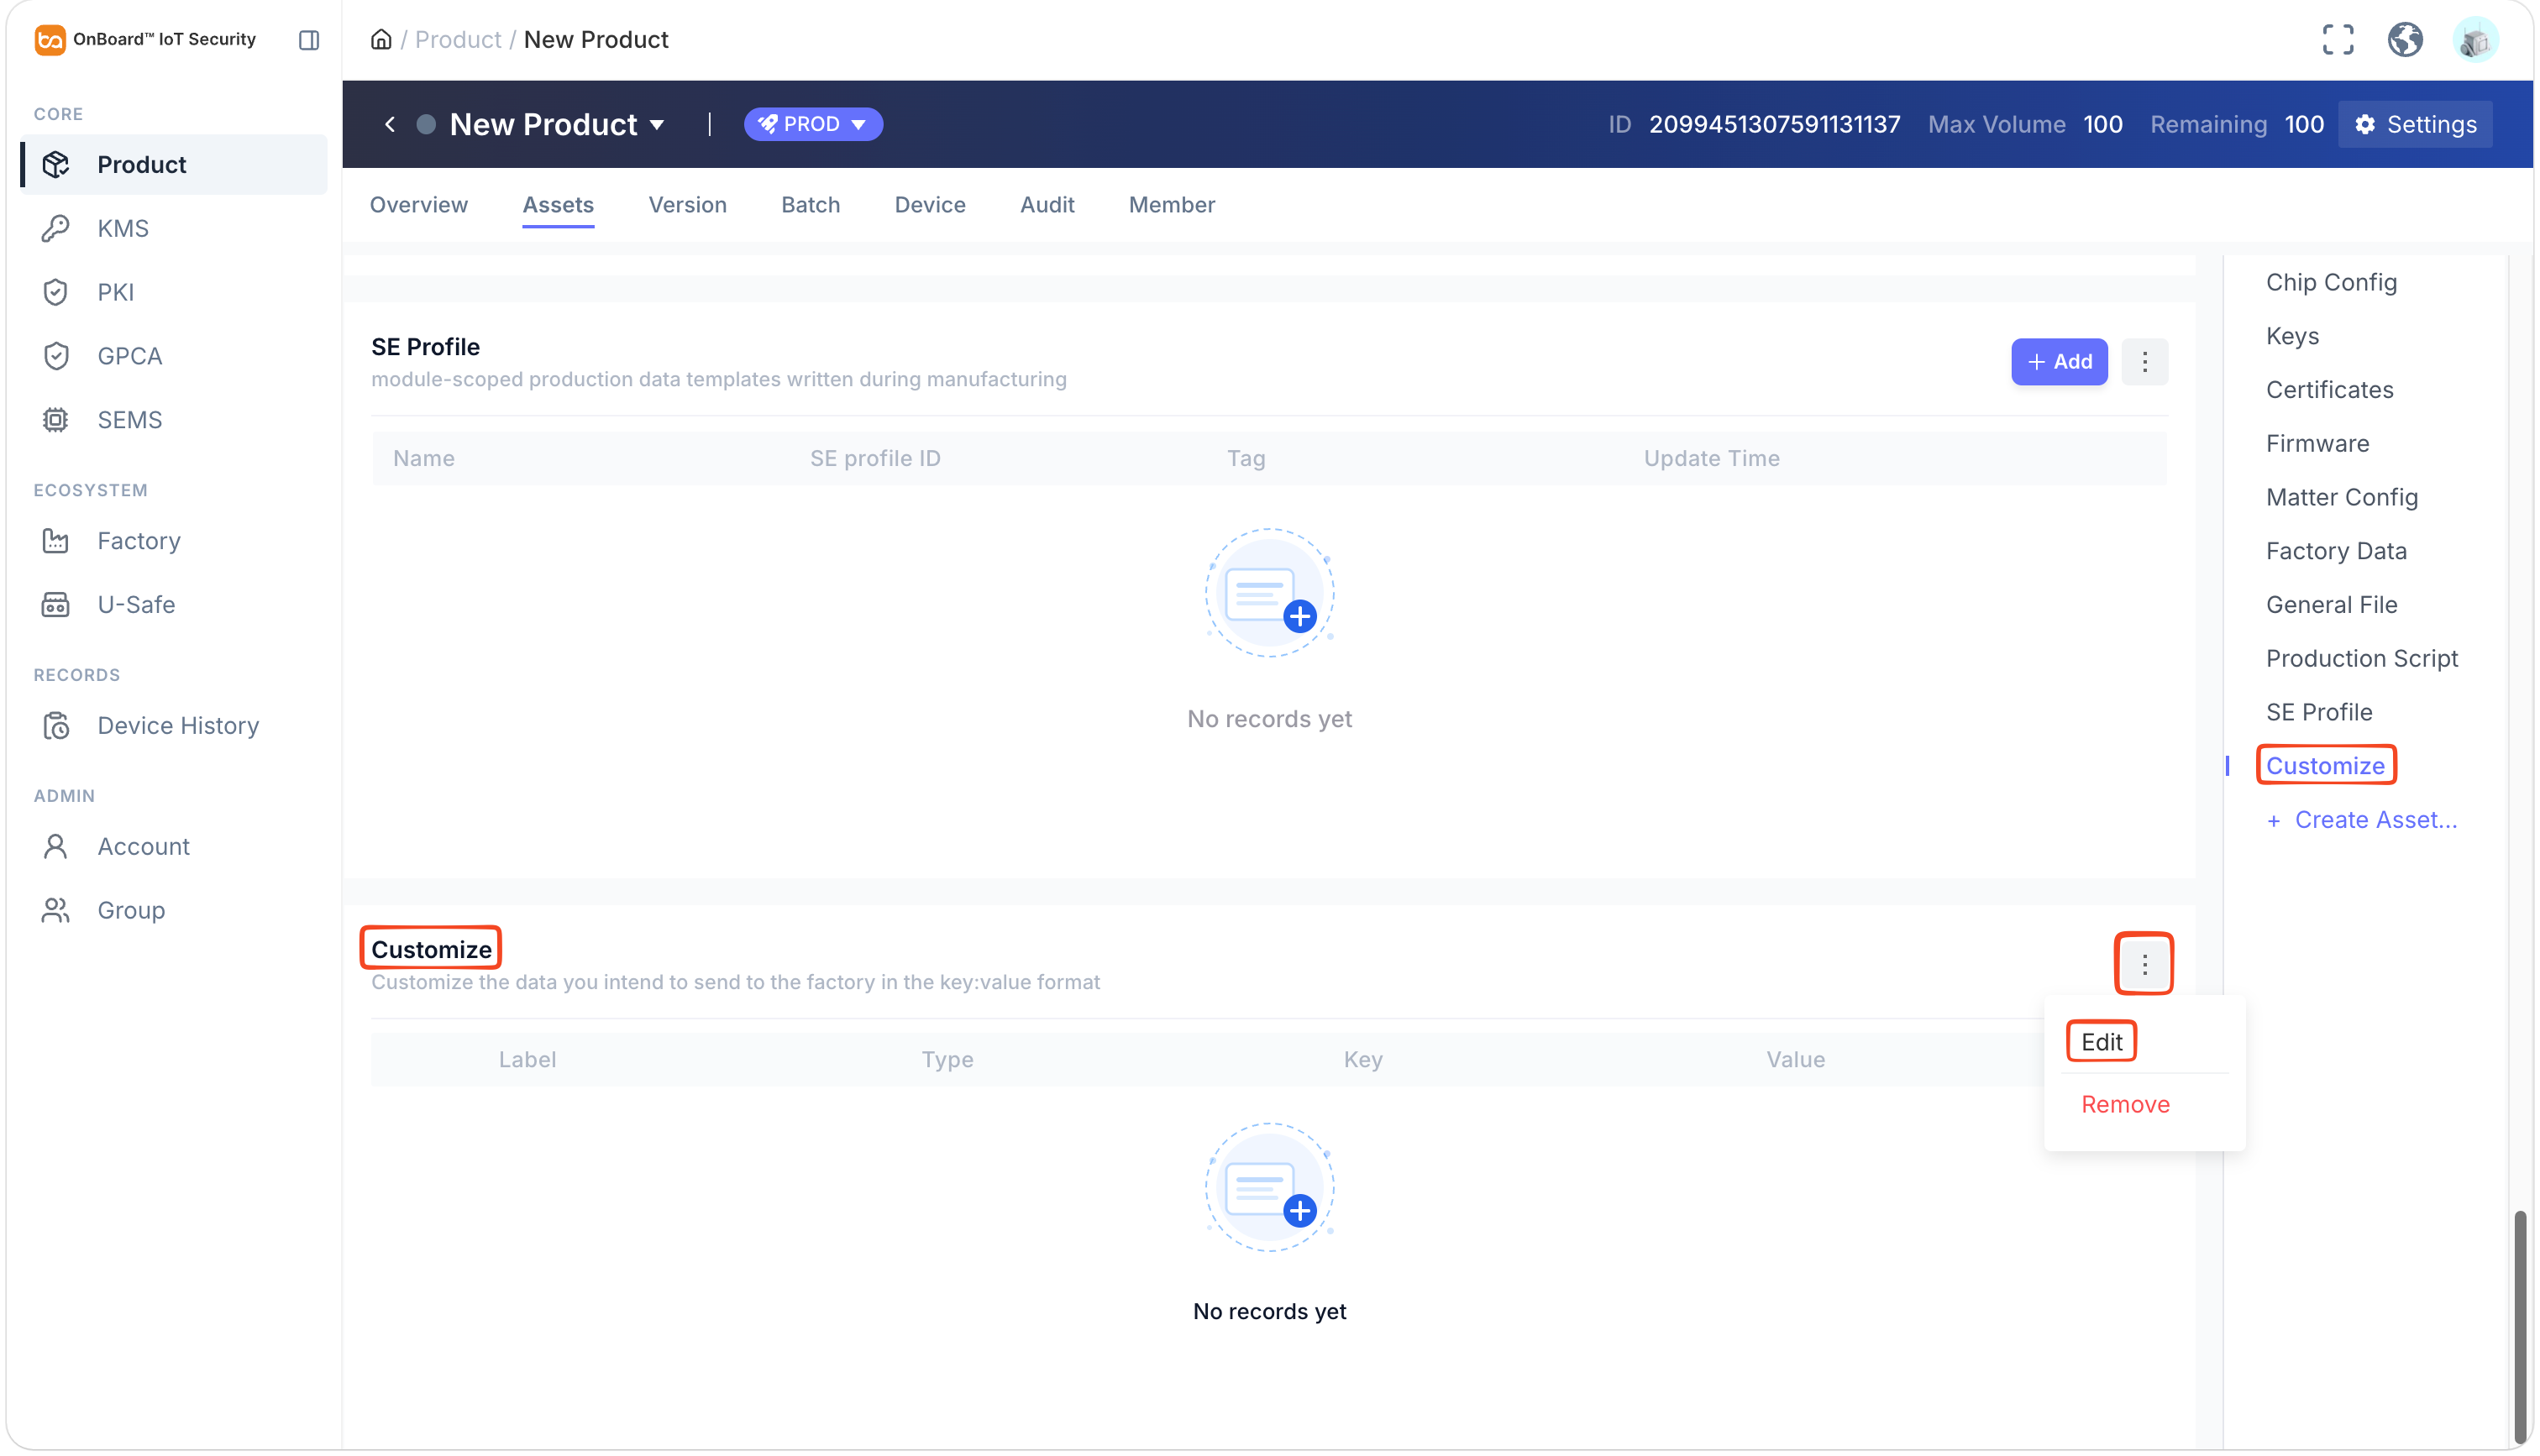
Select Customize in the Assets section to navigate to the Assets tab.
-
In the Customize section, click the Options icon and select Edit, then you can modify the asset name and enter the relevant information for the custom asset.
Description of custom asset information:
Information Mandatory Description Label Yes A label used to identify the custom data. Type Yes The supported data types include: String, Number, Boolean, Key, Certificate, and File. Key Yes Assign keys to files. During later programming, the programming script can retrieve and use the corresponding files through their keys. Value Yes The value corresponding to the custom data. -
Click Save to complete the configuration of the custom asset.

 Download User Manual