How to create a batch in OnBoard™ IoT Security
Currently, batches can't be modified or deleted after creation.
This article will guide you on how to create a batch in OnBoard™ IoT Security (OBIS), which can then be assigned to programming stations (local factory & cloud factory) for programming. Each version can create multiple batches, and a batch represents a production plan based on that version.
Prerequisites
Before getting started, please ensure that:
- The version has already been created and its status is Approved (If manual approval was enabled when the product was created, versions created in the PROD environment will require manual approval by the Product Owner or Product Manager).
- You have product role permissions for the corresponding product: Product Owner, Product Manager, or Batch Manager.
- The factory has already been created, the HSM U-Safe has already been added (local factory), and the factory status is Normal.
Instructions
-
Sign in to OBIS.
-
In the Core section of the left menu, click Product, and then select the corresponding product to navigate to the product page.
-
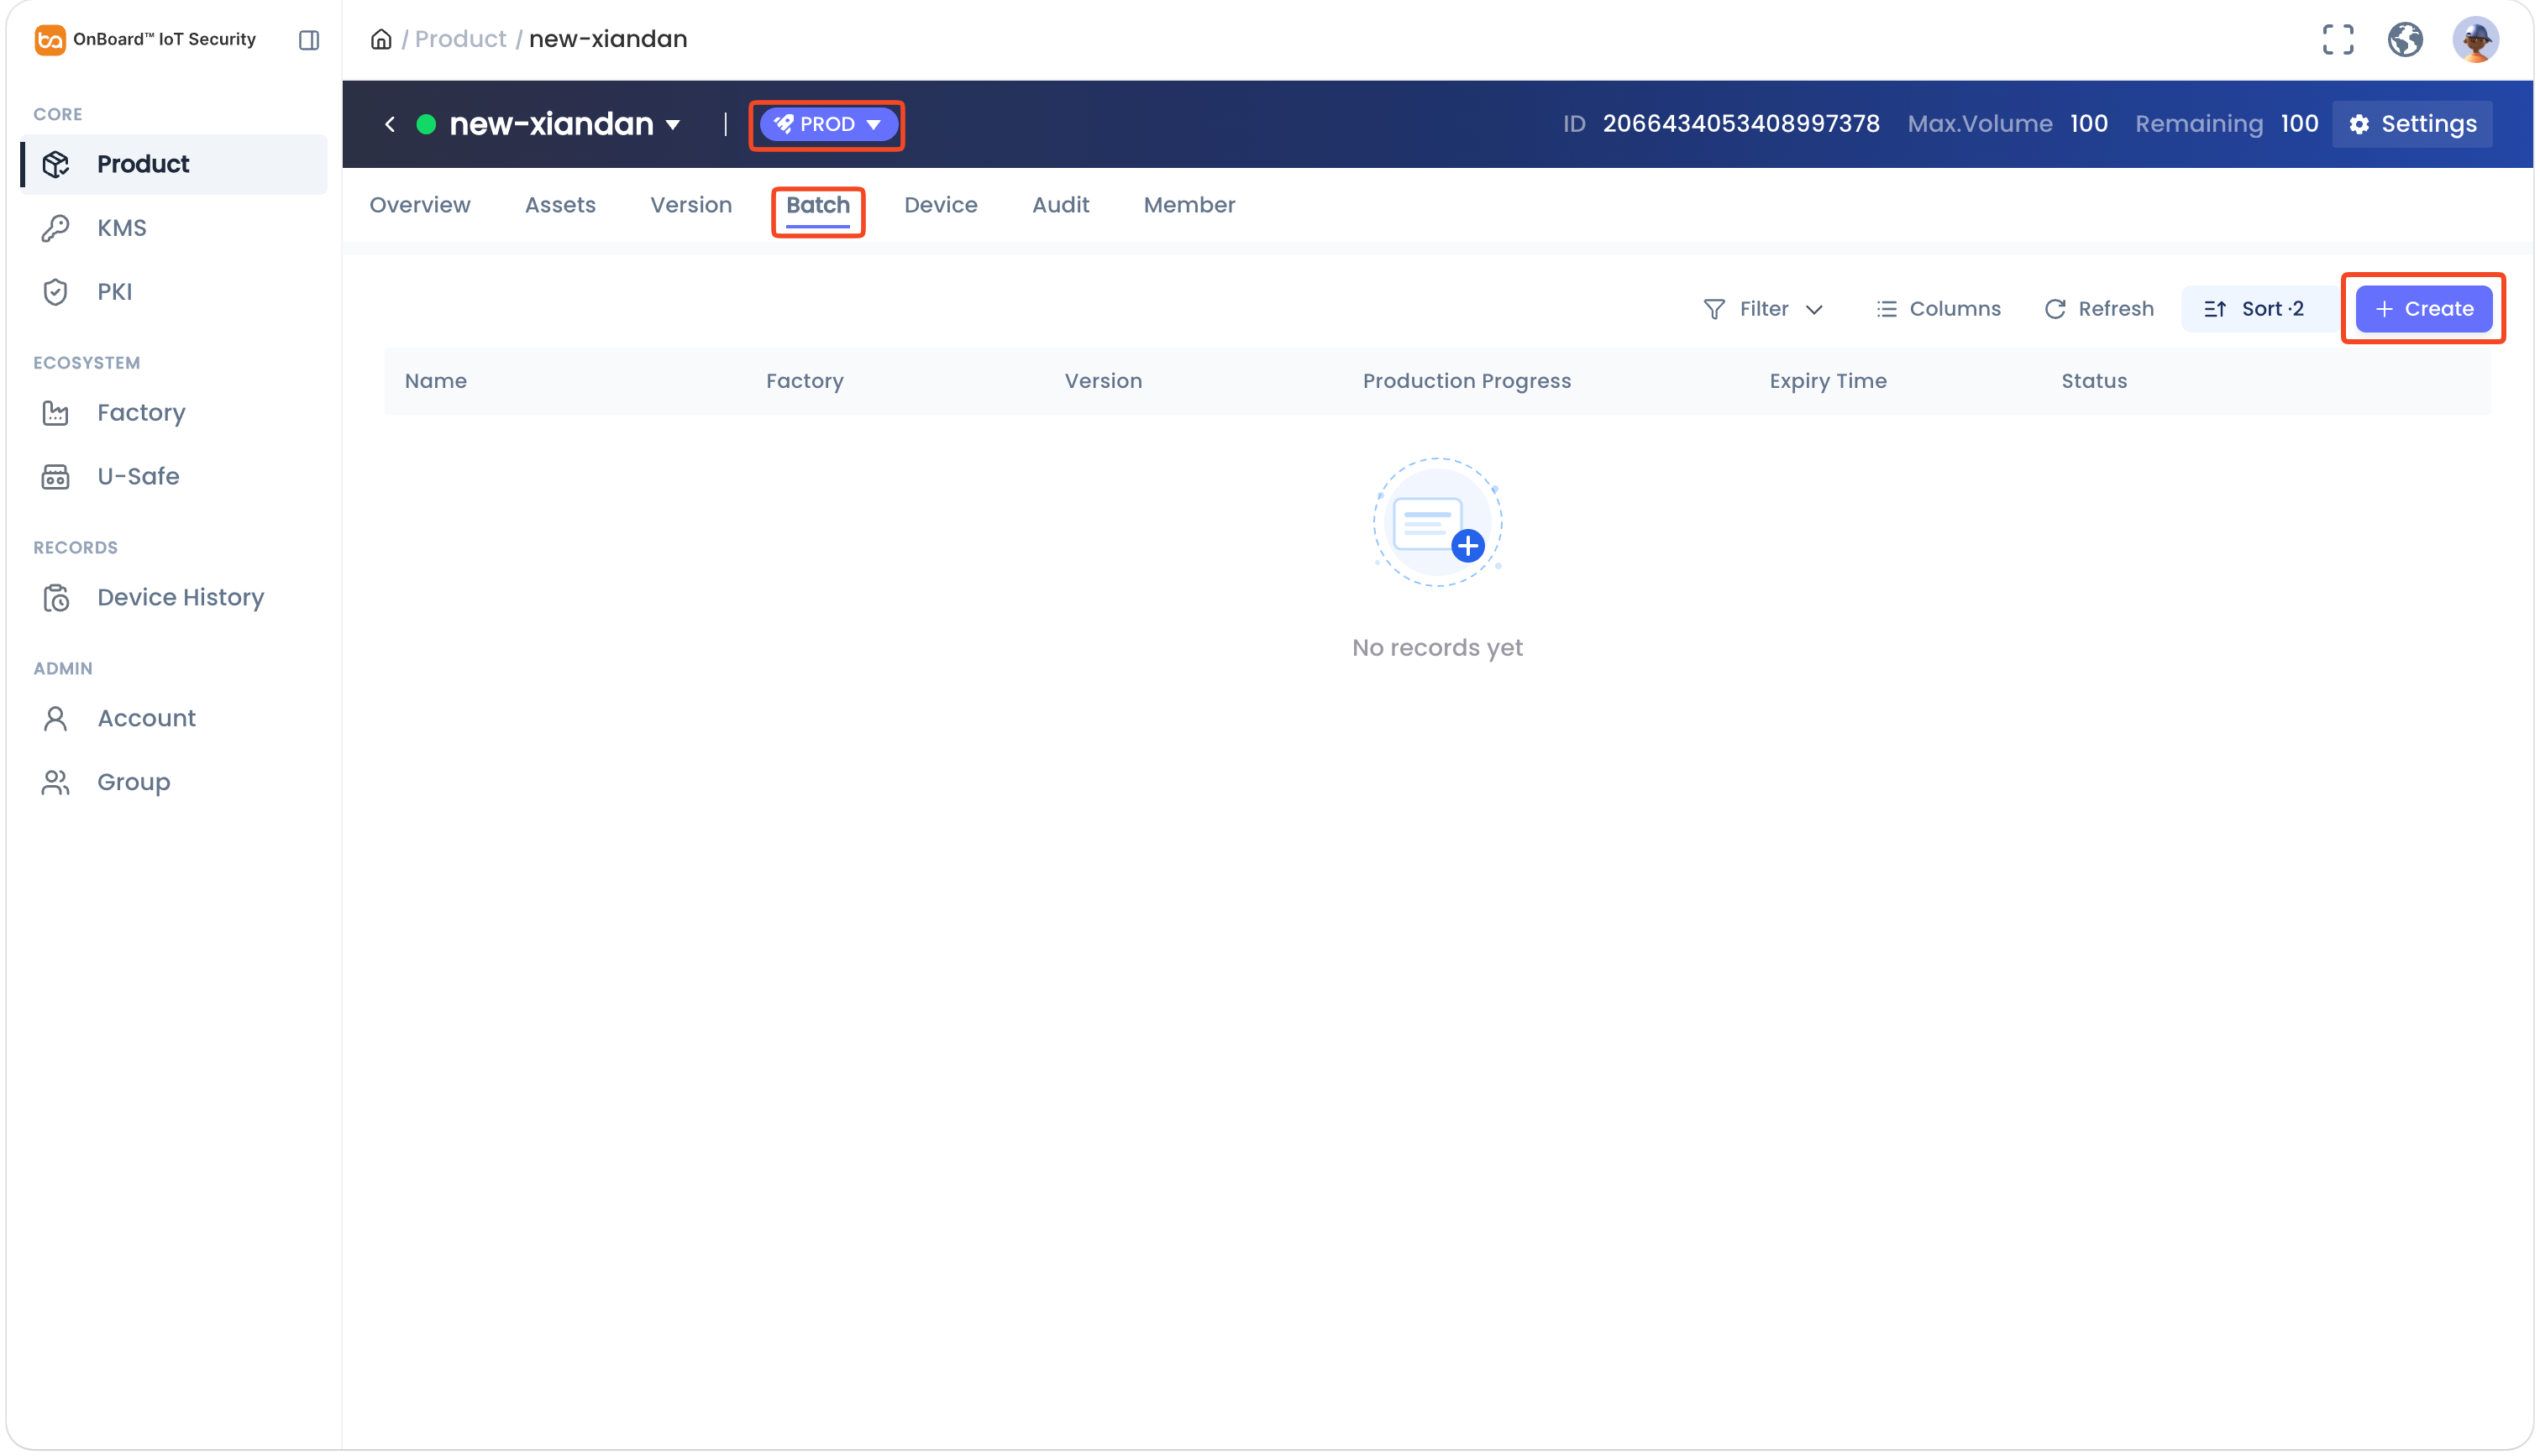
On the product page, select the TEST or PROD environment, select the Batch tab and then click Create. The page will navigate to the Create Batch tab.
tipIf the Create button appears grayed out, it is currently unavailable. Please check whether a version has been created. After a version is created, the Create button will be enabled automatically.
-
On the Create Batch tab, select and enter the batch-related information.
tipWhen adding product assets, only assets that have not been deactivated can be selected. For more information, refer to Deactivate or activate a product asset。
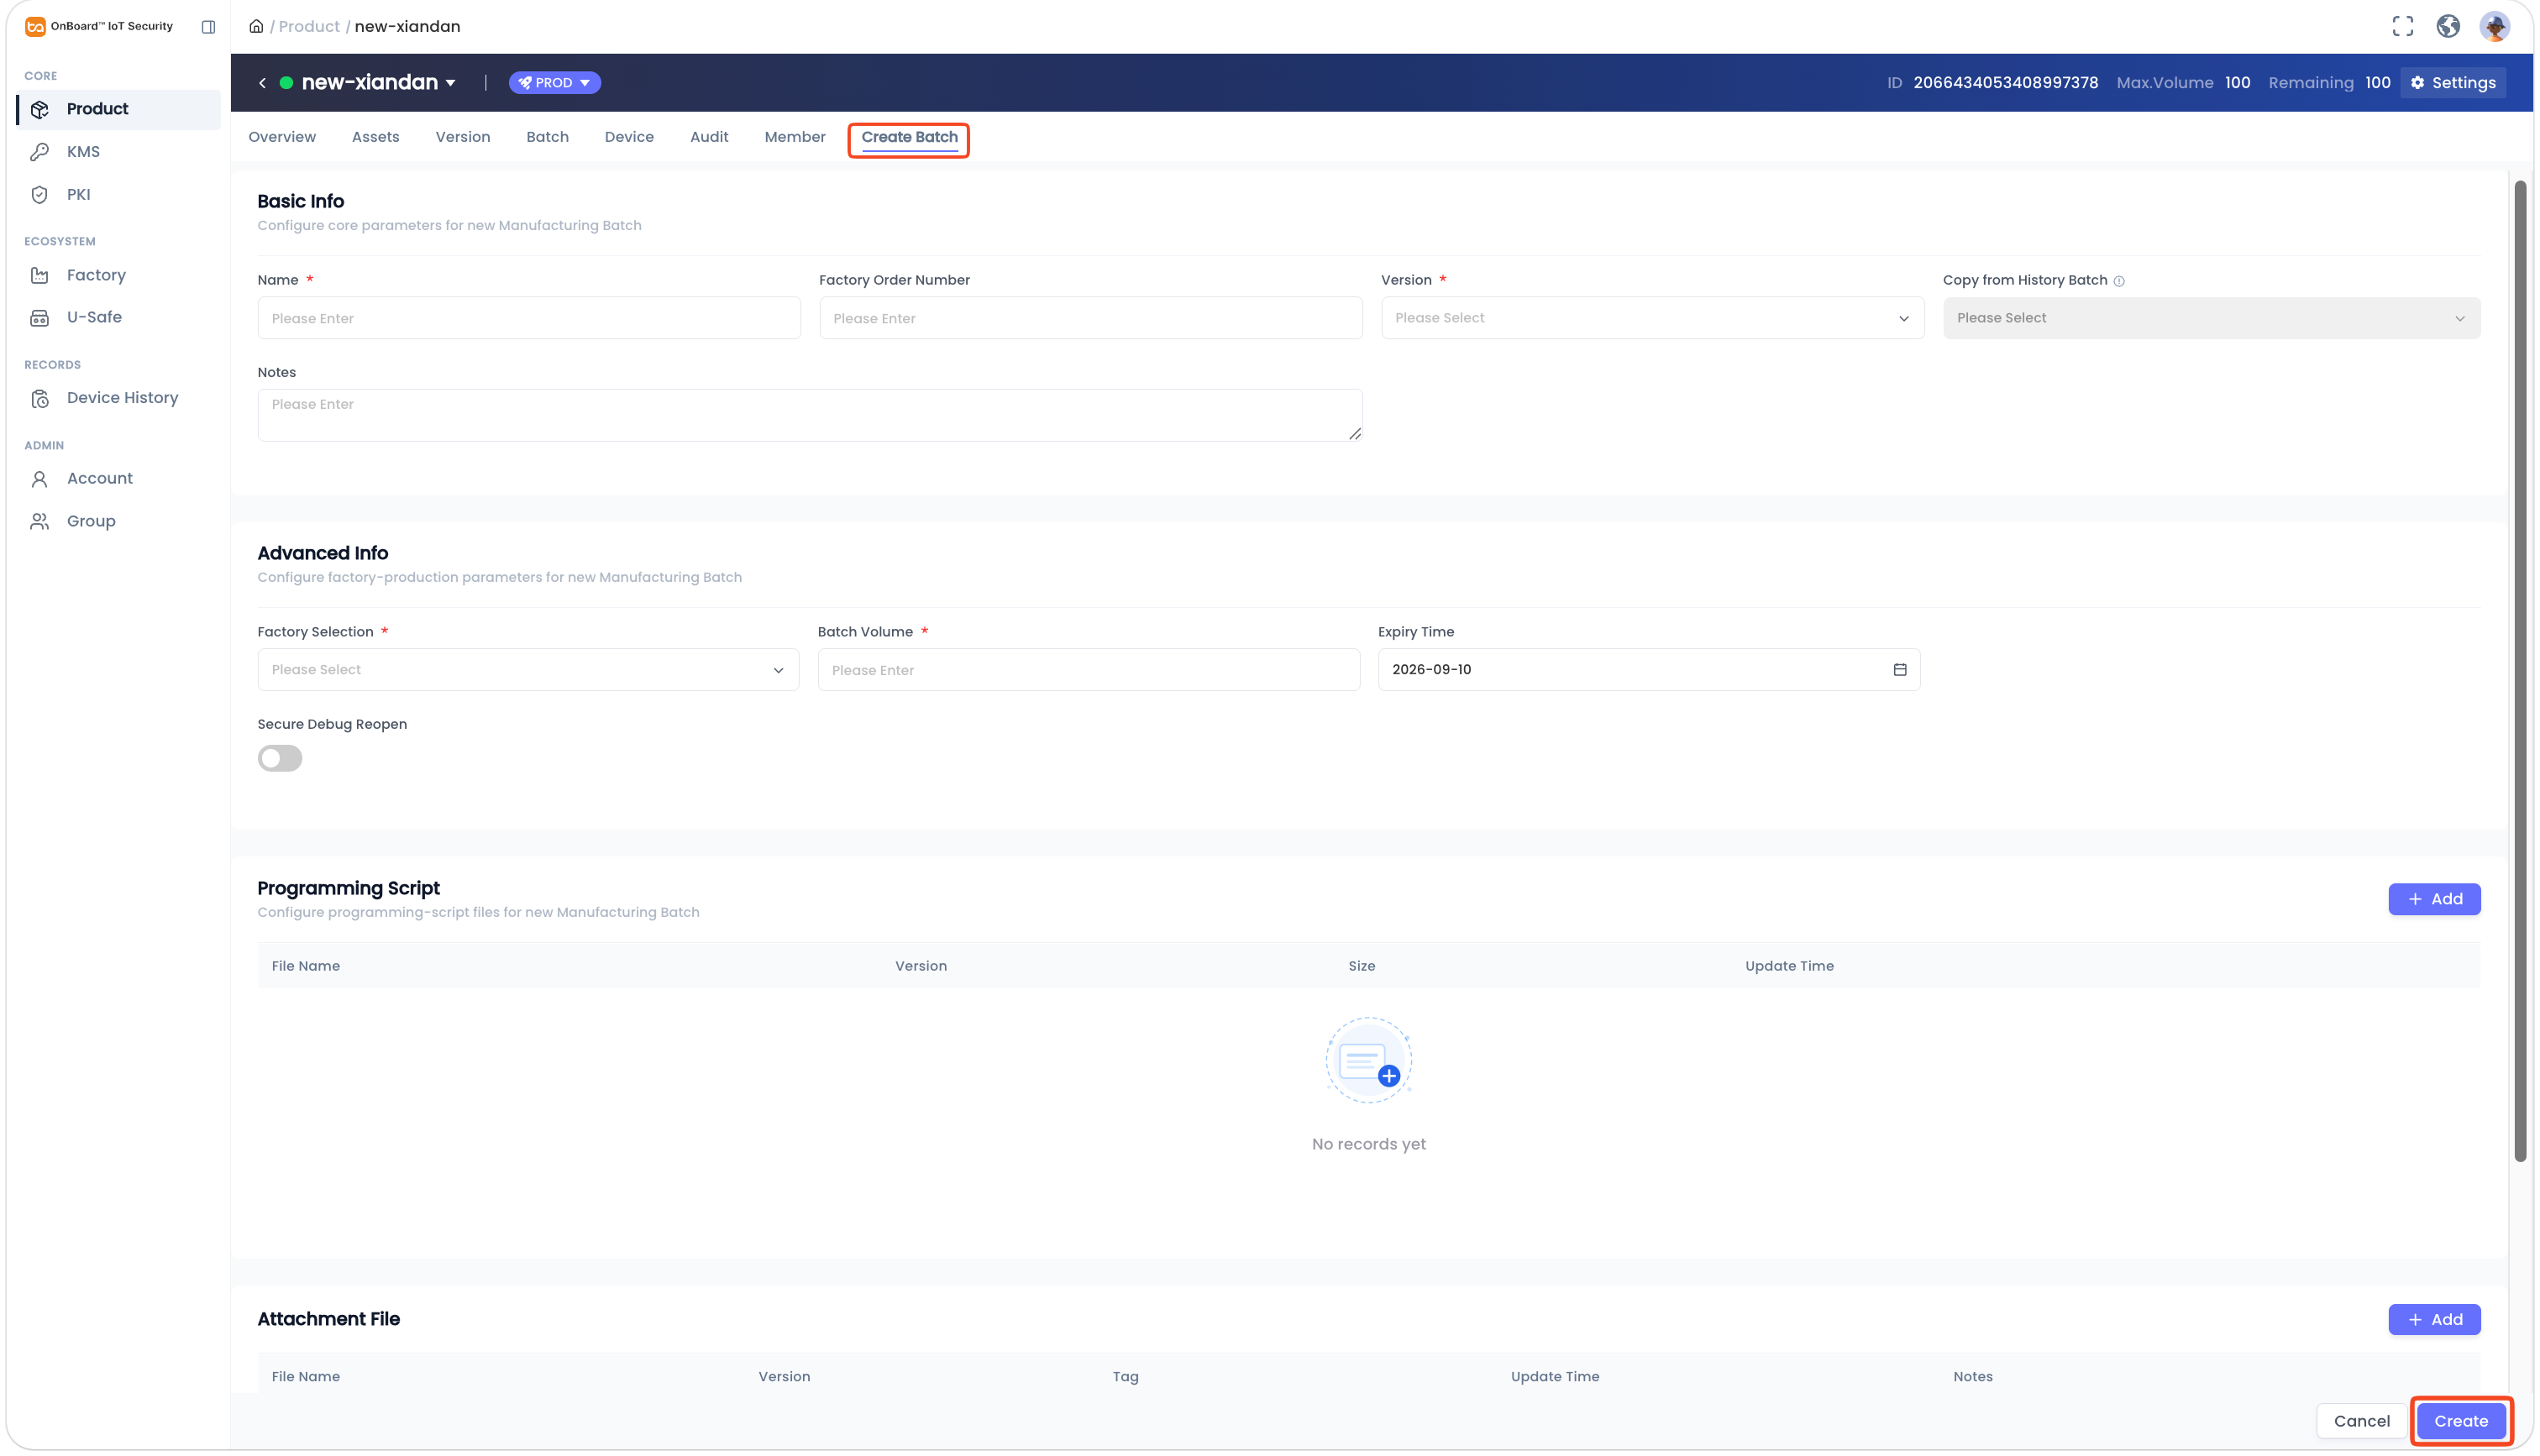
Description of batch information:
Information Mandatory Description Name Yes The batch name must be unique. Factory Order Number No Associate with a specific factory order. Copy from History Batch No You can select a historical batch as a template for modification. Version Yes Select the version with the Approved status. Notes No Provide additional information related to the batch, such as special requirements and important Notes. Factory Selection Yes Select a factory with the Normal status.
Note: Batch data will be synchronized and updated in the factory's Batch List.Batch Volume Yes Set the batch volume. - If the batch is in the TEST environment, this volume will not be deducted from the total.
- If the batch is in the PROD environment, this volume will be deducted (the unproduced volume of an expired batch will not be reclaimed). Additionally, the batch volume must be less than or equal to the Product Volume Balance (the Max Volume configured when creating the product).
Expiry Time No Specify the validity period or completion deadline for the batch.
Note: Expired batches can no longer be used. In OnBoard Edge Service, the batch status will display as Expired. Available time depends on the Batch Expiry Duration configured when creating the product.Secure Debug Reopen No This feature uses the configured Secure Debug Key to unlock the chip's debug interface and erase the existing data, enabling the chip to be reprogrammed.
Note: To enable the Secure Debug Reopen feature when creating a batch, the Secure Debug feature must be enabled when configuring the product. For more information about enabling the Secure Debug feature, refer to the description of Chip Config information.Programming Script No Add the Programming Script configured in the Assets tab as needed. If it is not required at the moment, you can select the programming script for a specific batch later in the Programming Station client. Attachment File No Add the Attachment File configured in the Assets tab as needed. -
After verifying that all information is correct, click Create at the bottom of the page to complete the batch creation.
Once the batch is created, it will be synchronized with the factory. If synchronization fails, navigate to the Batch tab of the product, click the Options  icon for the corresponding batch and then select Resync. For more information, refer to the description of batch status and batch synchronization status.

 Download User Manual